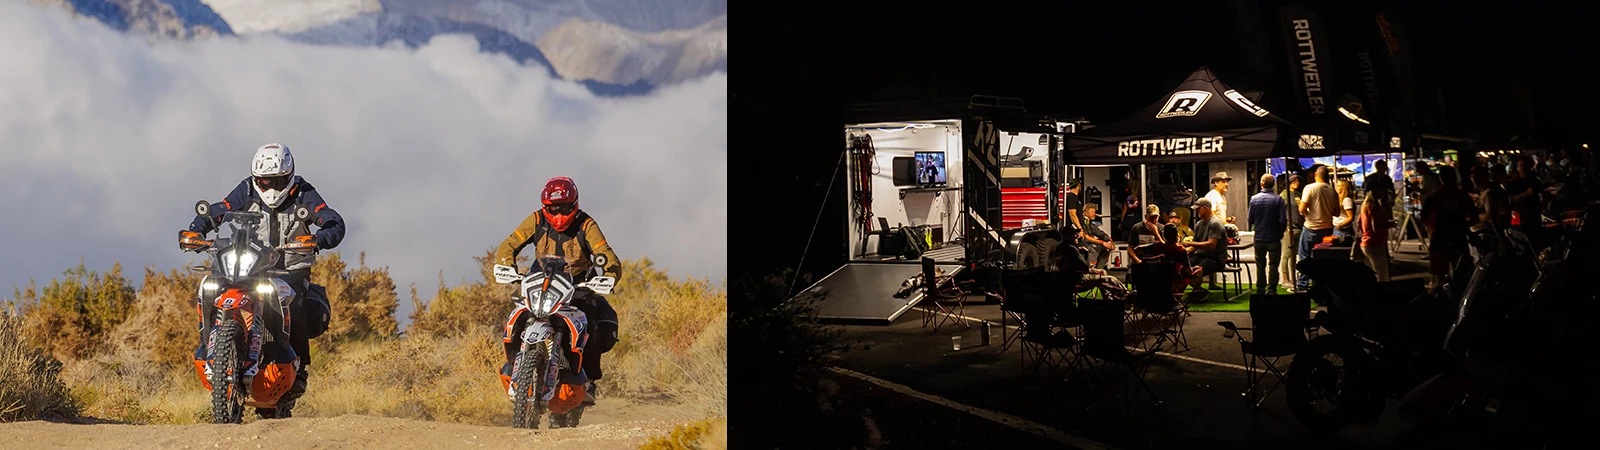
SECOND TIME AROUND - RIDE MUST GO ON 701 RALLY BUILD / ROTTWEILER PERFORMANCE
Feb 19, 2017
Article Content Blocks
We first met Tolga at the behest of Mark Kinkart, a representative of KLIM Adventure Gear at the KTM Rider Rally in Taos New Mexico in 2014. My wife and I were just barely getting over some slight cases of altitude sickness and barely beginning to acclimate to the 10,000' hell they called a 'resort' when Mark approached me and said, "You need to hook up with Tolga Basol". "Tolga What?" I responded. Mark went on to describe in gritty detail the adventures of a world-traveling former media producer that had, you guessed it, quit his job to travel the world on a motorcycle. If I heard one more of these stories it would have been 324 too many but Tolga had done well for them with some social media marketing and had carved out a modest living traveling throughout the globe and creating beautiful videos and some photography. Sometimes through places that would make any hardcore adventurer retreat to Starbucks for a $9 coffee and some sense of security. Intrigued I pressed for more and he went on to explain that he thought that 'Ride Must Go On', Tolga's handle with his website and social media accounts might be a good marriage with Rottweiler Performance.
Fast forward, a few months later we finally met Tolga when Eric Hall of XLADV and one of many hosts to support Tolga throughout his journeys had brought him by the Rottweiler Performance headquarters for a meet and greet. Tolga had brokered a deal with KTM to take an Adventure 1190 throughout the globe, including Istanbul to Magadan, then over to Vancouver, and looping down through the western United States, the Baja peninsula, a fairy over to the Mexican mainland, and then through Western parts of South America where he would finish his journey in time to plan his next.

It didn't take much to convince us that this was a perfect opportunity to test our intake system for the 1190 through some of the nastiest of conditions known to man and Tolga was a willing participant. We decked out his 1190 with an intake system, pre-filters, a Quick Flip Mirror kit, and a few other odds and ends, bid our farewell, and during the next year or so watched as he traveled further and further south until his journey had ended and it was time to return to Turkey only to plan his next adventure.

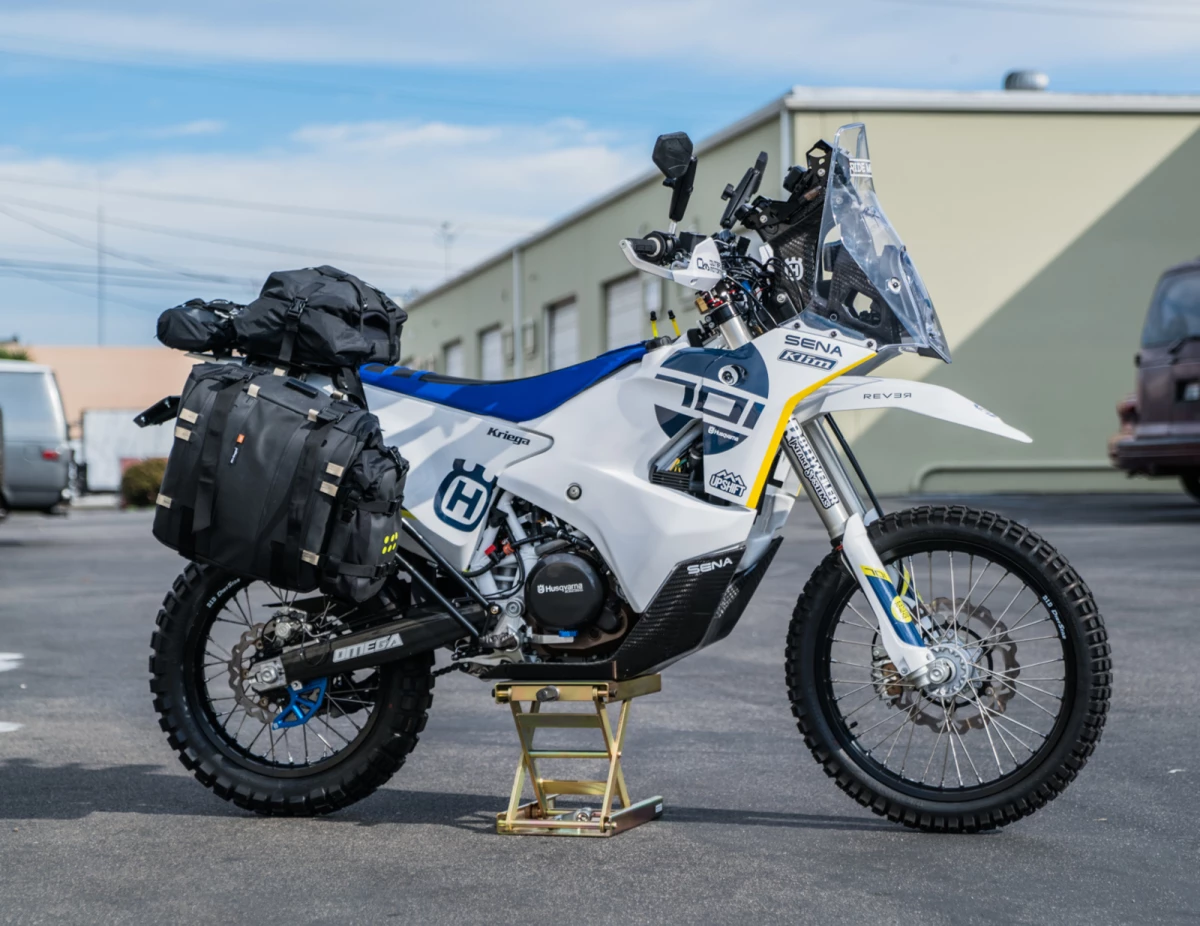
A tall slightly out-of-place figure with a rough slightly unkempt black beard and donning a full set of KLIM adventure gear was looming near the parts counter. For some reason, this person looked a bit familiar but I dismissed the thought and went about my business looking for items on my shopping list. And then it hit me like a ton of bricks as I walked toward the counter. "Tolga!, what the hell are you doing here? I thought you were in Turkey still?". Tolga had been working on a deal with Husqvarna to return to the open road with something a little lighter the second time around. He had flown into Orange County and was shacked up on Eric's couch eagerly awaiting the arrival of his new 701 and some parts that would be coming in from all over the world. Tolga had asked me if there was any place that would rent out some space and tools to work on bikes and I responded that that's kind of a 'San Francisco big city thing' and that I didn't know of anything like that in the area.
And that's when it hit me. "Bring it to Rottweiler!" I said. "We have really been wanting to build one of these and I can't think of a more perfect situation. You need the space, and we want to develop more stuff for this bike and really get deep into it". A handshake and a few days later and the 701 was ready for pick up and it arrived at our shop, ready to tear it apart.

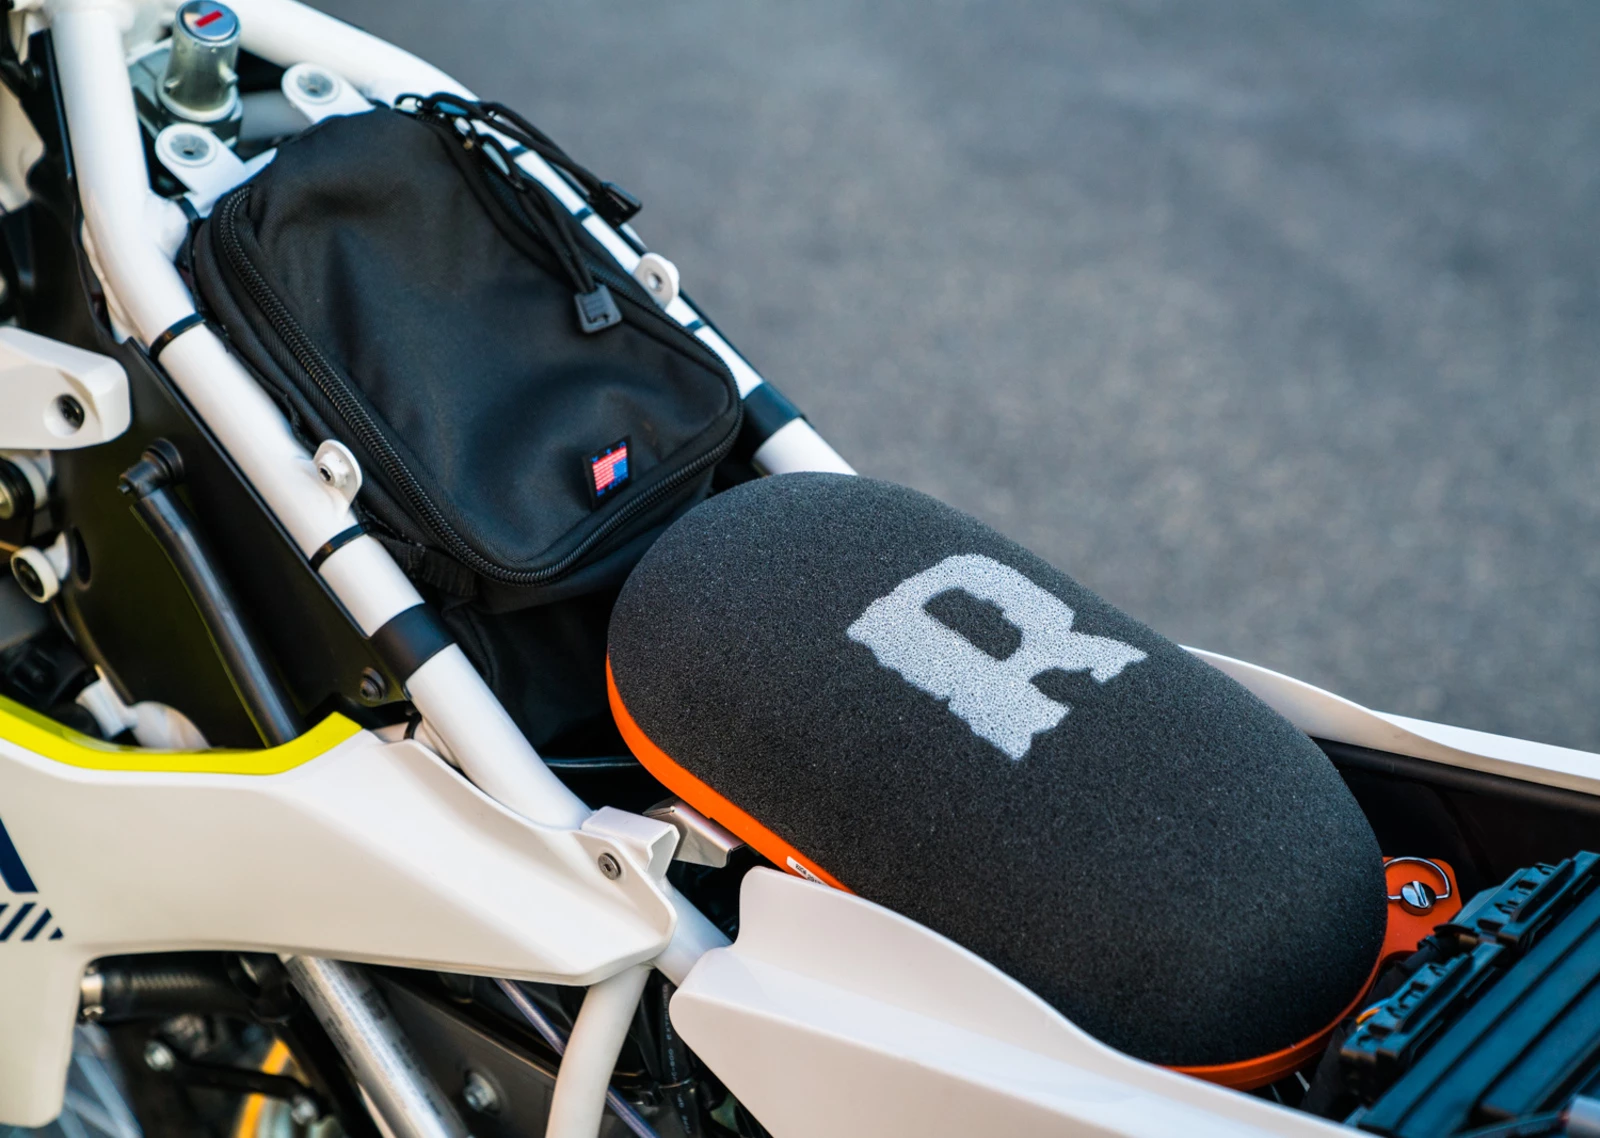
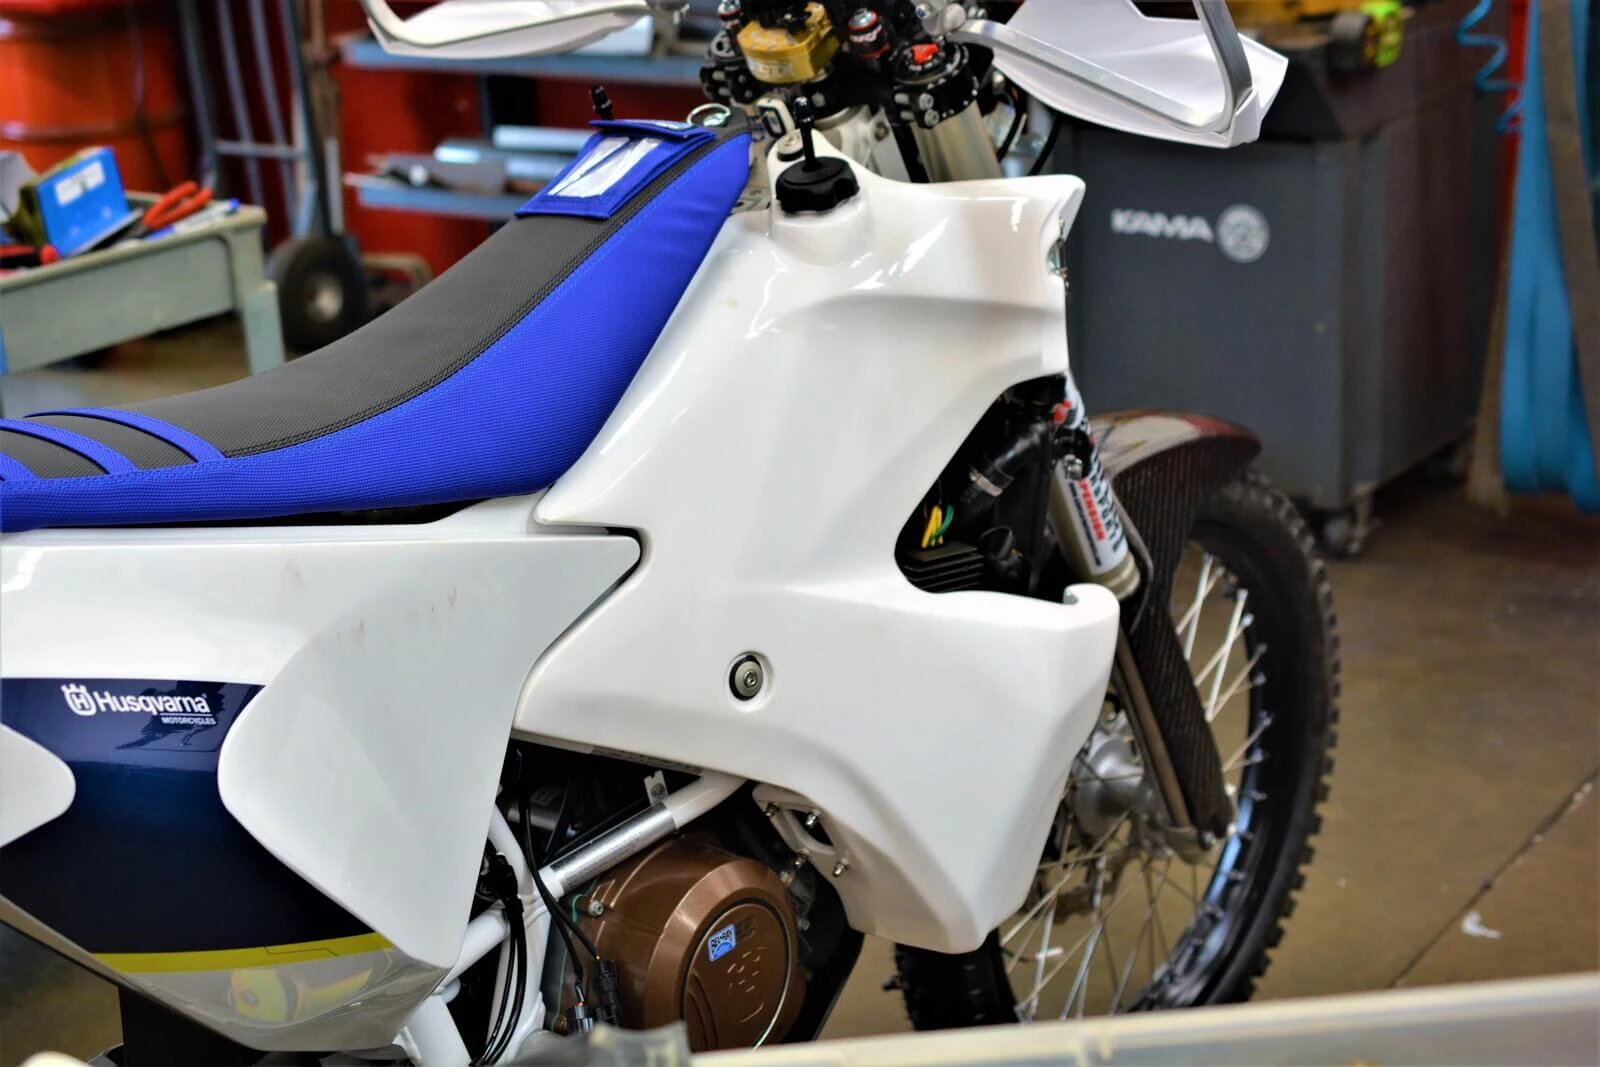
Tolga felt that another welcome byproduct of the Rottweiler Intake is tool-less access to the throttle bodies. When traveling, or in any situation, easy maintenance can be a lifesaver and allow you more time to enjoy the things you set out to do. With the tug of the seat release and two twists of the 1/4 locking tabs, you can have the filter in your hands for cleaning or inspection of the throttle bodies within seconds anywhere. For a world traveler or anyone for that matter, this can be tremendously helpful because if the stock air box is submerged, it can trap water making your day even longer on the other side of the river. The billet velocity stack is also designed with a special lip to discourage any water entry into the throttle body and the filter itself can be easily dried on the spot, unlike the paper stock element. This is an invaluable commodity anywhere.
In addition, the Rottweiler Intake was designed to allow for more room inside the frame in front of the filter to allow the use of our 1-gallon storage bag. Another invaluable item for this kind of bike is that there is precious little space for spares, tools, first aid, etc. When the bike is together the bag is also totally hidden which can keep prying eyes from noticing anything is there. Tolga was entertaining putting his tube spares in the bag but kept coming up with all kinds of ideas and we are not sure what ended up in there.
A Powercommander V was installed next in preparation for heading to the dyno (more on that later in the story) and actually packages in the bike quite nicely positioning the unit right behind the battery inside the frame.
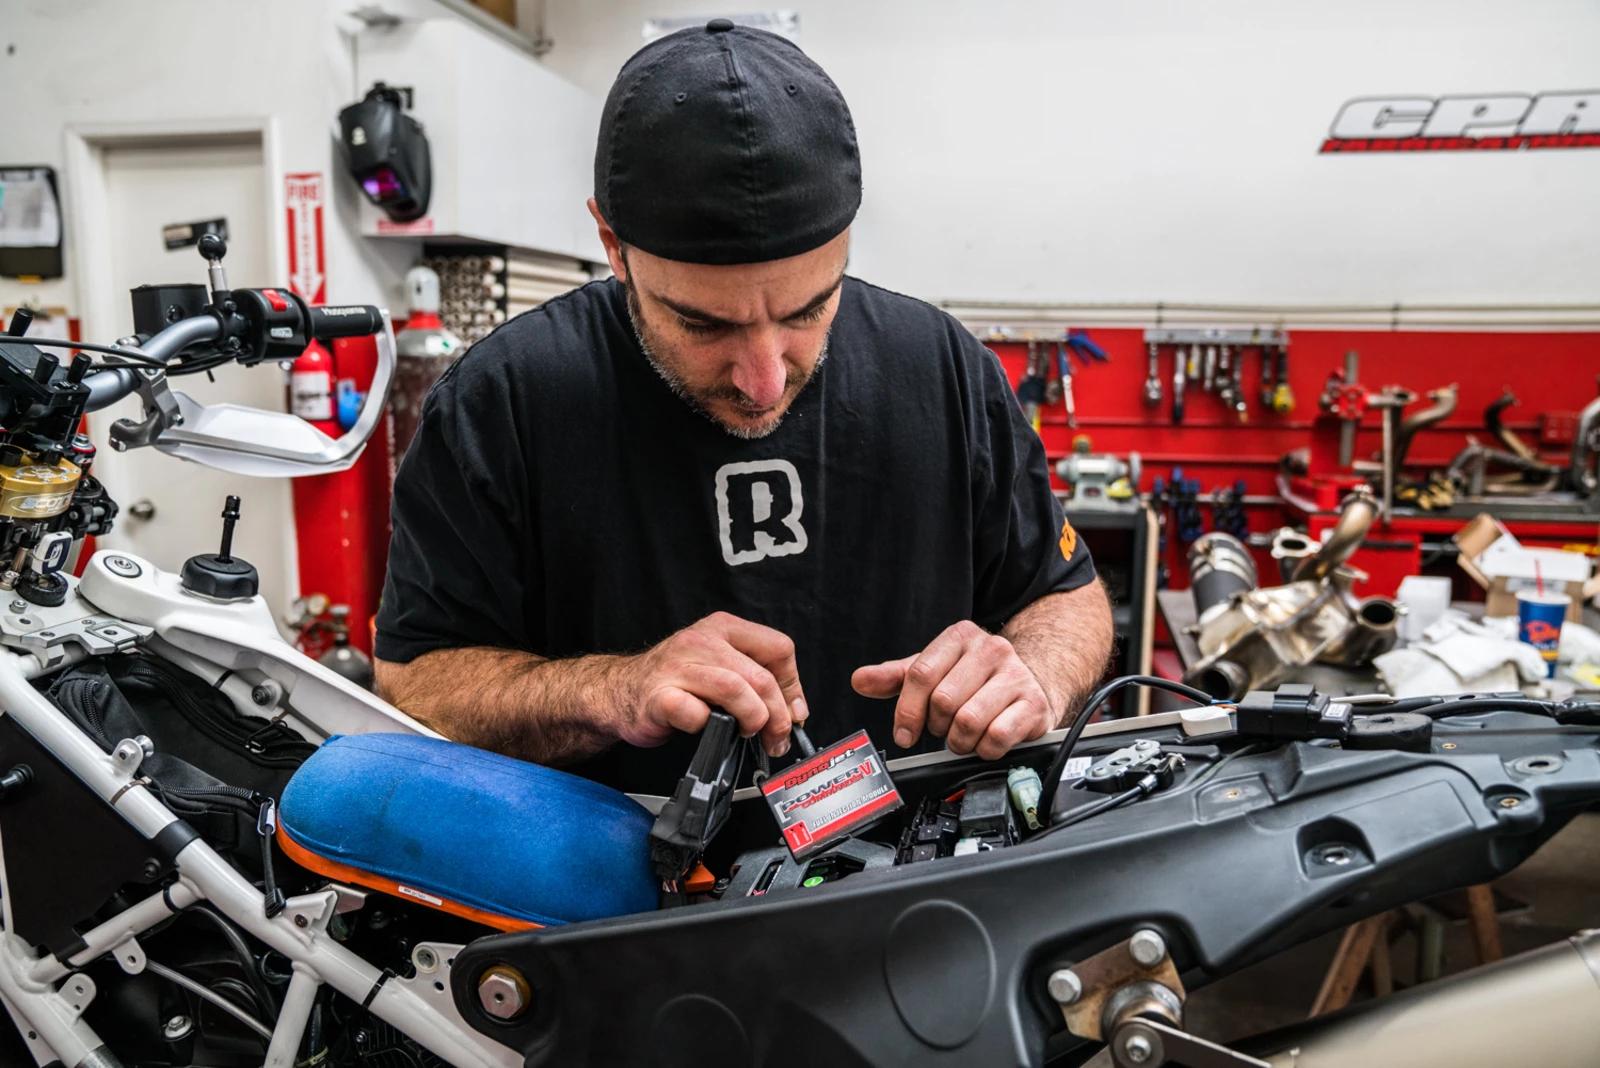
We set up the Powercommander V with a map switch that allows the ability to toggle back and forth between two different maps, even while the bike is running. In Tolga's case and many others, we set up the PCV with an 'Economy' map and a 'Power' map which we had built on the dyno with this bike. The economy map is basically all zeros, which is very close to stock mapping but slightly richer on the bottom up to about 5000 RPM due to the O2 Optimizers that are included with the PCV. The idea behind this is that extra power is always nice, but it comes at a cost. More fuel consumption. So when we add a map switch to the package, this allows us to load both maps and generate the ability to toggle back and forth between a map that is more economical when the miles need to be stretched out, and a map that generates extra power through more fuel and ignition advance (if desired) when gas consumption is not a concern. In Tolga's case with the long distances, this was a serious advantage.
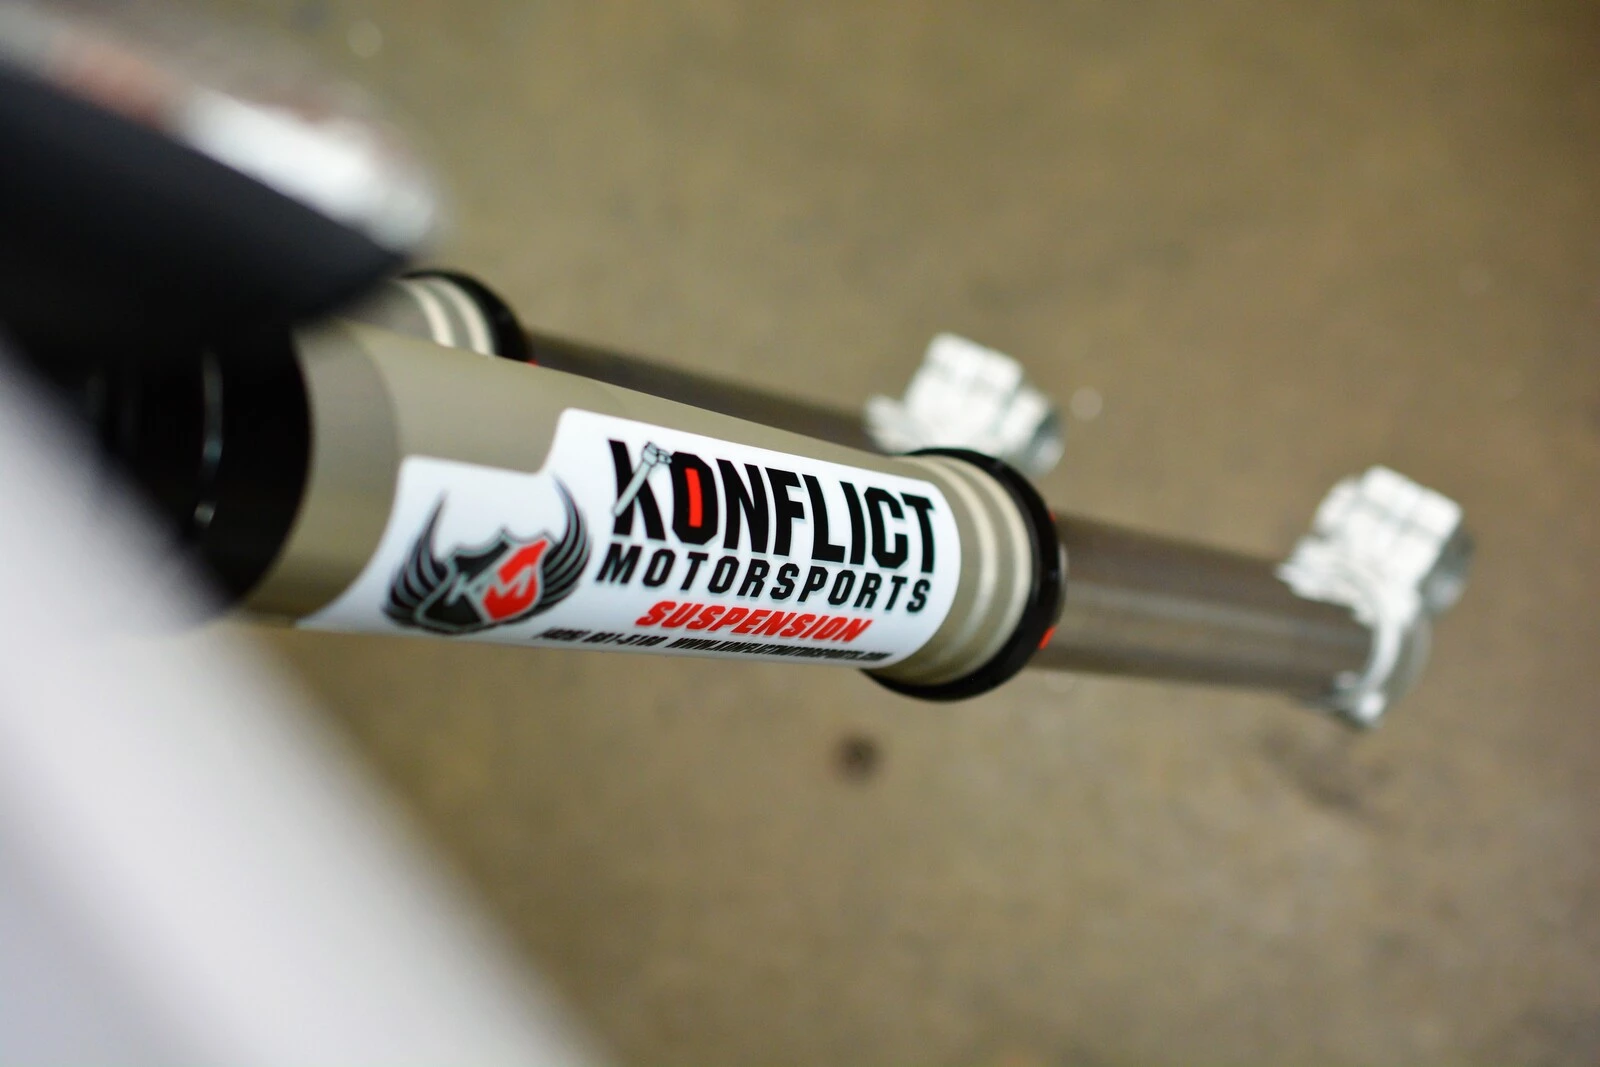
Proper suspension is always a must, and at the forefront of adventure suspension technology is Alex Martens of Konflict Motorsports in the state of Washington. Alex sent us a rifle case (he has about 50 of them) to pack the suspension components into and a ready-made shipping tag that made sending it off as hassle-free as possible. Konflict then set up the fork and shock to Tolgas's riding style and weight and quickly turned them around and we had them back in good time. We also had the option to Kashima coat the outer fork legs and DLC coat the lowers sliders for a completely works package but due to the time constraints for Tolga's departure, we had to do without these options as the turnaround takes a bit longer.
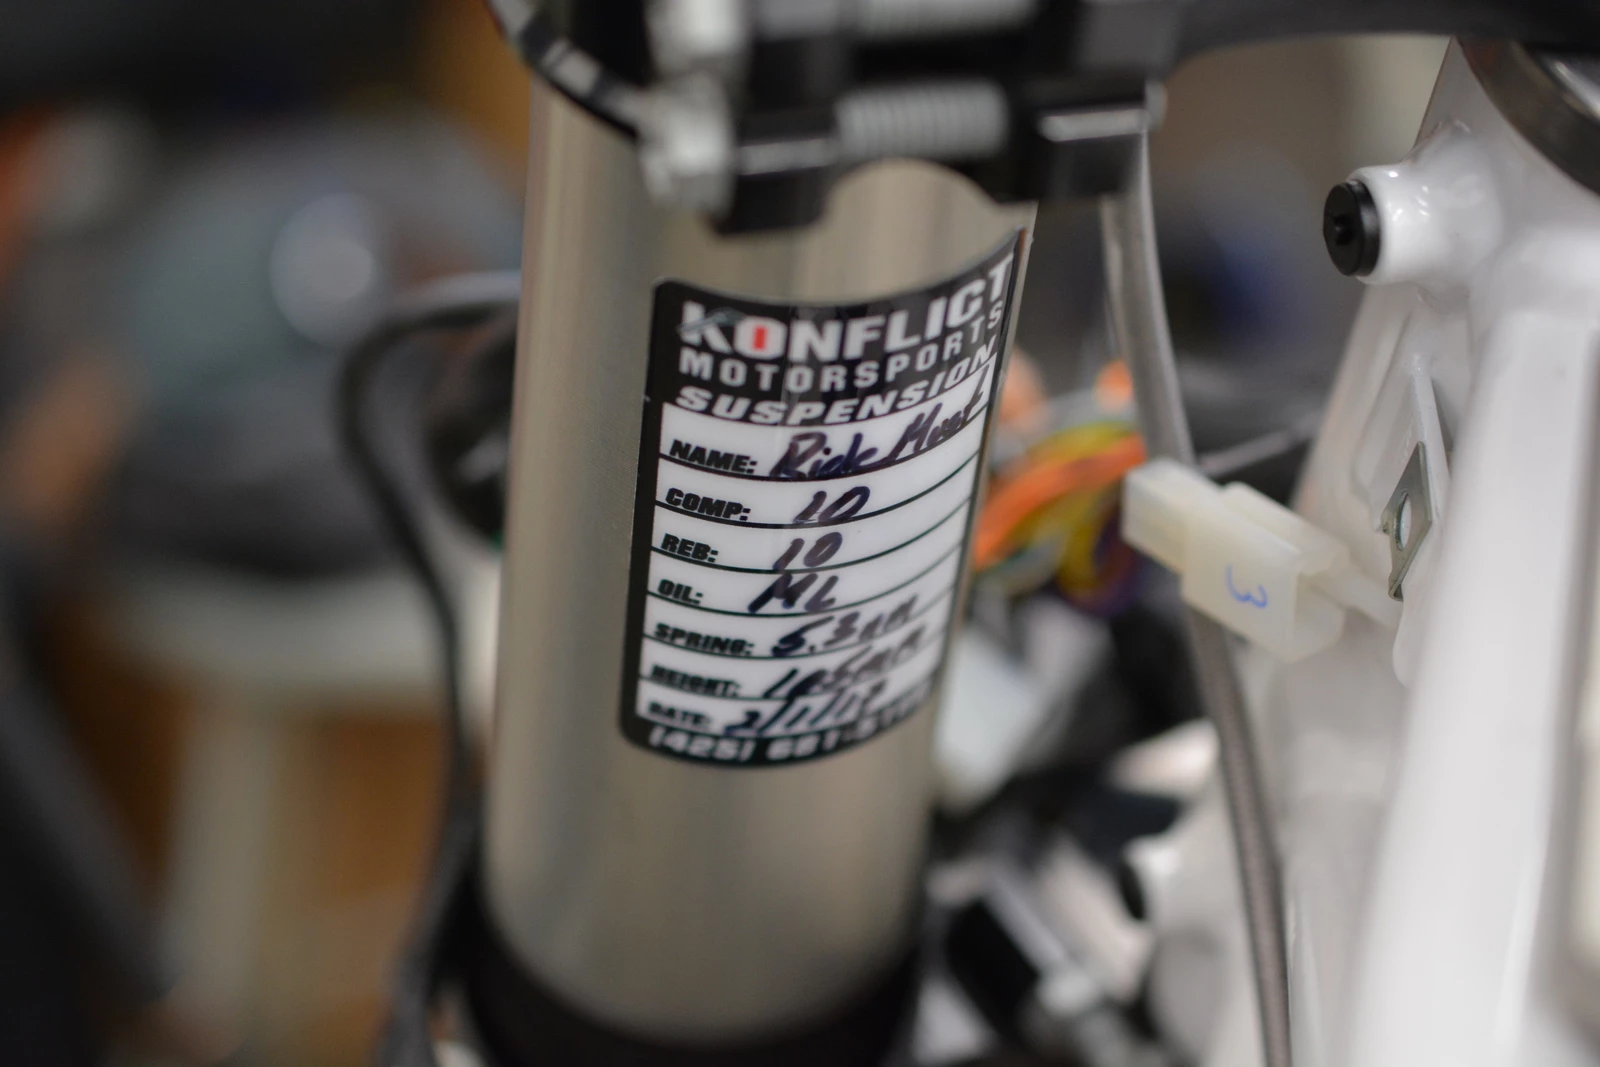
Upon return Tolga's forks came with a setup sticker with all the settings recorded so if any changes are made, returning to Alex's default settings would be fairly easy.
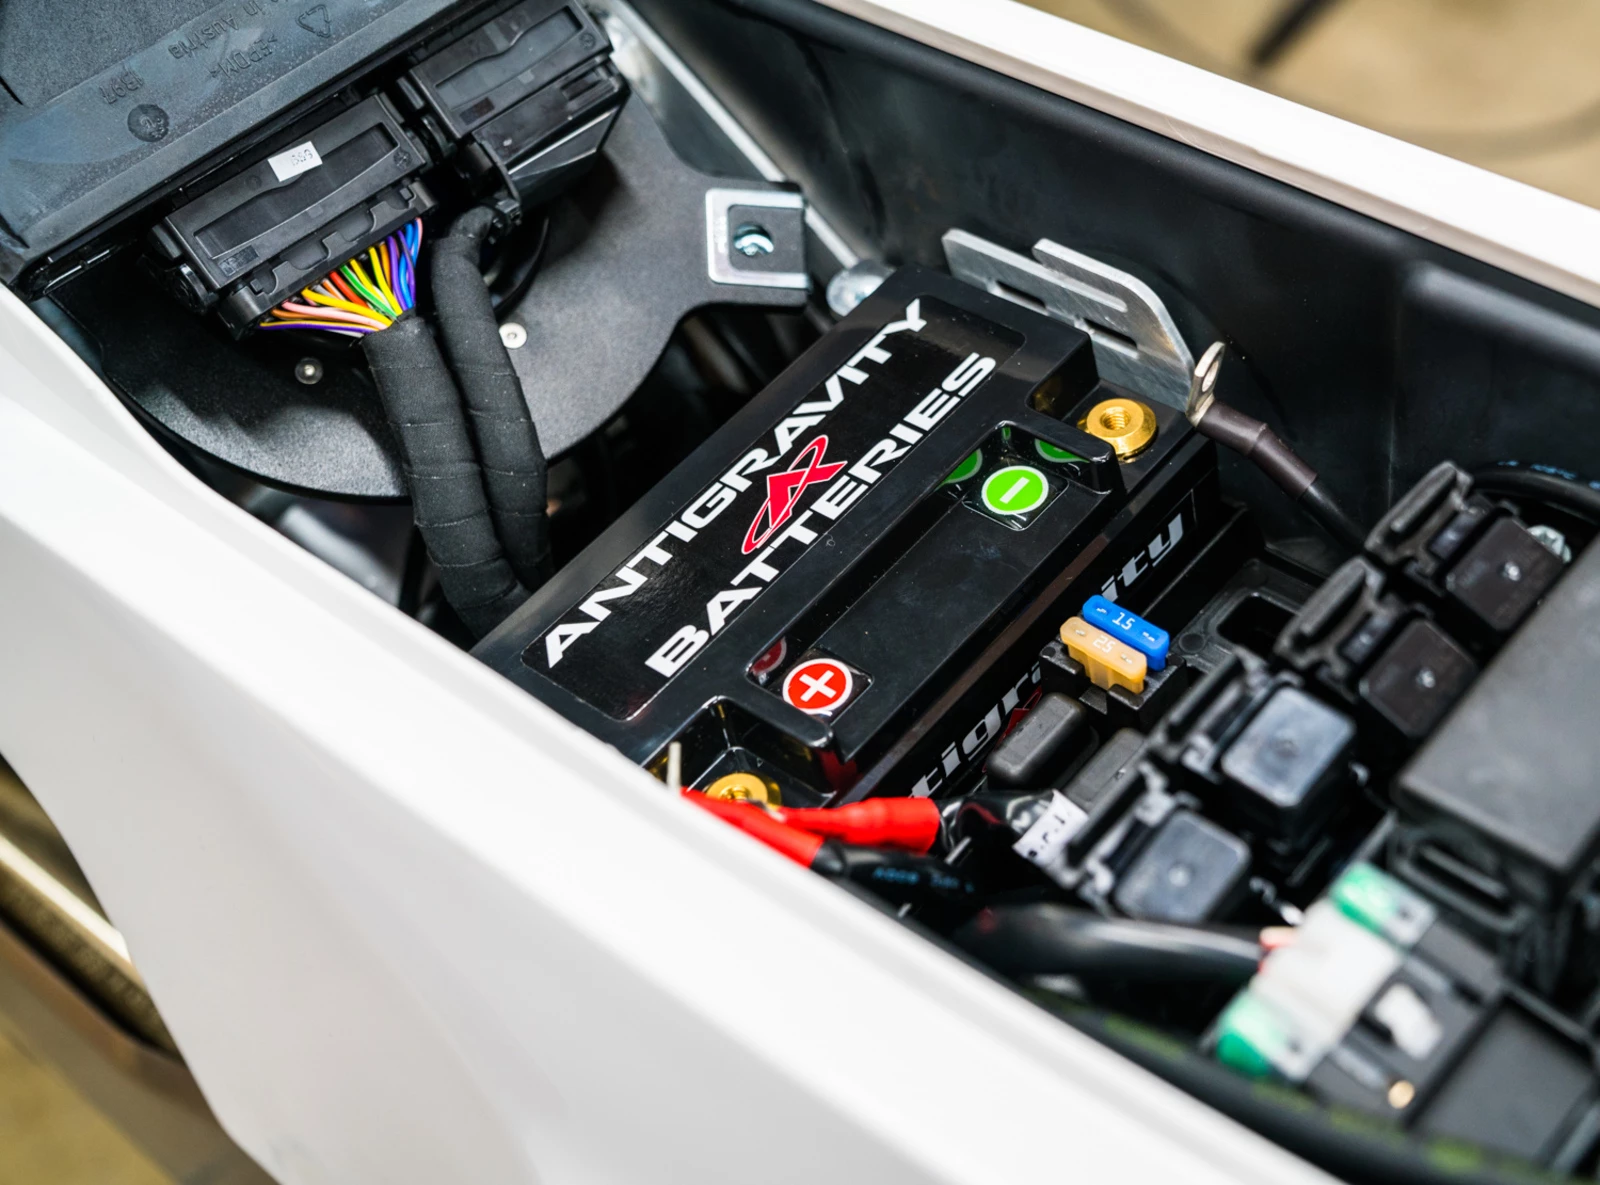
One of the fastest and cheapest ways of dropping weight on a bike is a lithium battery. We installed an Antigravity YTZ10-12 which was a perfect fit and dropped about 5 lbs off of the bike and any little bit can help when picking up a motorcycle. We have had great success with lithium batteries and consider them one of the first swaps when purchasing a new bike. The extra cold cranking amps are also a bonus when starting as well.
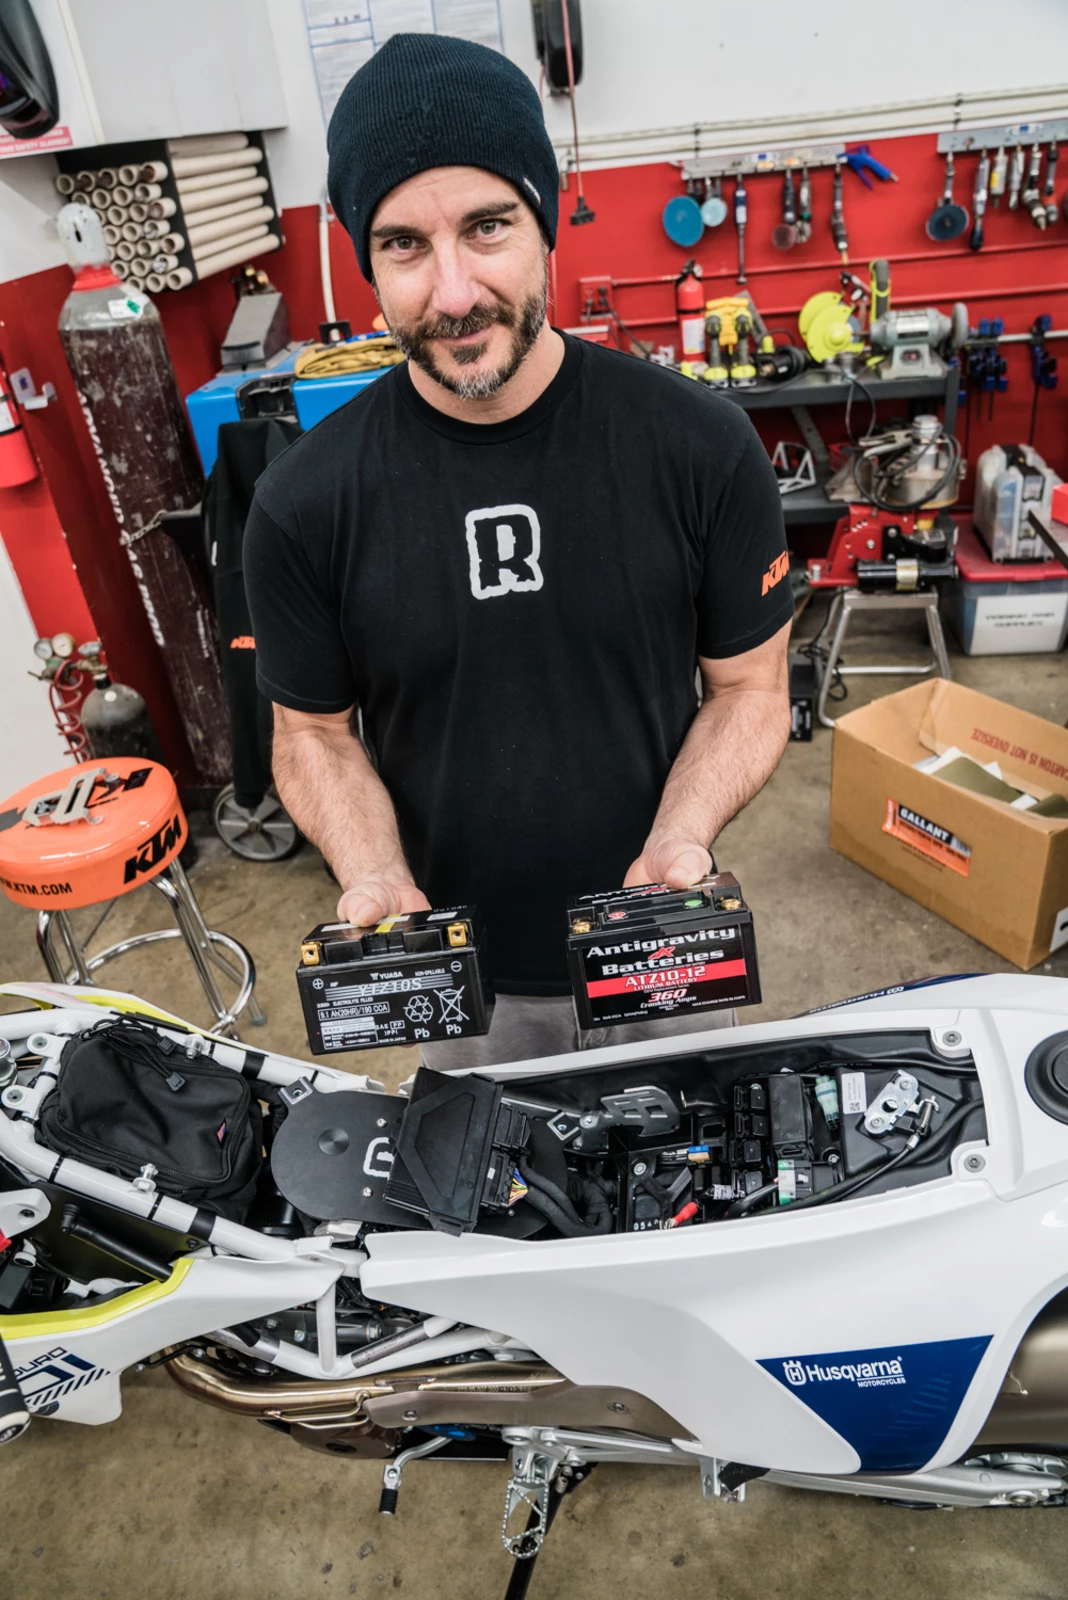
On the 701 a YTZ10-12 drops in like it is made for the bike.
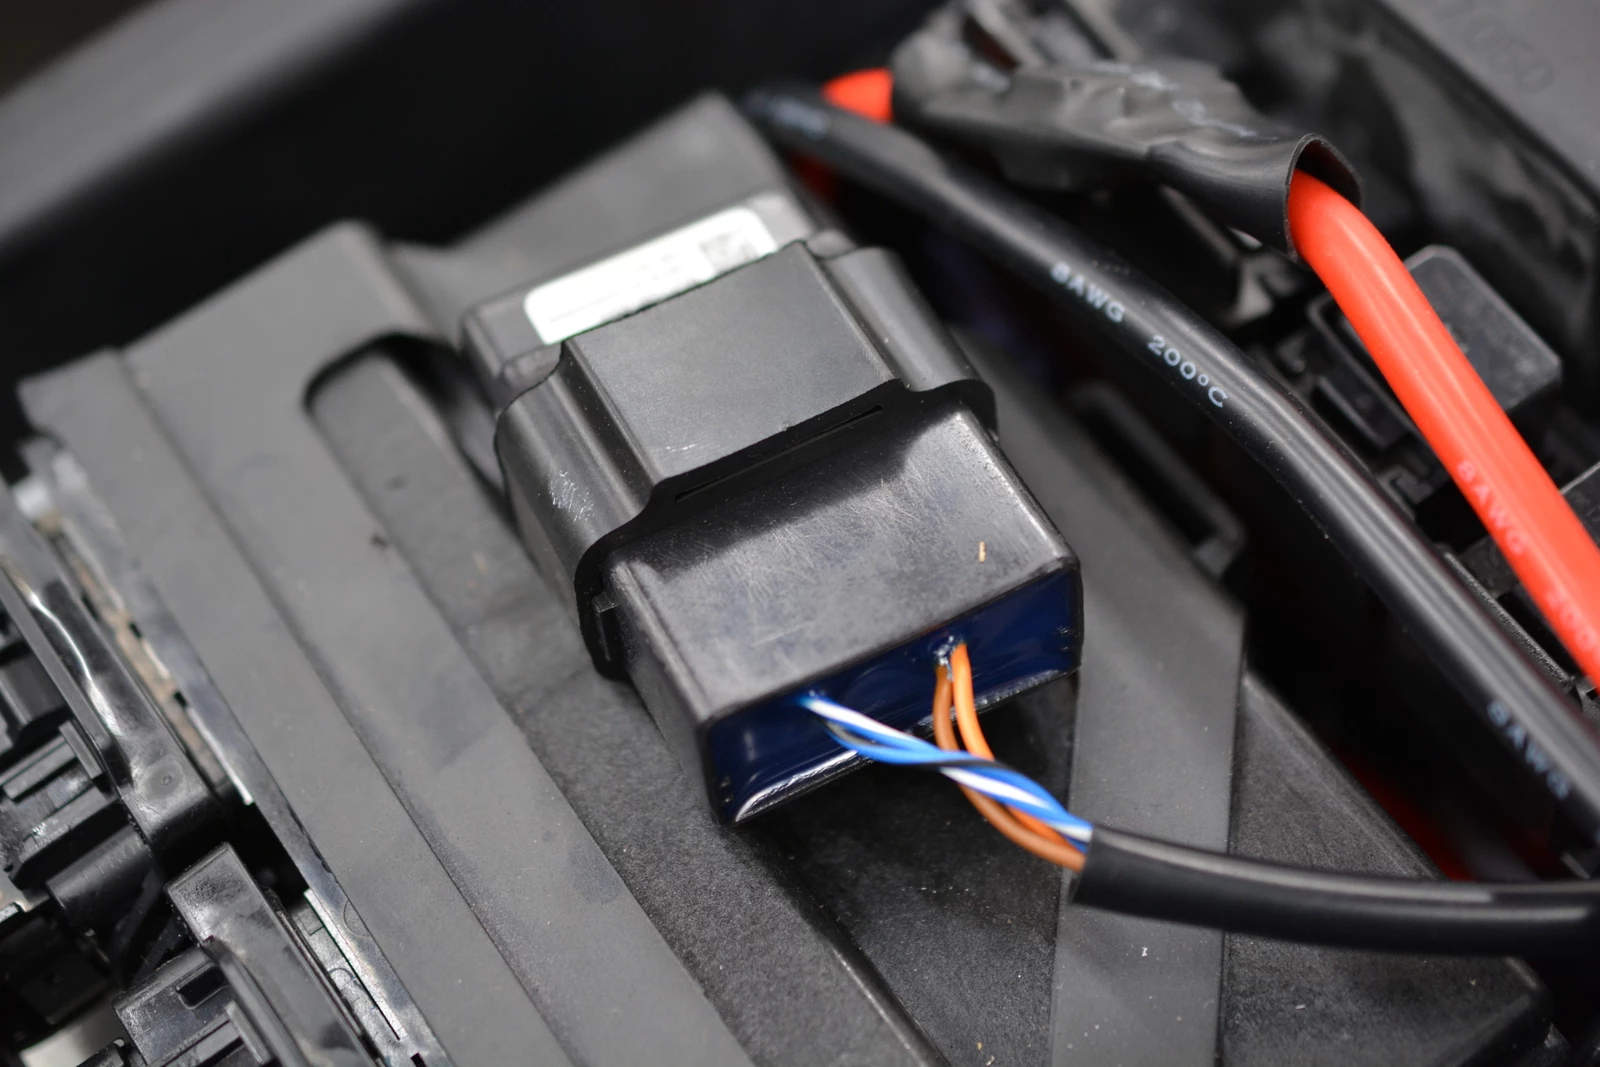
An 'ABS Dongle' is a must on these bikes and why they don't come with them is a mystery but at least they exist. With this little plug-in dongle, all of your ABS settings will stay where they have been set when the bike is shut off. No need to keep resetting everything every time the bike is started back up. This is one of the first items that was added to this build.
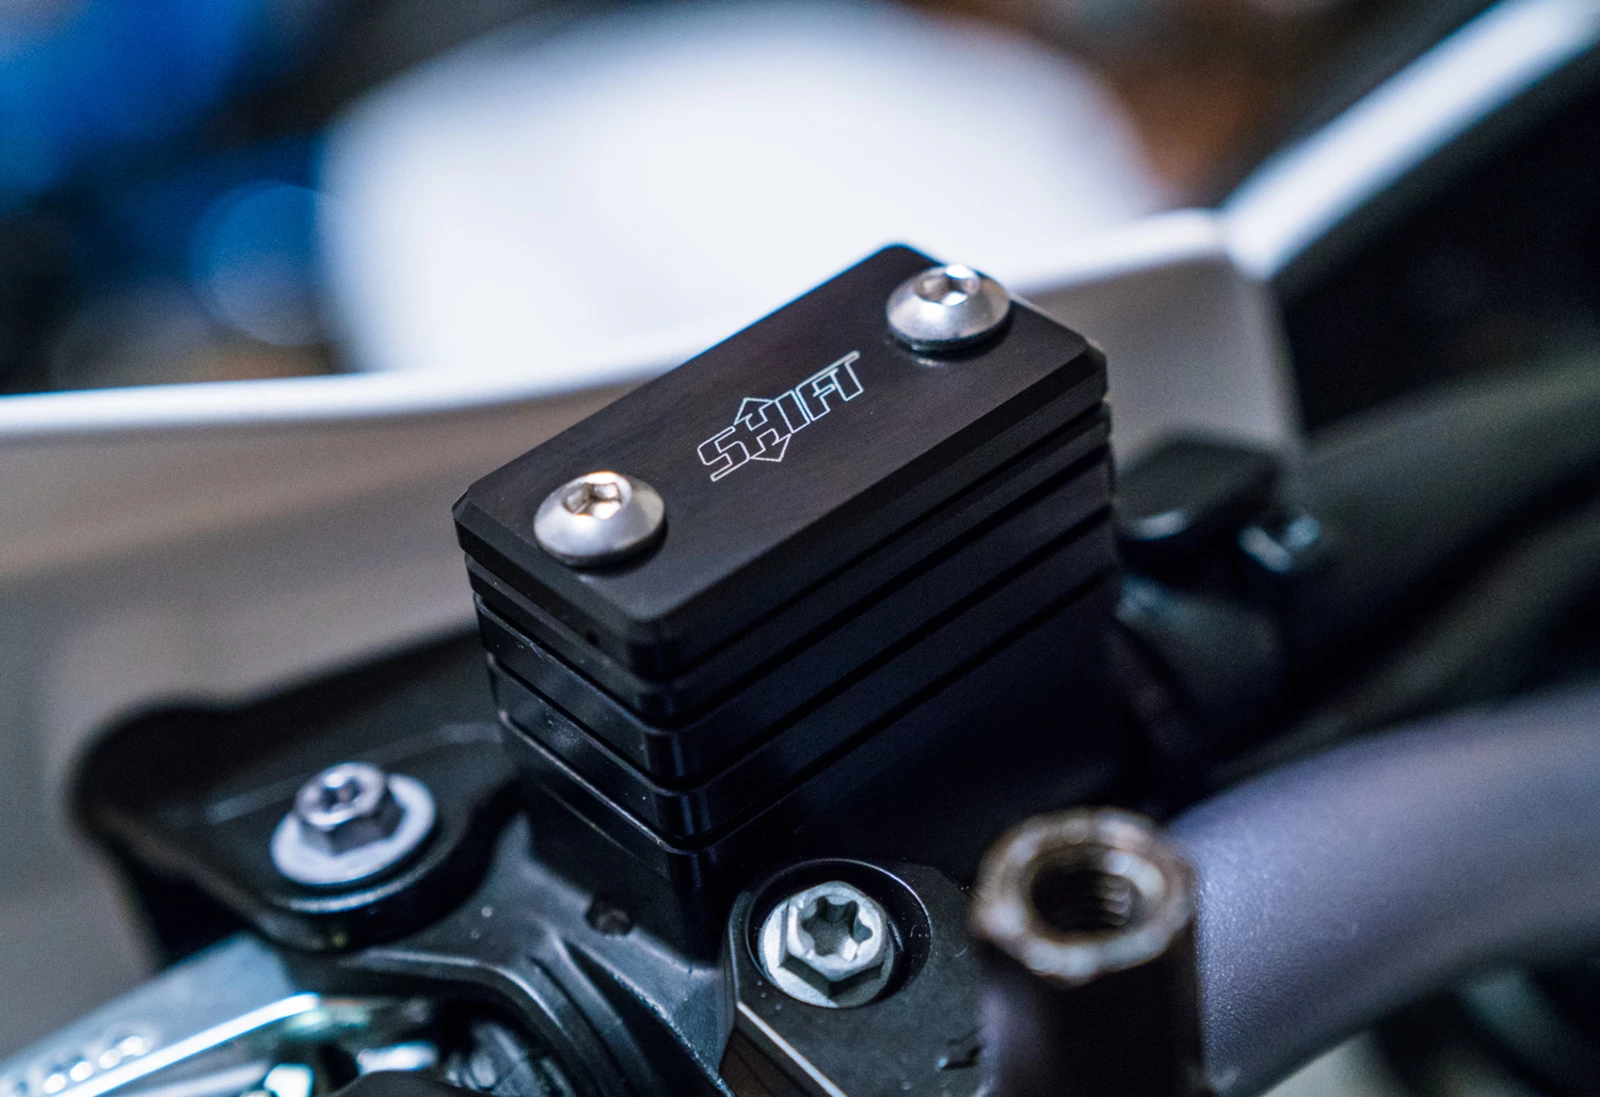
SHIFT components were added to the bike and were very clean. Below is a clutch reservoir extender to make bleeding the clutch a little less painful with fewer refills needed.
The stock brake levers are known to be a bit weak on the 701 and 690 and prone to snapping off, a serious problem when in the middle of nowhere, so Tolga opted for Shift's heavy-duty rear brake pedal. This thing was burly and good-looking to boot. We like the natural aluminum approach as anodizing always looks bad on a brake pedal mere minutes into the first ride.

Shift also offers this beautiful sprocket guard for the 701 as well and if a chain ever lets go, you know you are in good shape with this sweet setup.

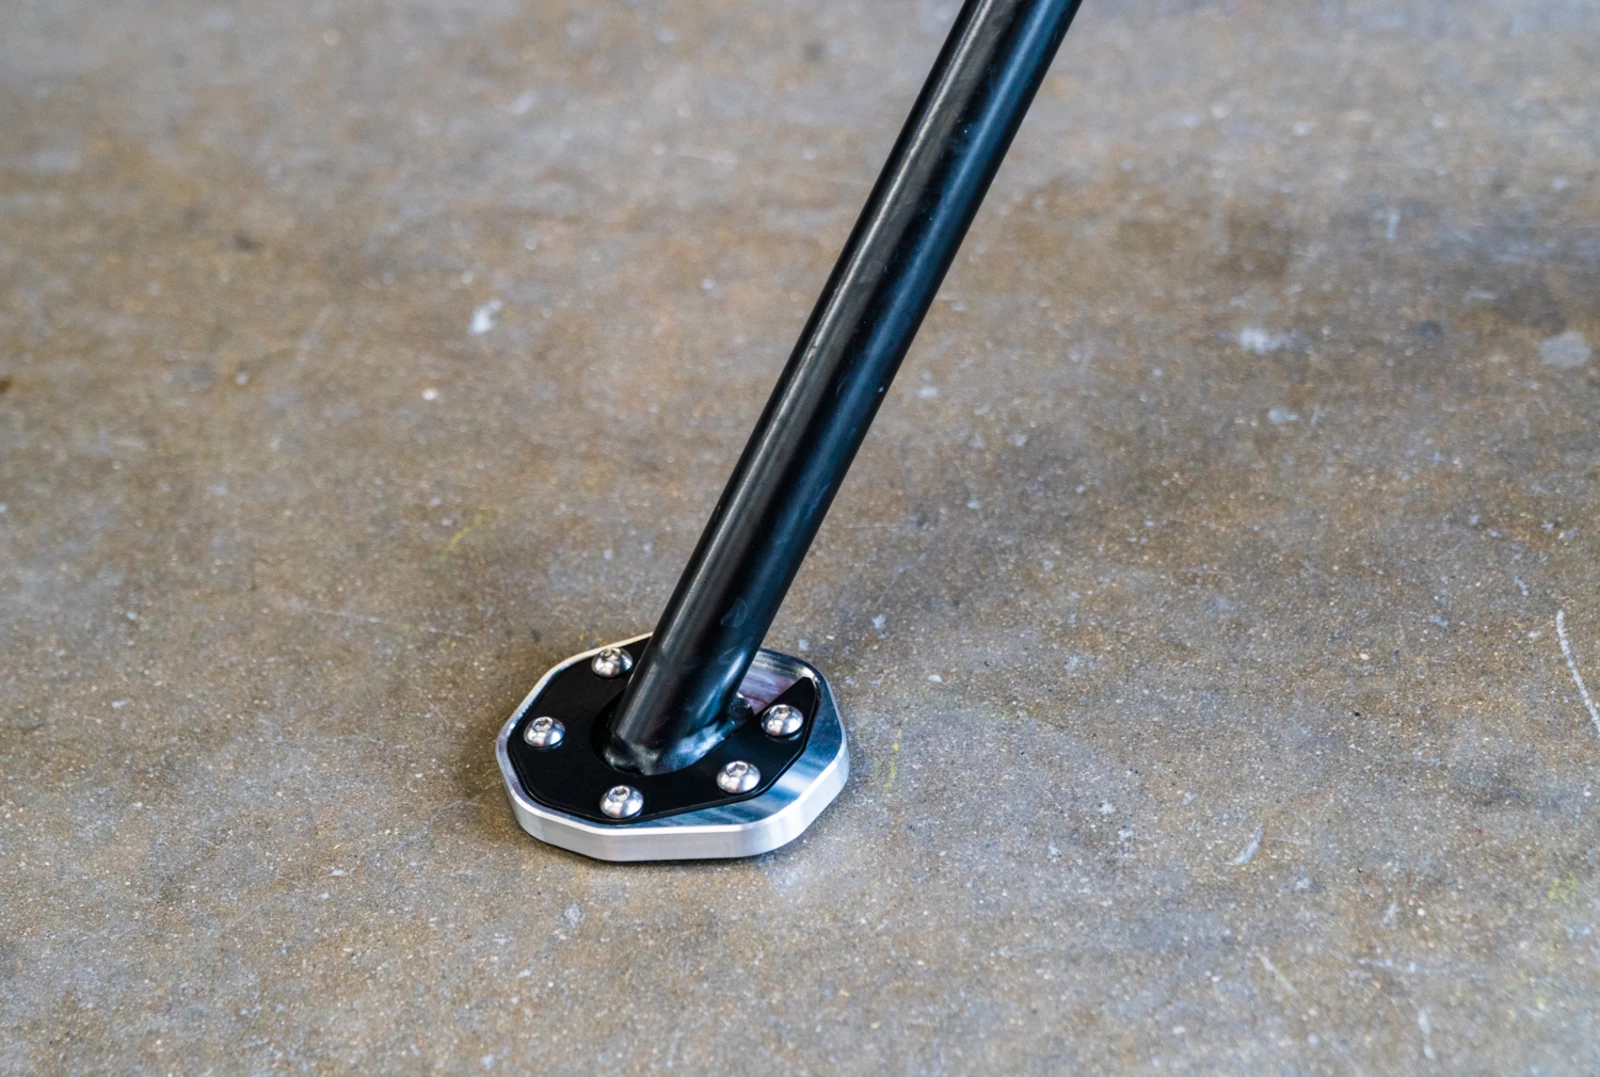
We shortened the kickstand about 25mm for Tolga for two reasons. First; for some reason, KTM tends to make their kickstands a bit long in the first place, and second; the extra weight of the bike tends to squat it just a little bit which makes the bike a bit more difficult to dismount if the kickstand is dropped before getting off. Even after shortening it 25mm (1"), we realized that we should have taken another 6mm or so.
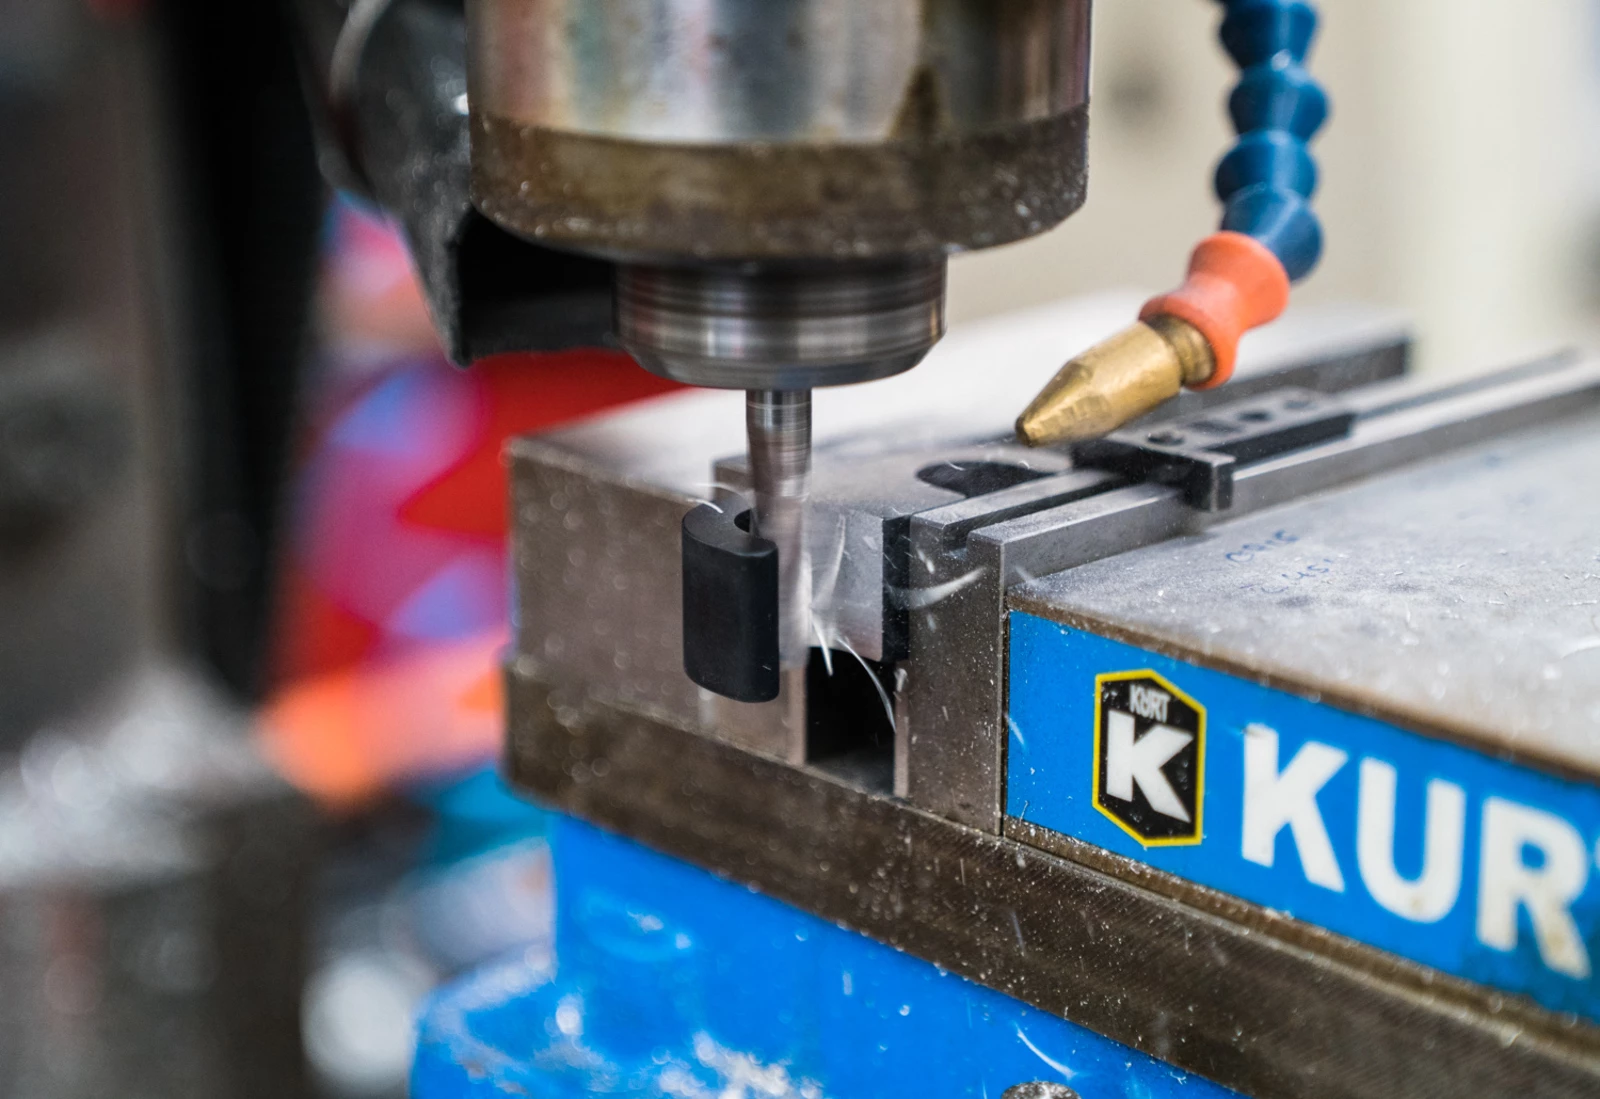
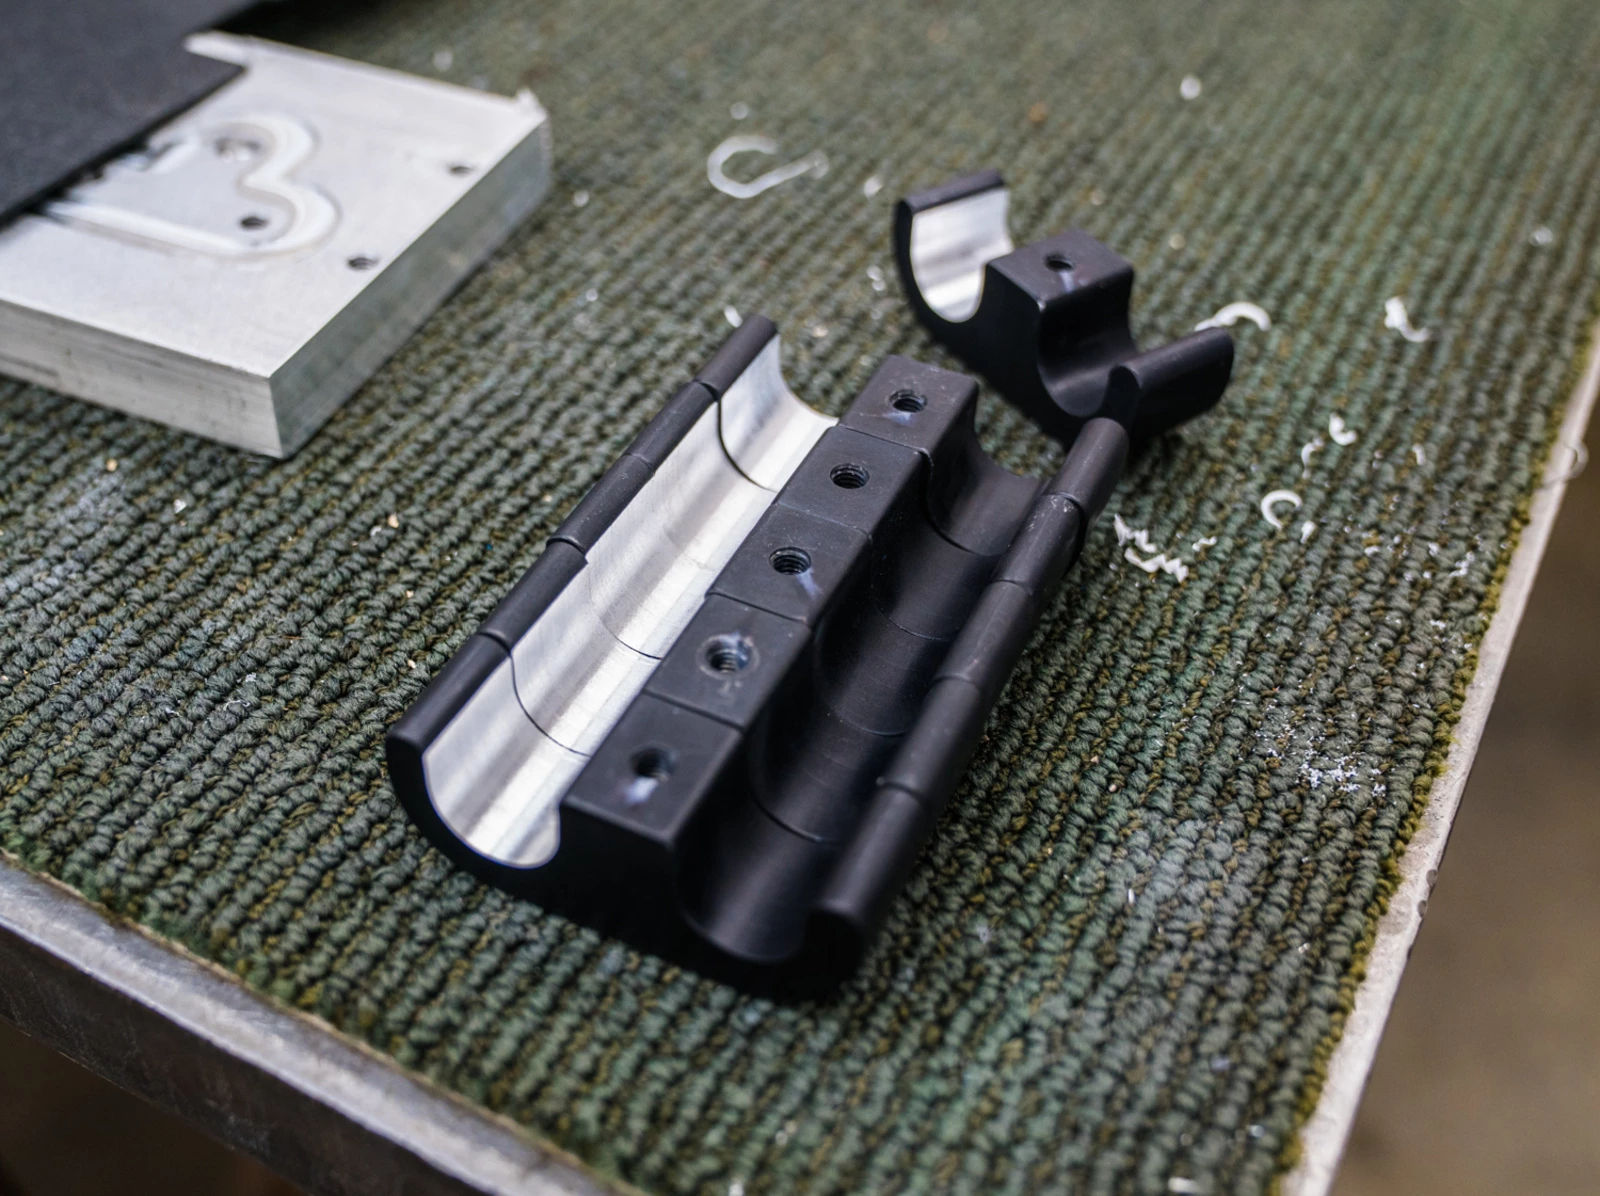
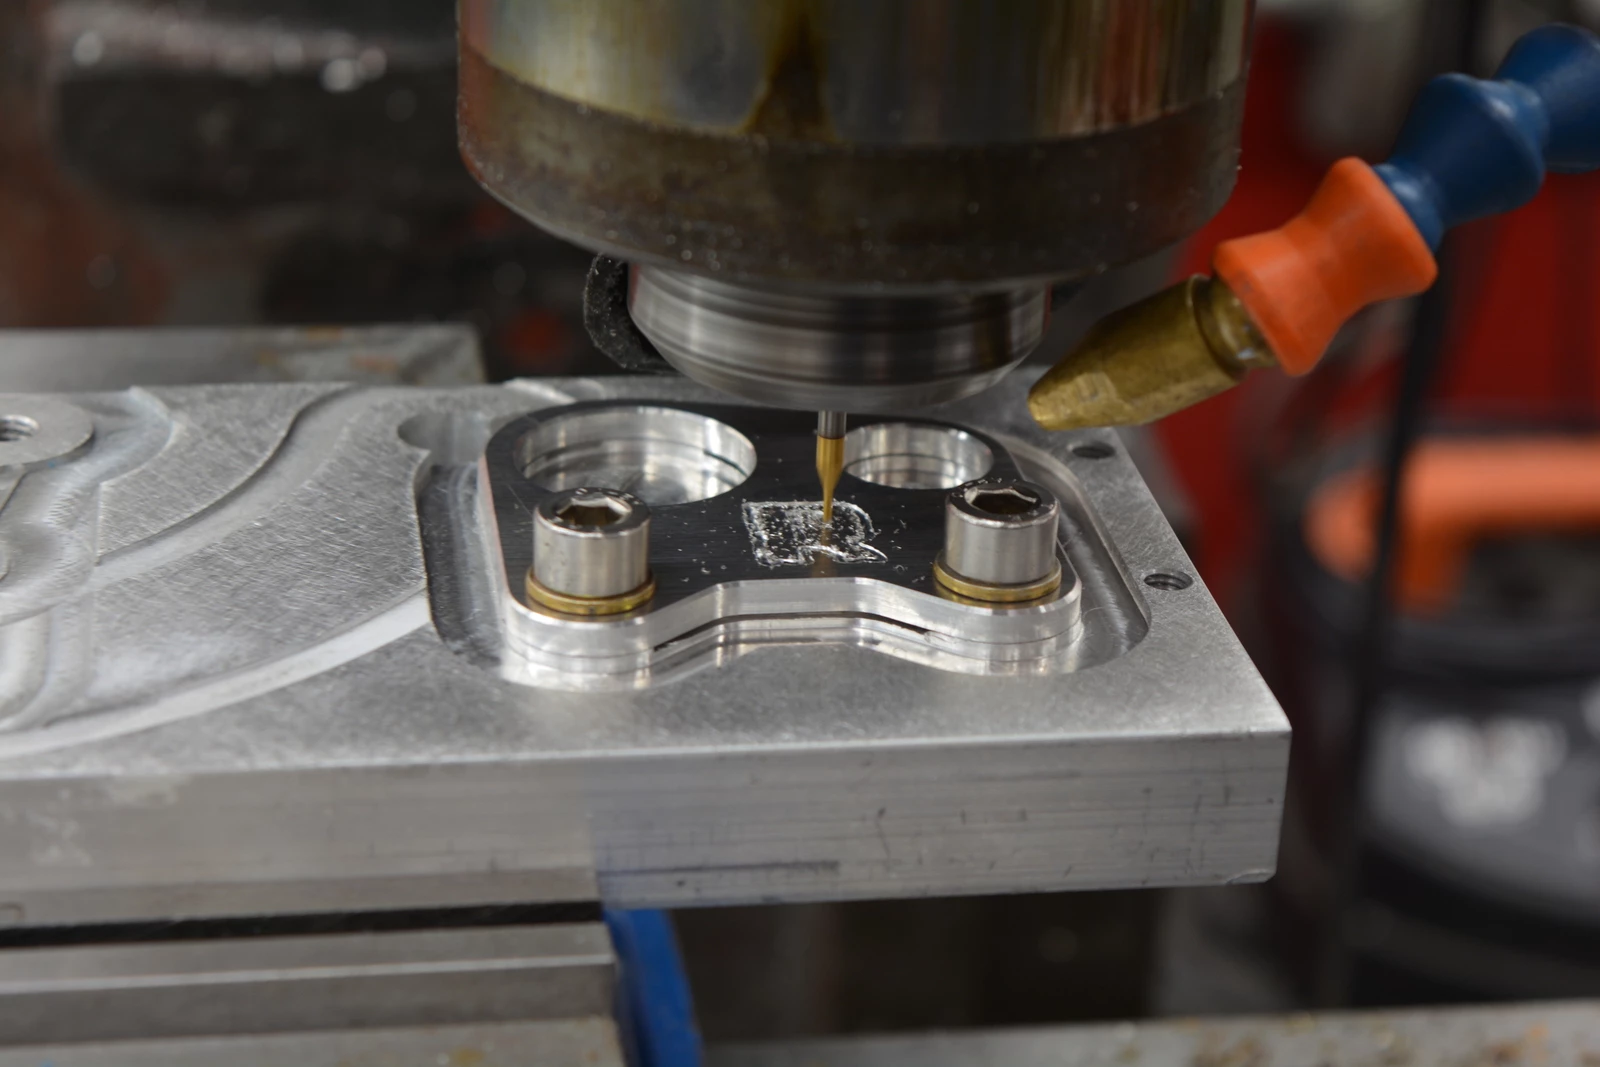
Tolga was mismatching some components with his side bags and the pannier rack clamps that came with his kit were designed for 18mm tubing and the rack he chose was a U.S. size of 3/4 (close to 20mm), which did not allow the clamps to fully seat on the tubing. He was very concerned with this and said he would 'just file them down'. Not having any of that we wrote a quick program on our NC mill and quickly machined out the clamps to fit the metric tubing perfectly.
Tolga also chose SHIFT for his pannier racks and the fit and finish was quite nice.
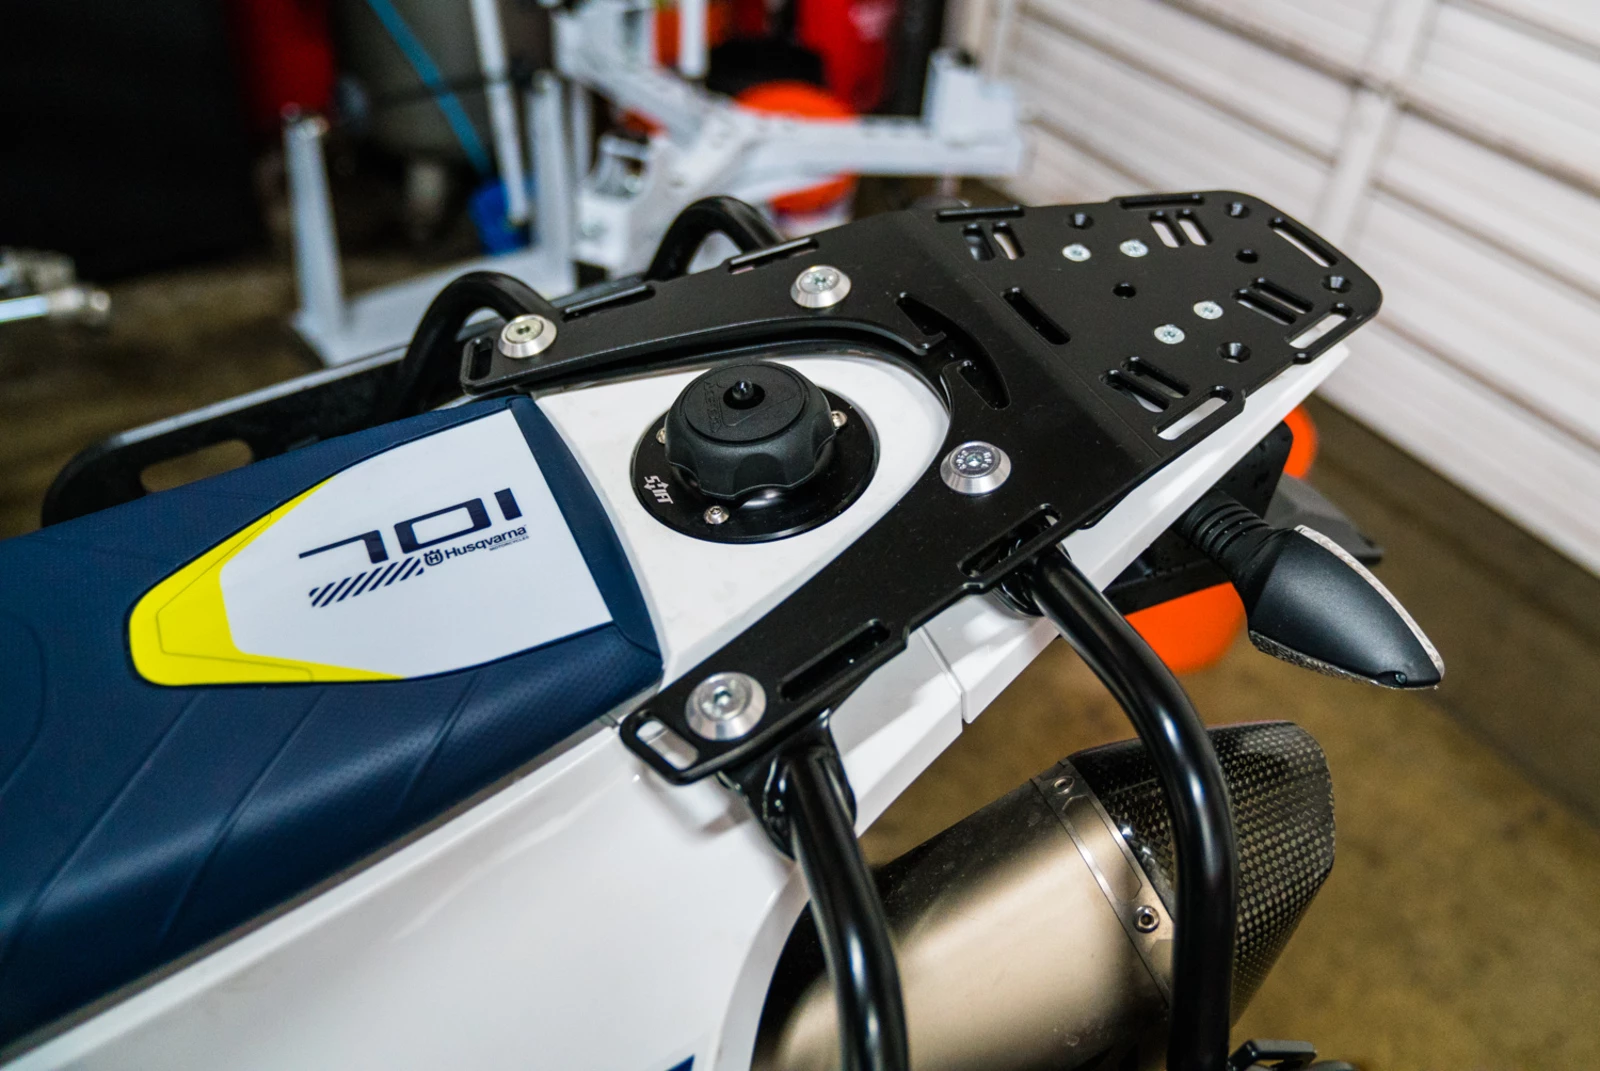
Perun Moto billet rack on the rear. Notice the clever strap hooks in the center just behind the Shift fuel cap replacement filler.
A BRP Anti Vibration Steering Damper Mount was installed to reduce fatigue to the rider in two ways. First, by adding a stabilizer you have the peace of mind that unseen gotchas and high-speed headshake due to running knobbies on the pavement are reduced or eliminated, and secondly the entire bar perch is isolated with your choice of two different durometer anti-vibration isolators (below in red). This mount also raises the handlebars about 25mm (1") which almost all riders prefer.
Tolga also sourced this clever little cell phone mount from Hondo Garage (Coming soon to Rottweiler Performance) that slid and adjusted for different sizes. This was one of the nicest and well thought-out phone mounts we have seen for motorcycle use. (Added 3/20/17) Reports from Tolga are that it is working quite well.
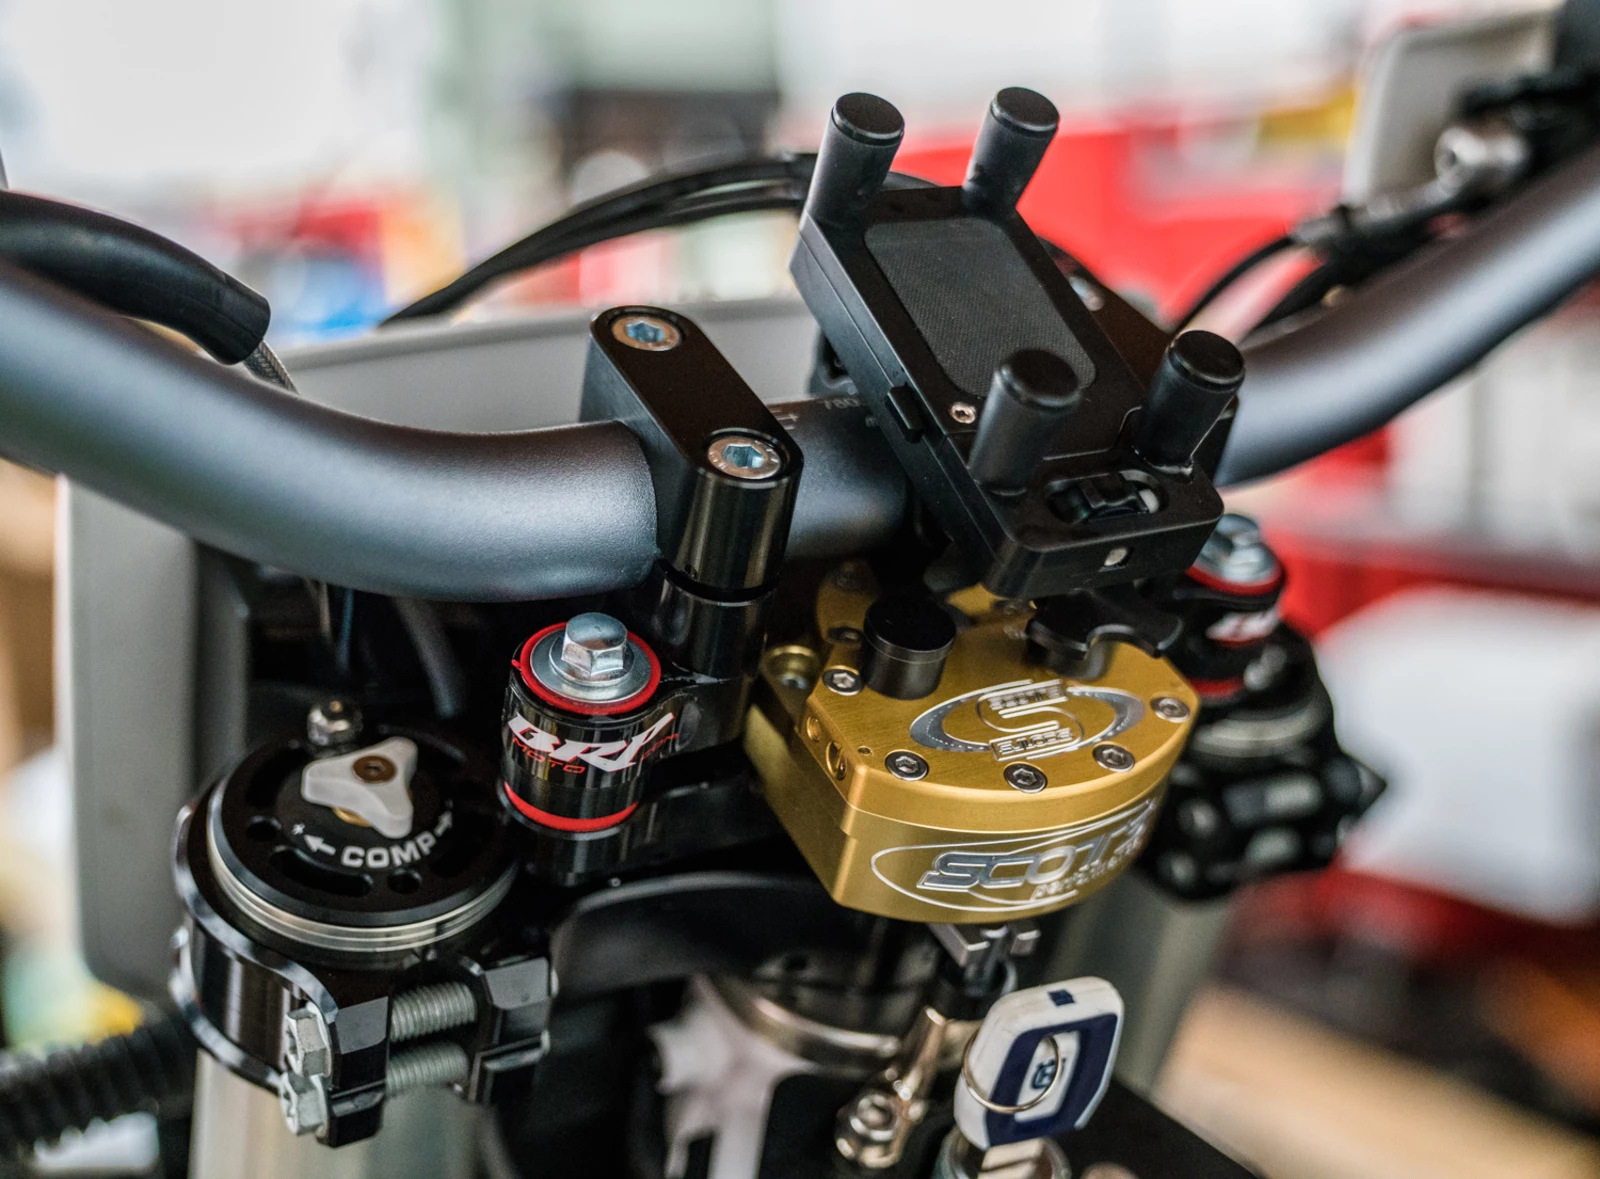
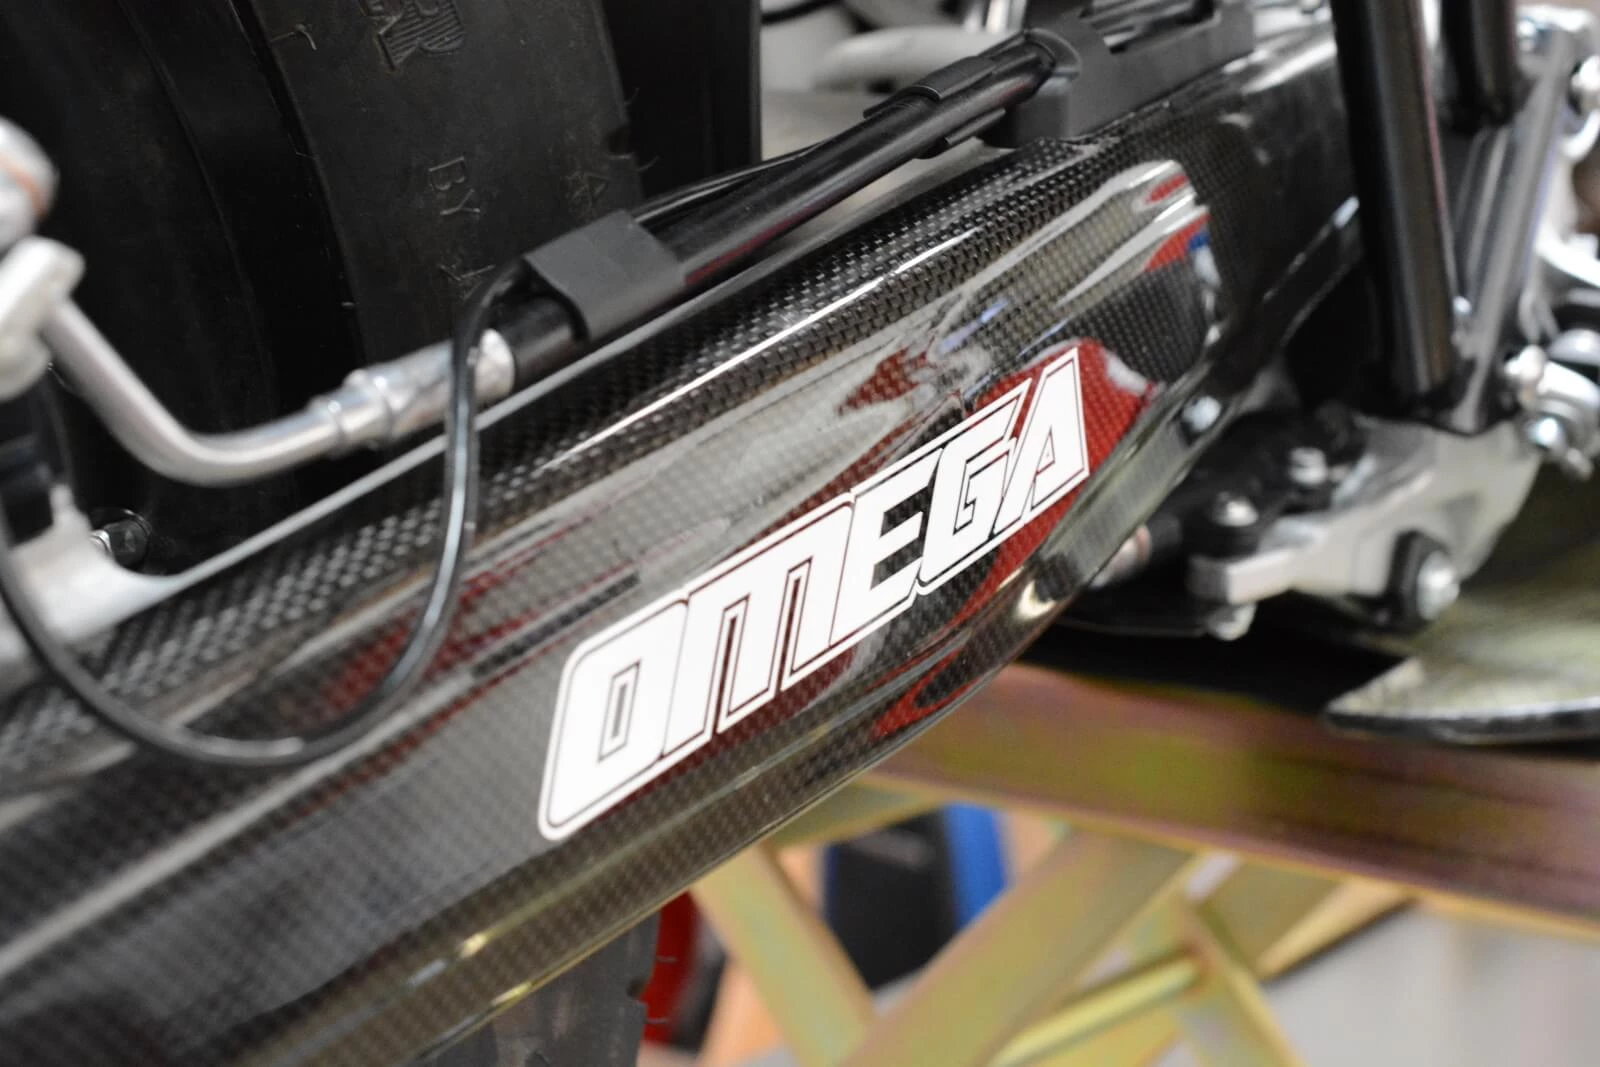
The omega billet fuel tank mount came prepared and threaded for the tower pin (depicted below) and was a perfect match for the BRP stabilizer assembly.

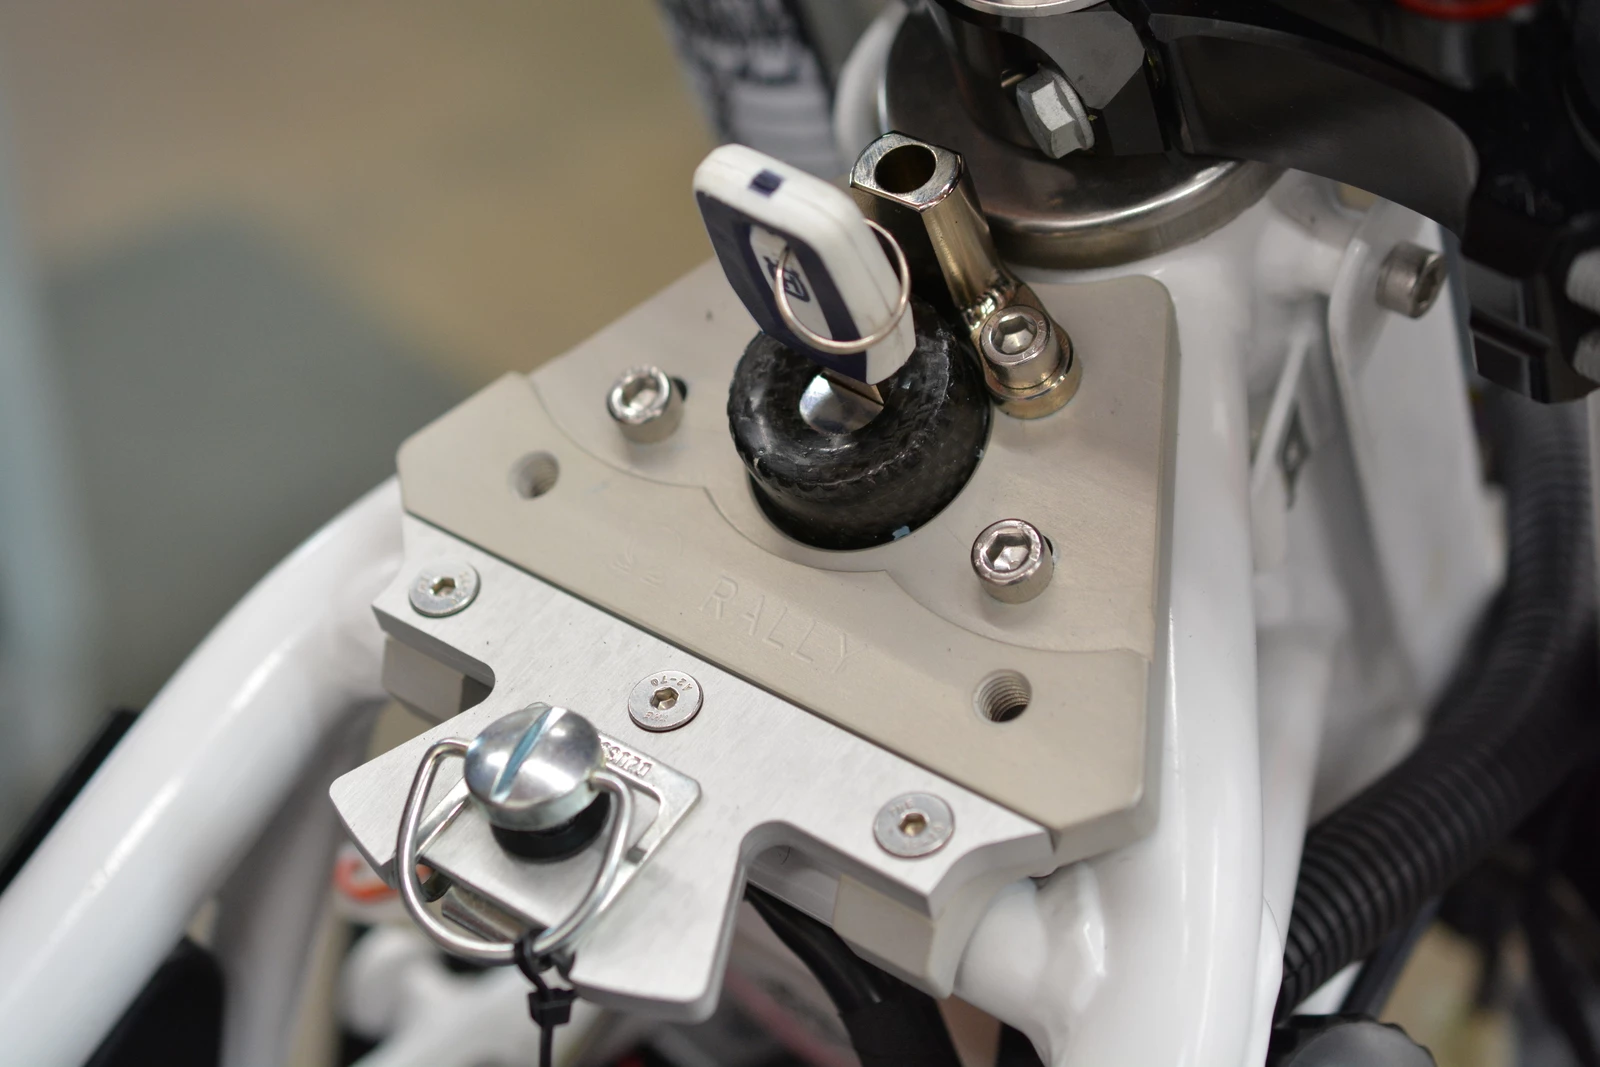
The tower pin housing is pictured below just above the key and was a perfect fit. Omega even makes a carbon key cover that comes in the kit.
Tolga needed a mount for his various chargers and wasn't sure what to do so we whipped up a quick CAD drawing that matched the bolt holes in the BRP sub-mount and programmed it into the CNC and whipped up this clean little mount. Of course, we had to etch our trademarked 'R' logo to make it official!
A USB charging hub is on the left and a headlight cutoff push button switch is on the right. We have bets on when that switch will fill with dirt and fail. Stay tuned.

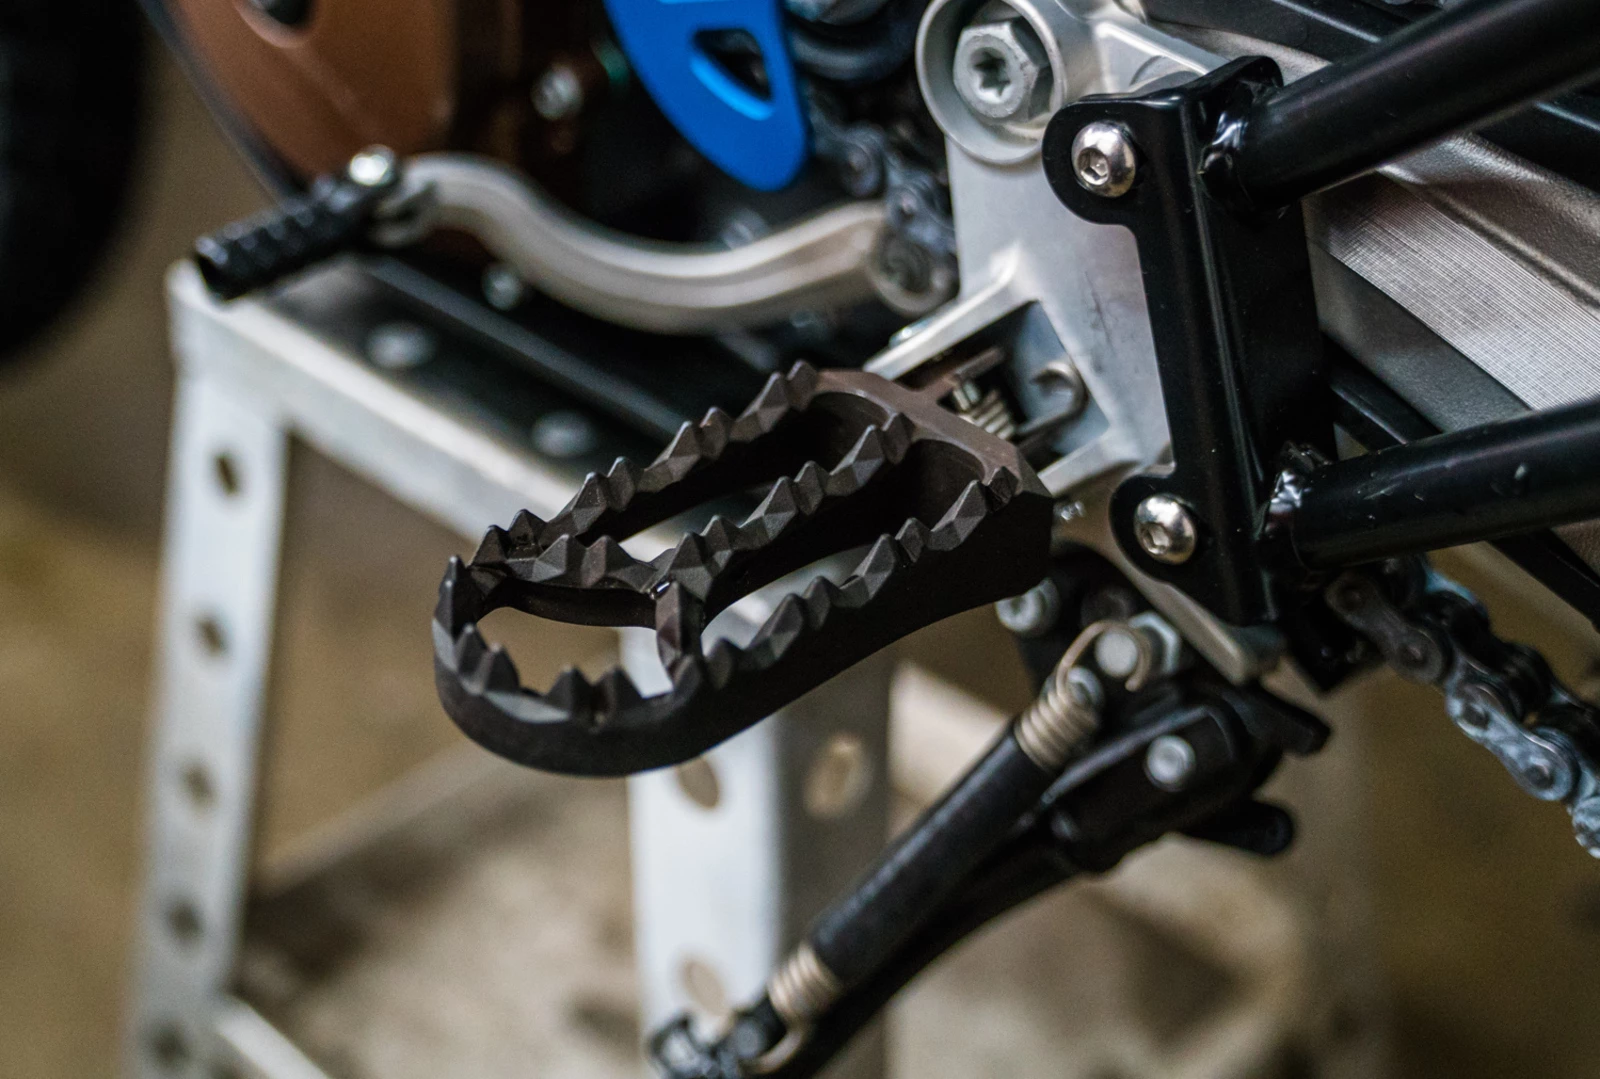
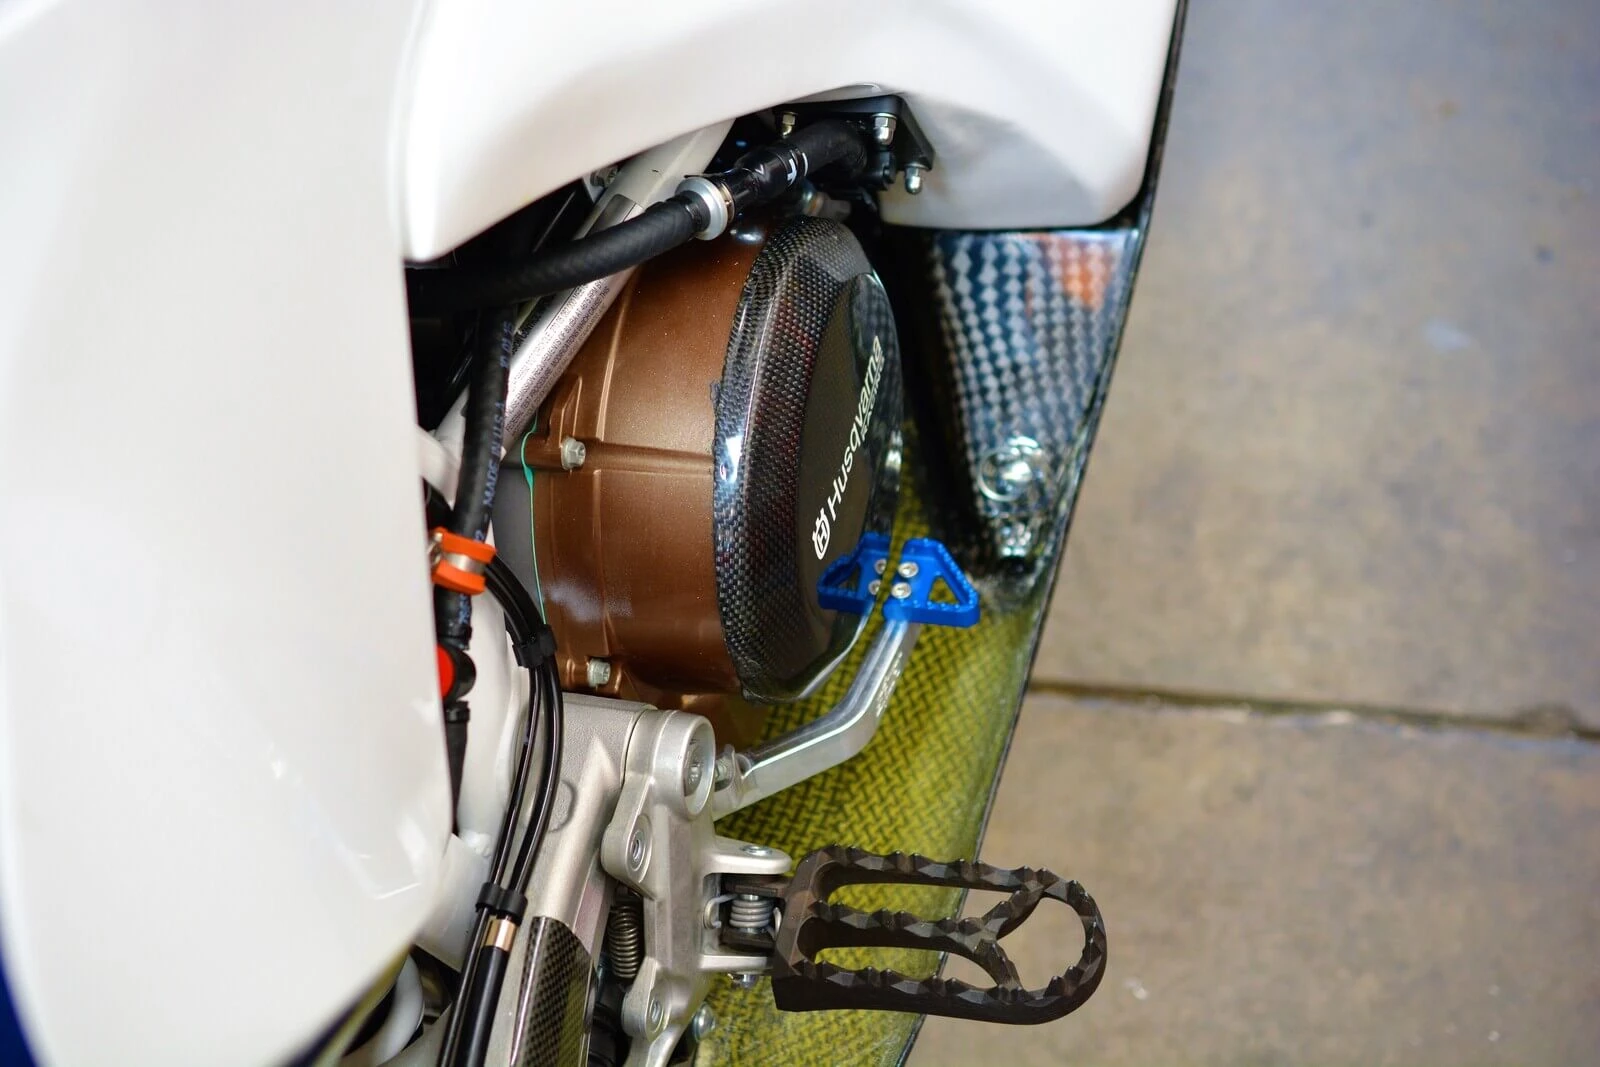
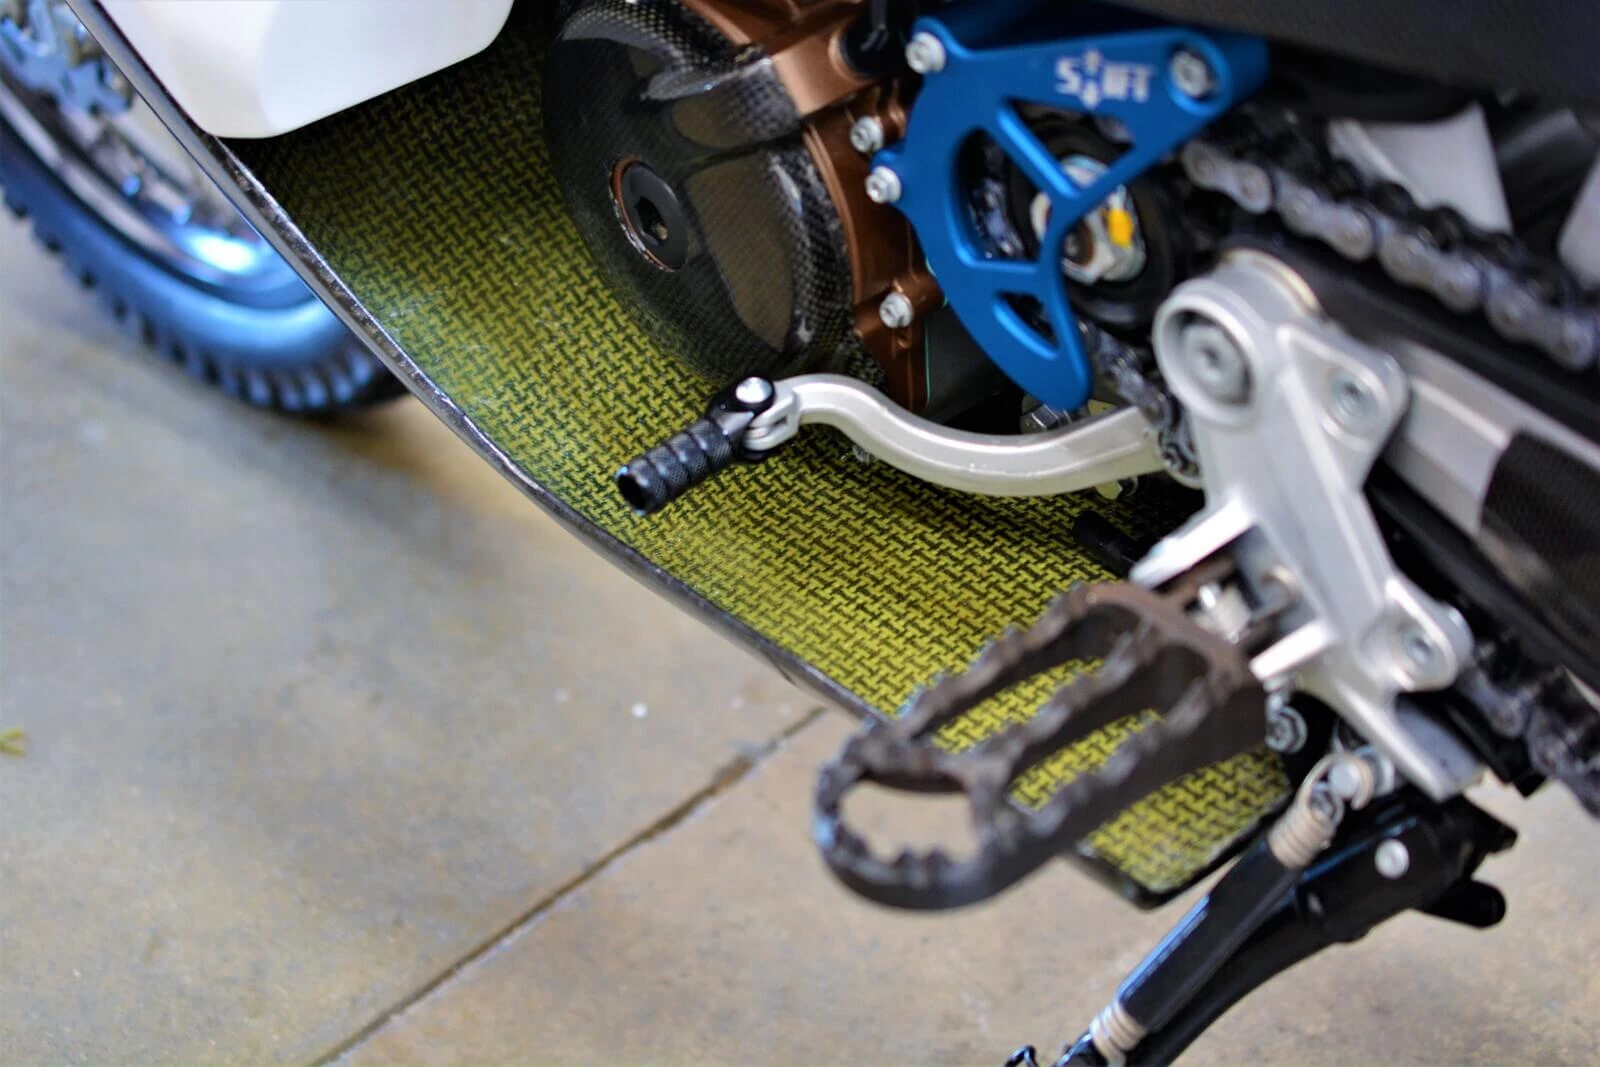
IMS 'Rally' pegs are a perfect match for the 701 and are bulletproof in construction. At -5mm down and back, they allow quicker seat to standing by just a little and are made from stainless steel. The cleats are not too sharp to the touch but offer great mud cleaning and traction, even with hard-soled boots.
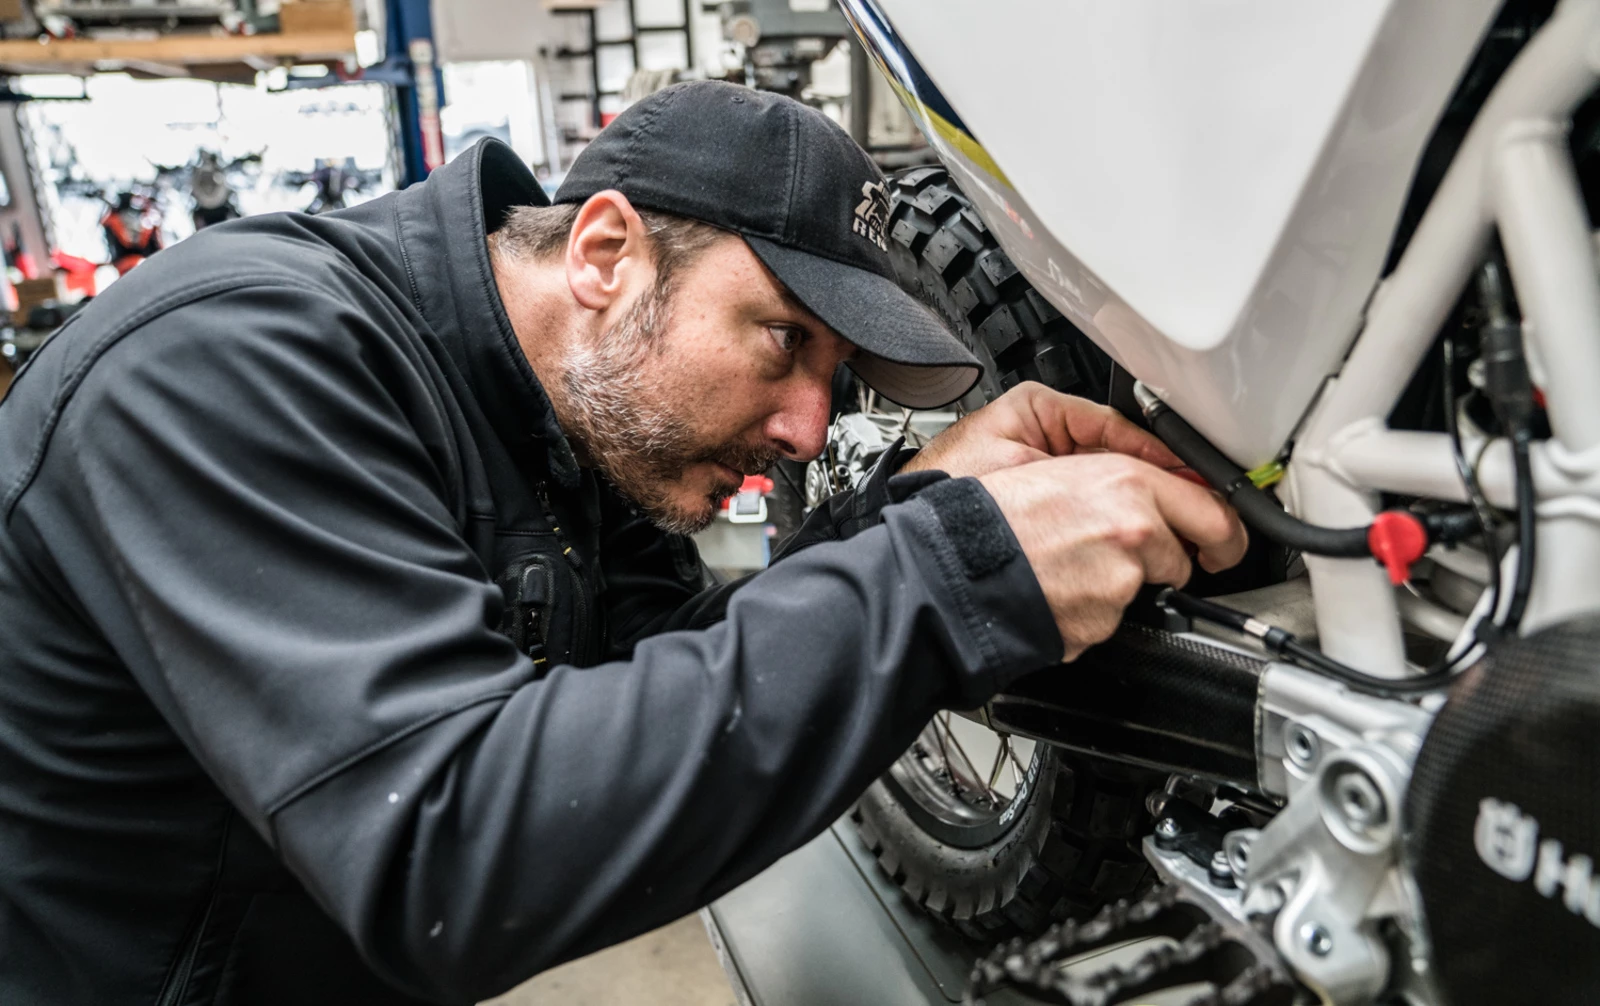
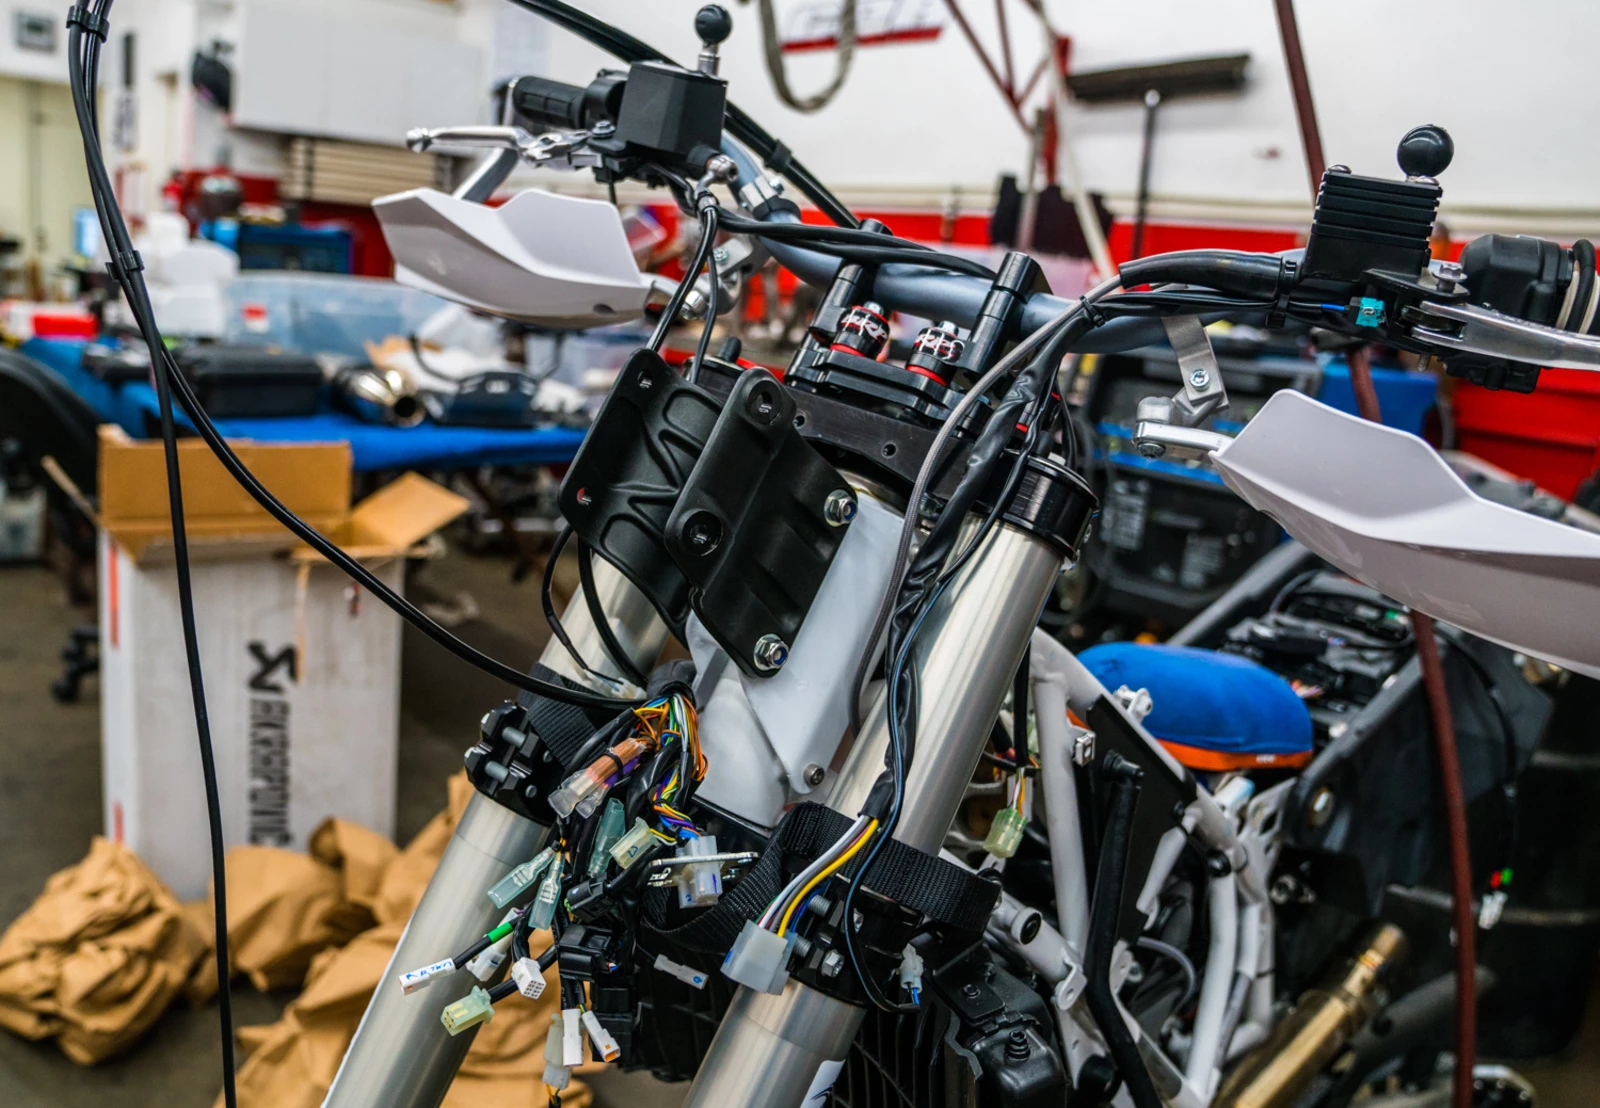
While Tolga has a wealth of experience traveling in countries mostly foreign to a lot of riders, he is admittedly not so versed in running fuel and electrical lines. This sent my OCD off the scale once I saw what he had done so I spent a day helping him simplify and reroute almost all of them to reduce the chances of failure in remote areas. Years of prepping and racing Pike's Peak, Class 1, Class 10, Trophy Truck, and my own 450 motorcycle team have been extremely helpful in knowing just how to route things so that failures become almost eliminated in long and harsh environments.
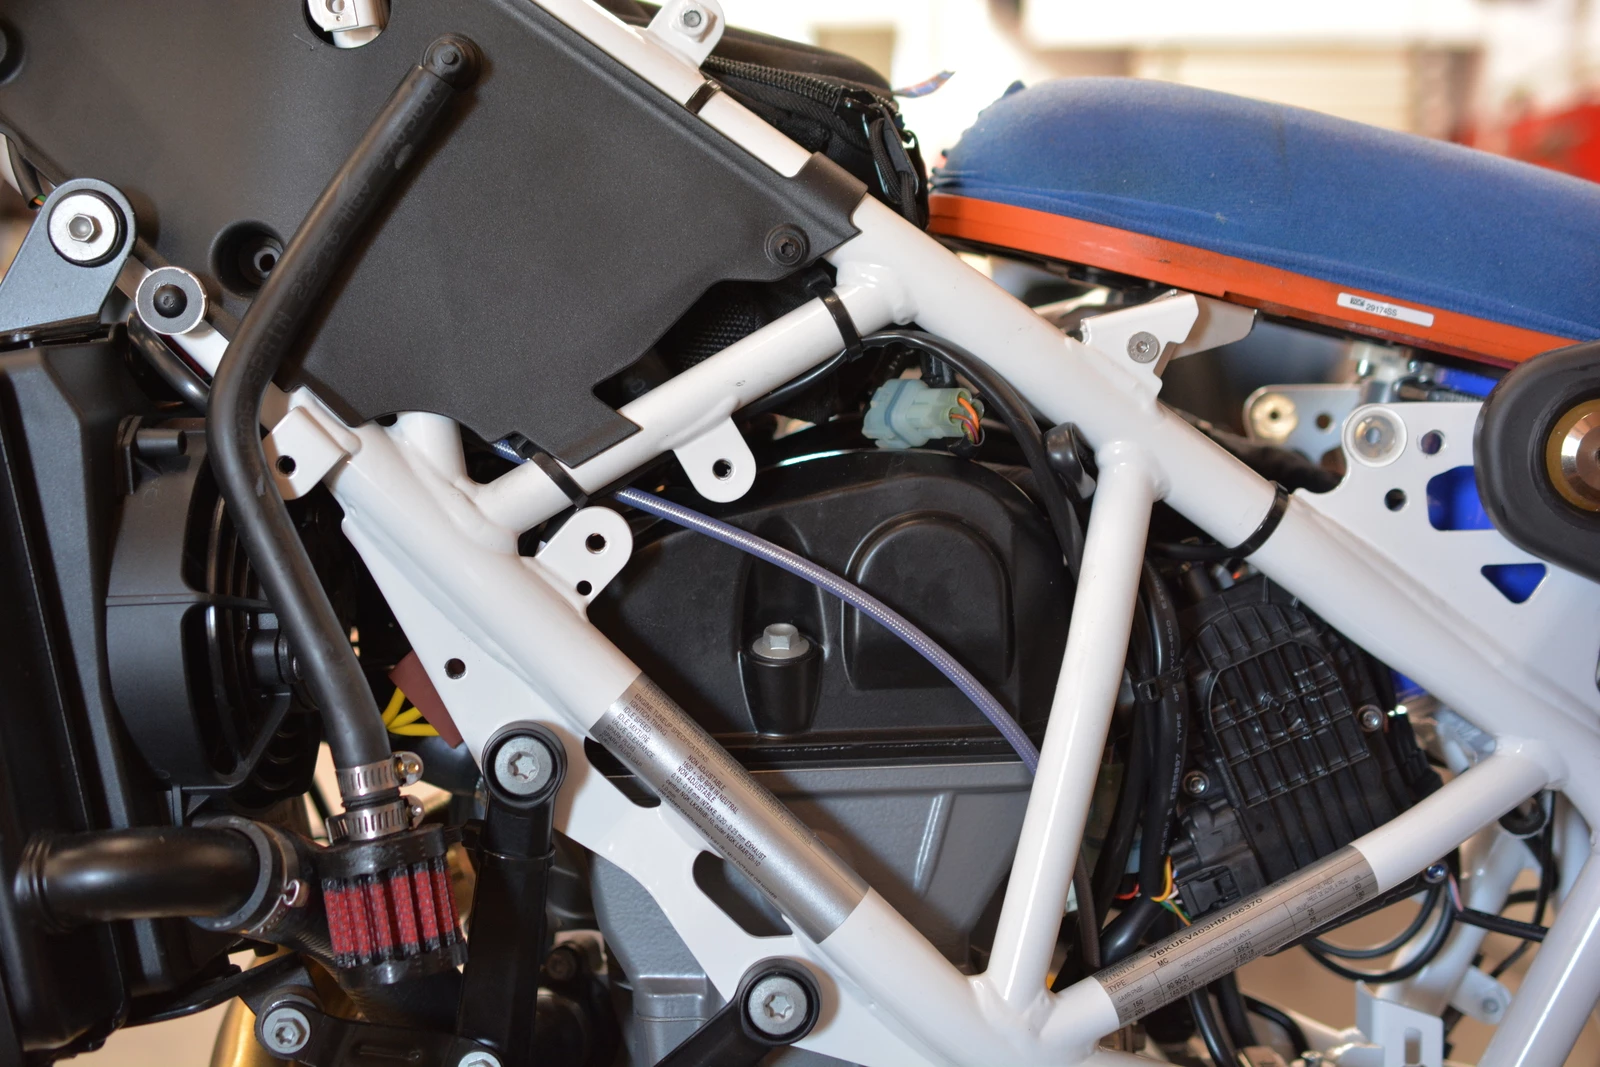
All of the emissions equipment was removed with our 701 SAS Kit which contains every piece necessary to ditch the SAS and canister system. Of course, none of our builds would be complete without our signature trademark. You can find the instructions here.
Tolga also opted for the crankcase block-off kit. The 701 and 690 models are perfect for this kit as they possess a perfect catch tank stock. The crankcase on the 690 and 701 needs to breathe as pressure builds up underneath the piston and is typically routed to the air box for emissions reasons. The problem is that this is 'dirty air' and getting it out of our intake charge is not a bad thing so with our block-off kits we can reroute the breather to a small K&N-style filter outside of the intake. The fact that those bikes have a catch tank and are not vented directly to the filter means that they do not make an oily mess and saturate the filter. Also a good thing.
The crank case filter was later shortened and moved just underneath the steering head.
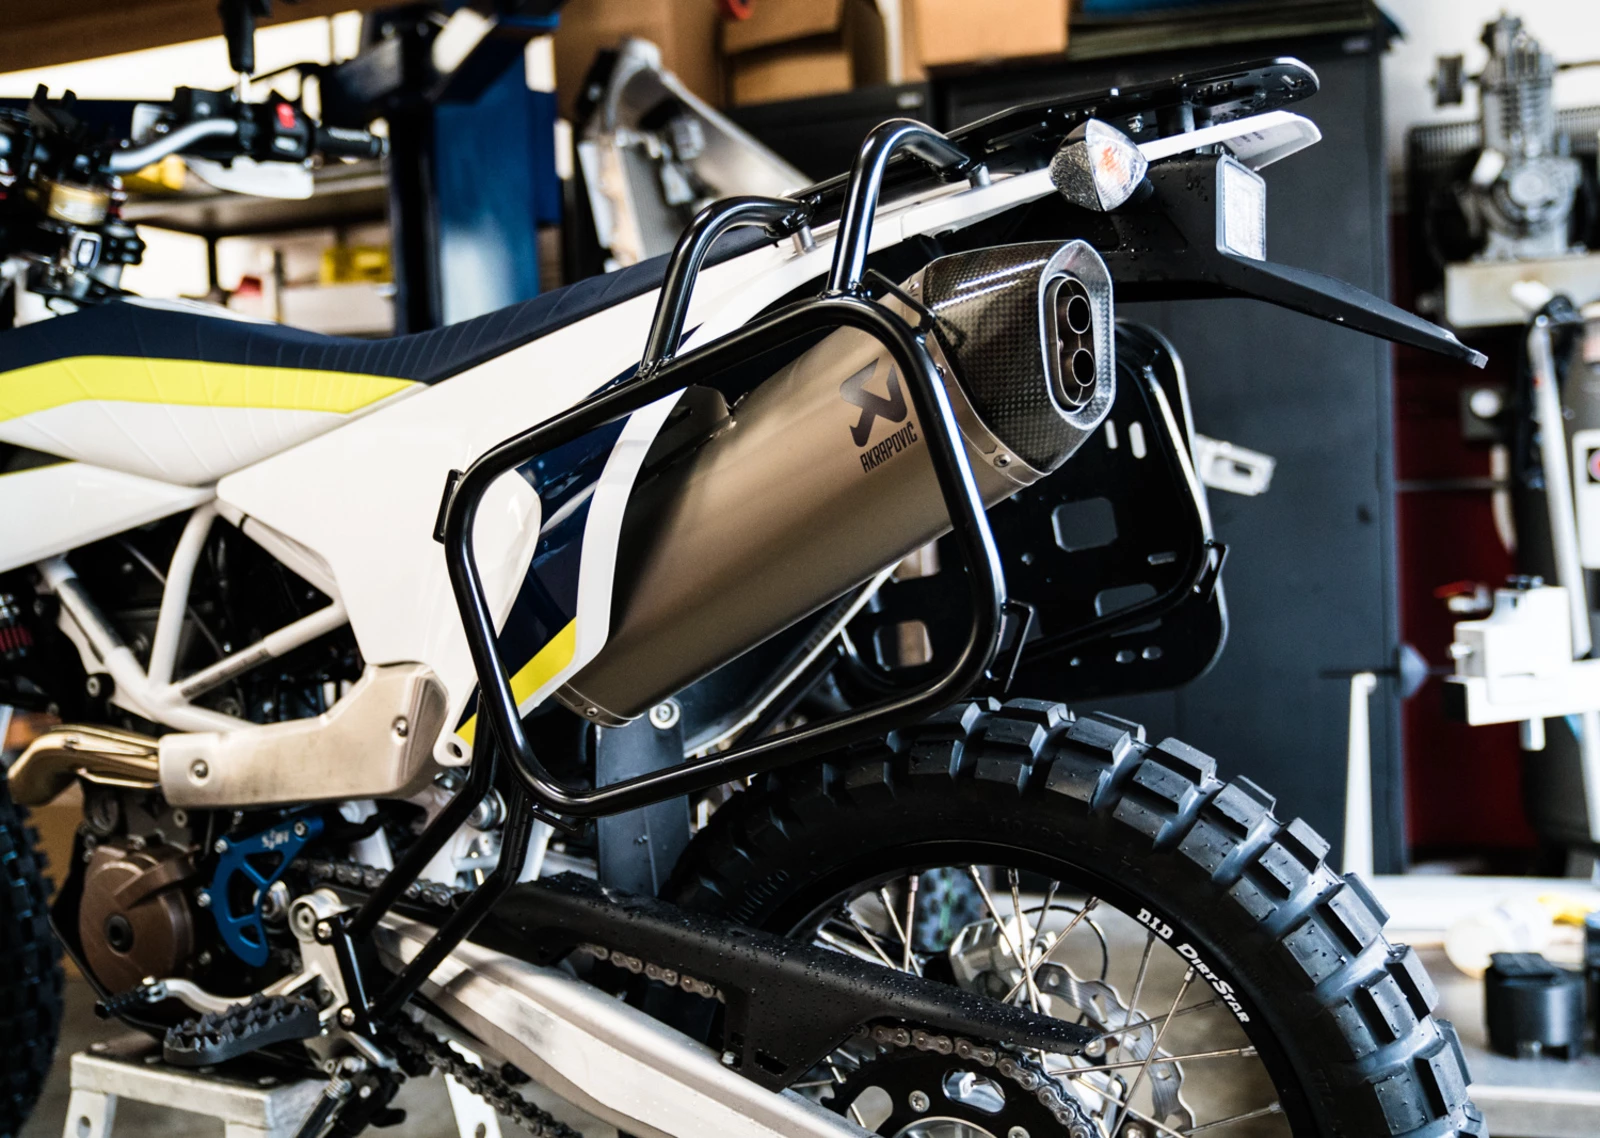
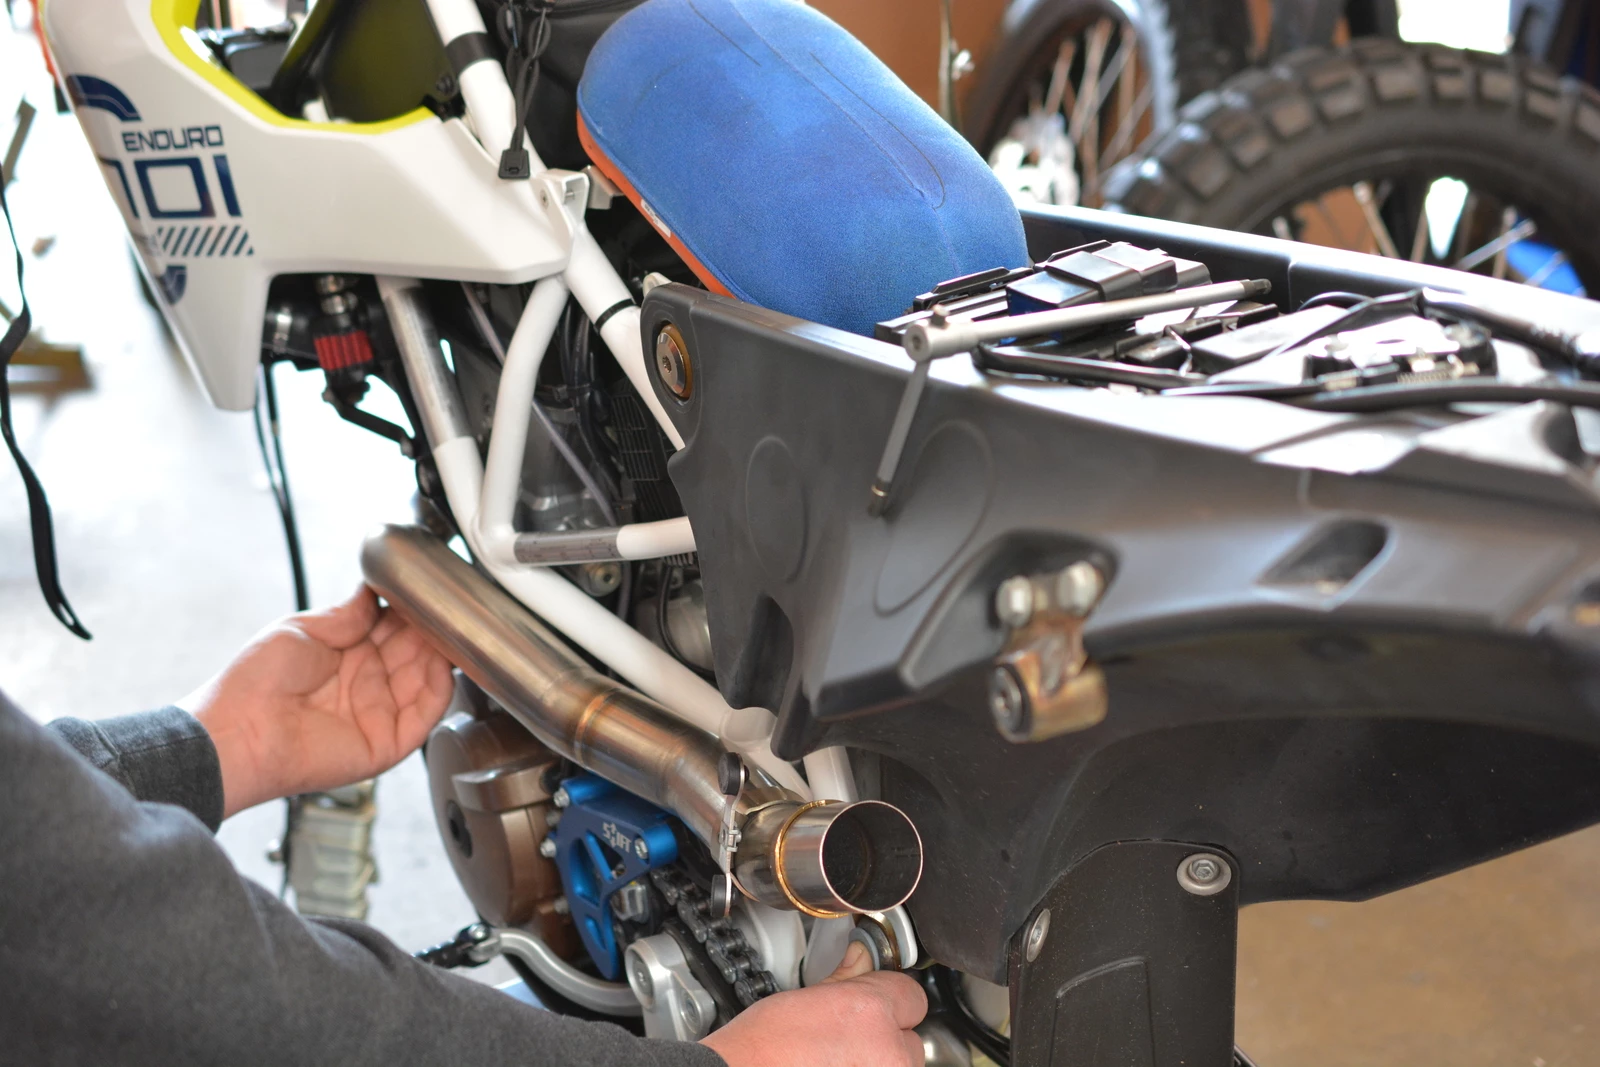
We took the opportunity to fit up an Arrow header pipe, mid pipe, and muffler. While we found that ALL of the 690 Arrow exhaust parts will fit on a 2016 and 2017 Husky 701, the carbon-tipped mufflers will hit the rear left signal. The Arrow mufflers with a steel end cap will not. If you are modding the signals or getting our (coming soon) 701 tail tidy this is not an issue and everything will clear perfectly.
Keep an eye out for our tail tidy with all brake lights, signals, and plate lights built into the frame.
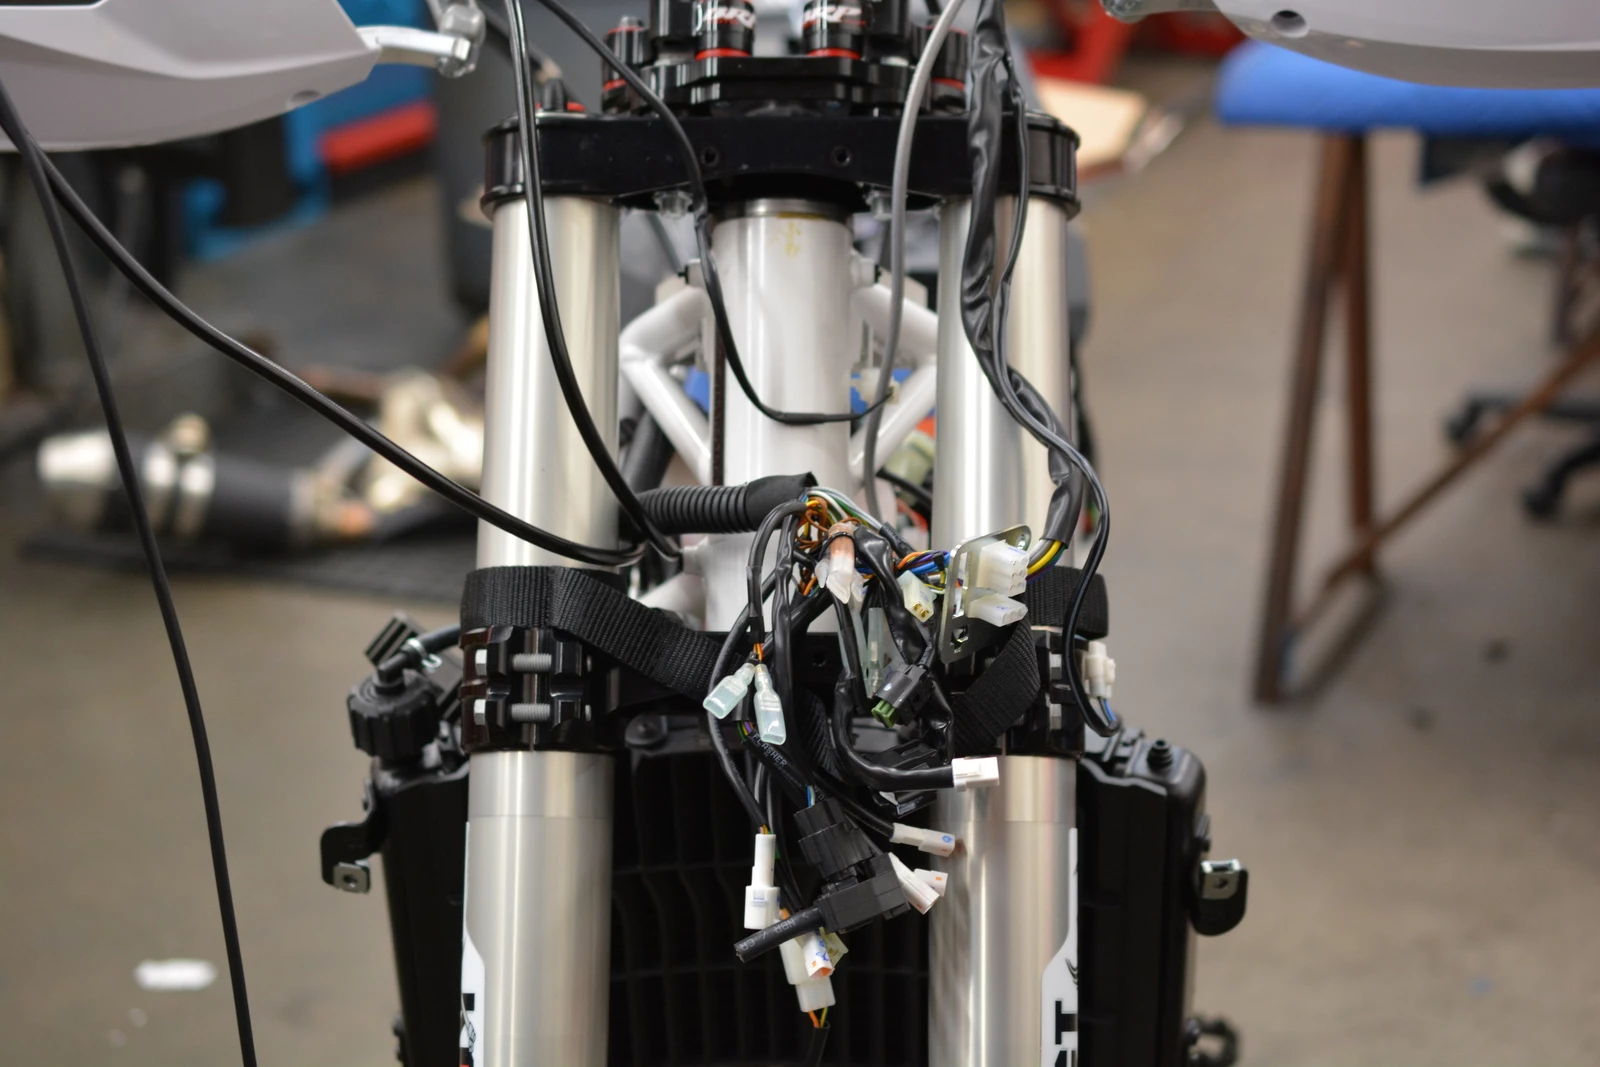
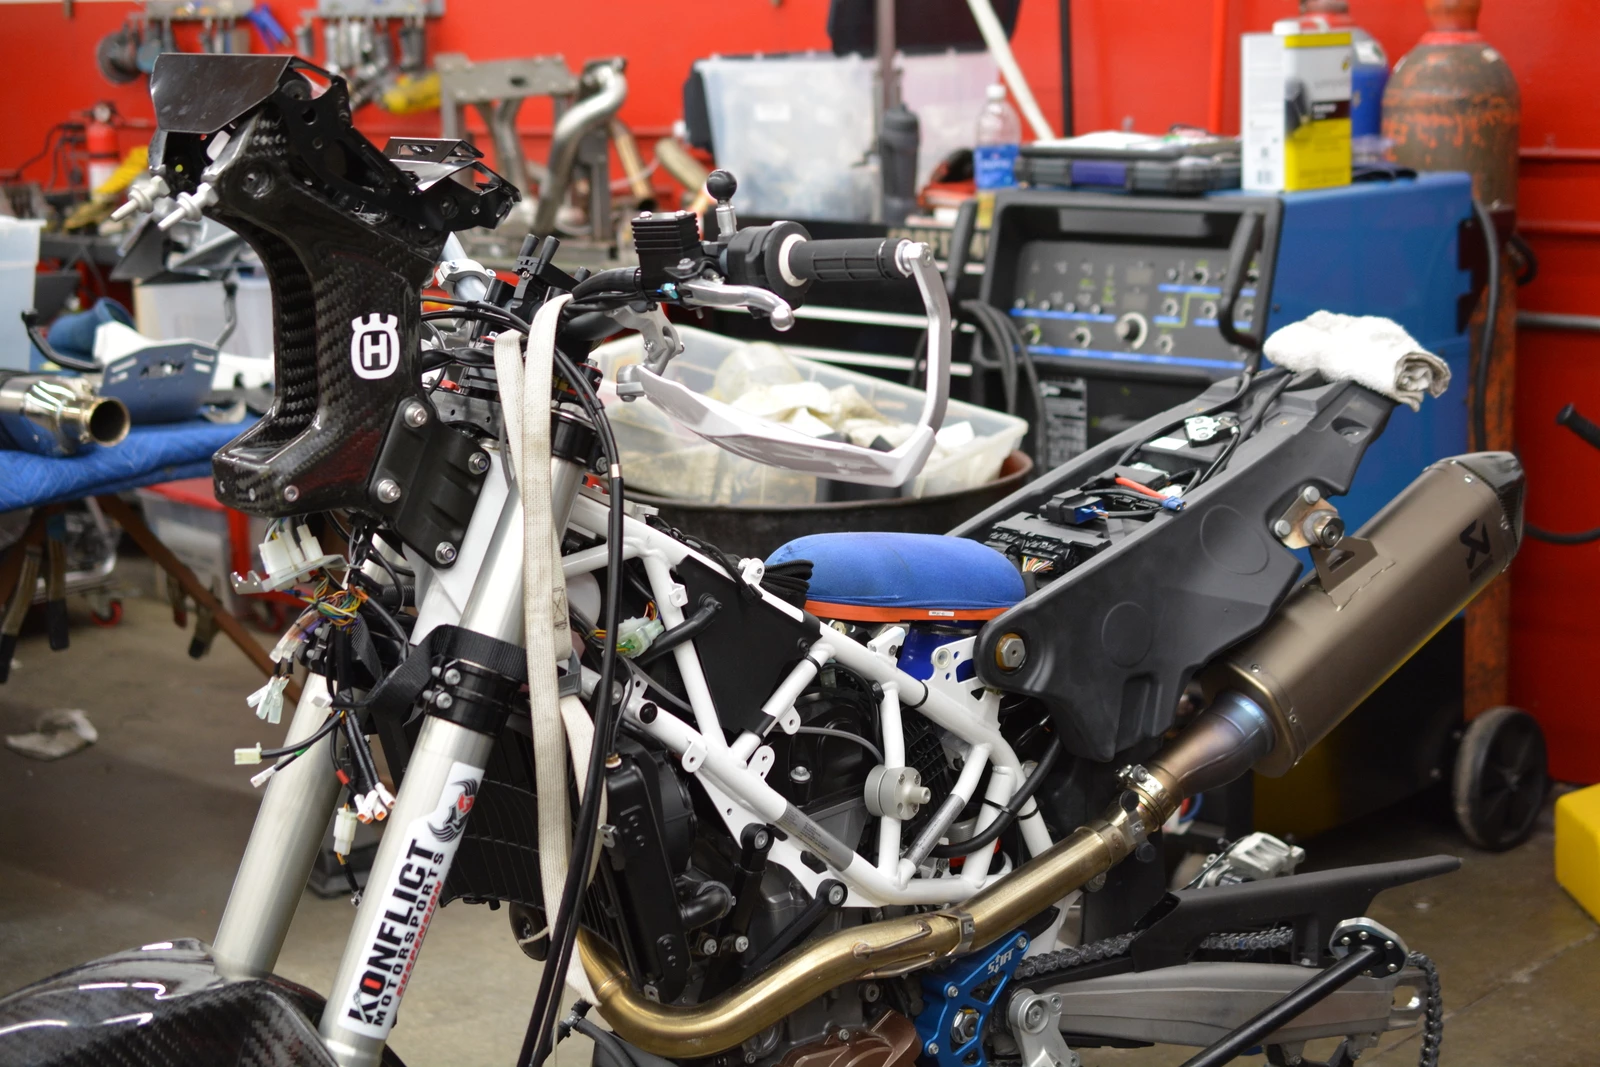
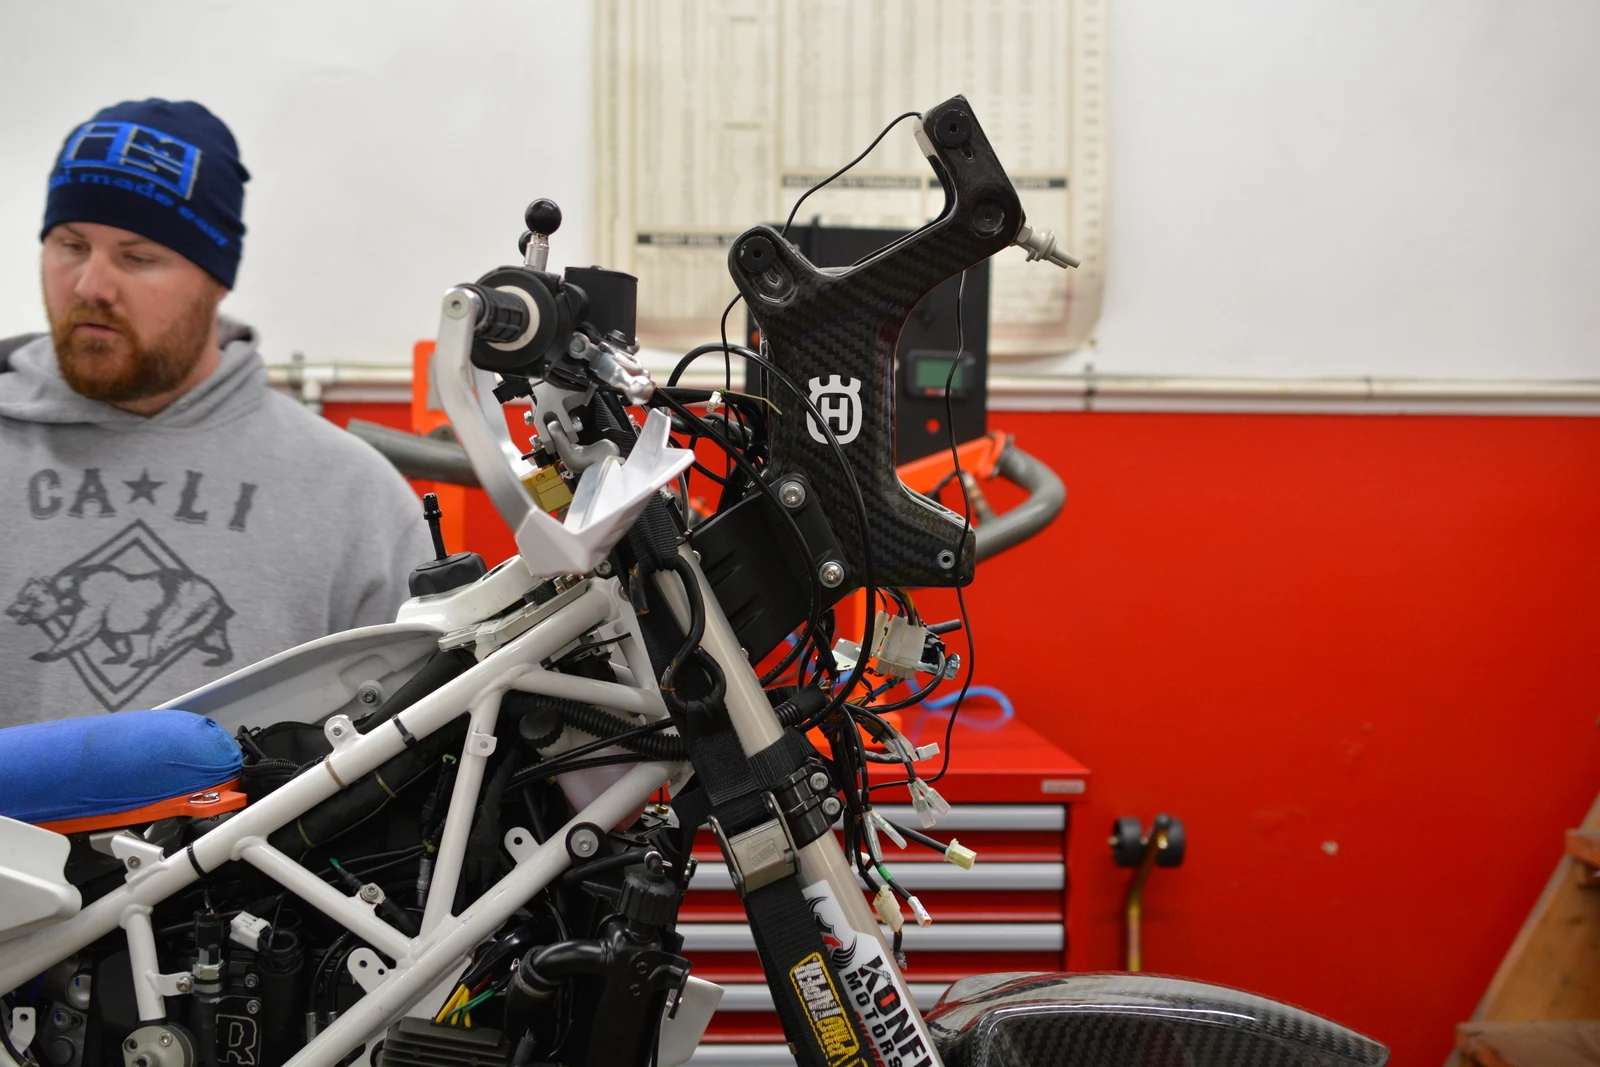
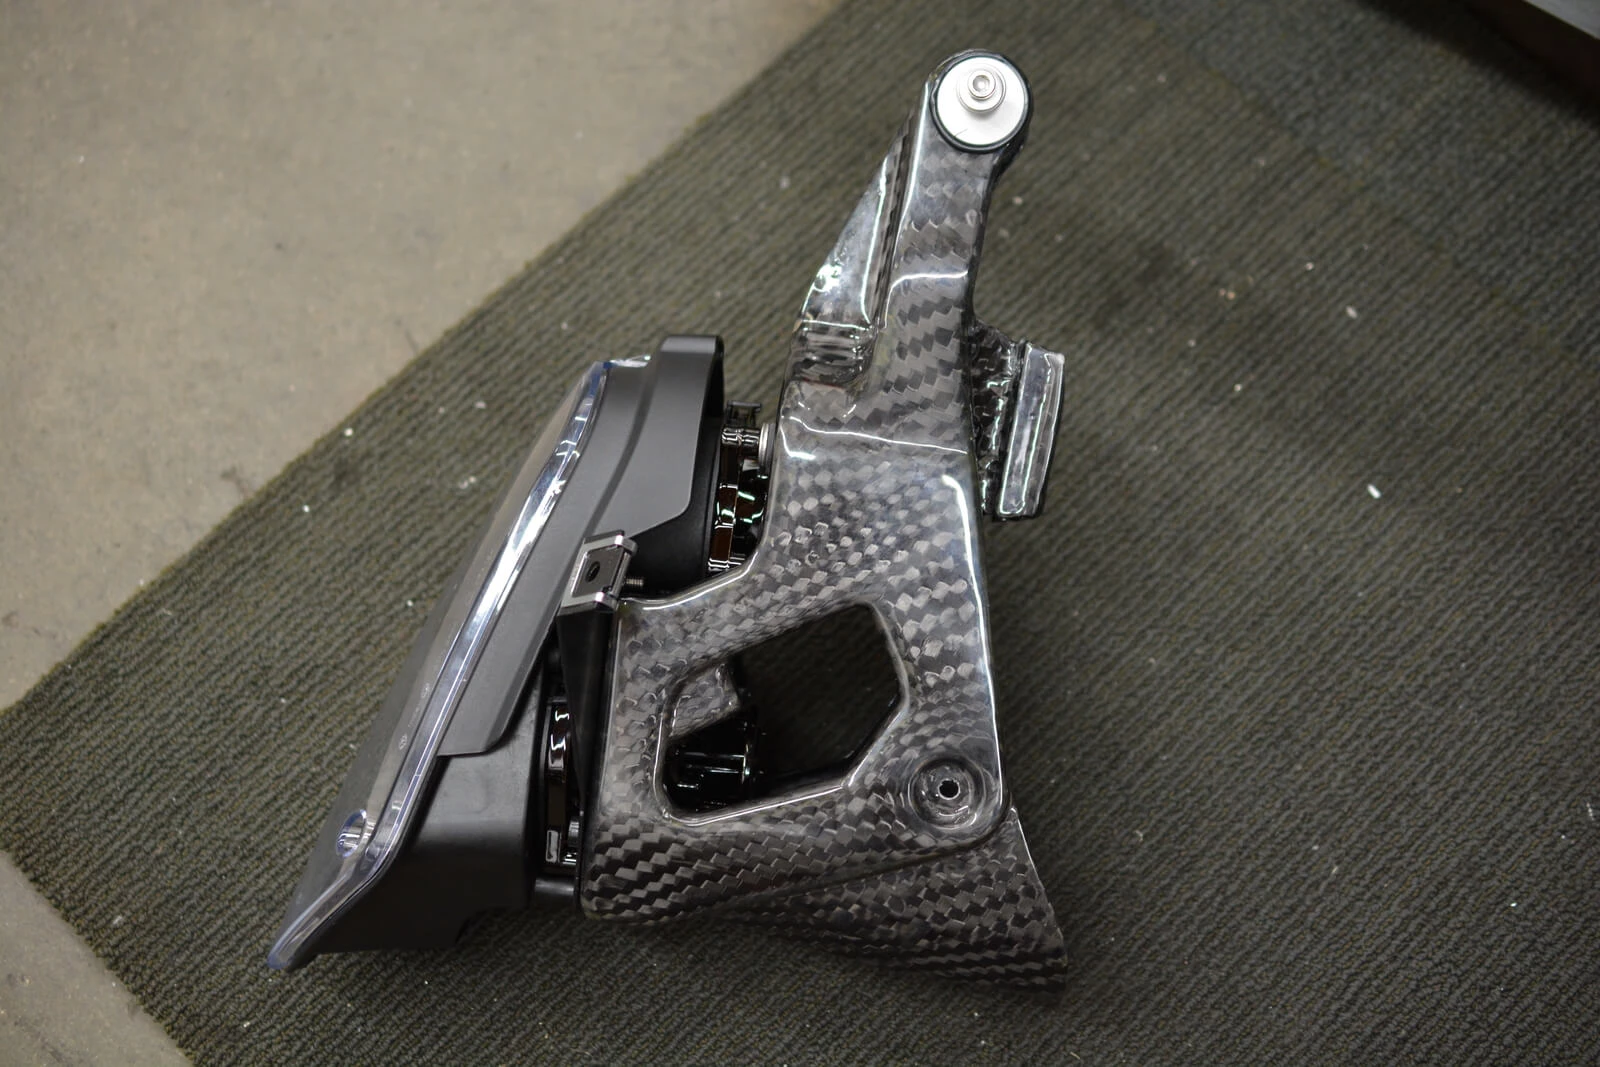
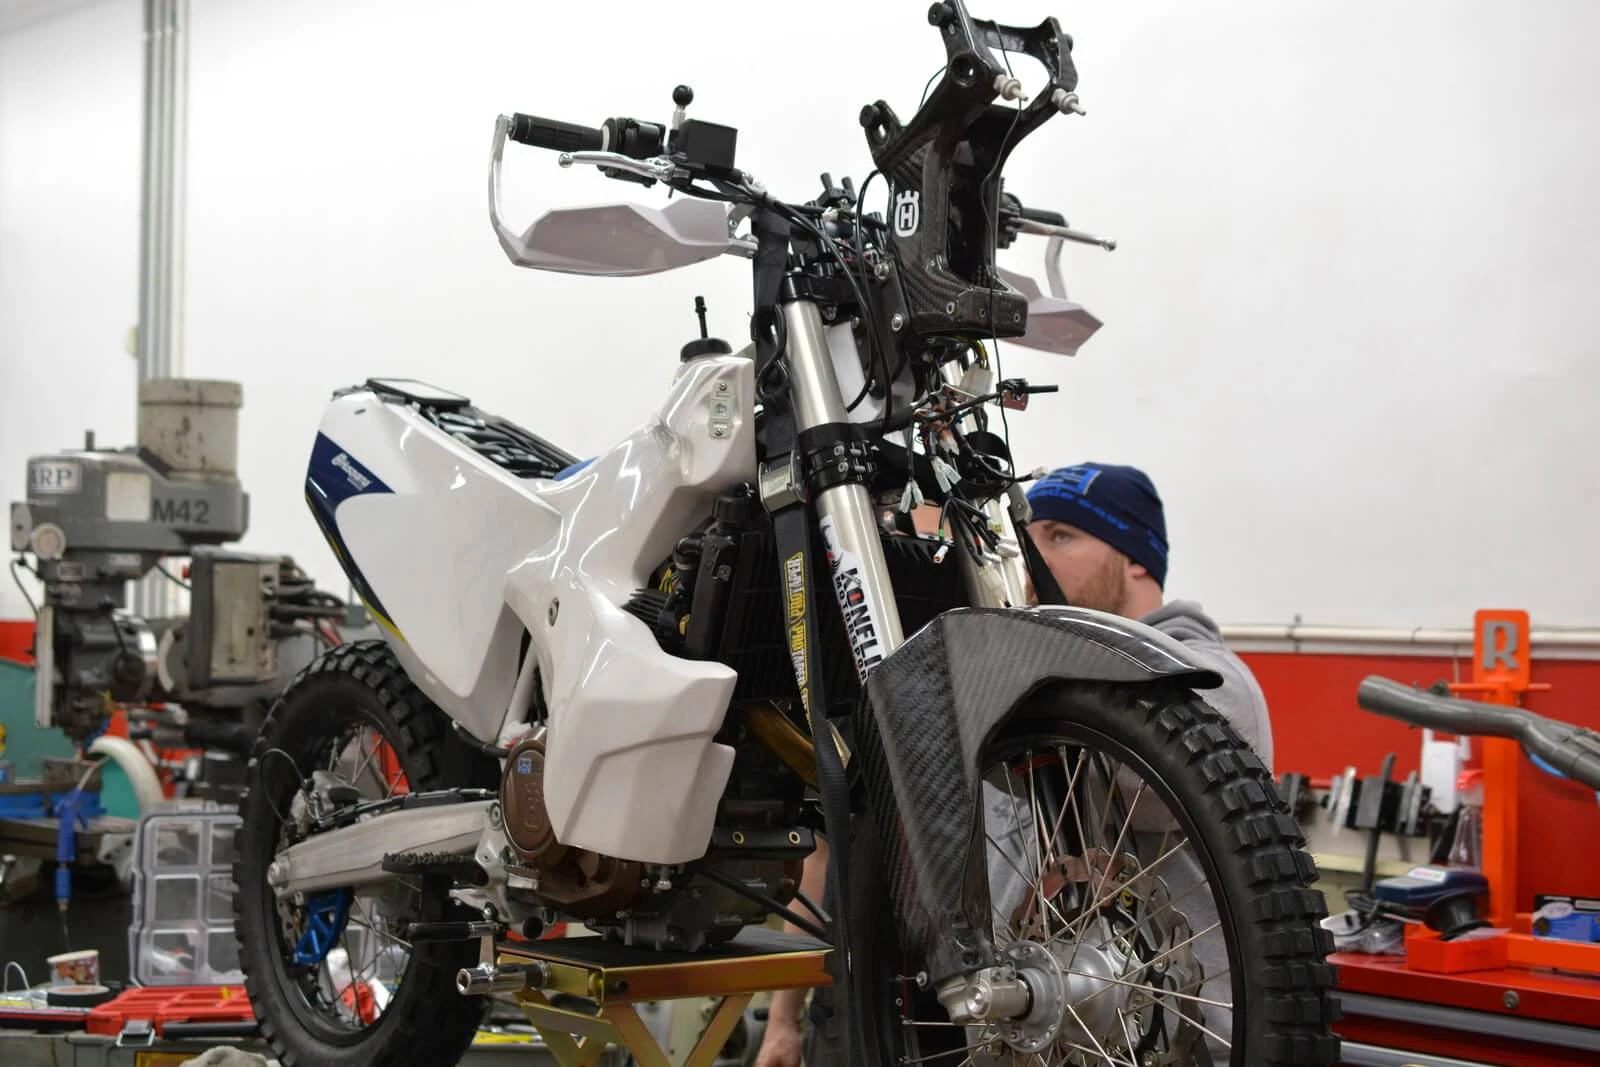
The entire front clip was removed in preparation for the installation of the front carbon tower. While the wires and connections look complicated, they are actually quite clean to move and there is seldom a plug that is the same so connecting it to the wrong thing is difficult to do. Numbering them with a small tipped Sharpie pen will help instill confidence when performing this task.

Portions of the Omega kit laid out. (No all is shown in this pic)
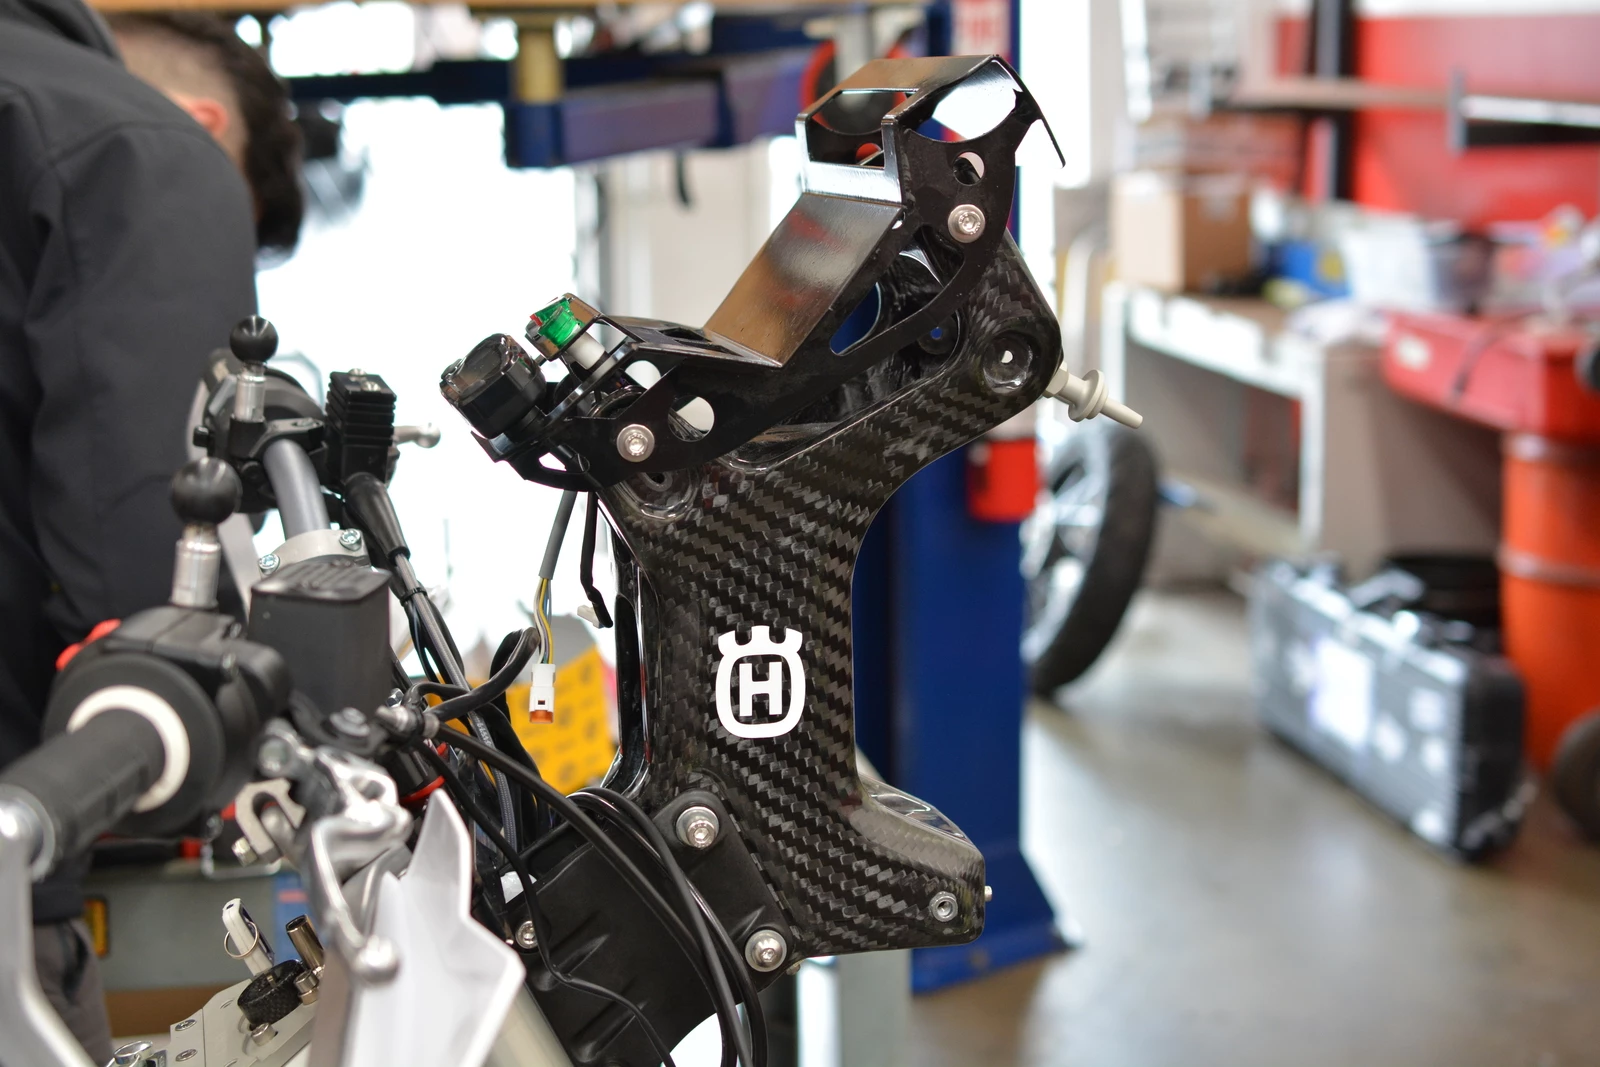
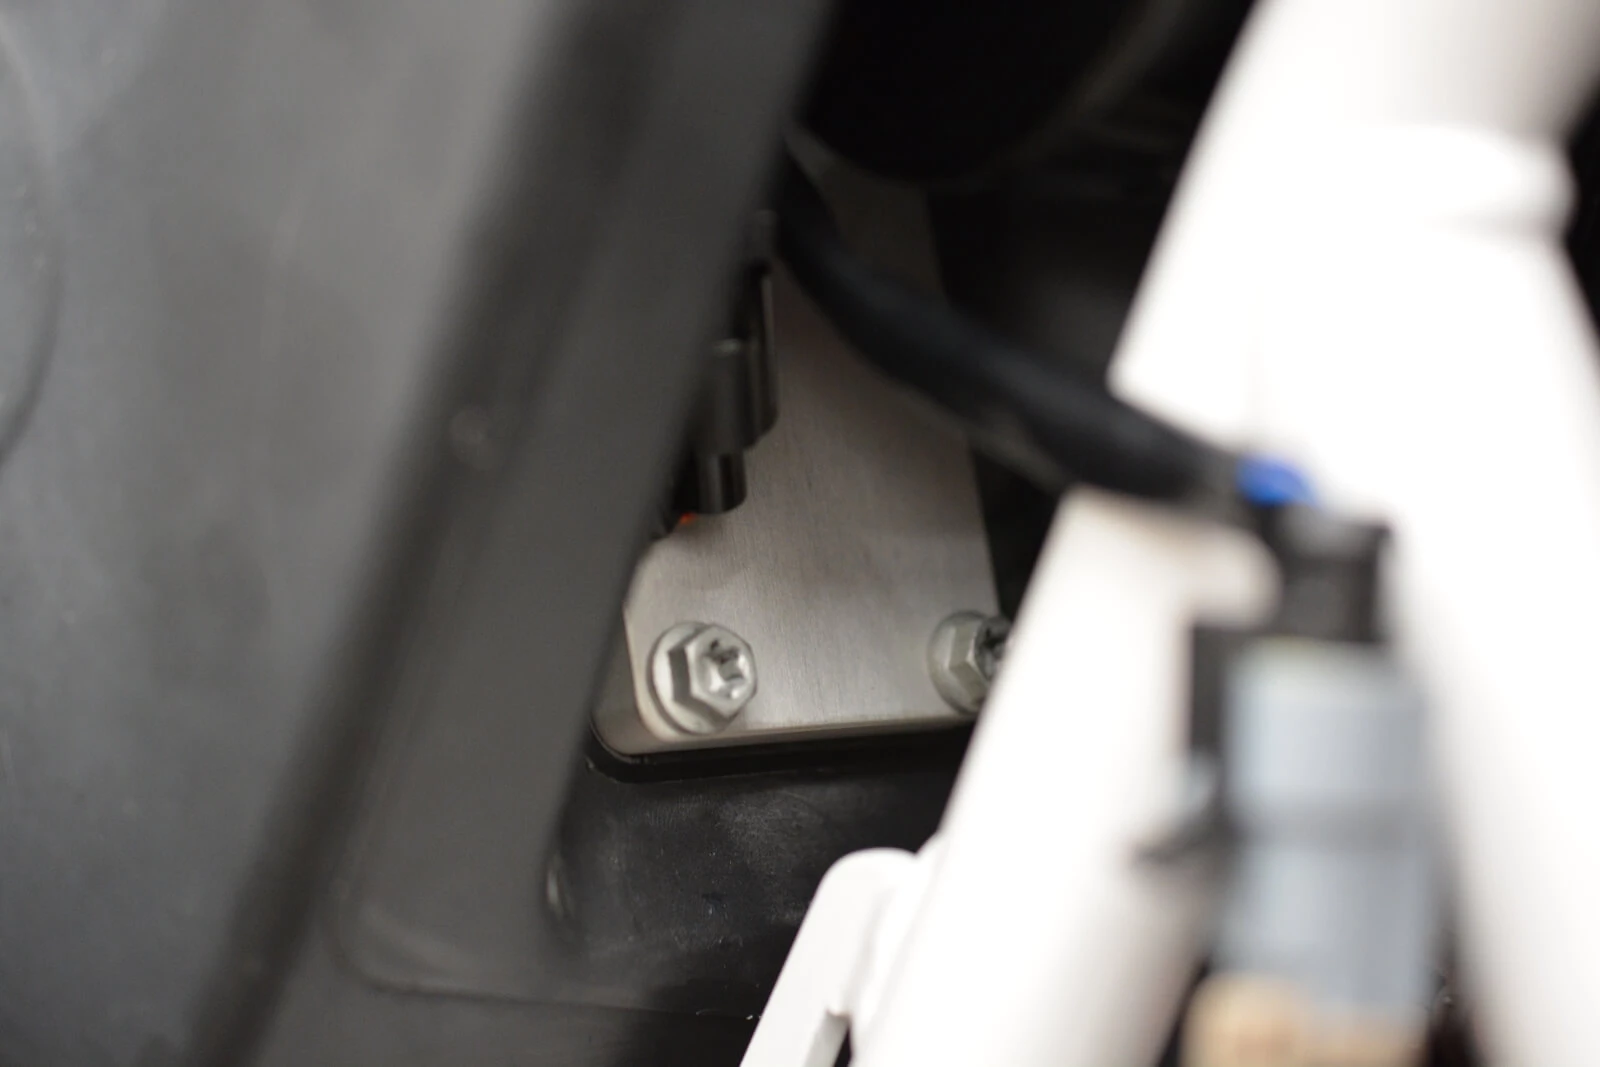
The navigation tower needed a couple of adapters to get it positioned where it needed to be and the parts you see below came with the Omega kit. Below the black nav tower adapters lay another adapter that traveled from the already threaded posts on the 701 frame and to the nav tower pieces.
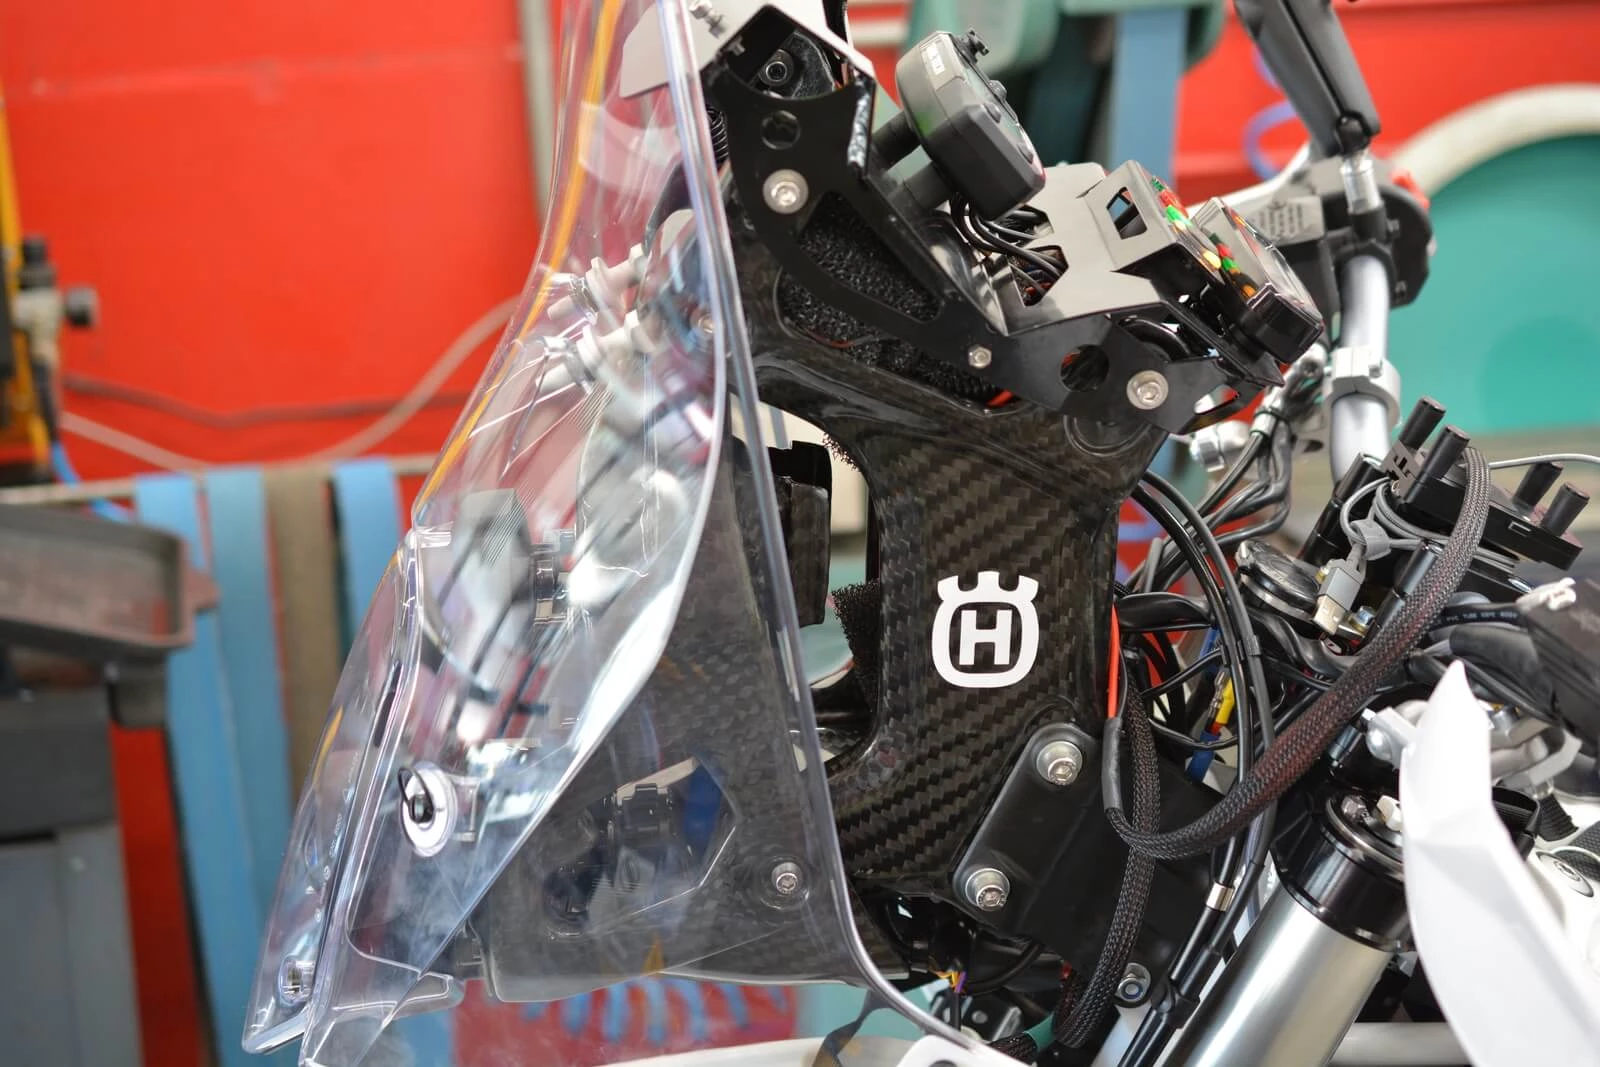
The nav tower was then secured to the adapters which positioned Tolga's digital equipment more into the rider's line of sight and also held the windshield pins.
Tolga's bike also came with a Euro 4-compliant Akropovic muffler, which was very quiet and subsequently seemingly restrictive due to the catalytic converter inside the link pipe and the permanent DB killer in the rear. Certainly lighter than stock, but we felt a bit of a hindrance on performance when compared to an open-core muffler which in turn is certainly a bit louder. Tolga said that he didn't mind because of the long days on the bike and wanting lower decibels.
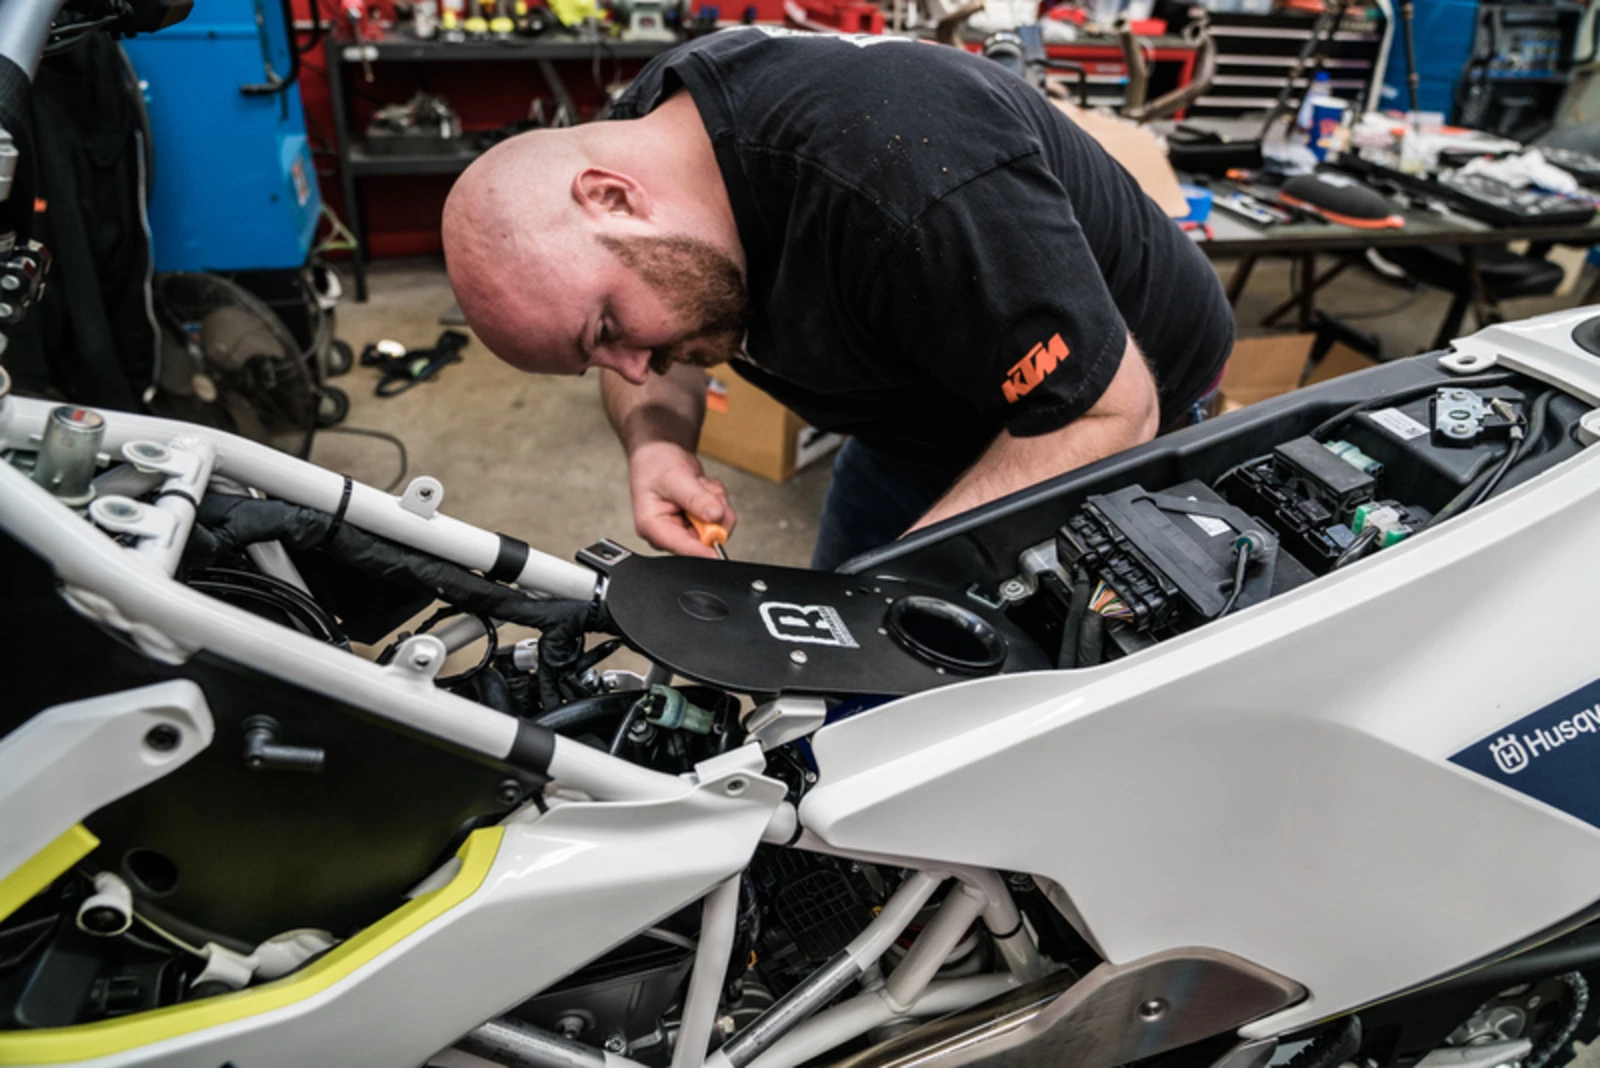
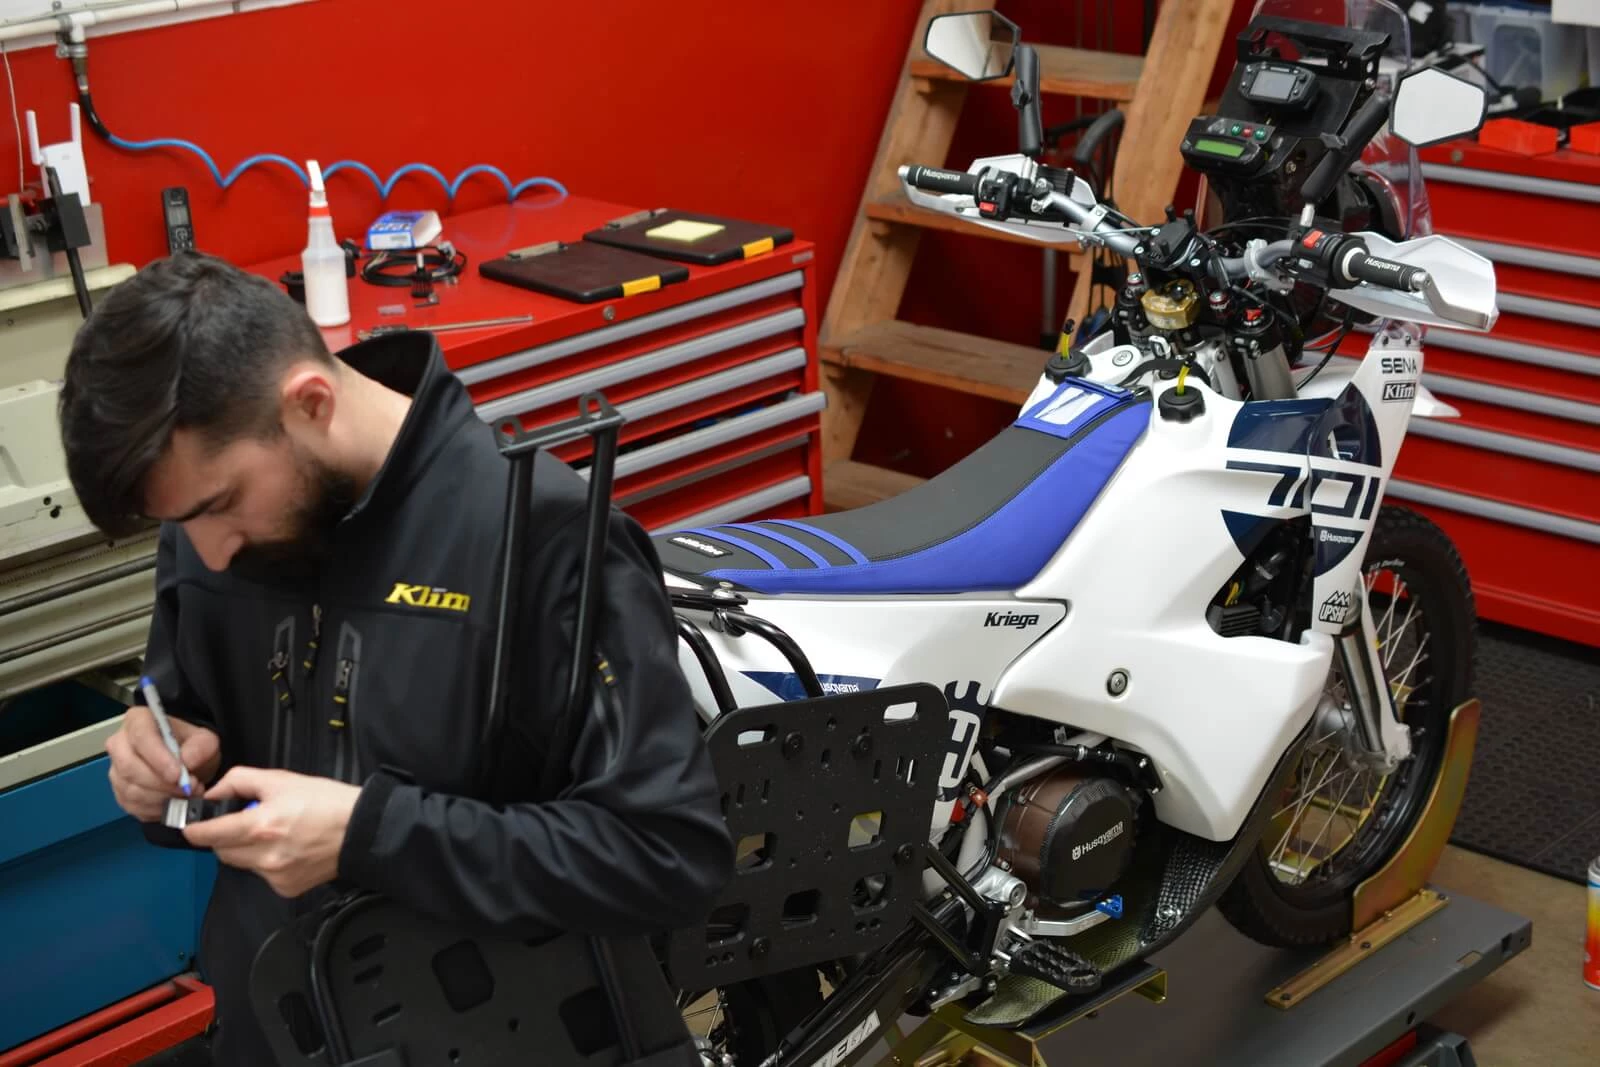
James W is in the background giving Tolga some needed help on his build.
As the nav tower went into place, the stock dash and warning lights were moved up a bit higher which the harness allowed for. The black-painted roll chart (or whatever you want it to be) had some adjustability to it as well.
The light shell mount was it's own separate piece and contained some flanges to hold (we think) a rally beacon. We are assuming that this piece was 'splashed' (a term used to duplicate a part out of fiber) from a factory part of similar shape and use. This added what we felt to be a bit of unnecessary complication and hardware (weight) to the build for Tolga's usage but being that the kit is designed and prepped ready for an actual rally race this seemed in place.
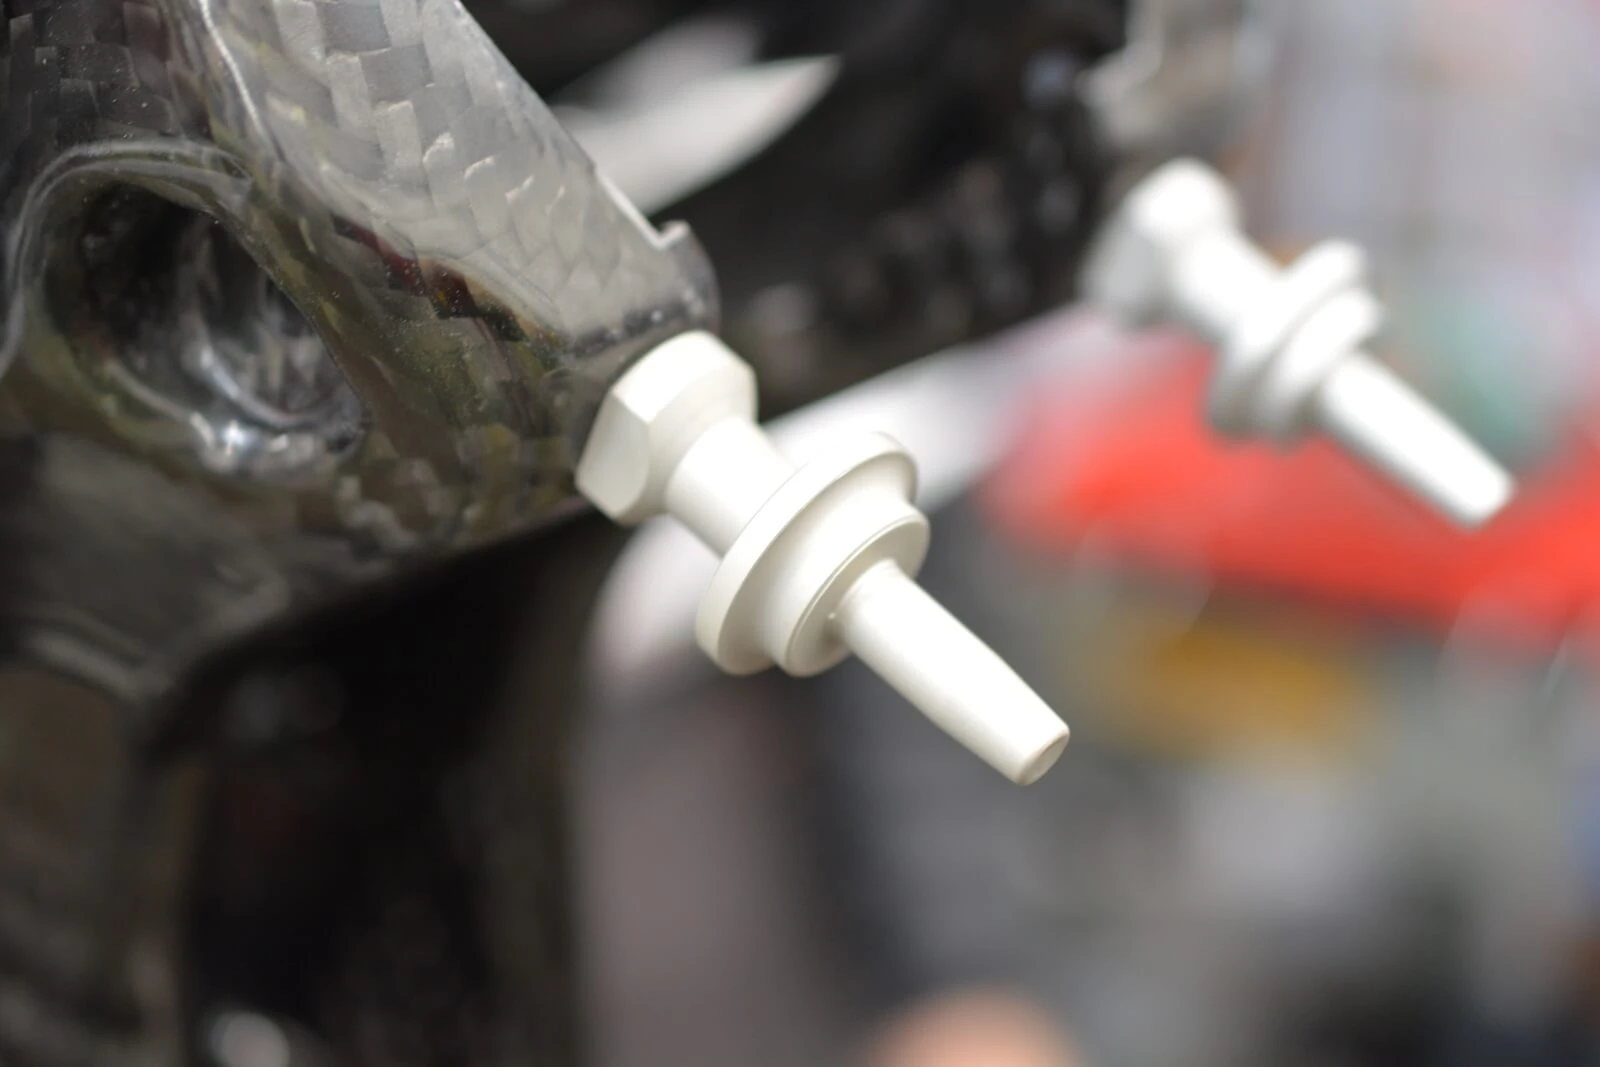
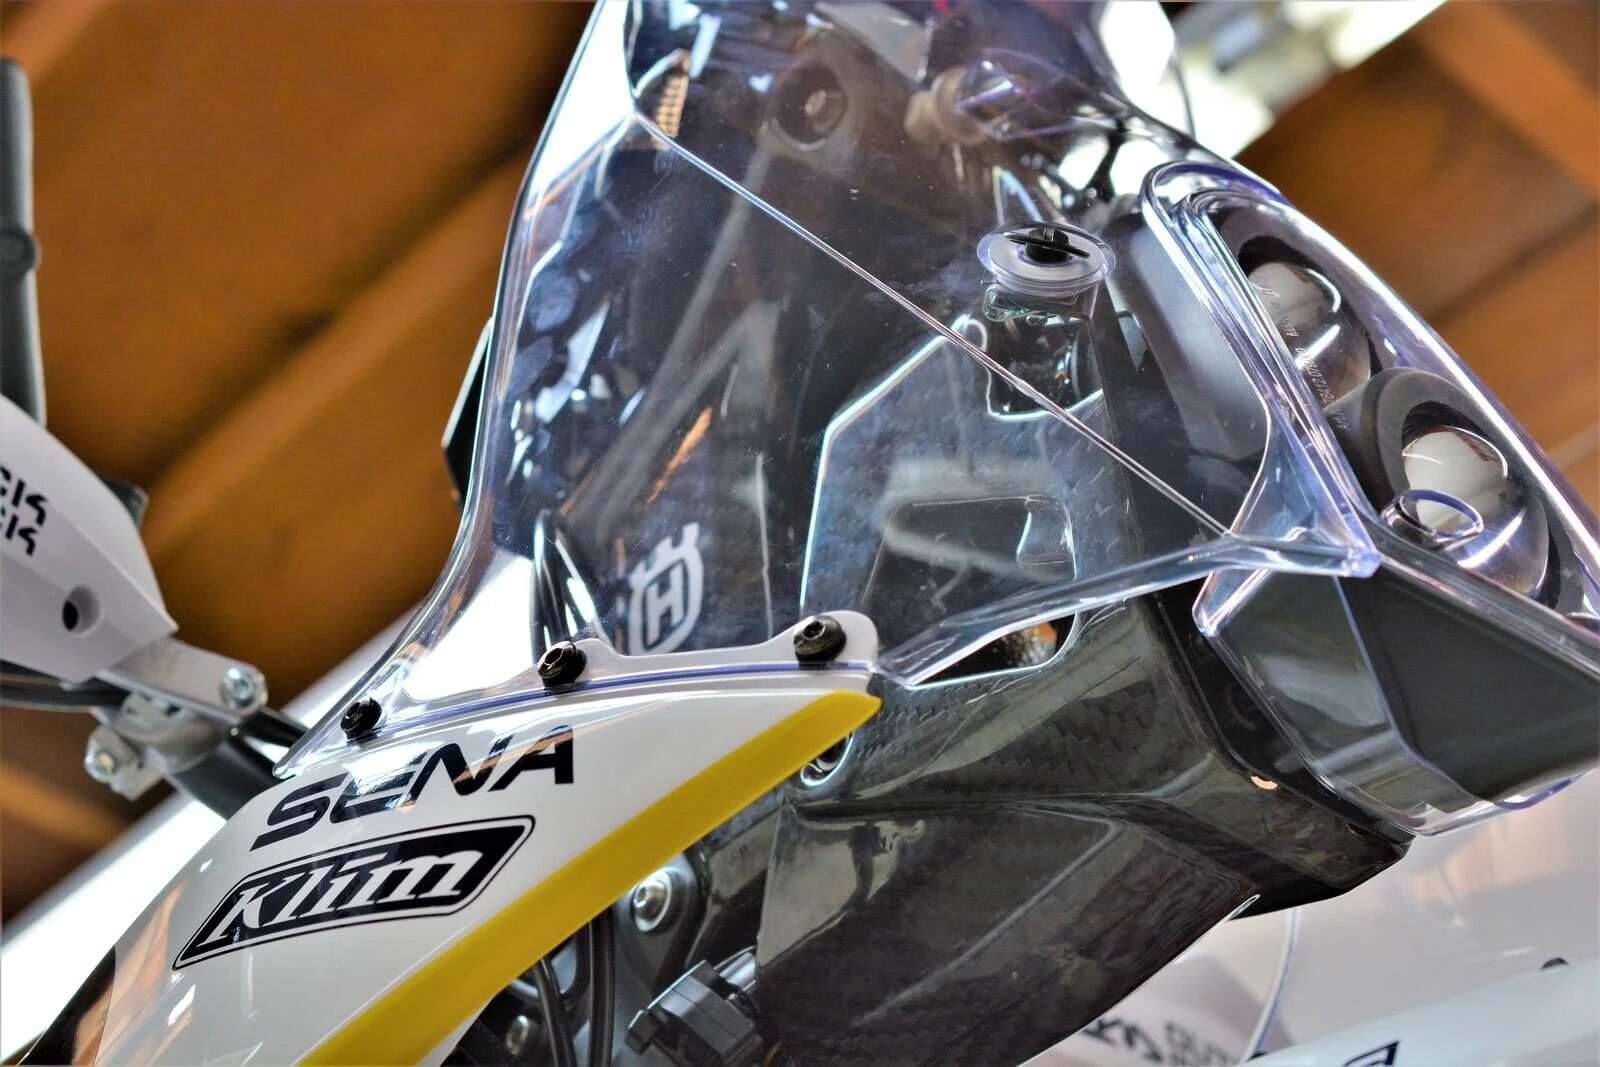
A close up of the windshield pins that located the clear plastic through rubber grommets.
They say that 80% of the time spent is in the last 20% of the build, and that was pretty accurate for this bike. Tolga spent quite a bit of time sorting his personal wiring needs throughout the nav tower and we only wish that we had more time to assist with this. With the right crimping tools (which we have) any number of bulkhead connectors can make removal of the nav tower an extremely quick and easy affair with some quick detachment options. This can although take some time to design and create.
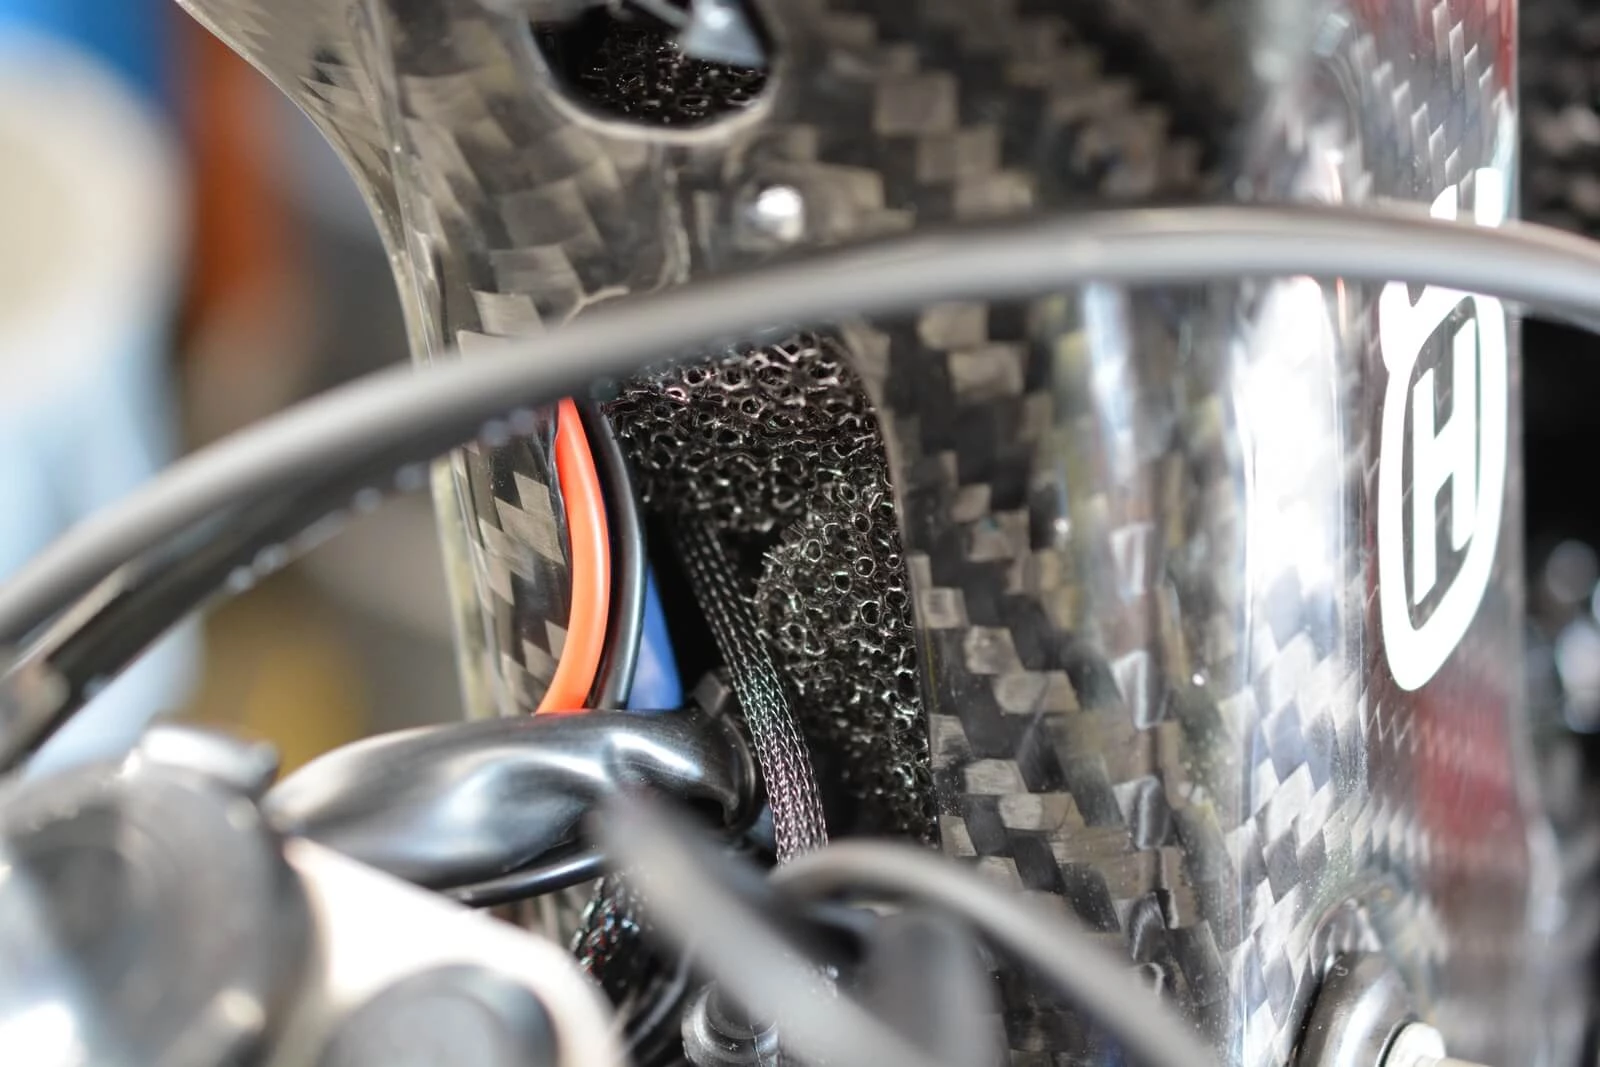
Tolga stuffed the tower with fuel cell foam to help alleviate and wire chafing over long hours on the road and off.
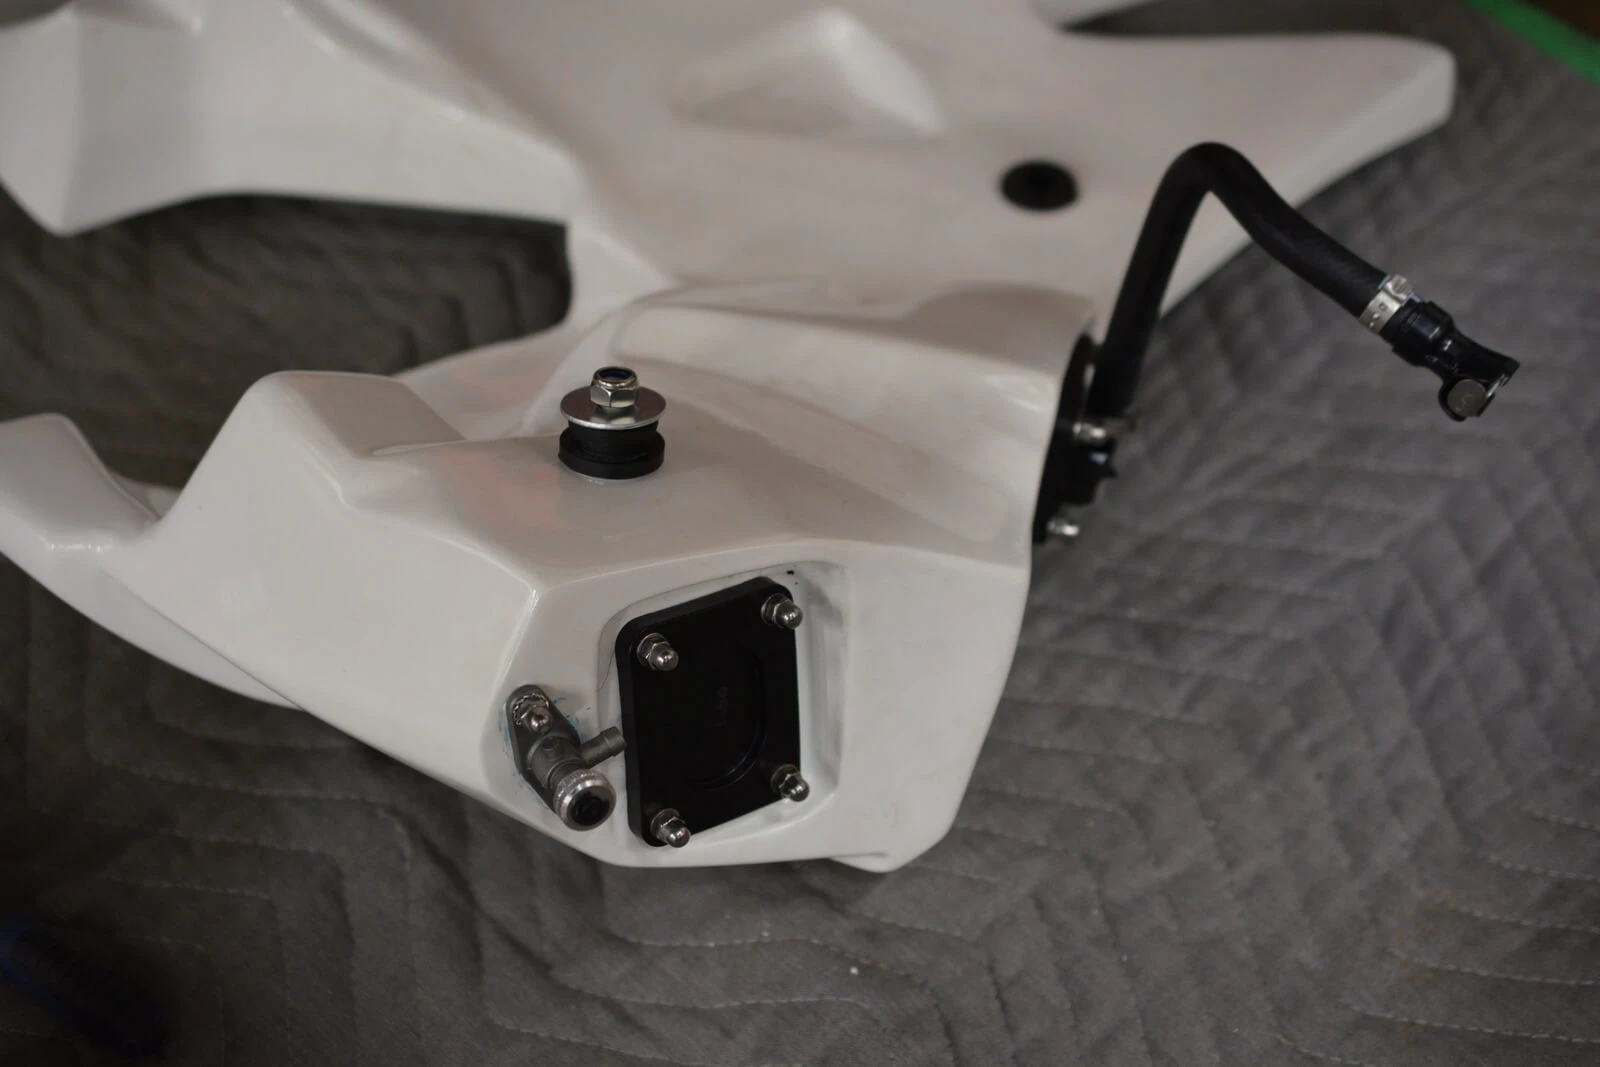
It was now time to fit the fuel tanks and the associated hardware. We found the billet pieces to be very nice with a clear anodize that gave them a nice touch. There is some back and forth fiddling but for the most part things lined up. This is the fear that consumers have with rally kits as they tend to be made all over the world and it can sometimes be hard to determine whether or not you are going to get quality or not for your $6000+ investment.
Omega's tanks are a mixture of carbon and kevlar with bits of billet here and there (tank caps) and were very high in quality and feel. You can see in this picture where the fuel pump is relocated to from the rear tank.
The frame mounts clamped to the 20mm tubes on the frame and became the the middle fuel tank mounts. A clever little fiberglass location tool came with them to get them into place that worked okay, but we resorted to just fiddling with the mount until we got it right.
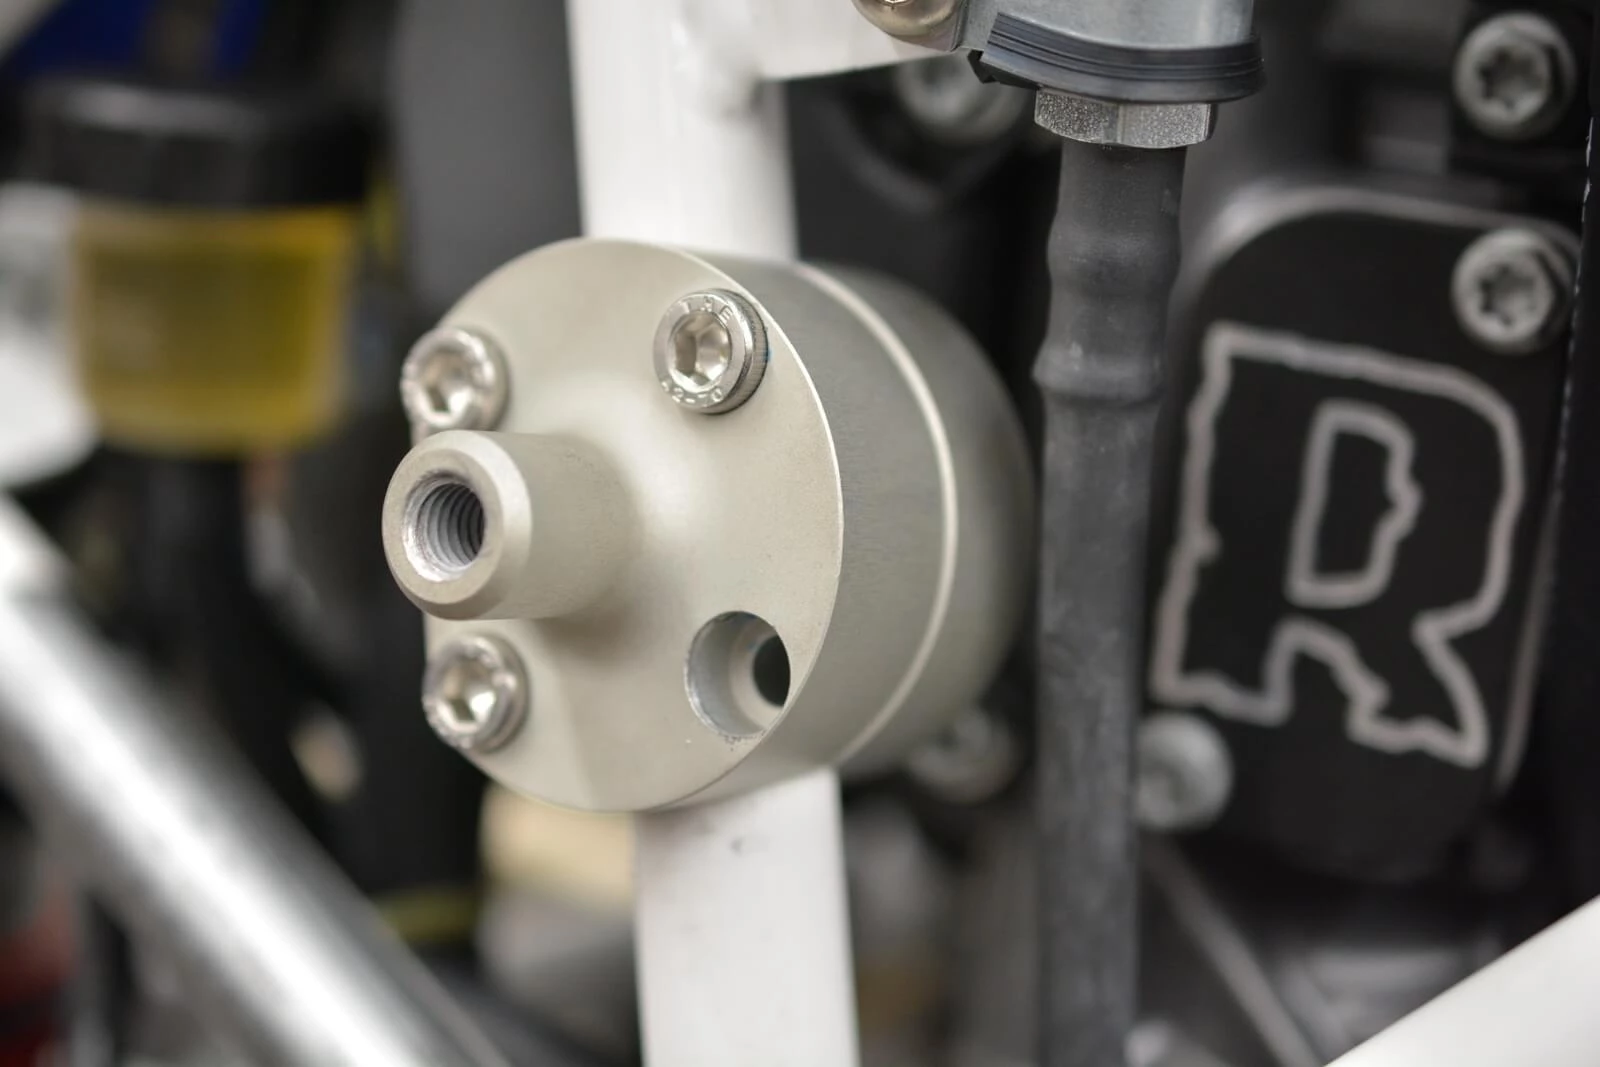
In place of the stock fuel pump location was an adapter plate that allowed fuel to connect to the other tanks and had a shut off valve plumbed into it (visible a couple pics below)
The factory fuel pump was relocated to the front right hand tank and the rest of the kit was 'T'd' in line at the petcock to the left of it.
Originally Tolga ran all of the fuel lines himself but after walking past the bike a number of times my OCD was redlining. Years of prepping race cars worth north of $1m teaches one how to put things together without failure points so I asked Tolga if I could spend some time redoing all of it and he graciously allowed me to.
In doing so I managed to remove one entire connection that I have seen fail in the past by cracking. This is a similar connection to the CPC connectors that come with KTM's, but just don't have the quality and strength. Especially if there is a side load over time. This simplified everything and removed one failure point. I then managed to shorten the line about 8 inches by turning the feeder line to the injectors down instead of back (Tolga didn't know it could do that when he ran the lines) and then trimmed a piece of another leftover hose with a bend in (coming out of the fuel pump) to give it a more natural and factory look.
We ran that line through a fuel filter (visible in the center of the bike) and then up to the throttle body.
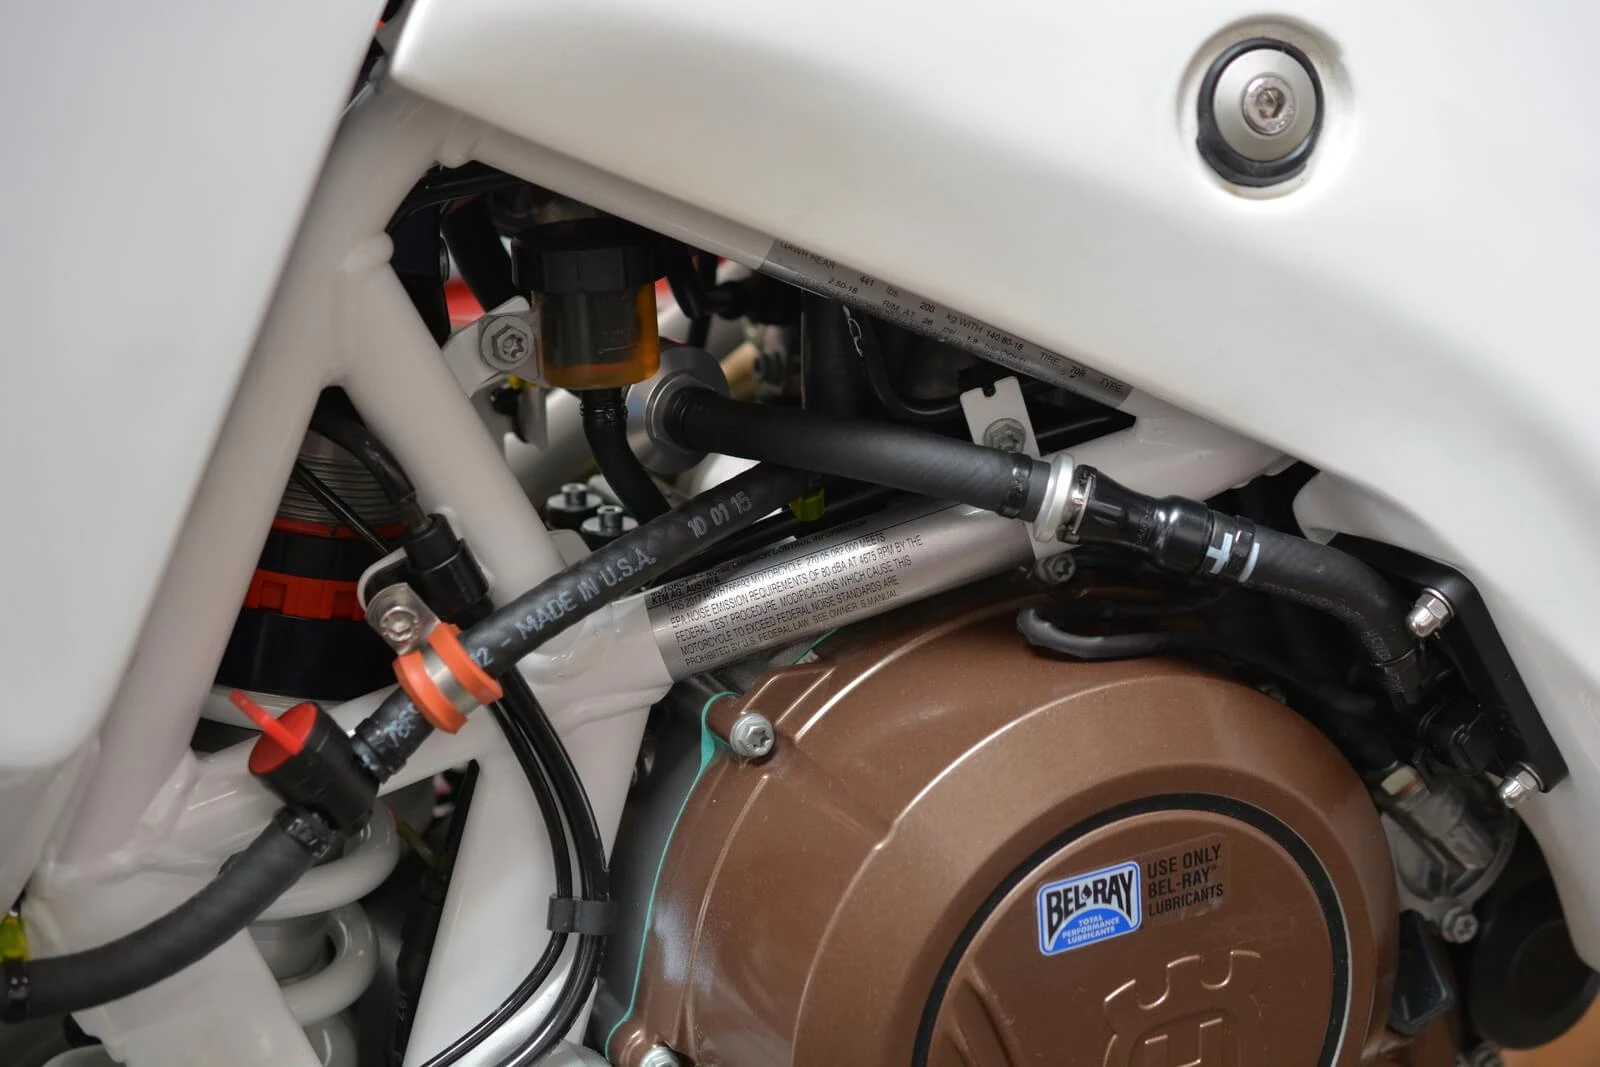
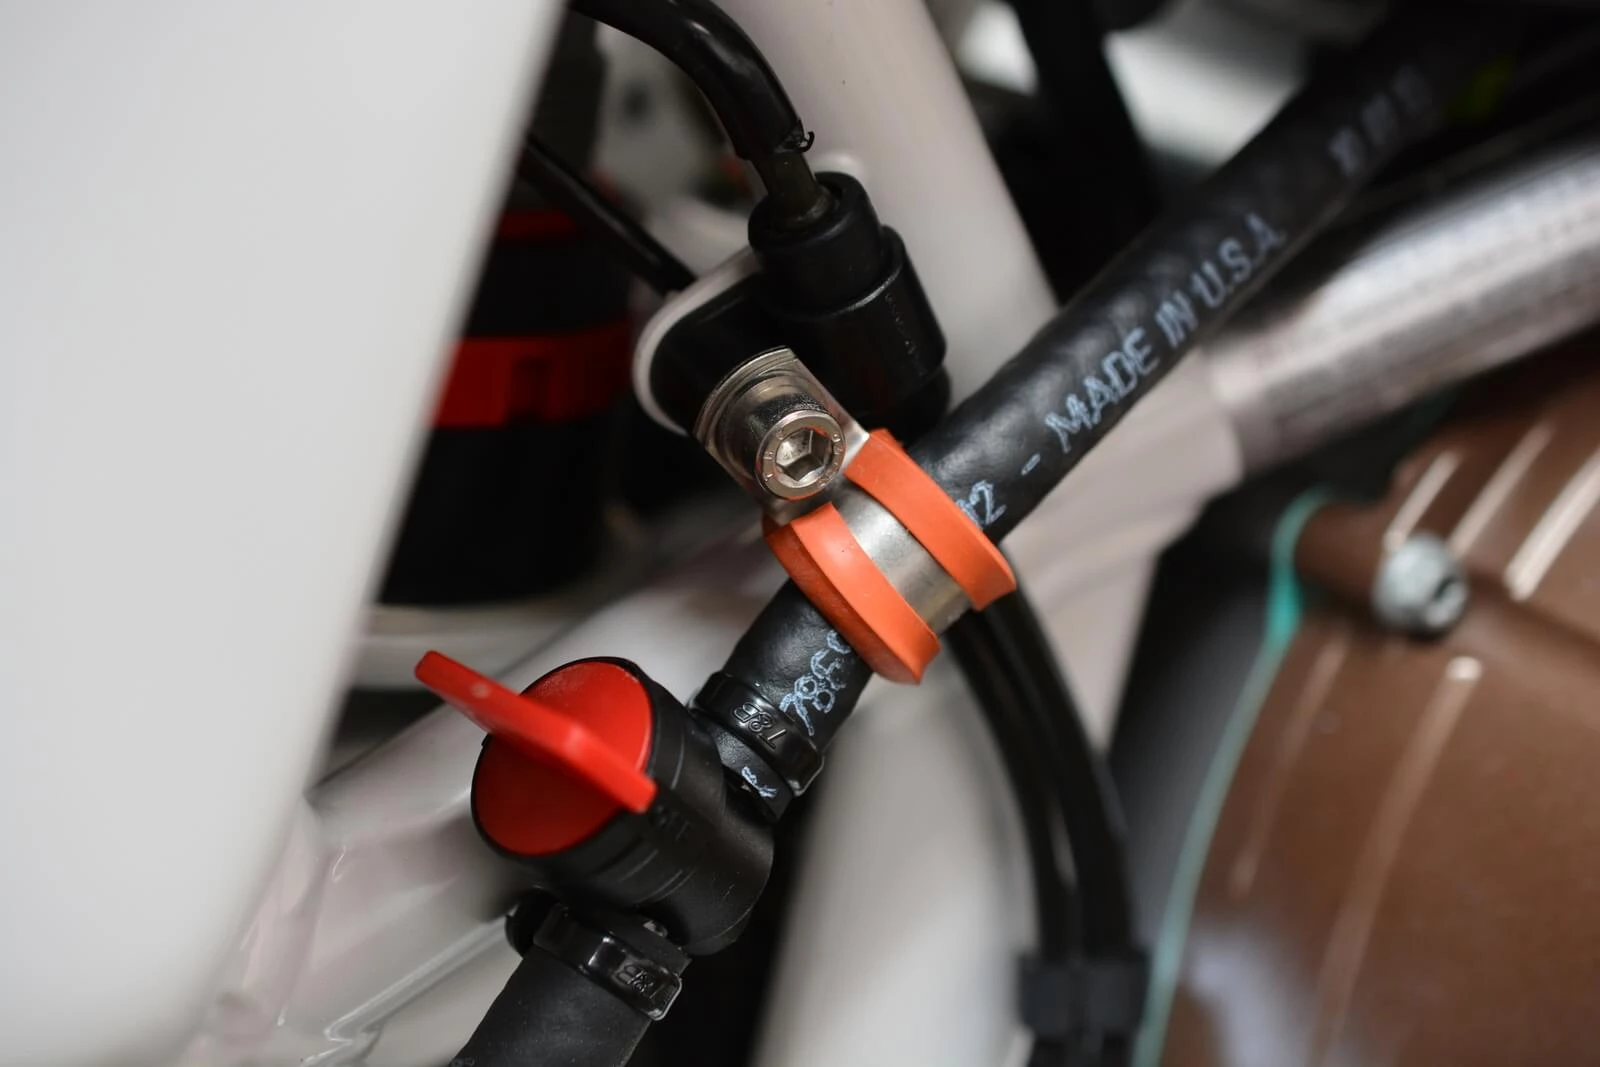
A small Delrin spacer was machined to space out the cushion loop clamp past the brake line so that there was no pinching of the fuel line. This came out very clean in the routing. Right behind that was the shutoff valve for the rear tank if desired. This can be used as a 'reserve' in case of long distance travel although we don't like the idea of a bike shutting off at any time for that reason. It's not good for the fuel pump.
Steel insert zip ties were used instead of hose clamps. These are very expensive but are infinitely adjustable allowing perfect tension on the fuel lines. These can be better than hose clamps as they don't cut into the rubber and are easily serviced in the field if there is an issue. Seeing that the blow off pressure without any clamps is usually double or triple the fuel pressure, this is very safe and reliable.
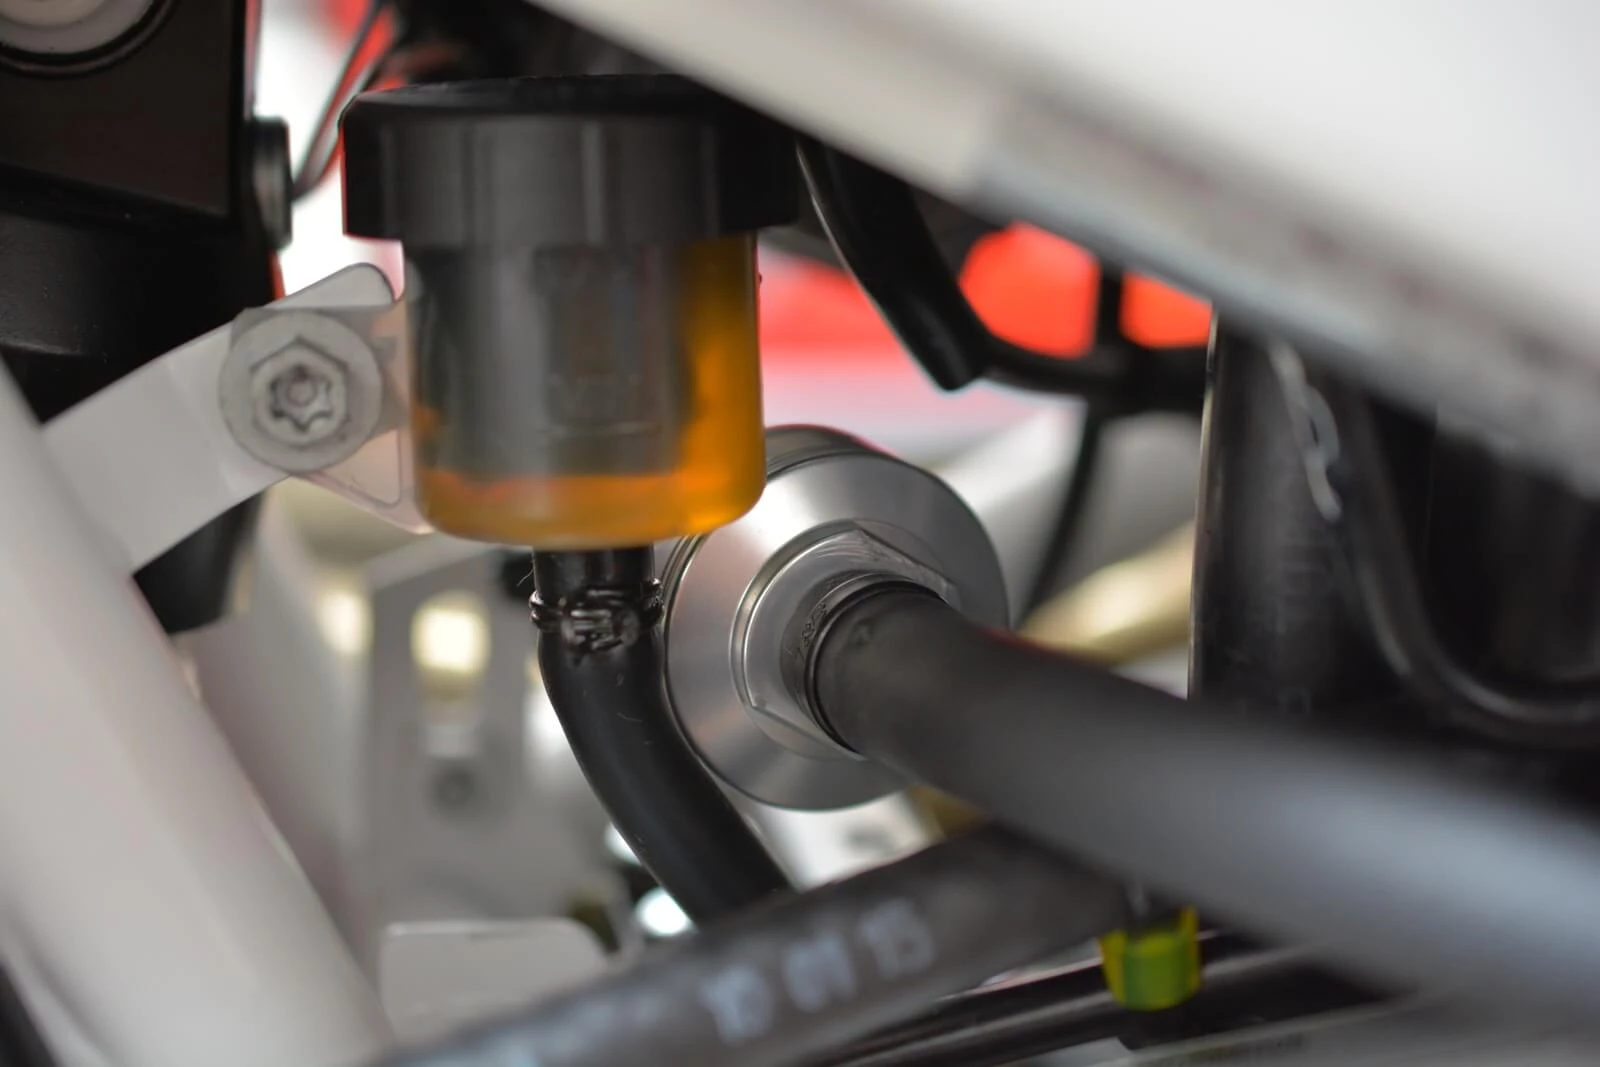
An added fuel filter is never a bad idea, anywhere.
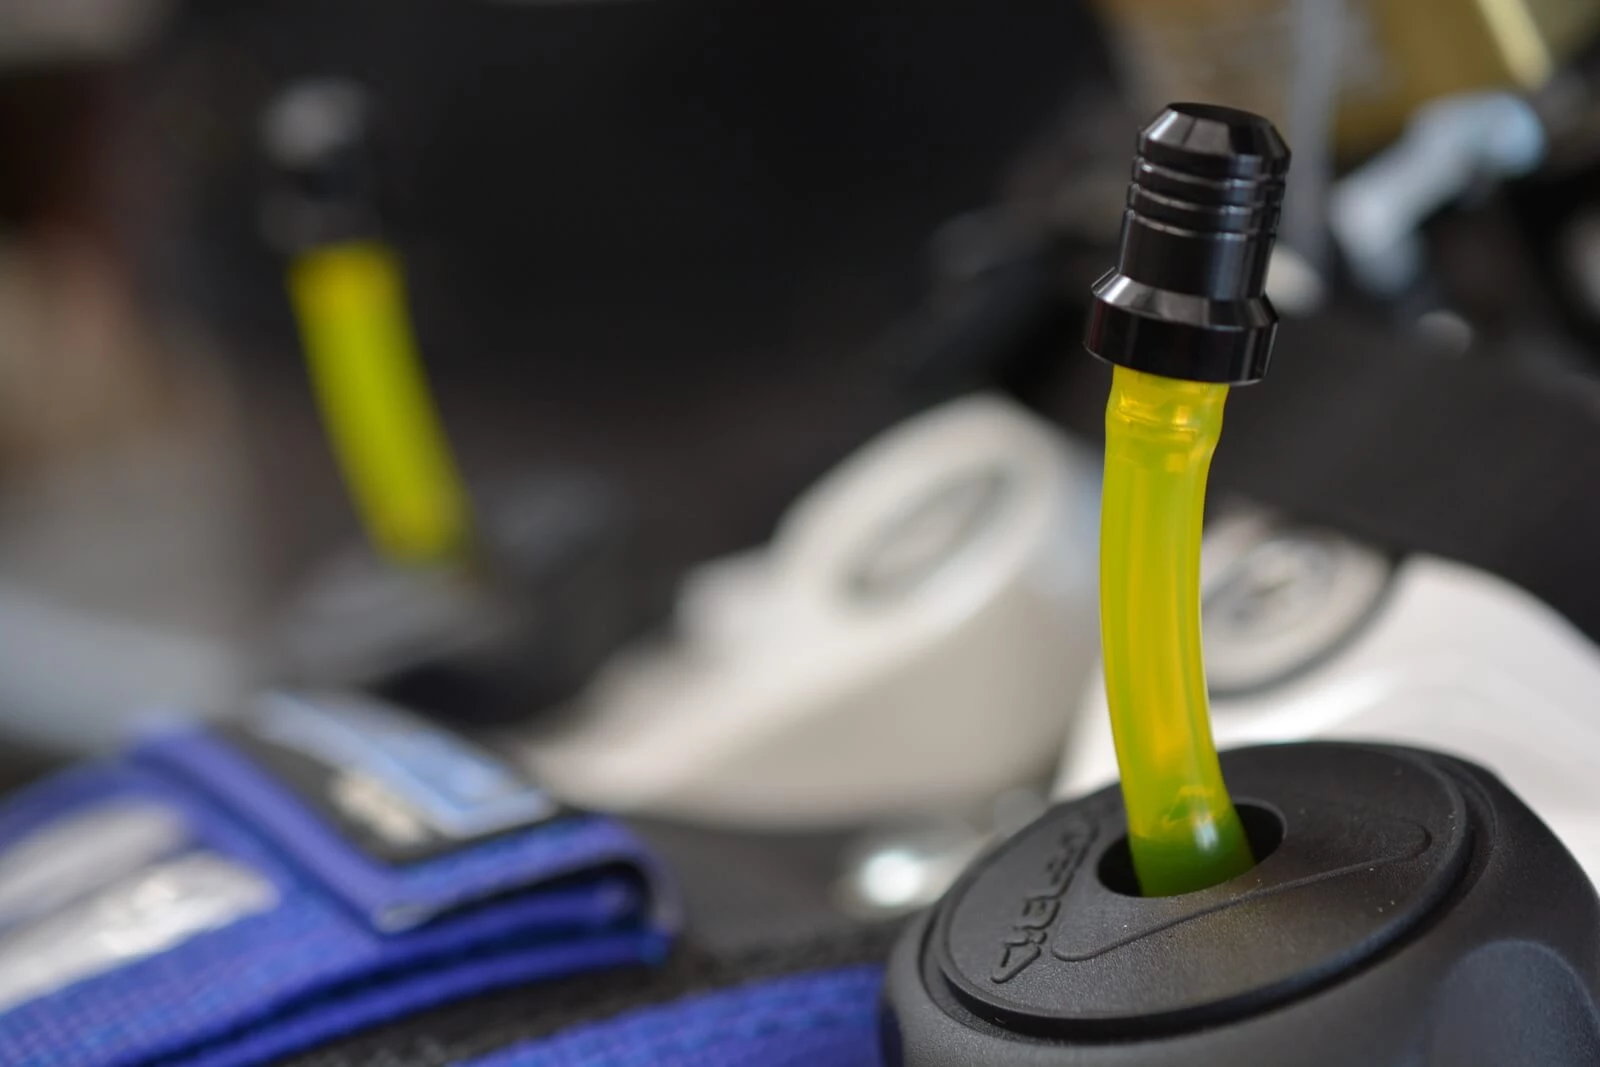
Tolga like our Tygon hose so much he snagged a couple of pieces to replace the black lines. This is the same stuff that the KTM Dakar bikes use. Yes, it's an unusual color, but lasts forever and doesn't get hard over time from fuel vapors.
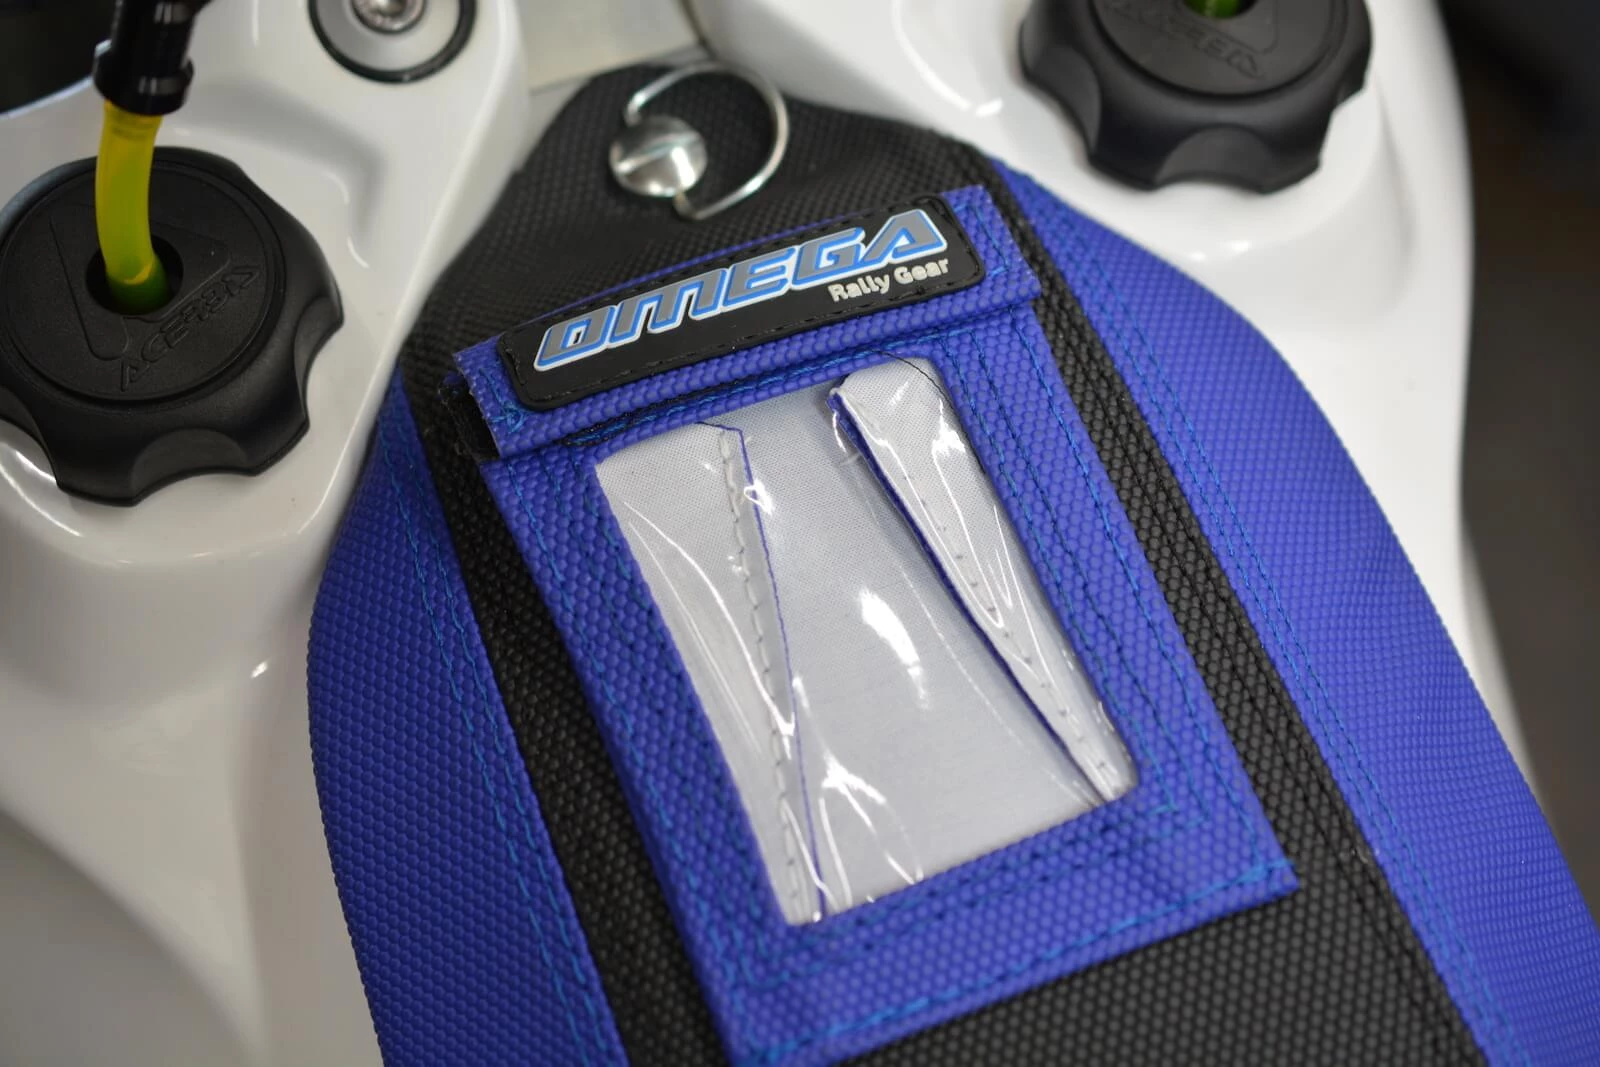
The Omega kit also came with a seat and pan (installed and ready to go) with a card holder in the front. If you are not racing an actual rally, this can be great for all kinds of things really. We felt that the seat needed a bit more padding though for long rides, but was of very good quality and craftsmanship.
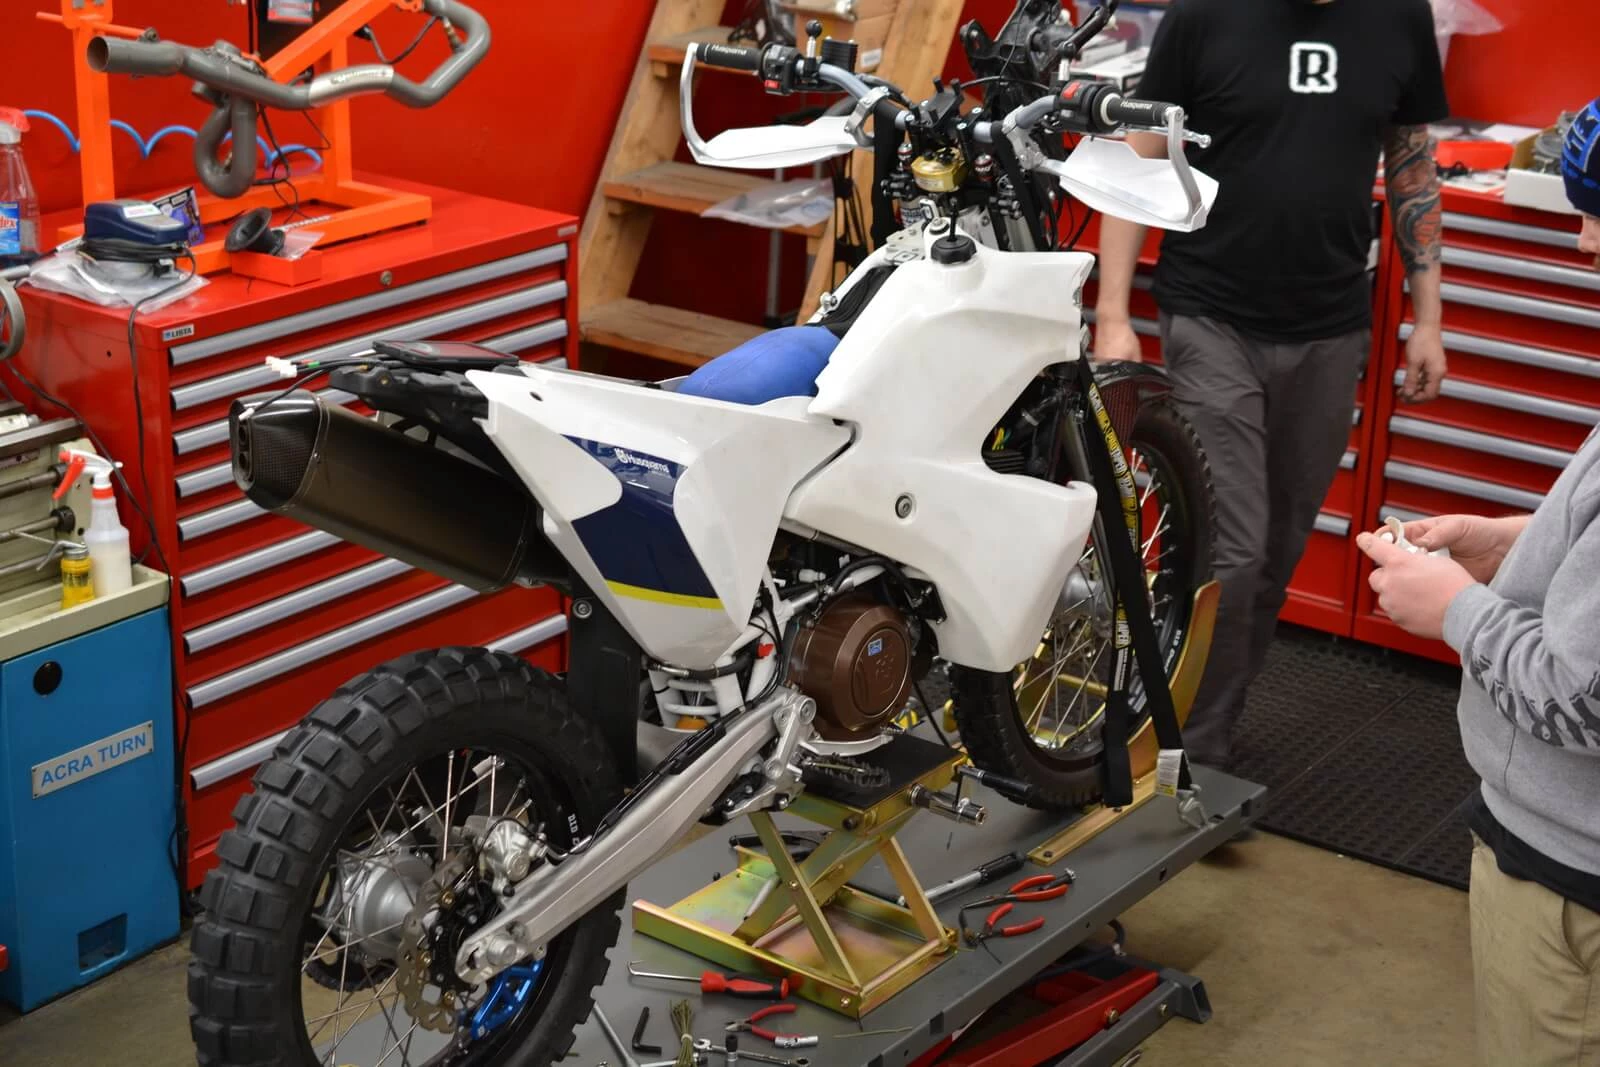
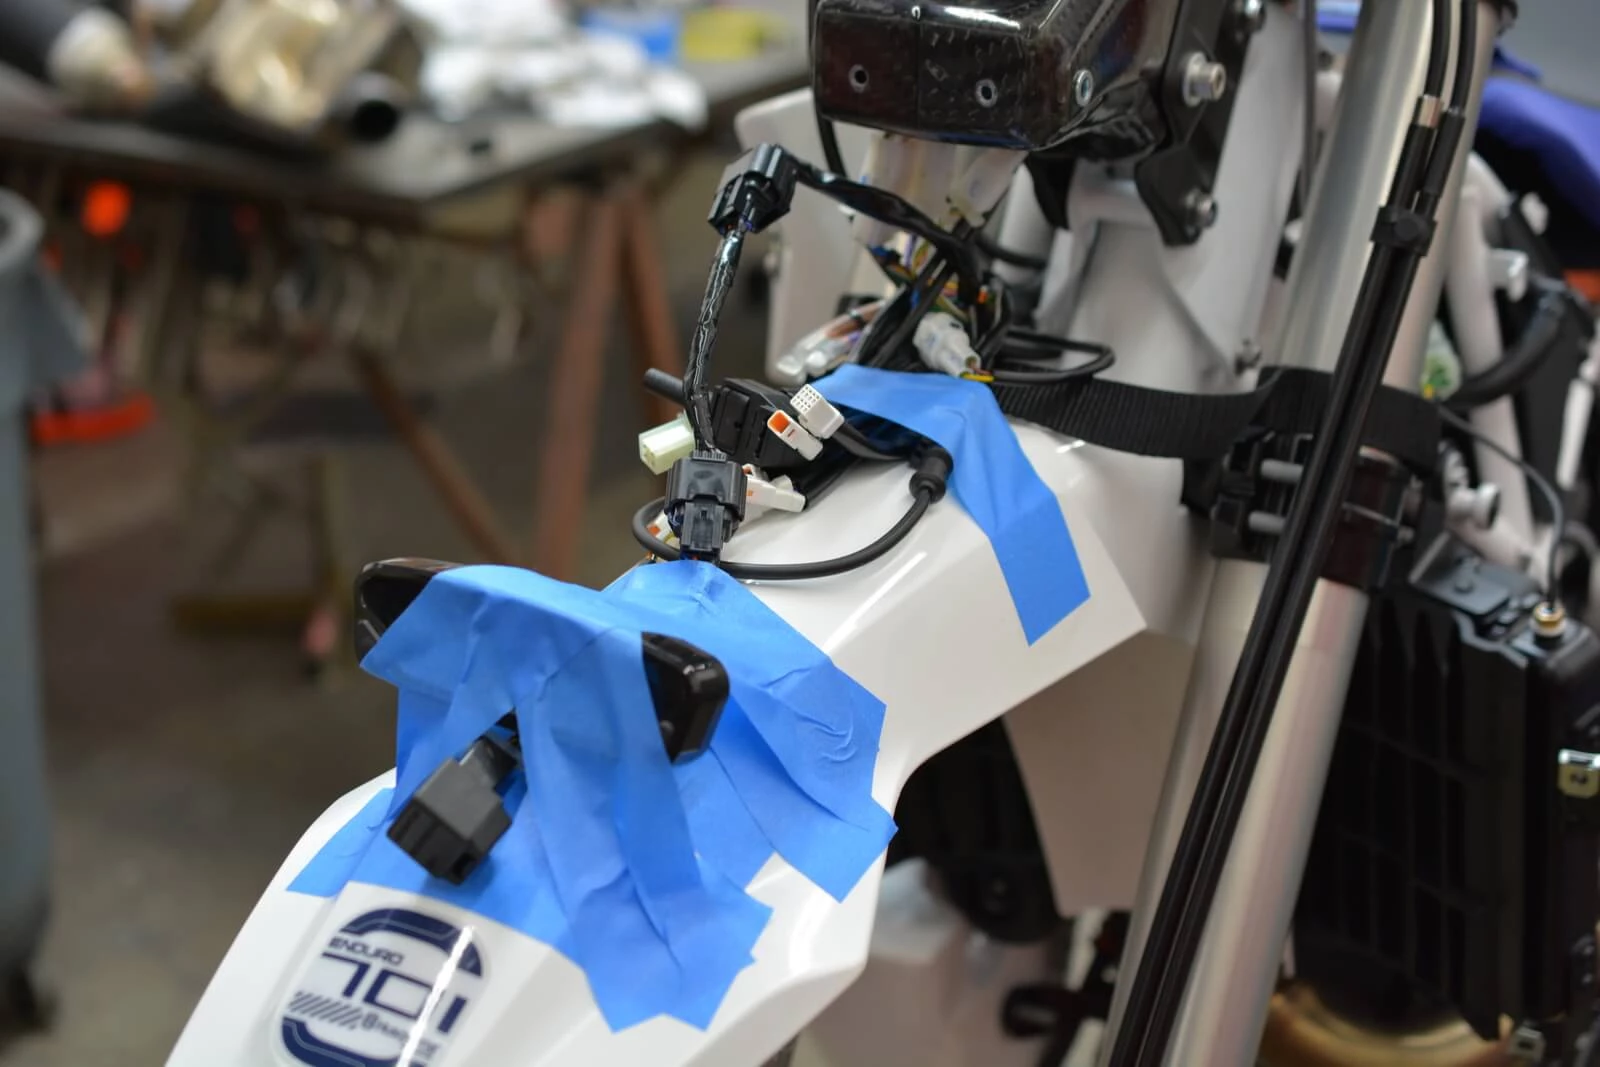
It was time to pack up the bike for the dyno, which doesn't require blinkers to be working, so we taped it all to the front fender for the time being as the wiring was not done by the time we had a window to make some runs.
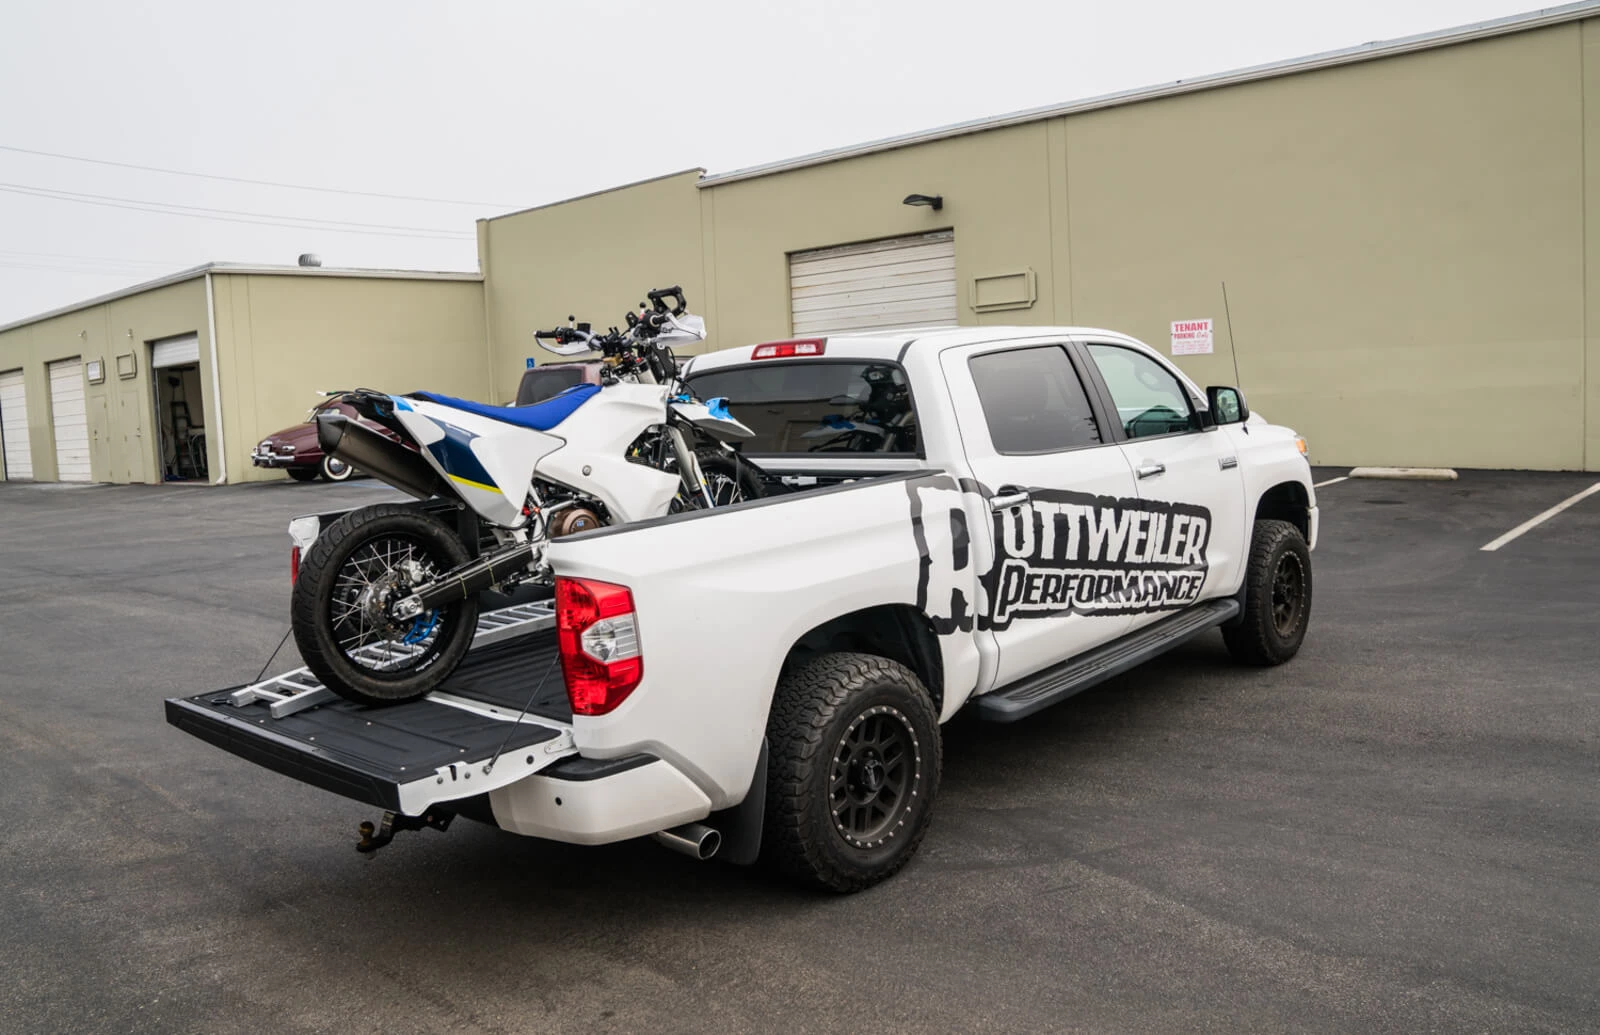
All loaded up and off to Superbike Corse in Laguna Hills, a tuning partner with Rottweiler Performance. Our shop is adjacent to some housing complexes so dyno work is unfortunately off limits so we have partnered up with Superbike Corse for all of our dyno testing and map building. Superbike Corse employes some of the best and brightest tuning minds around that also do work for Yoshimura, Ducate, Yamaha and many others. We just love sitting with these guys and talking about tuning theories and implementation.
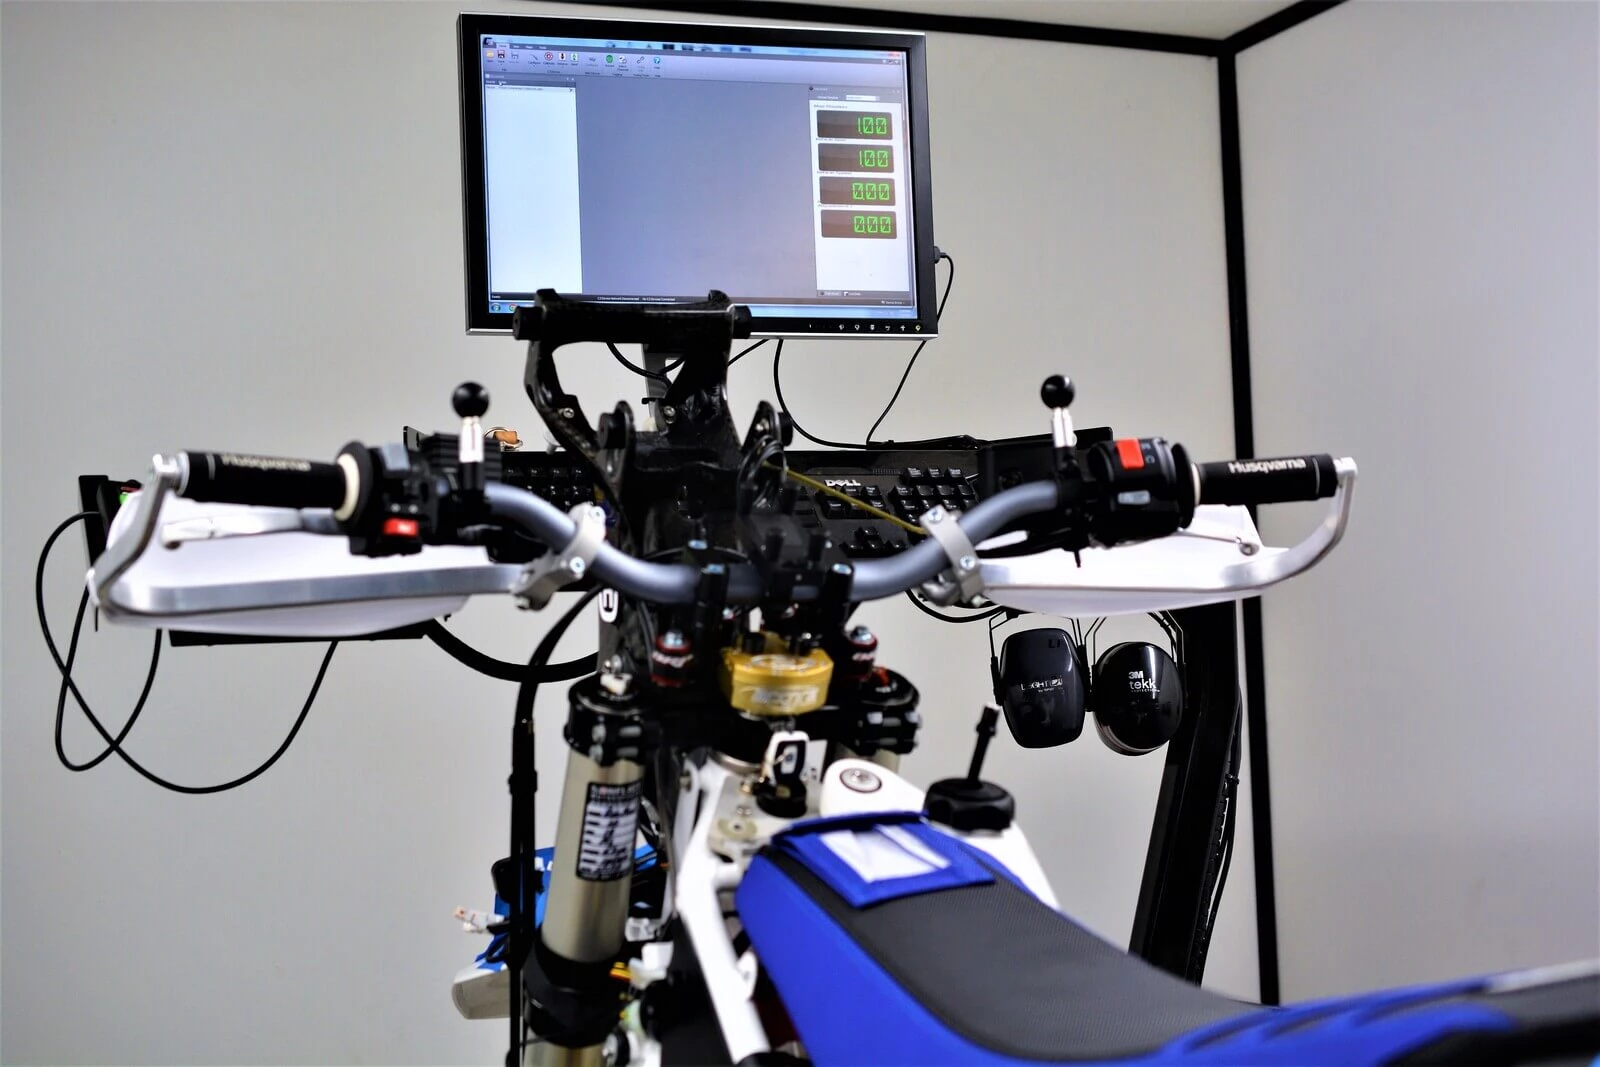
Strapped down waiting for the session to begin.
Different sensors are hooked into the bike with RMP, AFR, can-bus connections at the Powercommander V etc. There are various channels that are read and recorded to determine how the bike is to be tuned. Our usual coarse of action is to make a few runs with the bike totally modified (intake and exhaust) but keep the mapping totally stock so we can see what the modifications do to the air fuel ratios (AFR) if a customer does not want the expense of a PCV or dyno run or both.
What we determined in this session (and others) is that a modified engine with stock mapping is totally safe and AFR's stay for the most part within safe limits. The AFRs seldom dipped above 15:1 and only for very short periods of time. That being said, to achieve the maximum amount of horsepower as well as a smooth throttle, mapping is highly suggested and has some worthwhile benefits for the price.
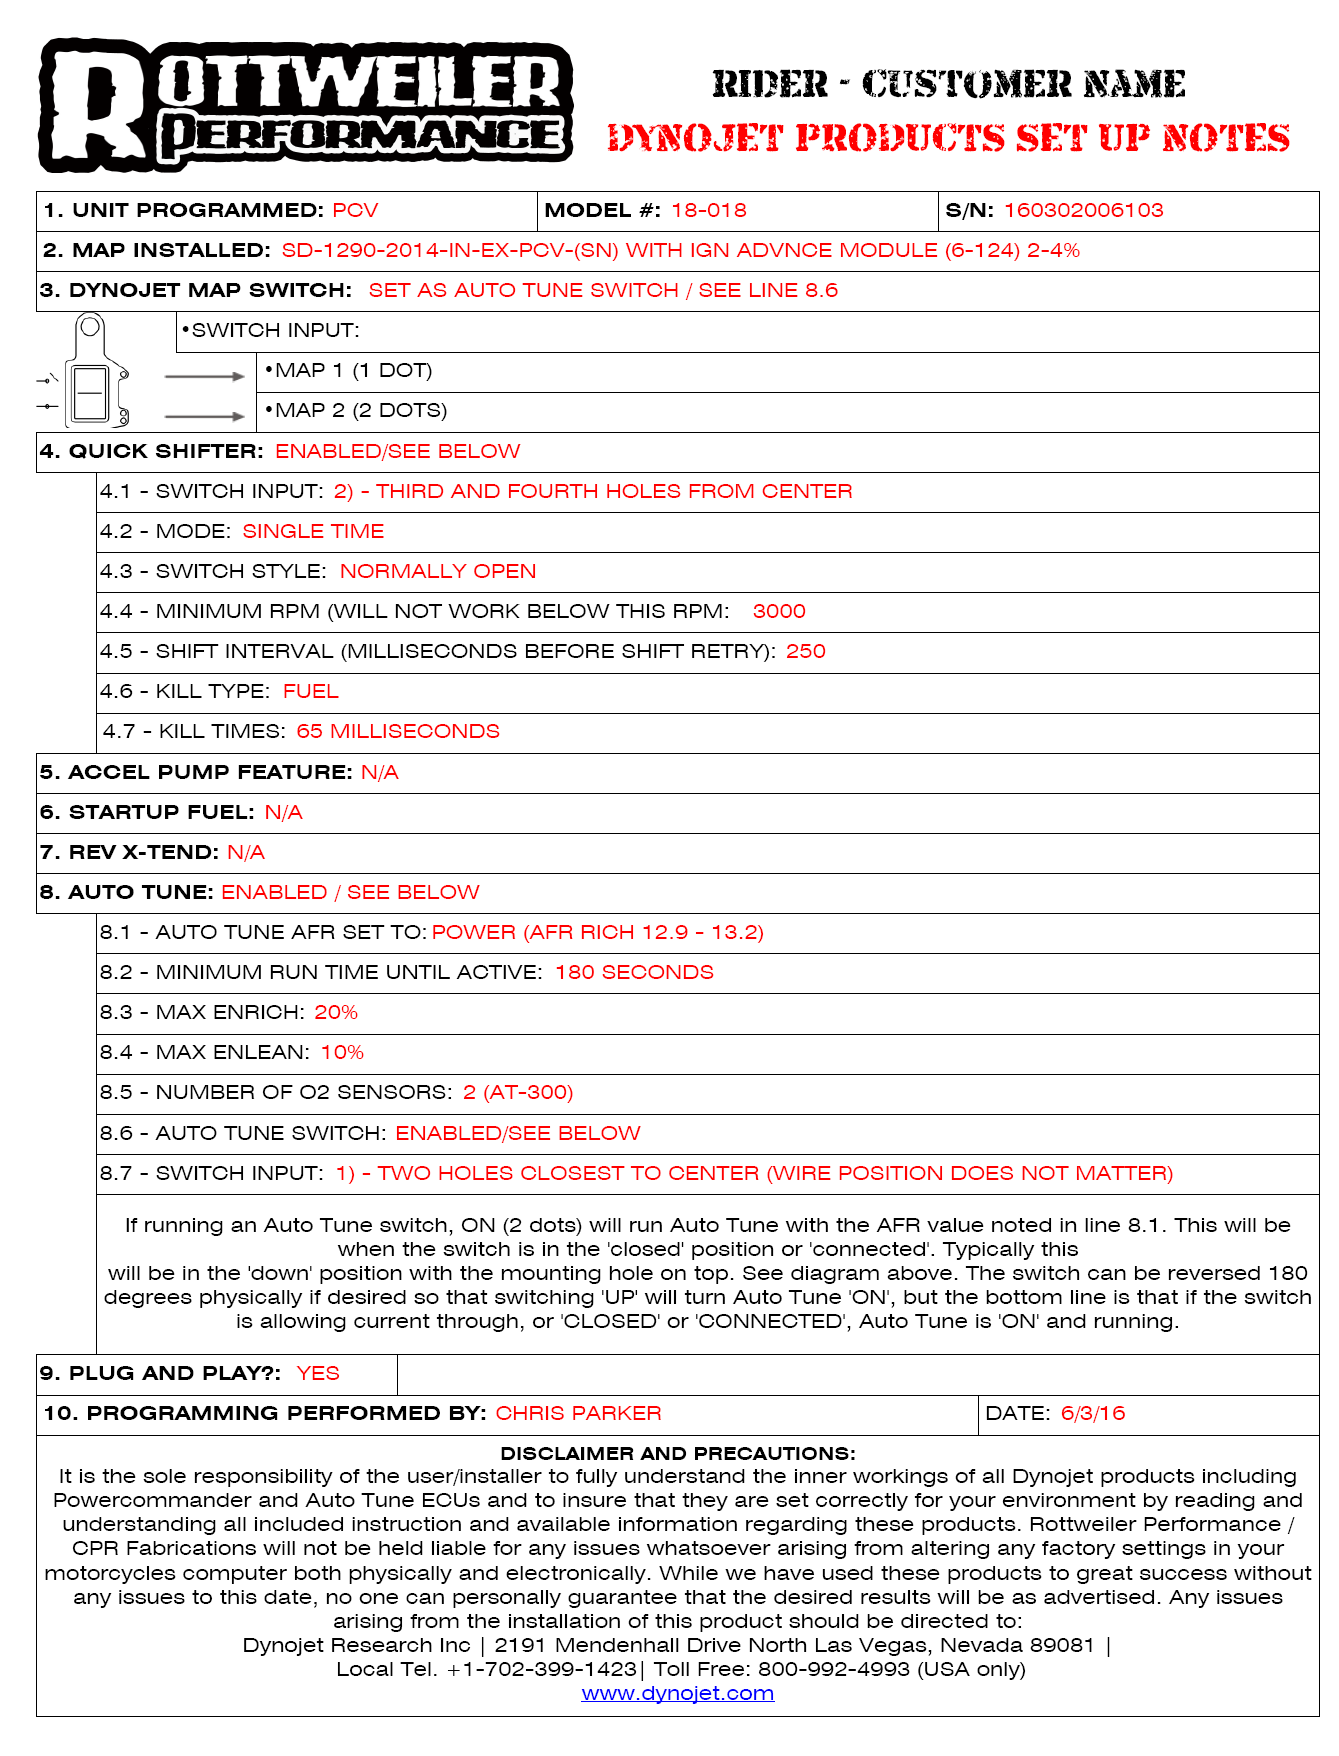
At Rottweiler Performance, any of our Powercommander V maps are free to our customers with the purchase of a Powercommander. All you have to do is tell us what map you want or what your final engine modifications will be in the comments section upon checkout and we will upload any one of our appropriate maps for free before they ship. We may even call if we need more information.
The PCV will come complete with a signed and serial numbered certificate explaining everything we set up within the PCV and that the unit is plug and play, ready to go. The maps from this very session are also available as well.
Running longer travel bikes can sometimes be a bit of a challenge in finding the right place to position the tire on the torque cell. This model was equipped with a power carriage to help position the bike without dismounting.
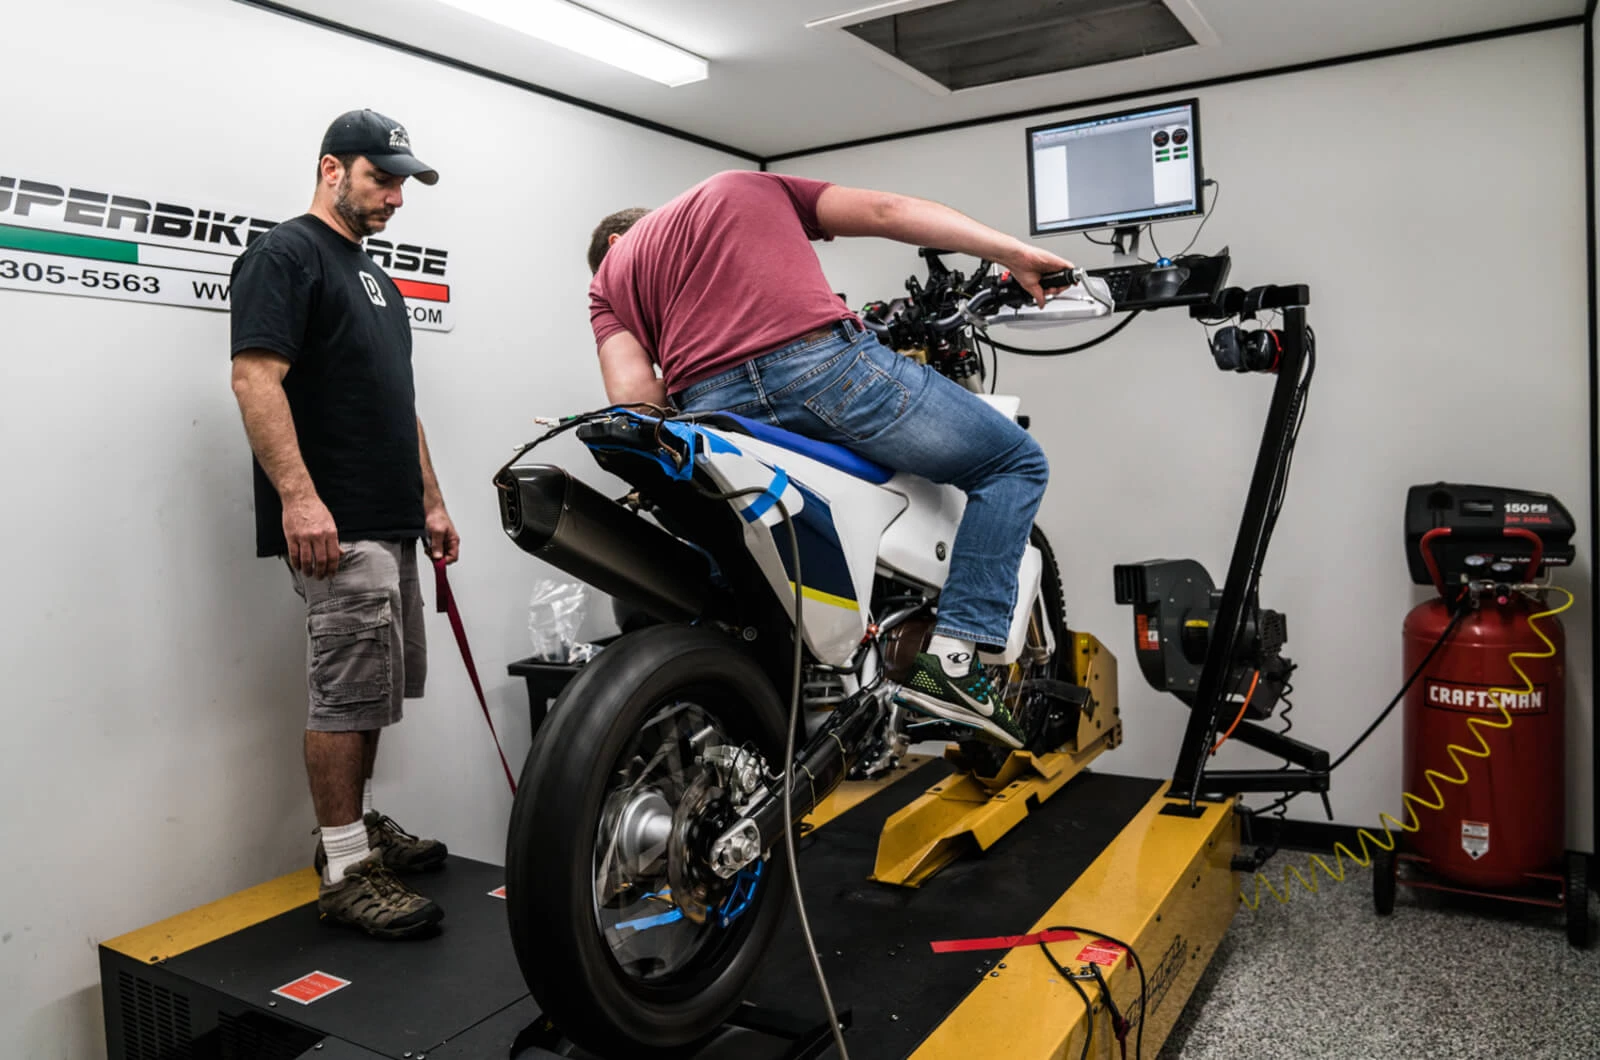
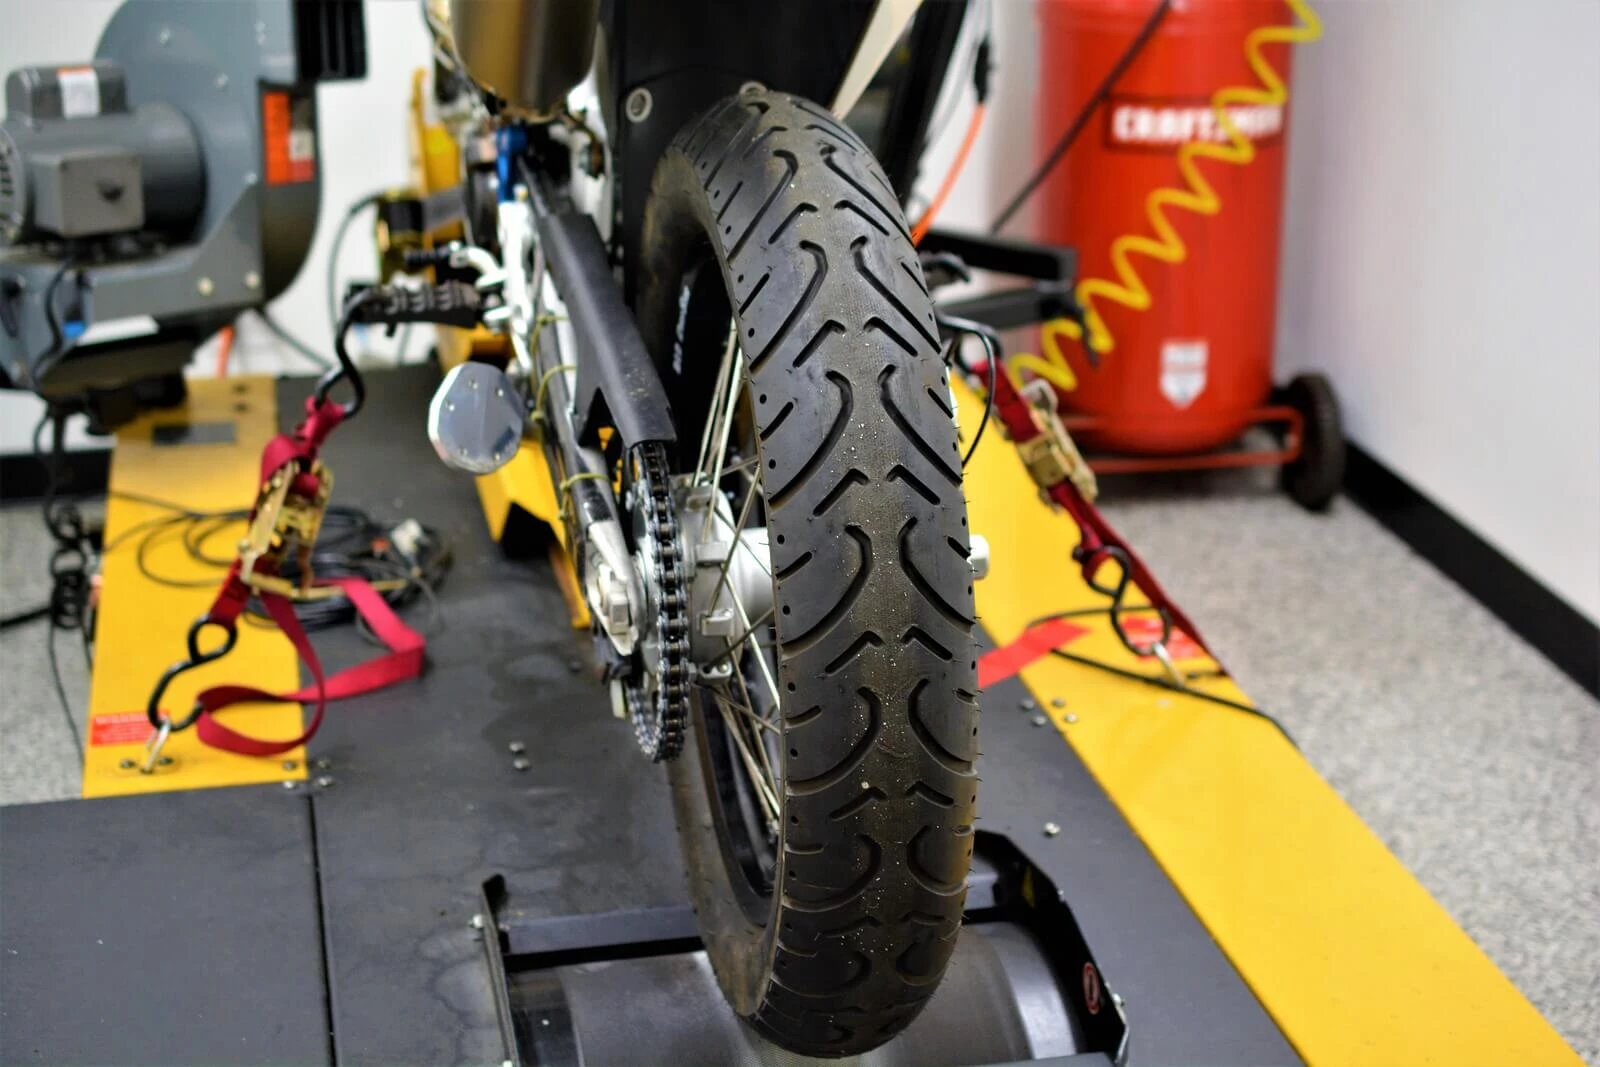
Knobbies are no good on a dyno so we fitted the bike with a road tire.
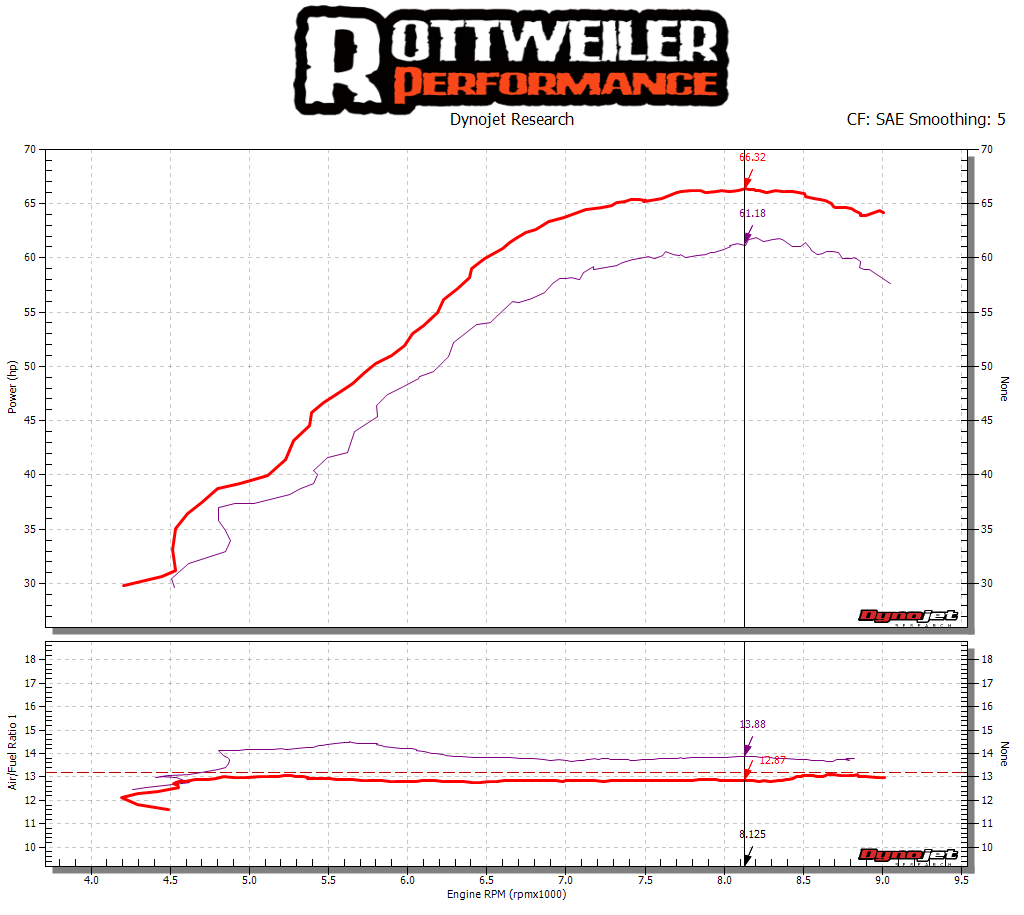
Below you can see some fairly substantial gains across the board. While the chart is noted at the peak at 5+ more horsepower, the overall gains and where you ride the bike are what is important. The 6 -8k range is especially stronger with the intake and mapping making the bike much more ridable as well.
The bottom chart is before and after AFR. You can see the purple line dances in the 14's and the mapped lines are closer to 13:1 AFR. This is where we start making power.
NOTE ABOUT DYNO WORK: We have seen a few runs out there claiming 73 rear wheel horsepower that have impressed some people. This is not indicative of what the general public can get. What is most important is BEFORE and AFTER runs as dynos can be either manipulated to impress a potential customer, or simply measure differently. If there are no 'before' numbers, the overall claims cannot really be substantiated and have no real bearing on what the end user will get from re mapping. We are quite sure that one 701 that measure at 73 horsepower on another dyno would most likely measure around 66 on this one.
The map from this session can be found here.
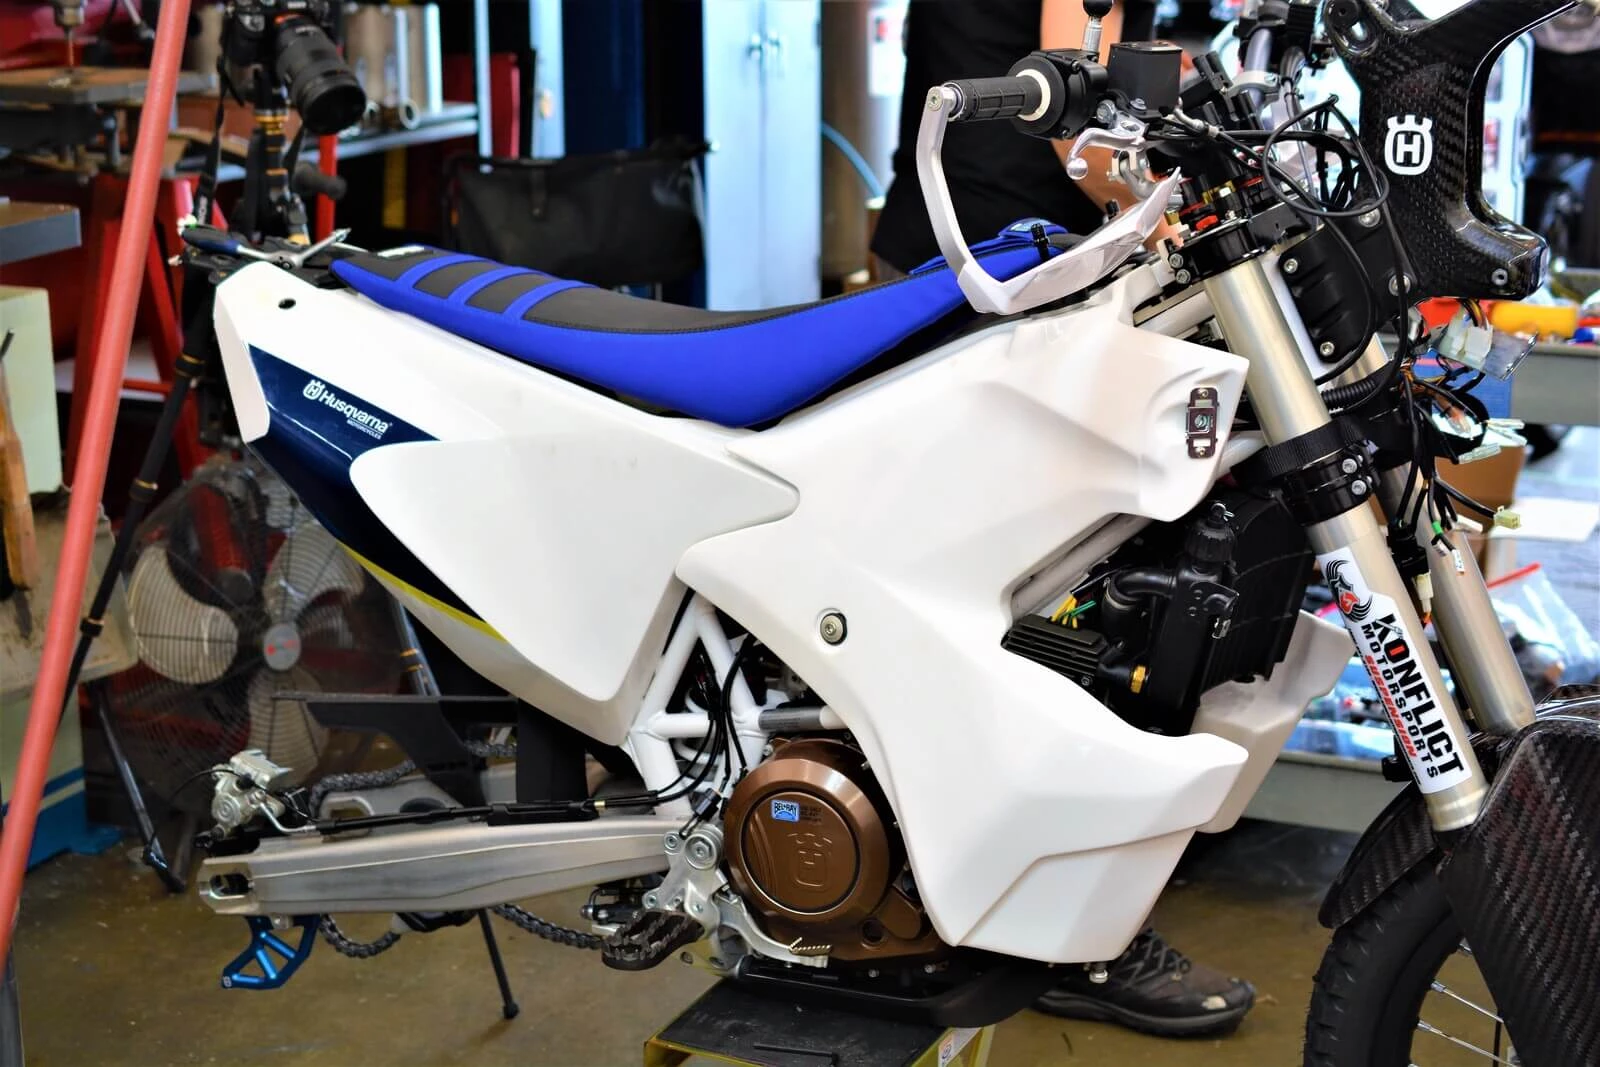
Remapped and back home. Now that the sessions were over, it was time to start the final assembly and the project 701 was starting to take form.
Tolga meticulously marked items so that he would know where they came from or where they were supposed to go. In the background the custom graphics were being applied. Tolga wanted to go a bit 'minimal' and didn't want to look like a rolling billboard. He wanted the products to speak for themselves and through his posts and travels.
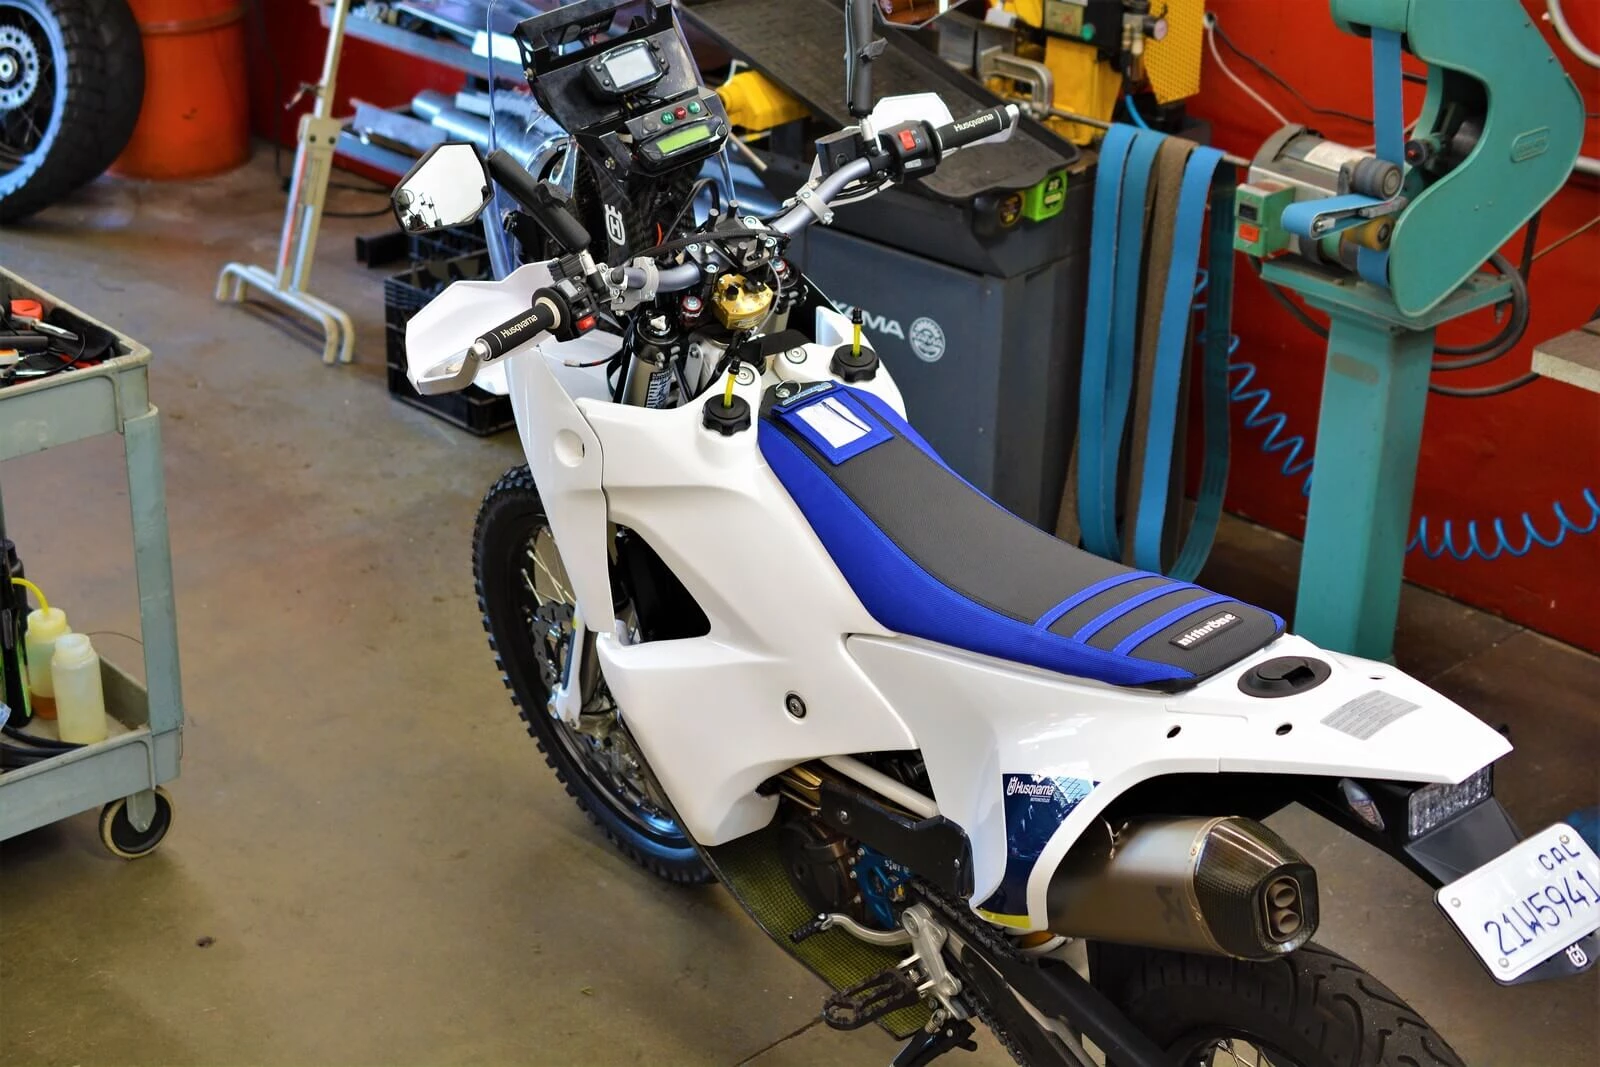
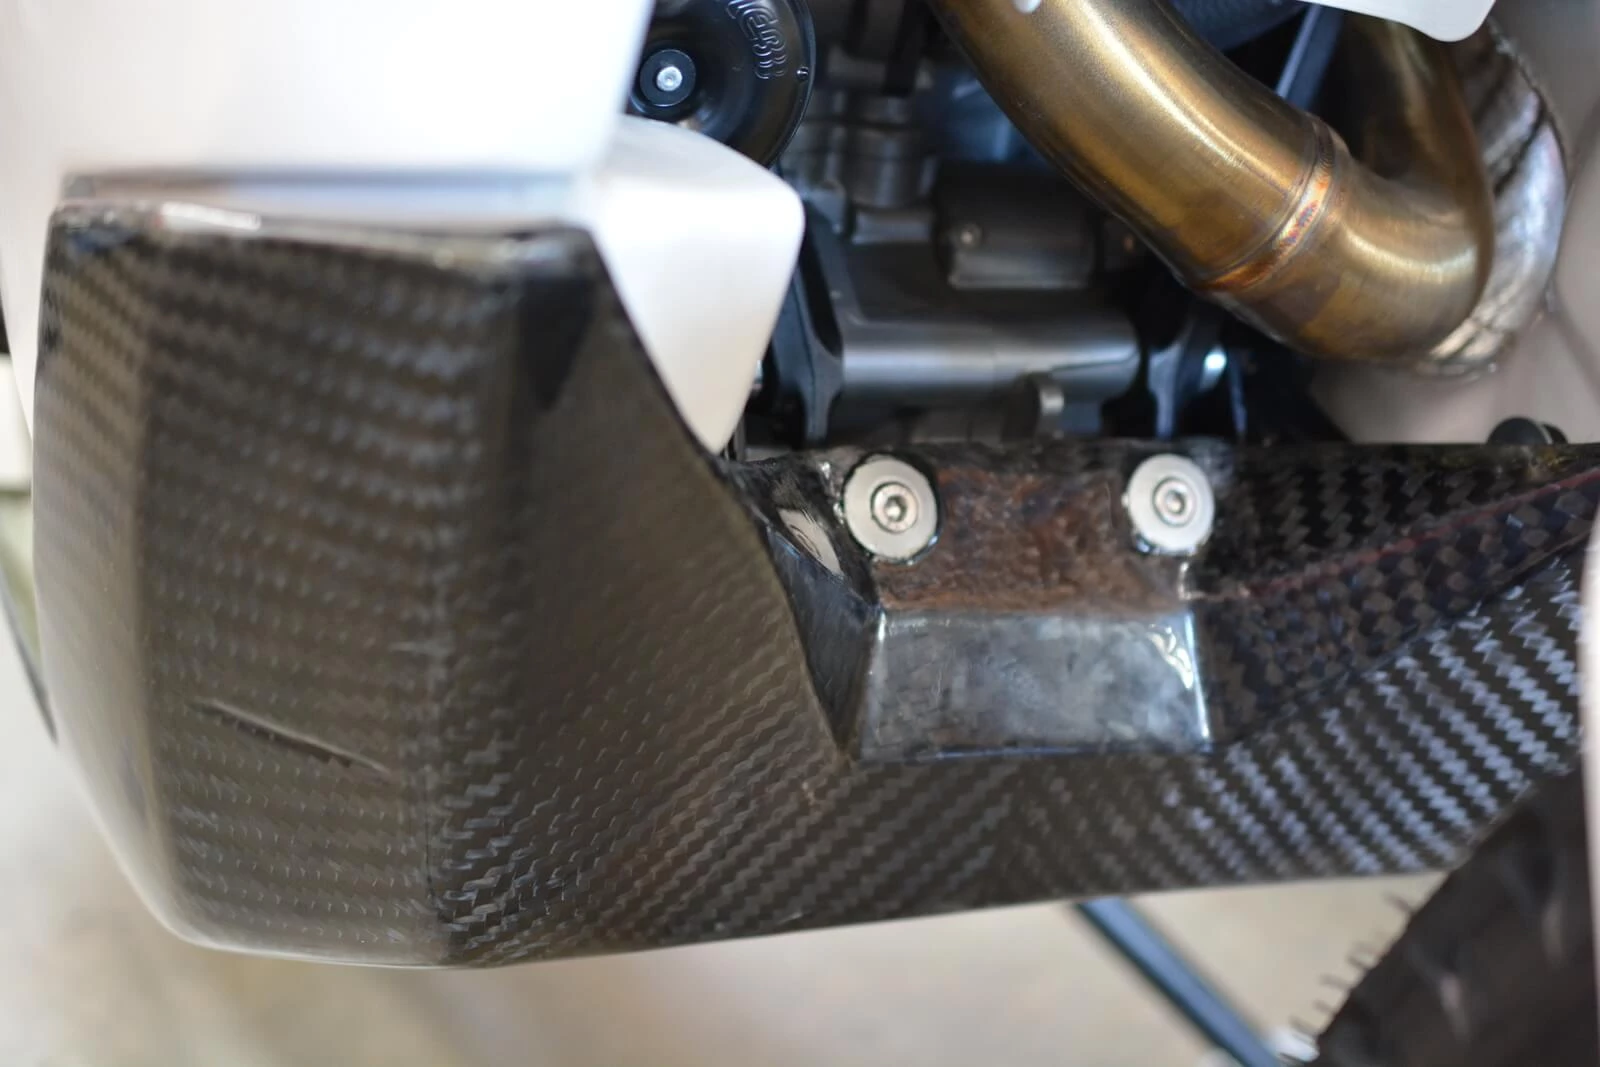
The skid pan was fitted and the bike was slowly coming together. Tolga was anxious to get on the road. He does not sit idle very well.

Fully assembled the lighting housing is a thing of beauty. Using the factory rally windshield, all of the parts tie in quite nicely and form a unique looking piece that is sure to attract some curious onlookers.
Omega also supplies some swing-arm protectors. Now if we only had a protector for the carbon protector.
Some extra bracketry hides behind the carbon skid pan to support it. It was all powerdercoaded black and of nice quality.
One nice aspect about the carbon / kevlar fuel tanks is that unlike some of the factory rally tanks that are designed for maximum capacity, thus forcing a low pipe that can sustain damage, the Omega tanks allowed plenty of room for the stock exhaust routing. This allowed the kit to be delivered without the extra expense of a full exhaust and kept the pipe higher and away from rock and crash damage. Something we felt was smart.
Omega carbon clutch cover option.
We had to raise the shift pedal a bit to allow room for a boot to get underneath it. I found that my foot kept getting caught on the skid pan and once it was raised the issue subsided.
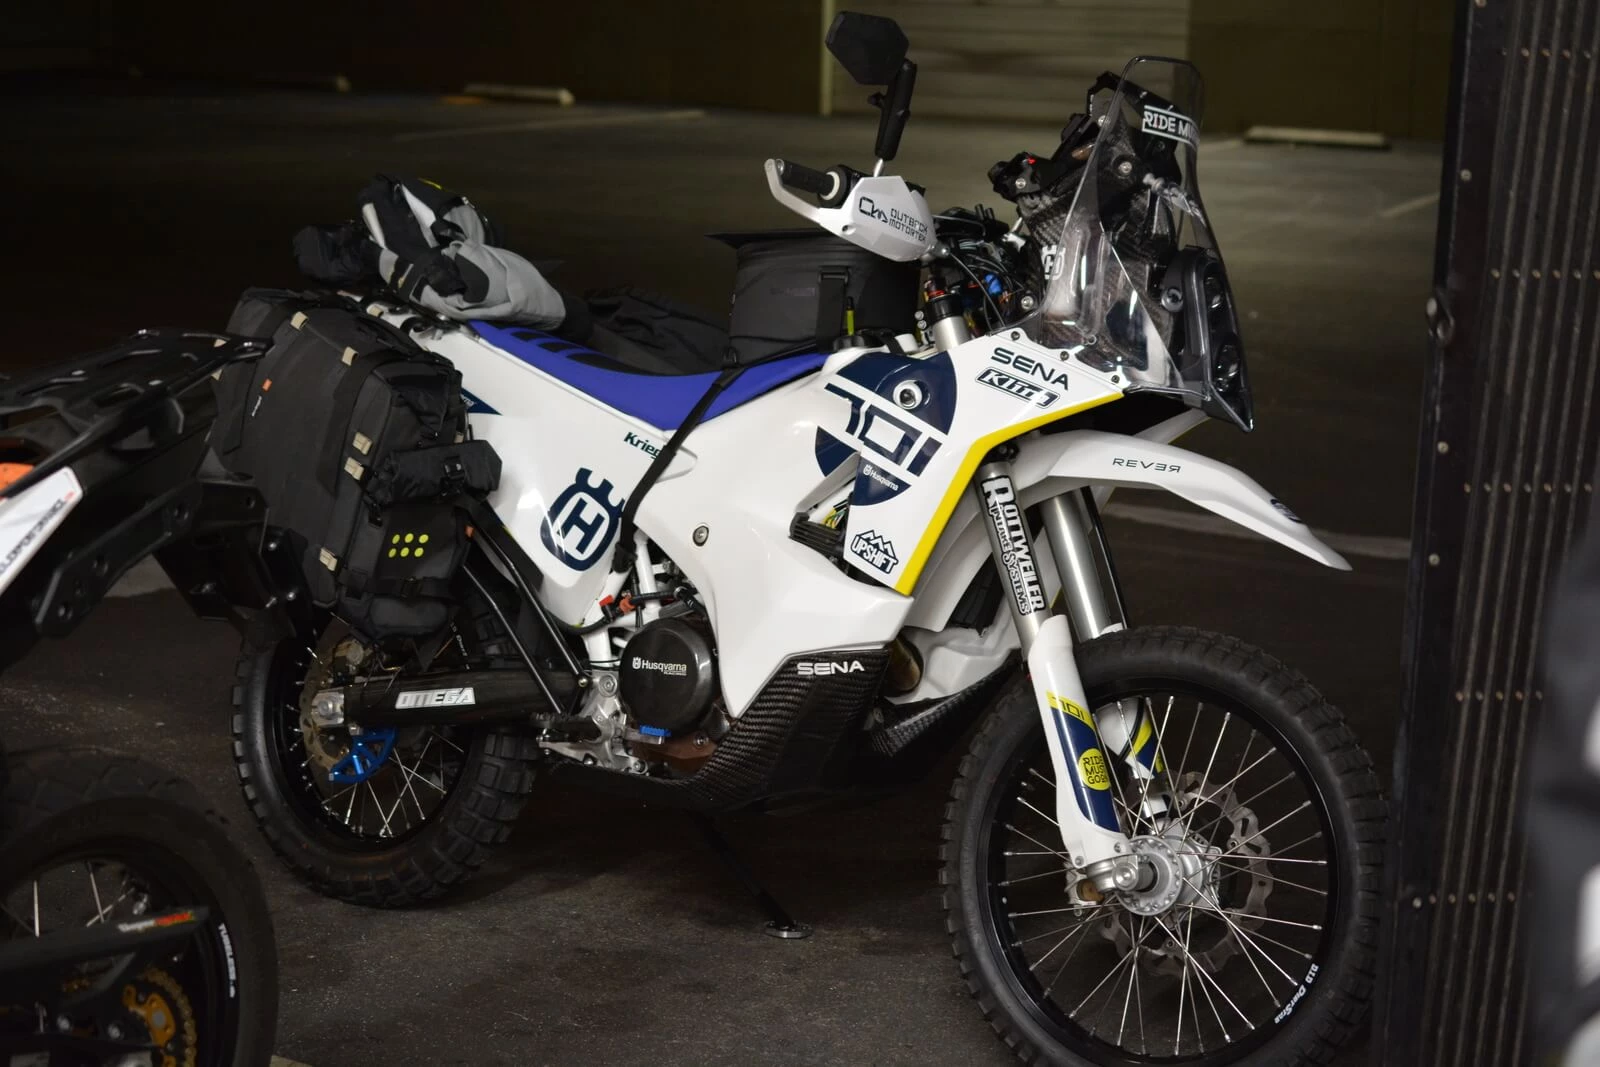
Tolga was now geared up and ready to rock and roll. Silently I was a little uncomfortable about the amount of prep the bike had (or lack of) to take a bike so far 'into the never' but realized that for Tolga, it was all part of the experience and overcoming adversity is what makes life more interesting. I myself have had a few Baja 1000 races that went flawlessly and at the finish line almost felt unfulfilled as none of us had any stories to tell. The most memorable races that I have had was having nothing but problems but finding ways to overcome, and through that created some of the most memorable experiences of my life.
Having the time and opportunity to help Tolga was without a doubt a worthwhile experience and created a new friendship that I feel may last a long time. Through this build we took many lunches together and he spoke of settling in Columbia, where he felt the people were most friendly and the country vast with many beautiful places to explore. He spoke of creating a first class tour company withing that area with a fleet of bikes and I'm sure some video marketing second to none.
Being the owner of Rottweiler Performance, I have become completely anchored to the business and it's physical location which is very close to my home and where I was raised in Newport Beach. I have often wondered what it would be like to only own what is on my back and the bike underneath me, and while I am almost certain that scenario will never play itself out for me, like many others that are following Tolga, we might all dream a little through his camera lens and follow him across the world.
We wish Tolga only the best in his travels and were thankful for the opportunity to help him build his 'Second Time Around' bike and learned so much in the process. Moving forward and due to what we experienced through this build and about this bike, we have now acquired our own Husqvarna 701 and plan on our own rally build and subsequent blog.
- Please check out our 701 pages and see all of the fine products that we carry for this wonderful bike.
- Check out Tolga's 'Ride Must Go On' Facebook pages here.
- Check out Tolga's Instagram Pages here.
2/21/17 Tolga Basol of 'Ride Must Go On' shares his mod choices on the 2017 Husky 701