INTO THE VOID - BUILDING AN OMEGA RALLY 701
Jul 01, 2023
Article Content Blocks
As of this writing, the KTM 790 Adventure is still either existing in the ether of the interwebs, drooled over by anxious would be investors willing to risk 'X' amount of cash in exchange for what might be the answer to the long awaited 'tweener' adventure bike, or are being ridden/tested by the lucky few who have managed to make a living at KTM cooperate. Since most of us are unfortunately not the latter, we are relegated to trusting that the aftermarket will be willing to take the risks themselves to fill this model wasteland with something creative and unique. As a consequence of countess hours of R&D in exchange for the occasional sale (no one is driving a McLaren making rally kits), this can be an expensive endeavor when in comparison to an available floor model, but what you end up with is always far more capable, completely custom, and definitely weapons grade material.
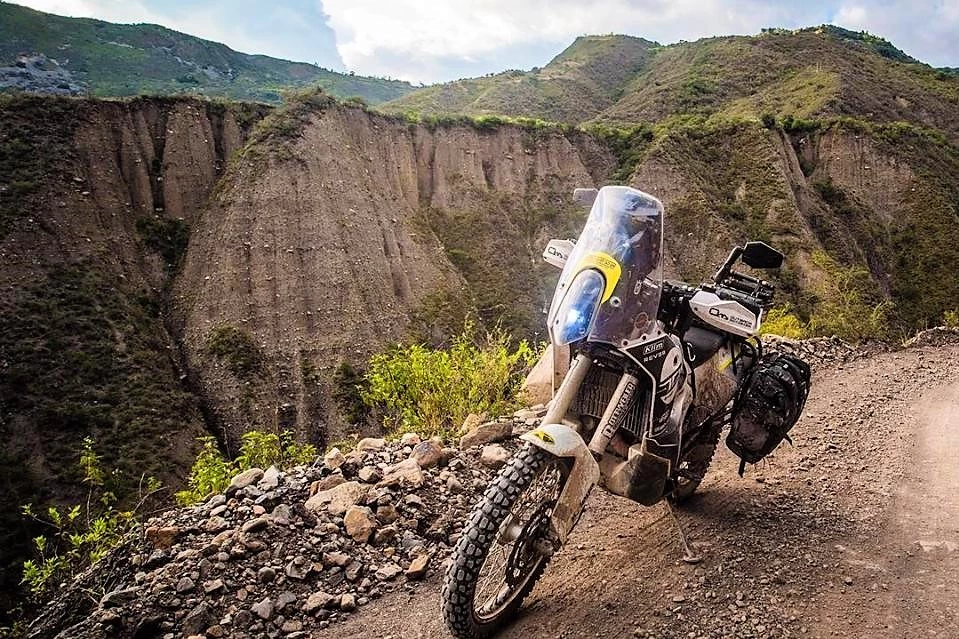
Our first experience with Omega Fibre was when we wrote our first blog on Tolga Basol from 'Ride Must Go On' and his 'Second Time Around' adventure, this time choosing the Husqvarna 701 platform coupled with an Omega Fibre Rally 701 kit. We had never had our hands on one of these before and anxious to check out the quality of the kit, offered to lend him some space in our shop to help him with the build. Many of these kits can be let's say, 'questionable' when it comes to fit and finish, and we really wanted to see first hand whether this kit was sound and would stand the test of time.
The good news was that we were pleasantly surprised with the kit. While none of these will go together like a factory designed bike, the goal when spending this kind of coin is that one can get as close as possible. After assembling about 8 of these to date, we can confidently say that this is achieved by Omega in repetition. The exotic nature of the final product feels more like a highly reliable race bike vs thoughts of doubt and questions about longevity. The Omega kit isn't cheap, but in trade inspires the confidence necessary to actually use the machine as it is intended.
After a few emails and subsequent phone calls to South Africa, the deal was made and Rottweiler Performance became the proud distributor of Omega Rally kits for the United States. The first move was to get some in stock so an order for 4 kits was placed. One full carbon kit for our build, and three more for potential customers. All three were purchased and slated for builds at the R.P. headquarters before the delivery plane even landed. Not a bad way to kick off our first deliveries.
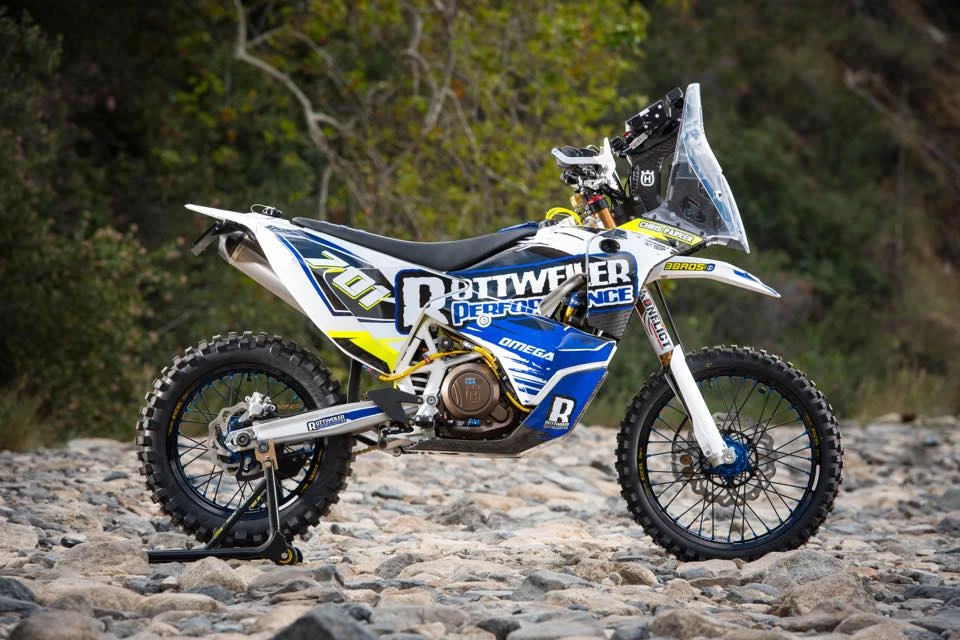
ENTER THE ROTTWEILER PERFORMANCE OMEGA RALLY 701.
While Tolga had prepared his leaning more towards the 'travel' aspect of a build, we wanted to explore the 'street legal lethal weapon' side of things. You know, for all of those times you happen to be traveling to your favorite destination and there just happens to be a Dakar Rally on the way. Those times. So we began by stripping the bike to it's bare essentials, bit by blue bit, and then building it back up with components chosen for either reliability, looks or performance. Most often times all of the above.
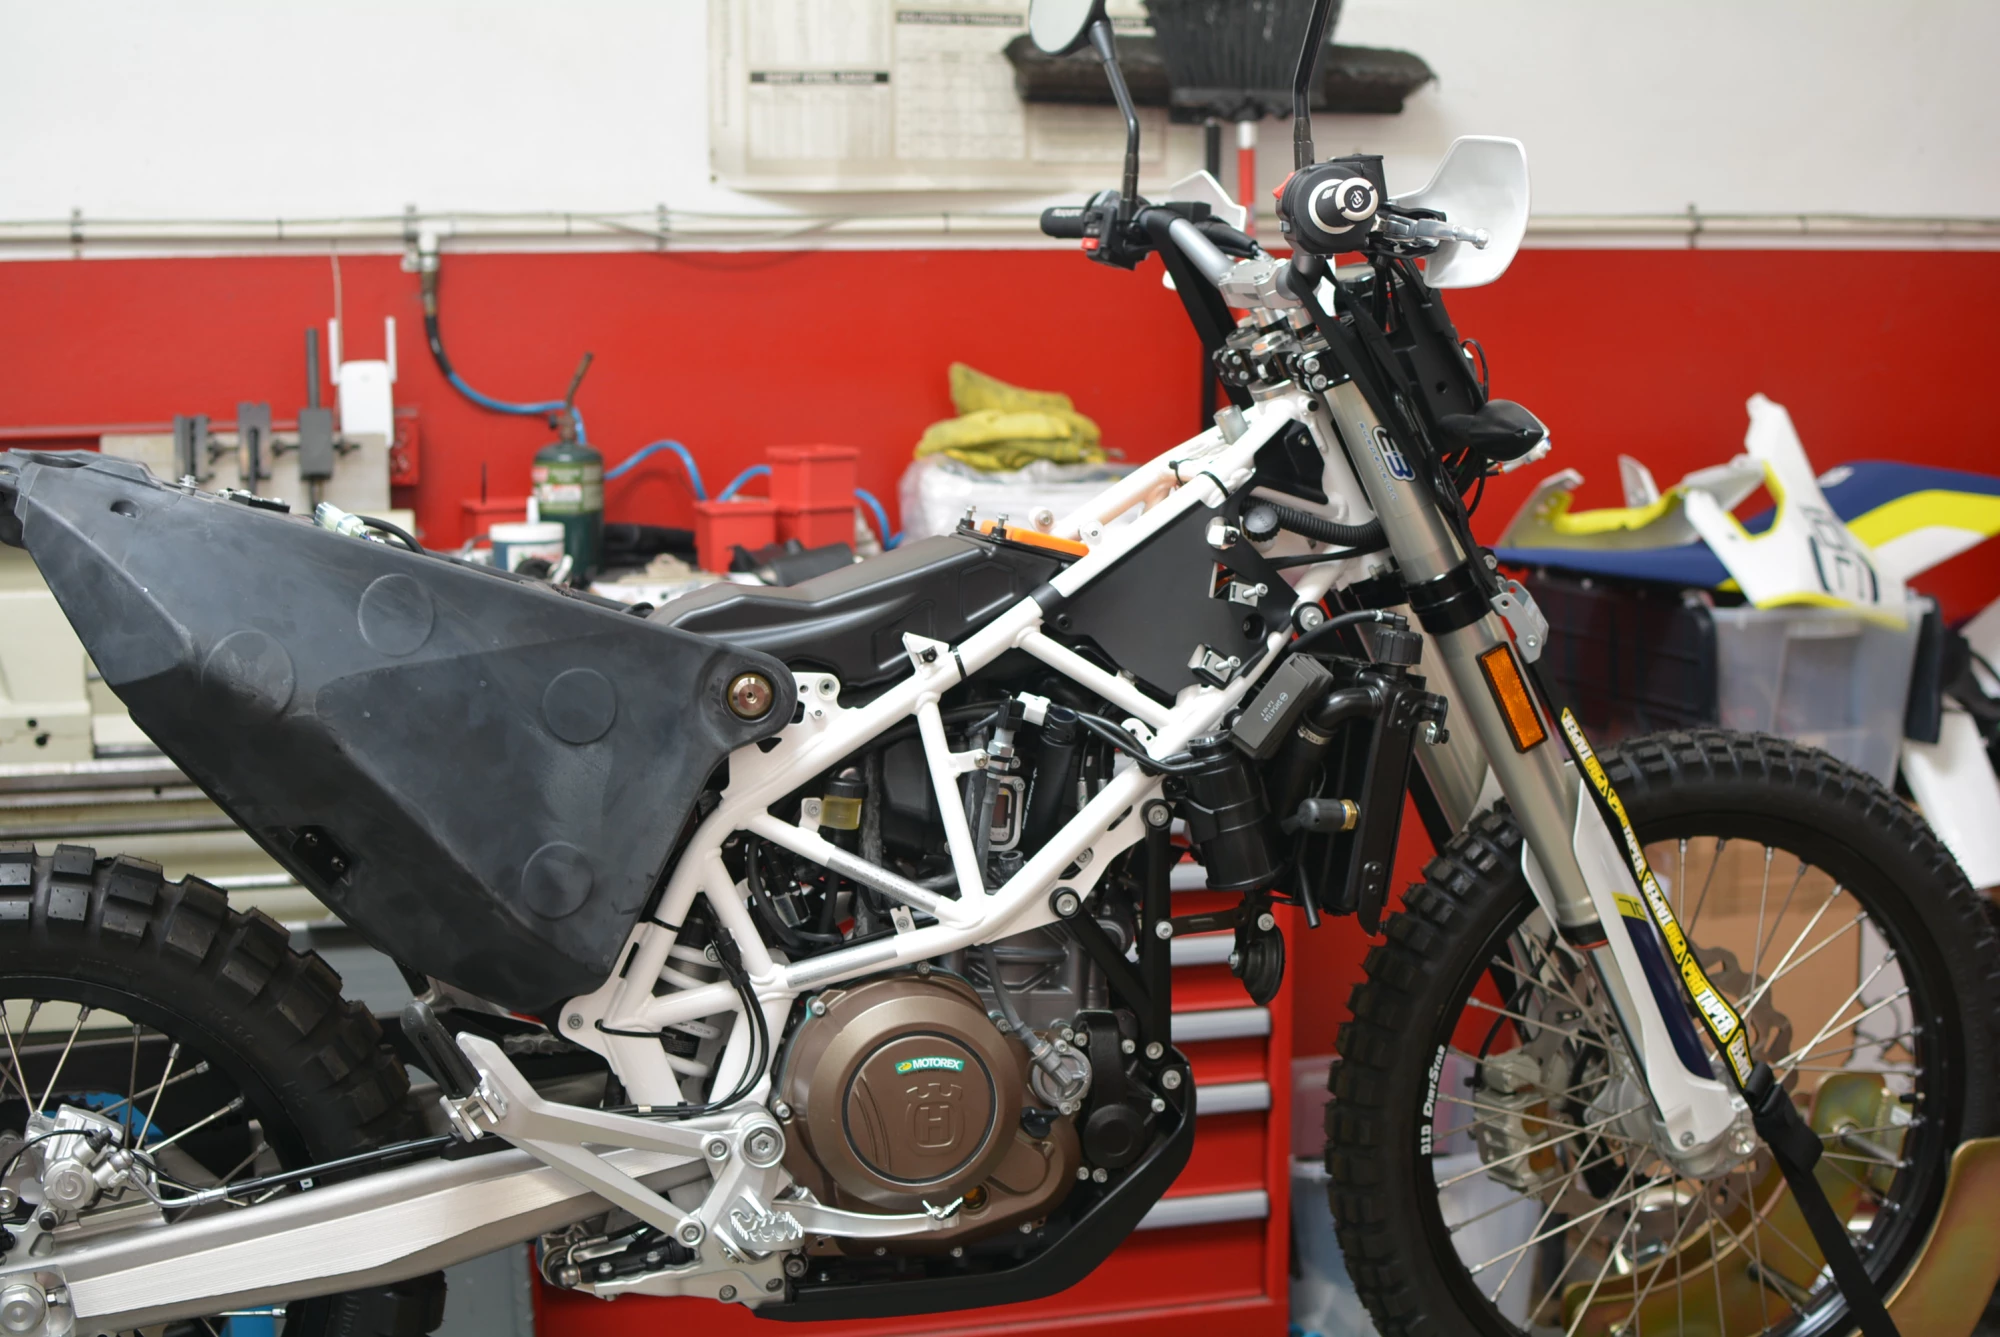
THE CLEAN UP
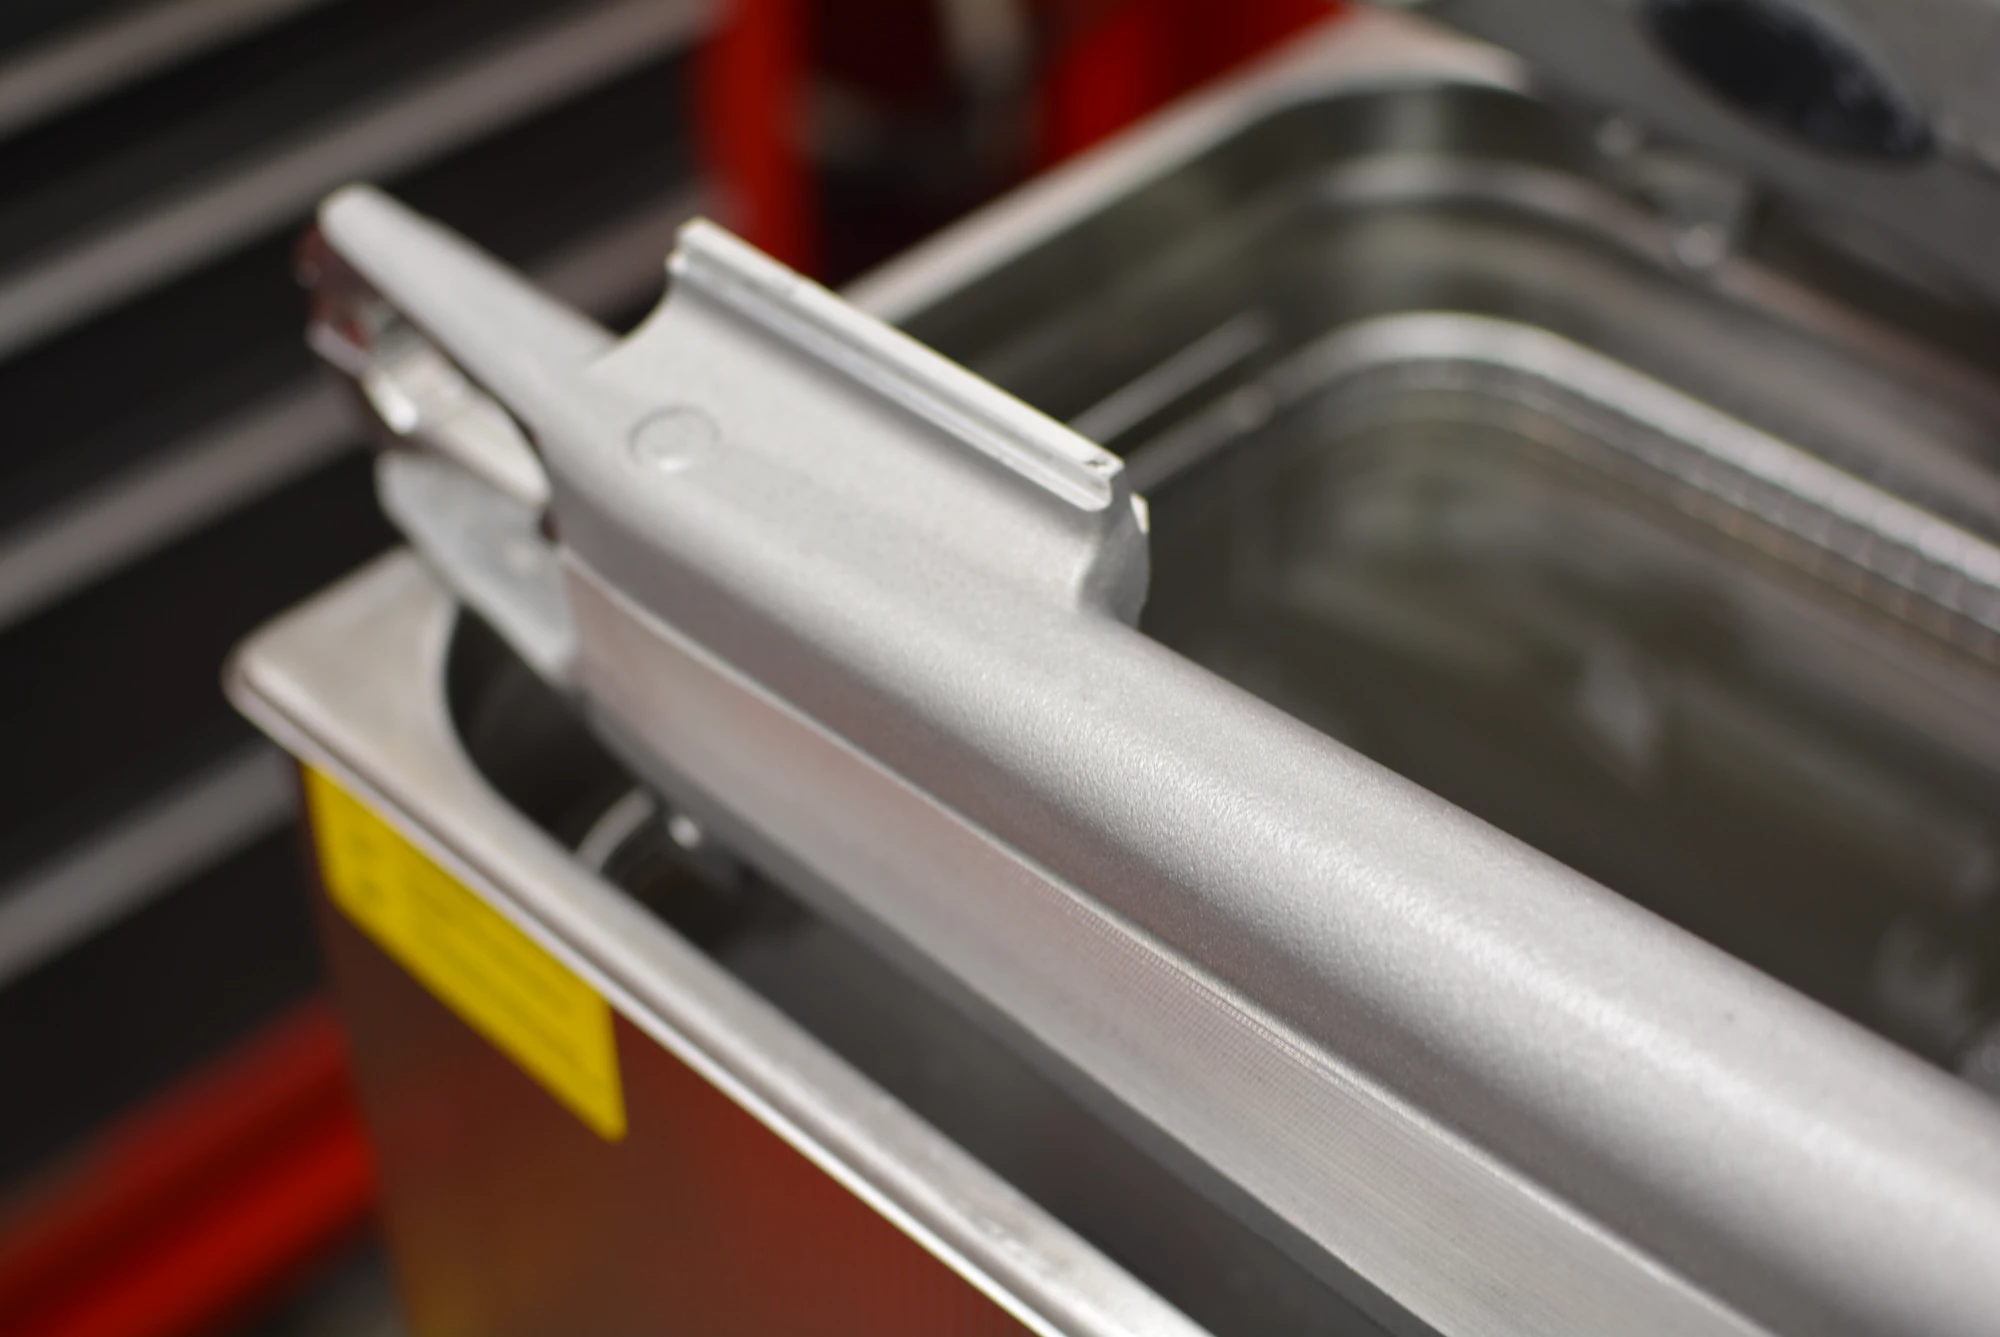
Oddly enough our first order of business was getting brand new parts 'cleaned up'. Before this build we put about 5 or 600 miles on the bike to get things broken in and so that we could perform the initial oil change and subsequent dyno runs for our 'before and after' results once the motor was built. The initial miles led to a bit of corrosion as we are near the ocean and so we decided to give the parts a bath in our ultrasonic tank.
Ultrasonic cleaning uses cavitation bubbles induced by high frequency pressure (sound) waves to agitate a liquid. The agitation produces high forces on contaminants adhering to substrates like metals, plastics, glass, rubber, and ceramics. This action also penetrates blind holes, cracks, and recesses.
EXAMPLE OF ULTRASONIC CLEANING: REAR CALIPER BEFORE
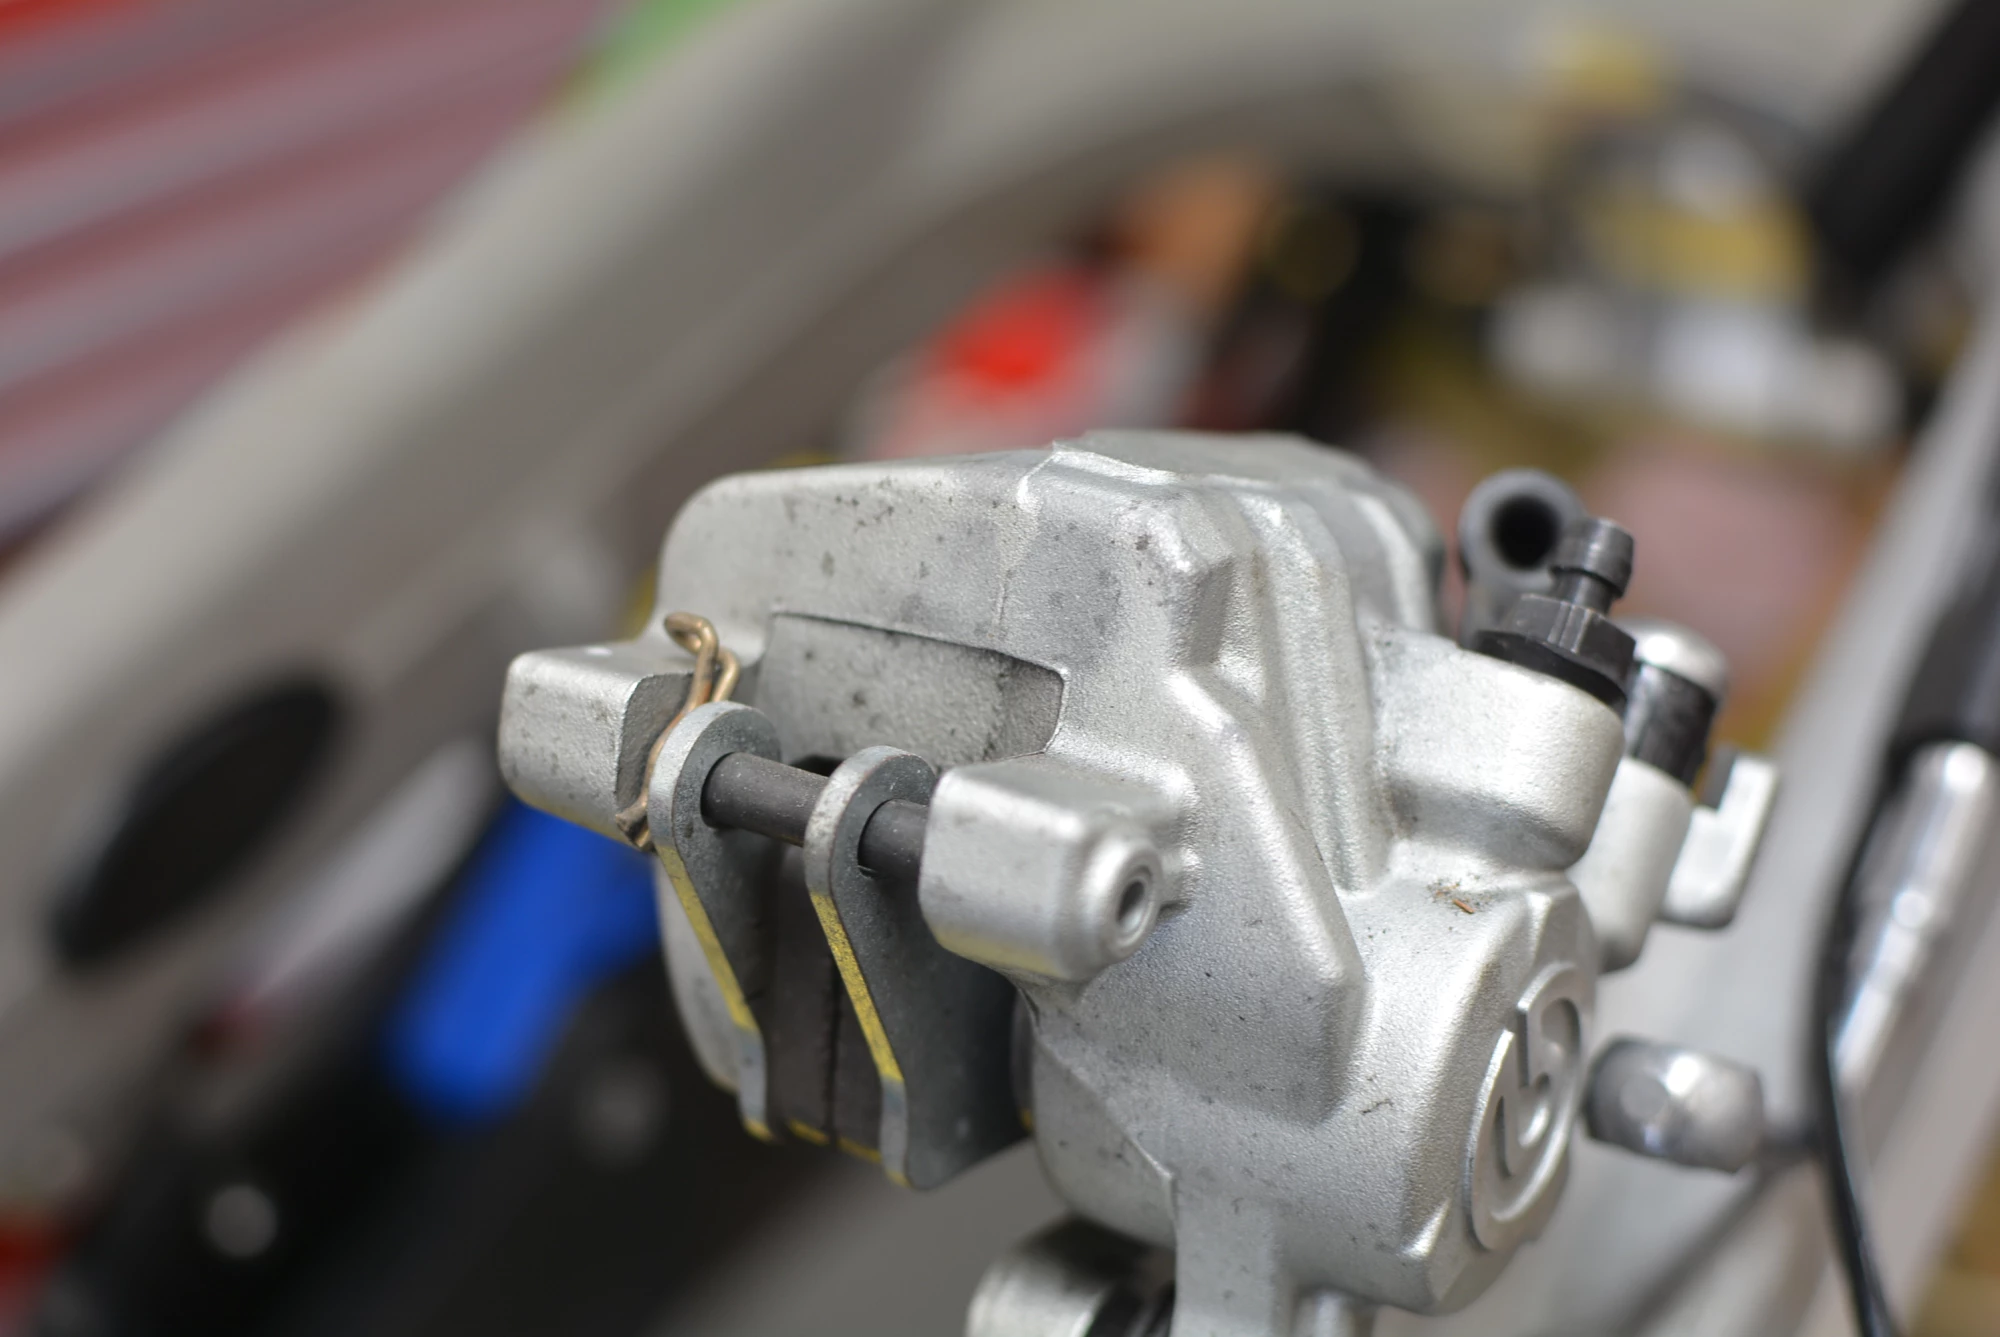
FRONT CALIPER AFTER

While most parts just dunk right in, the swing-arm had to be cleaned in quadrants which made things a little tricky. All bearings were subsequently cleaned and re-greased.
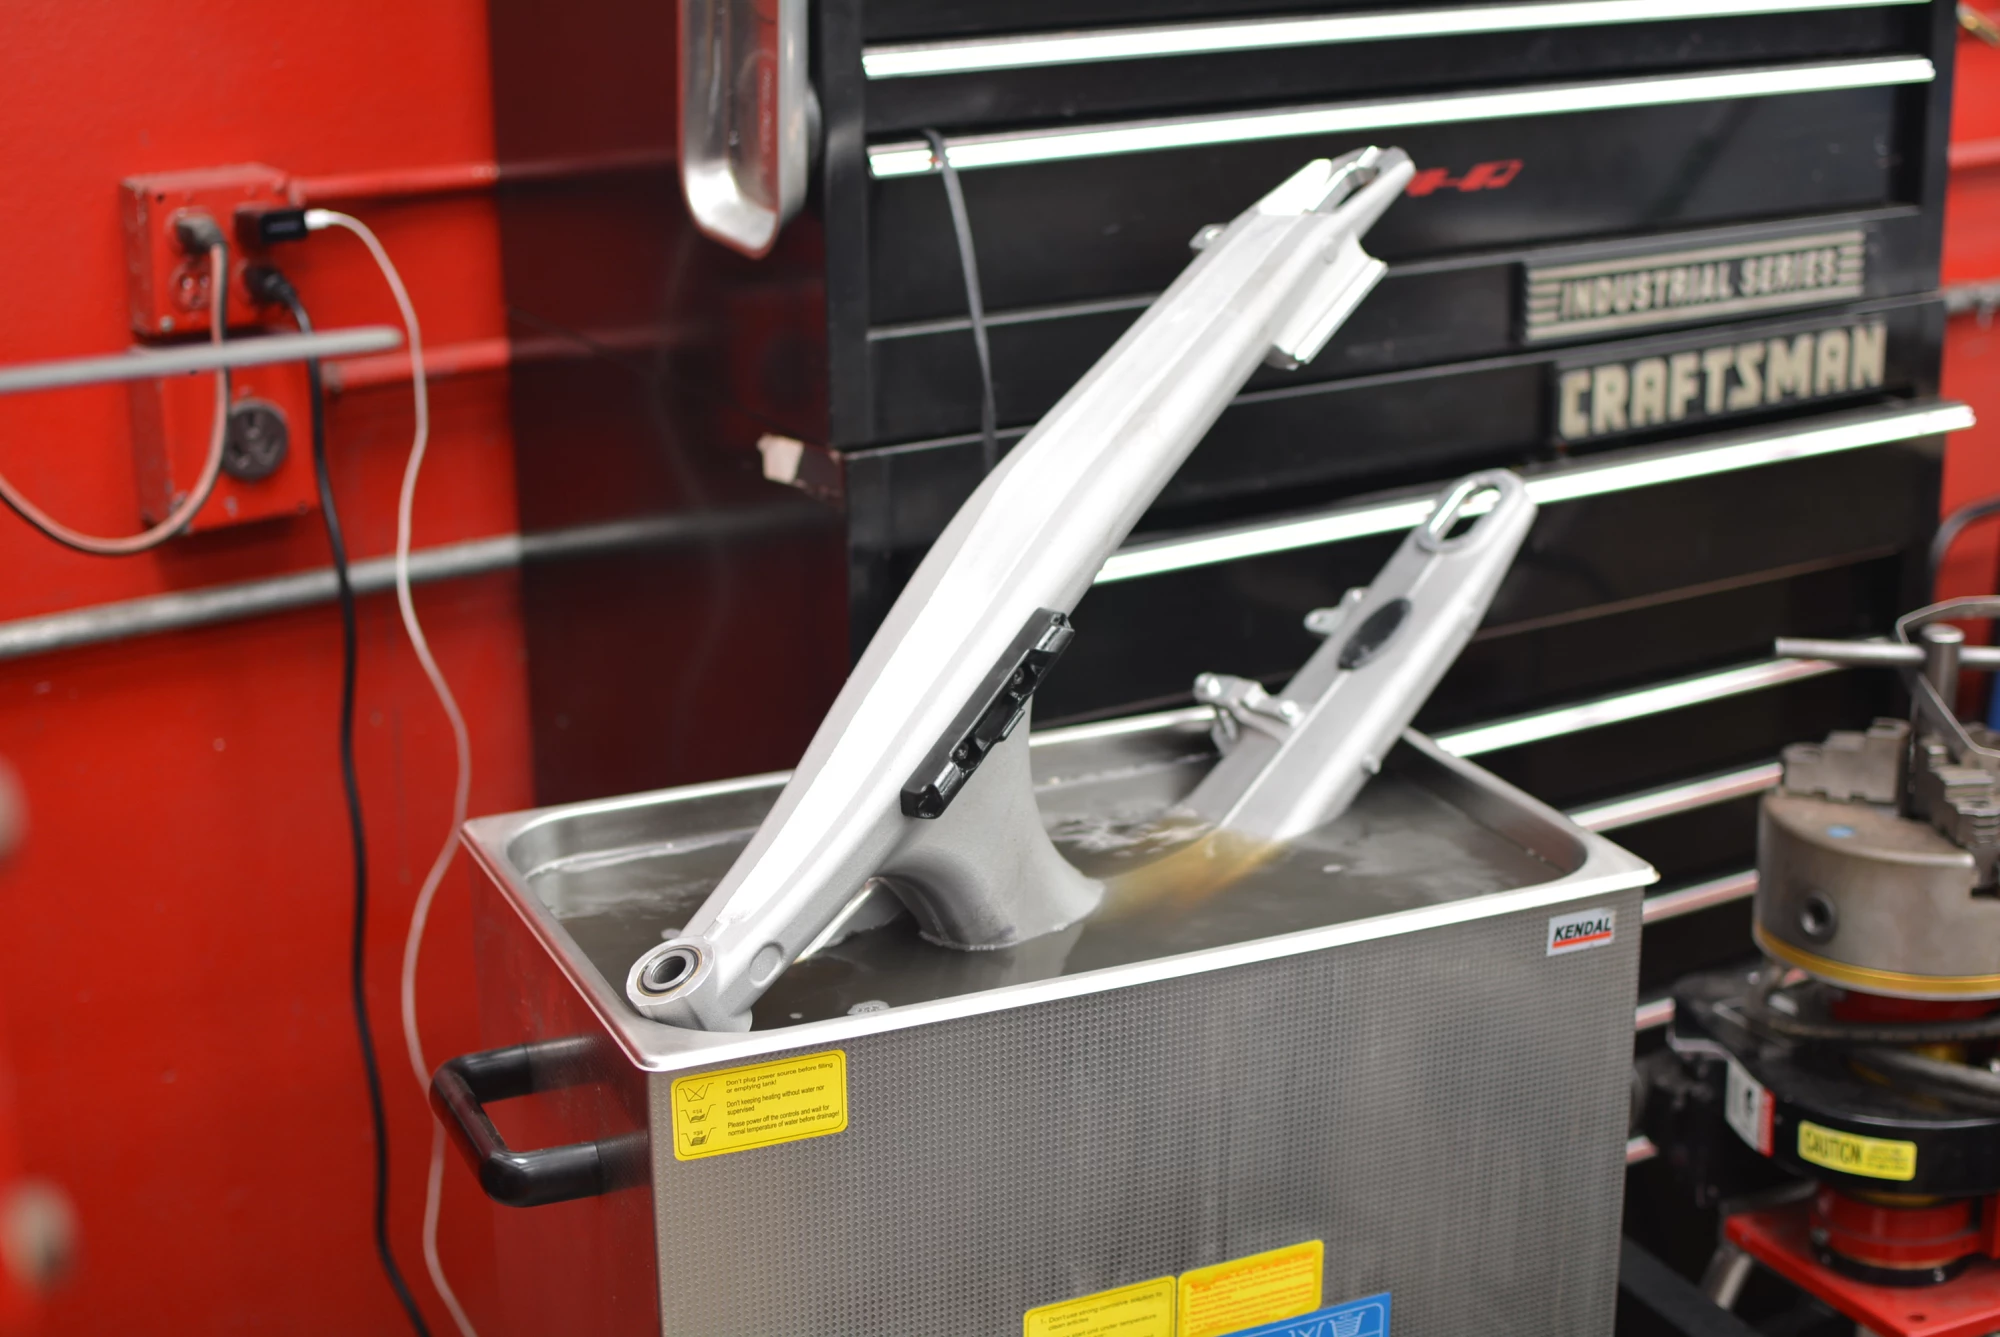
SWING-ARM BEFORE
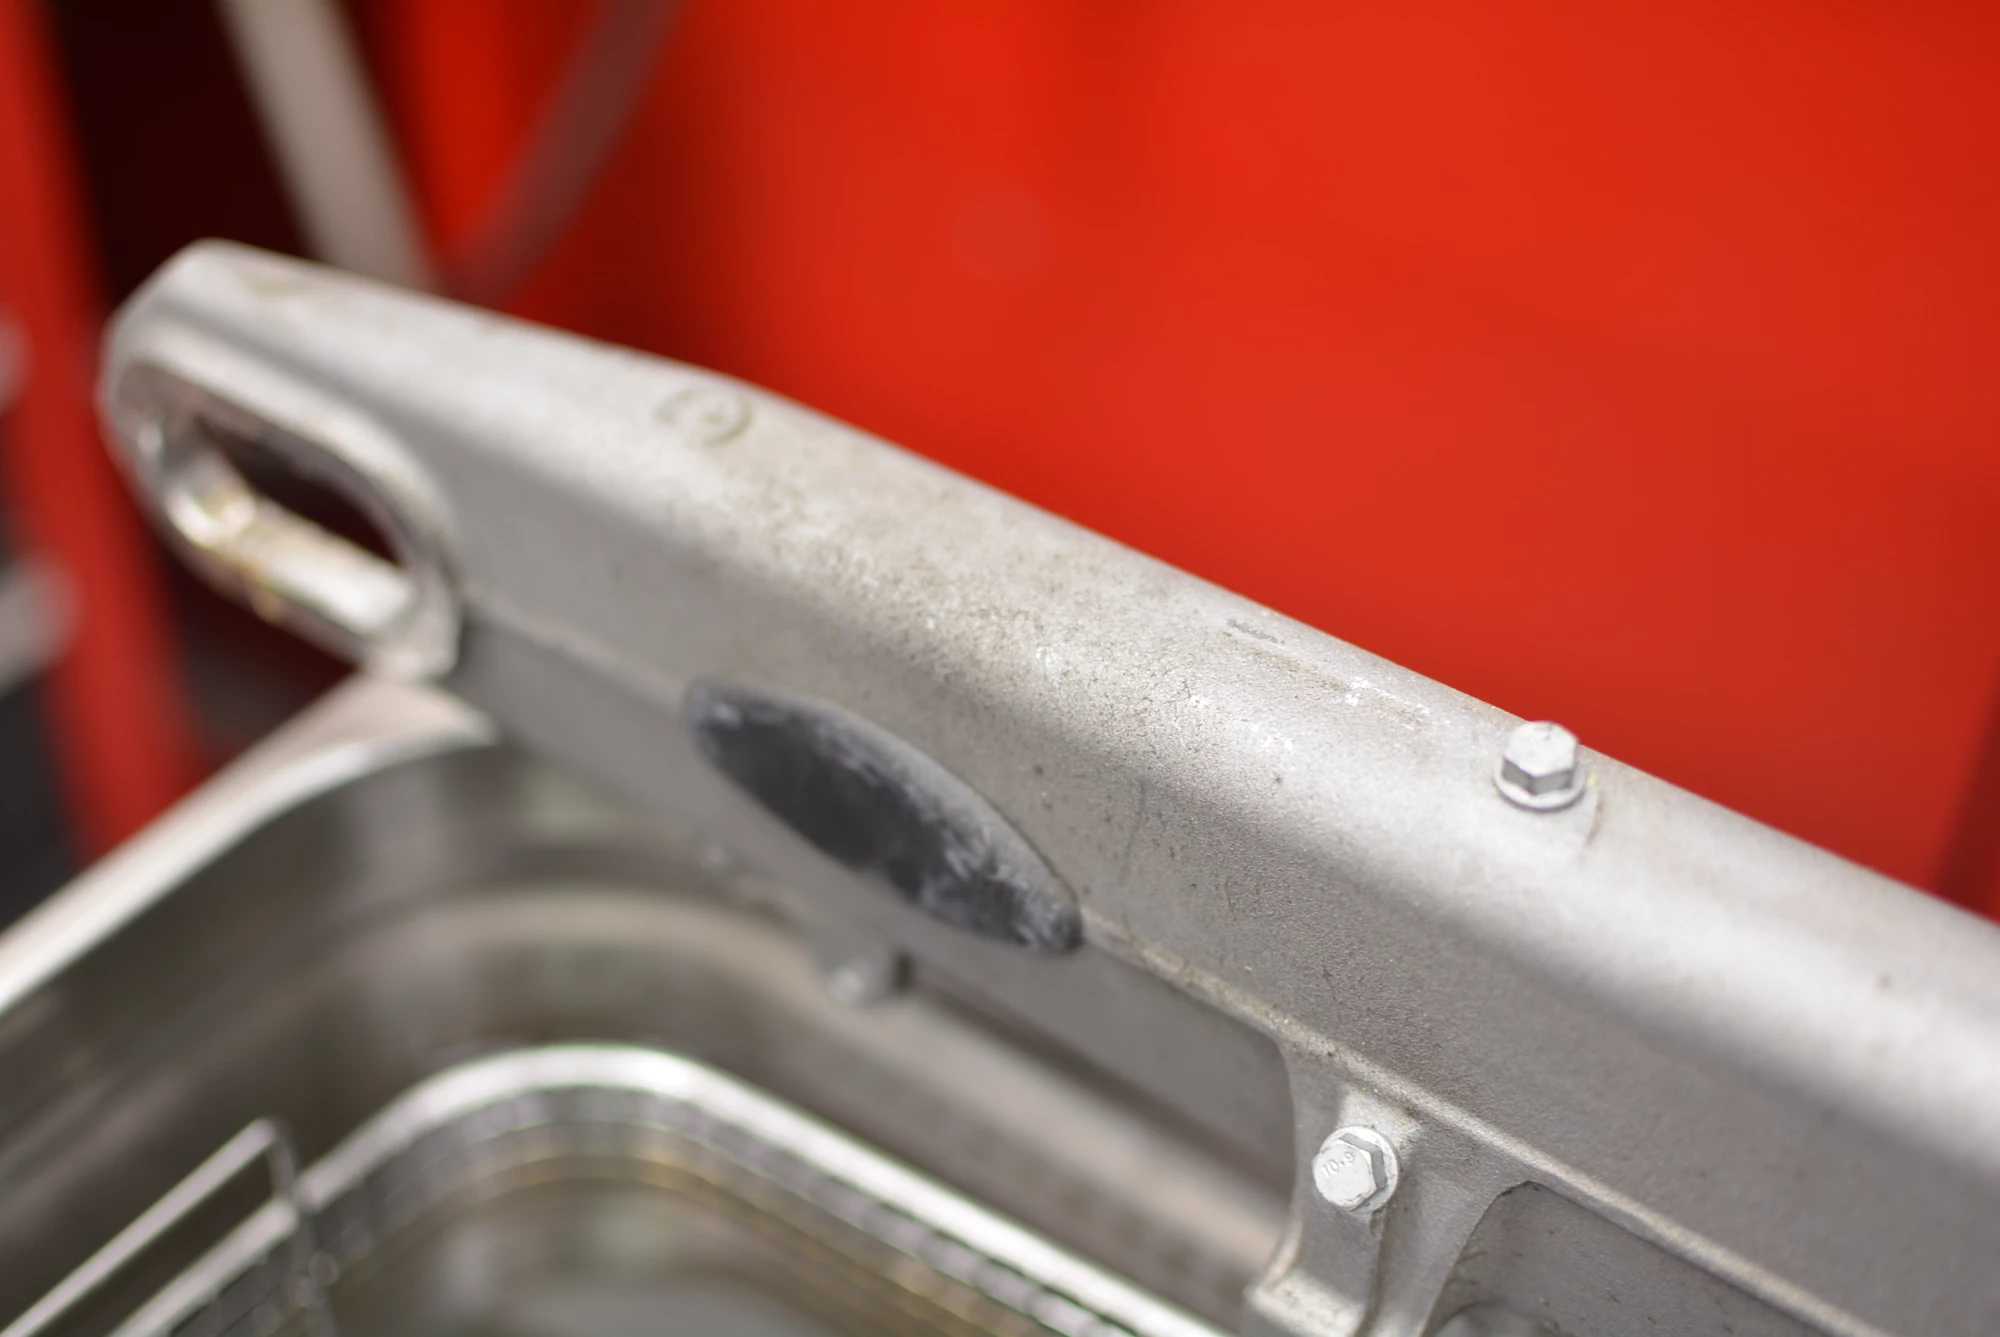
SWING-ARM AFTER - You can see the benefits in under 20 minutes with our in house machine. Mixing in different cleaners can almost be fun to see what kind of results you can get. We really liked Simple Green 'Aviation' formula. While pricey, it worked like a charm.
RE PREP - THE 'LUBE & LOCTITE LIST'
Imagine yourself on the assembly line and your the person in charge of greasing every joint on the bike. (I know this person doesn't exist but bear with me here) It's Friday at about 4:30 PM and you've got a hot date tonight. This is how I approach the re-prep of every new project bike we own. You can count on one thing, that bike was not prepped like it would have been had it been destined for the start line of Dakar.
When the bike is new and torn down in this condition, these are the best times to go over each and every lubrication point. This may sound strange, but when I'm bombing down a road in Baja somewhere, knowing that every box has been checked on the 'Lube and Loctite List' makes the ride just that much more enjoyable. The owners of the bikes we deliver are usually the ones stopping to help 'that guy', and not the other way around.
Admittedly most pictures below showing the 're-prep' happened as the items were being installed. If we were leaving the bike stock, we would still perform these tasks, but all at once.
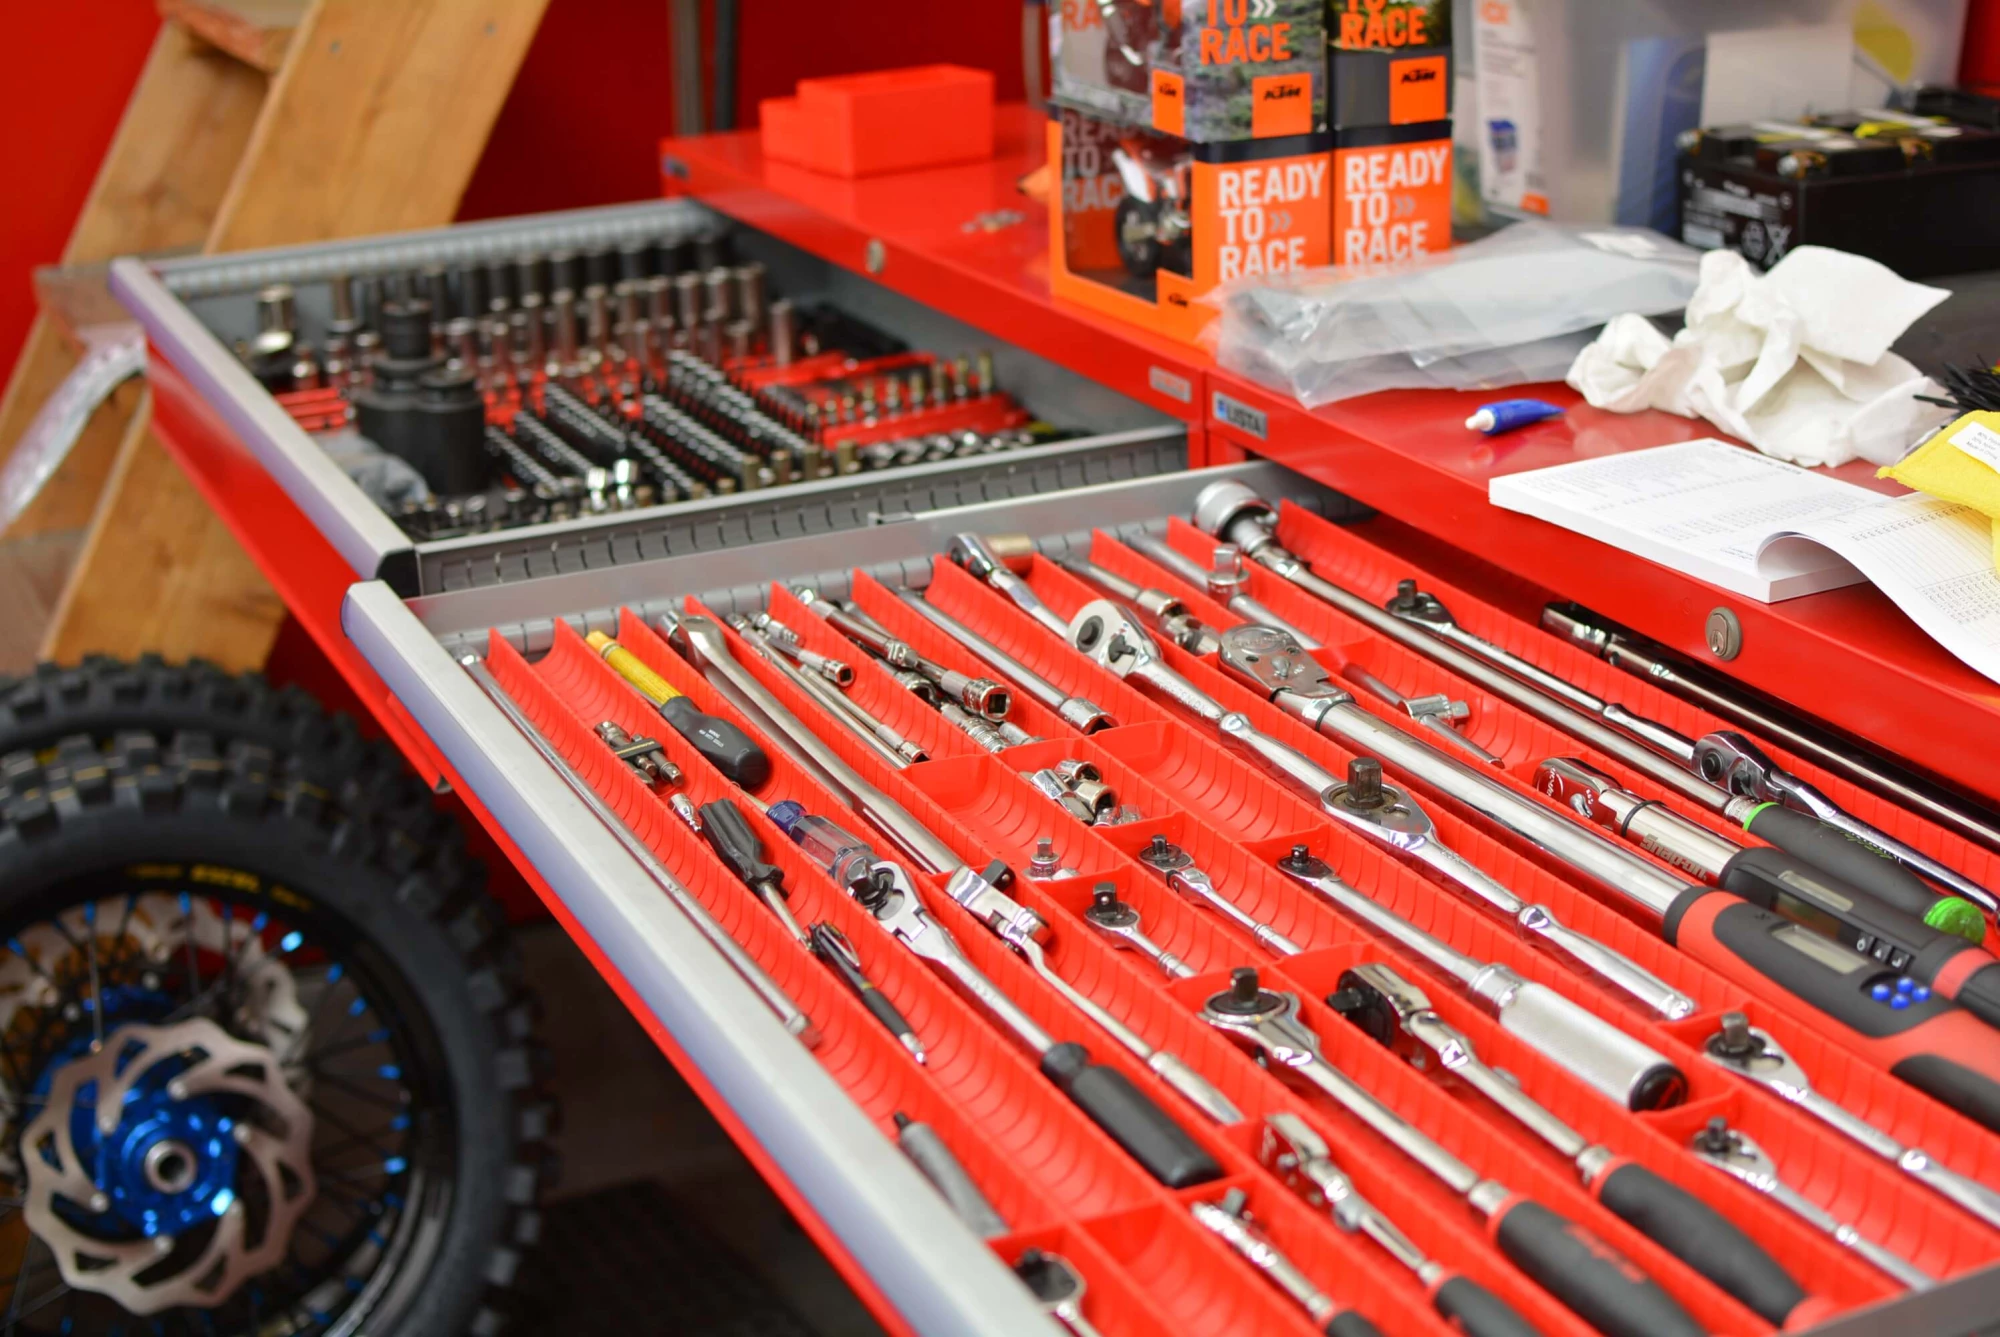
We are a little OCD when it comes to proper tools.
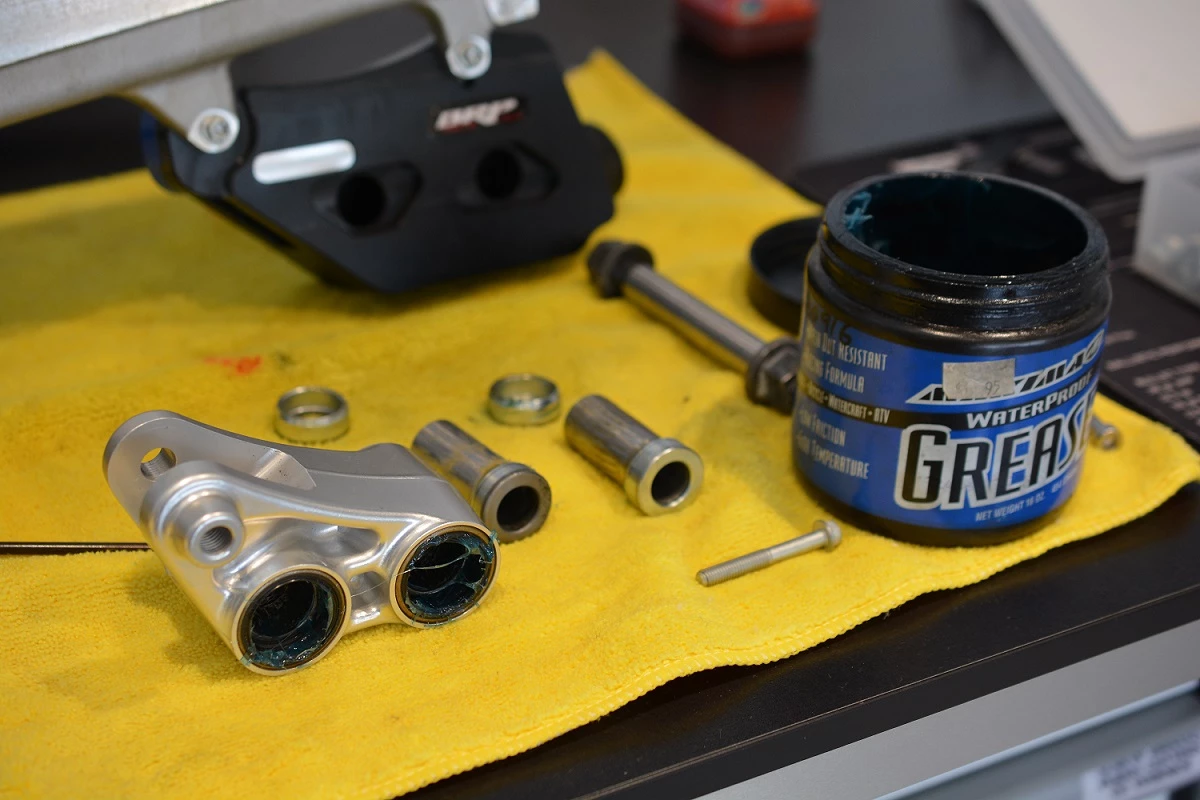
Re-greasing a linkage is almost compulsory. These things can take a beating and starting out with minimal lubrication is playing with fire.
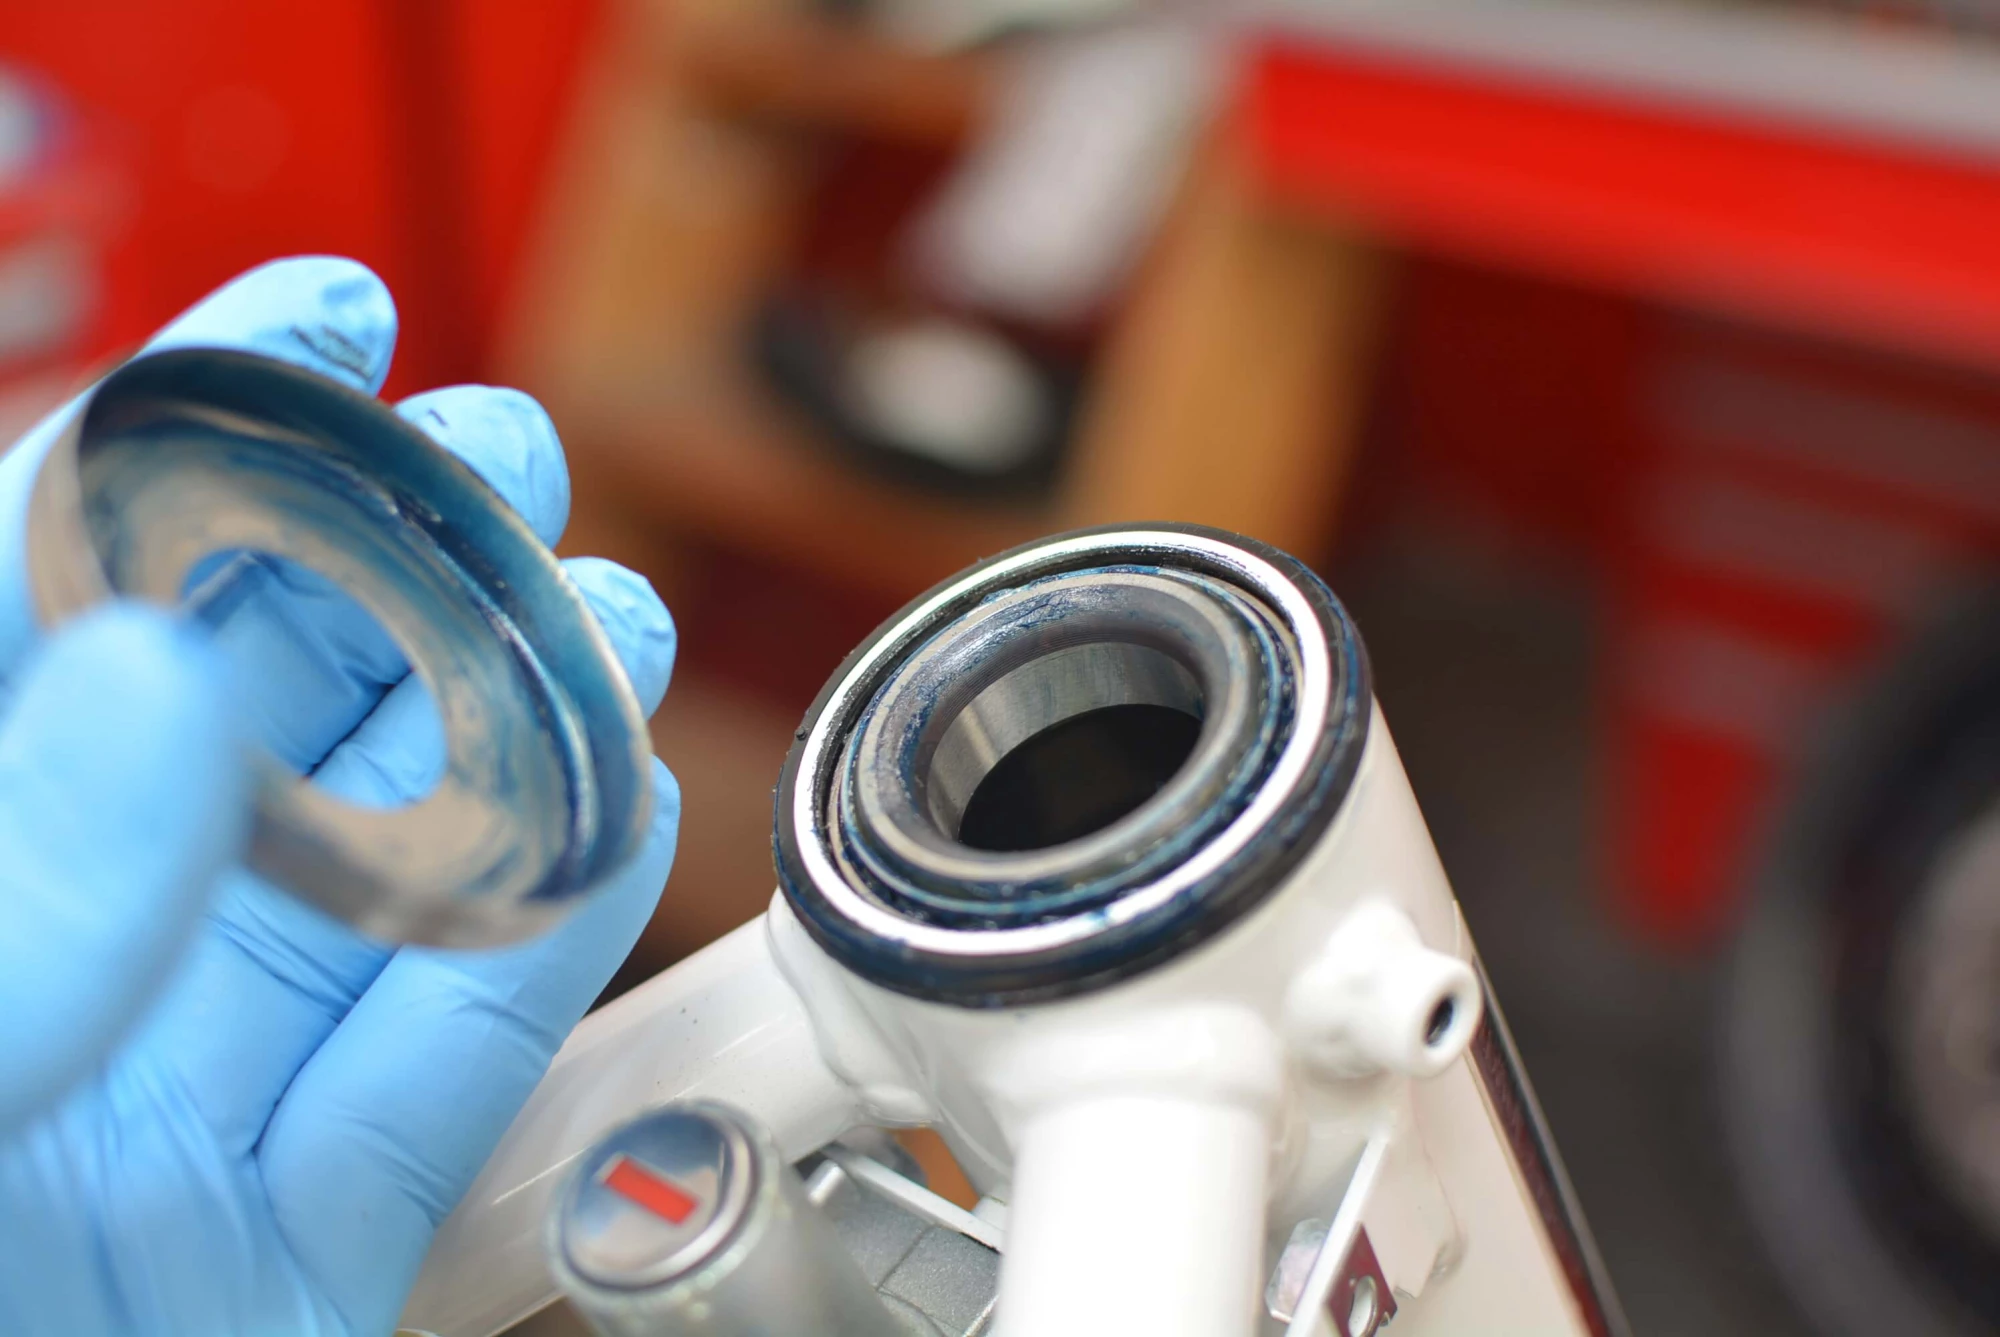
Head bearings we almost always find minimally greased. This is high on our 'lube-list'.
Red Loctite© in the right places (usually steel threading) is one of the best confidence builders there is when it comes to prep.
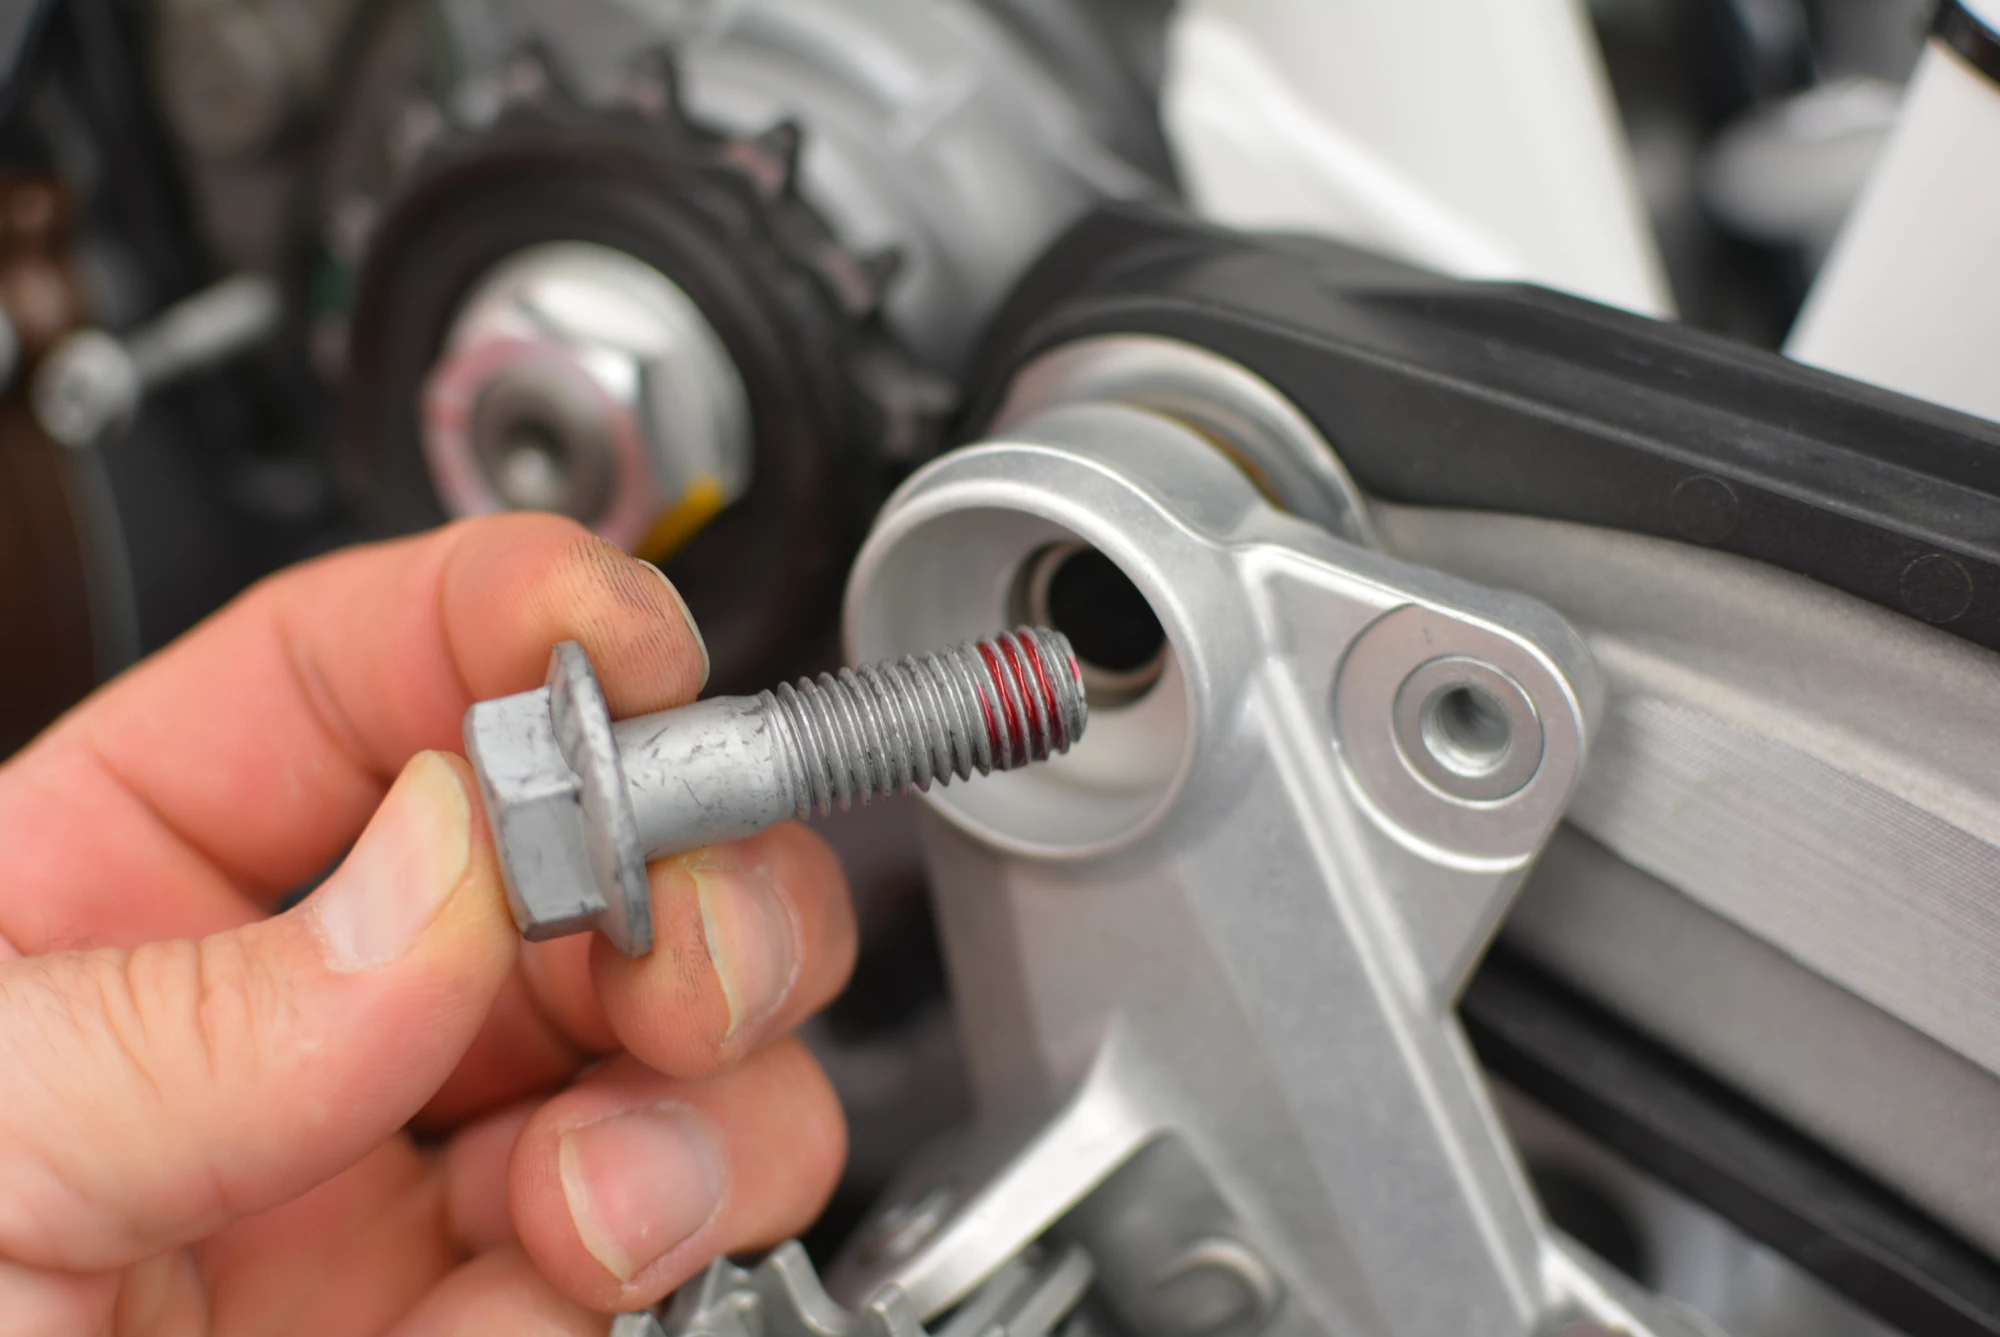
Big believers in the proper torque specs. Along with either anti seize (in the right places) or Loctite© (in the right places), these tools allow us to deliver a bike with full confidence that the customer will enjoy many miles of trouble free operation.

SUSPENSION
The first thing to get stripped off and sent out is always the suspension. This requires shipping, a bit of time for the rework and coating, and then the shipment back to be placed in a hold pattern until such time that they are slated for installation.
In our case, we contacted Alex Martens, of Konflict Motorsports to go over our wants and needs for this build. Luckily, right about this time Alex was developing his 300mm travel kit for the 701 consisting of lengthening the front forks and the addition of an custom adapted Tractive KTM 690 rear shock.
Using pieces of the KTM 690 linkage and with a slight modification to the body, Alex took a rally racing shock that was designed for the KTM and made it work with our Husky 701 project bike, effectively removing the weakest link on that bike; The limited suspension travel. If you even want to dream of attacking the desert at race speeds on this bike you have no choice but to opt for this kit.
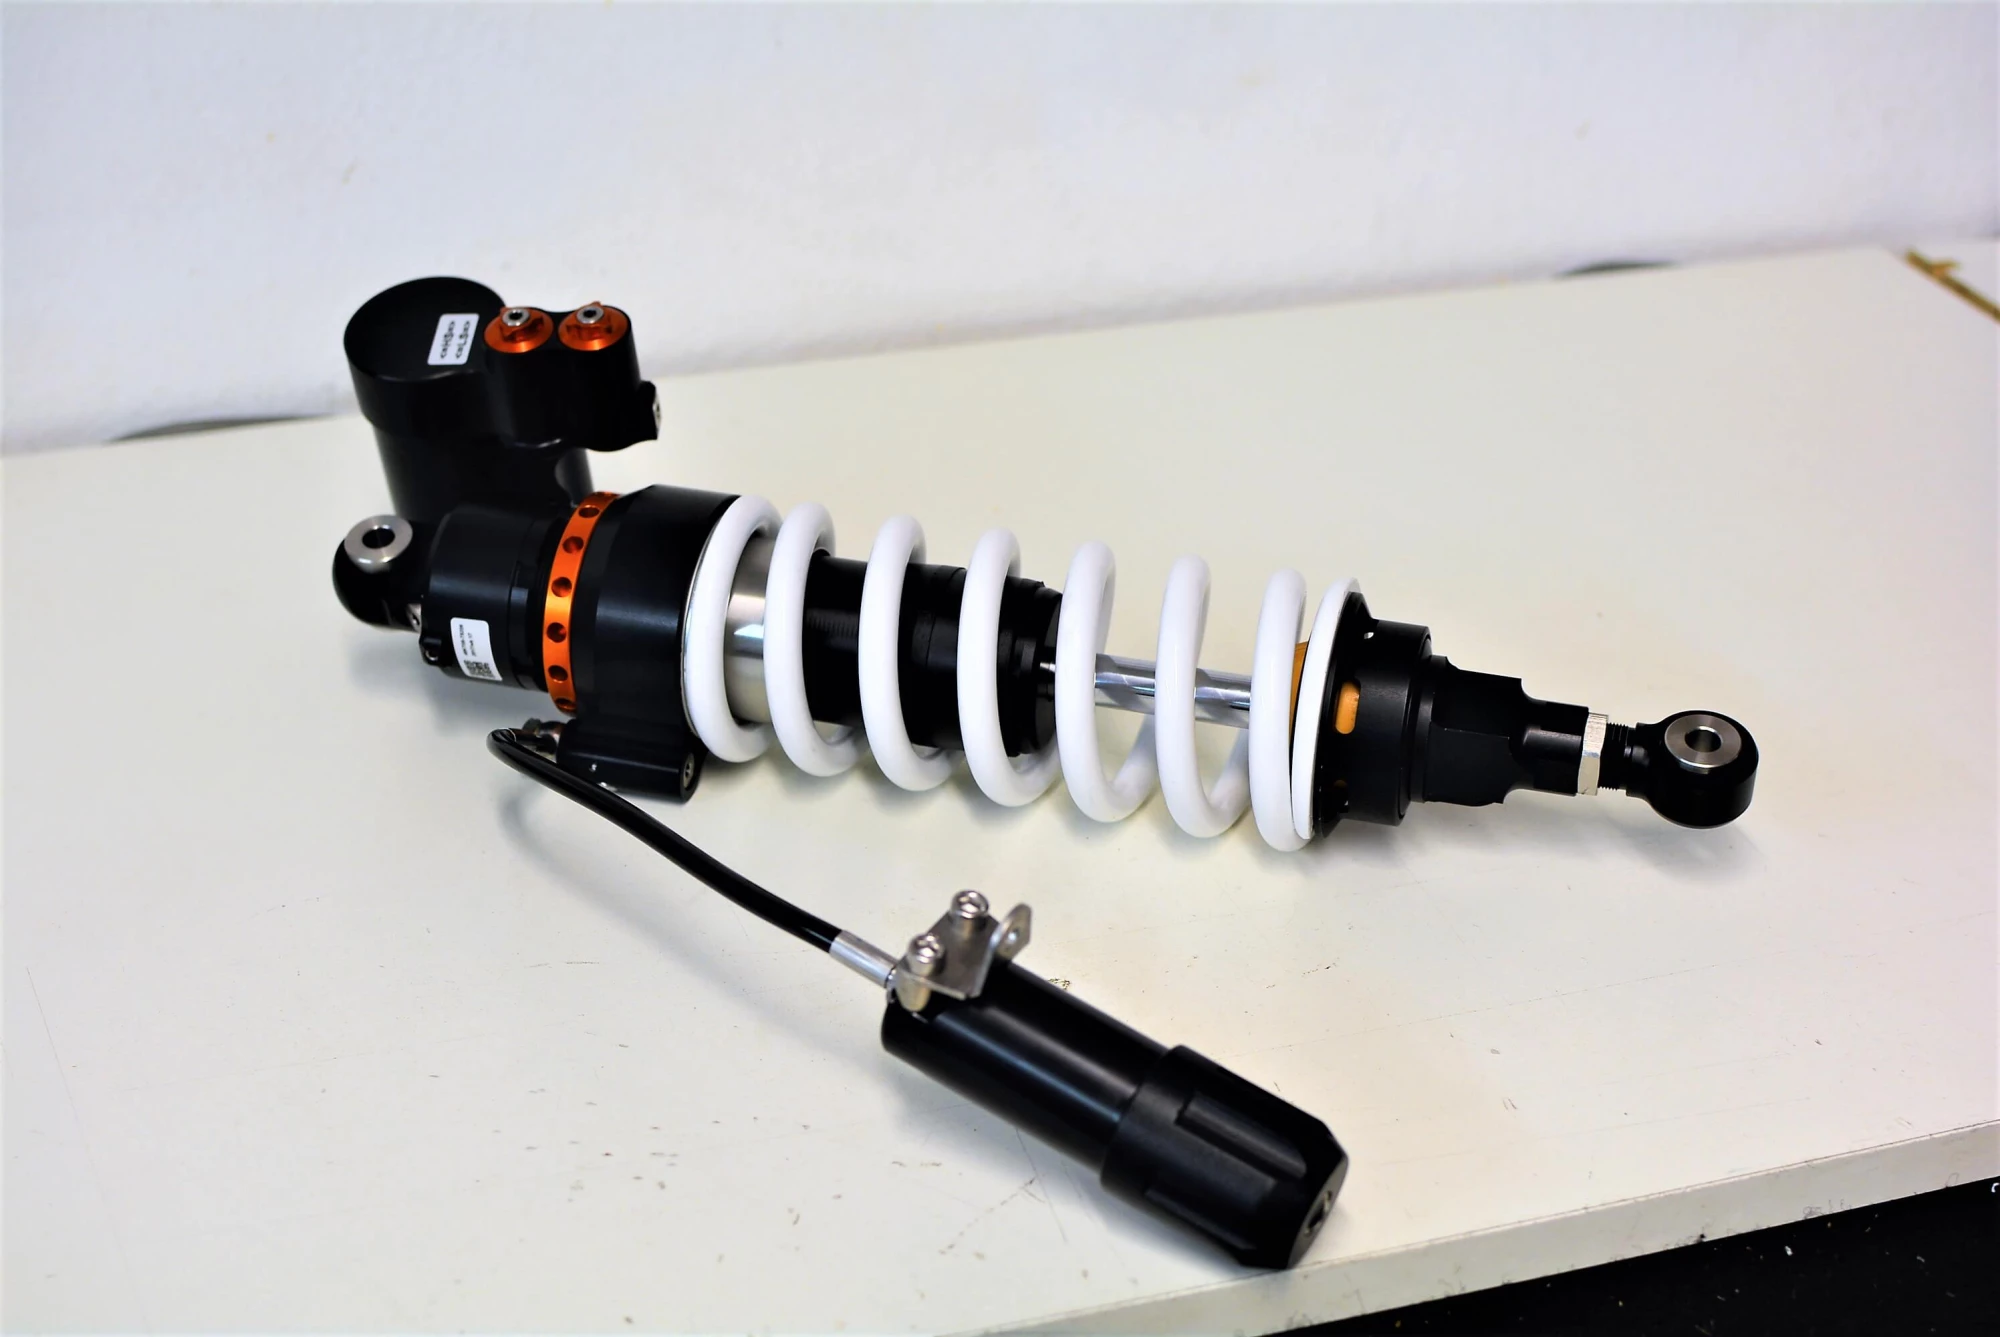
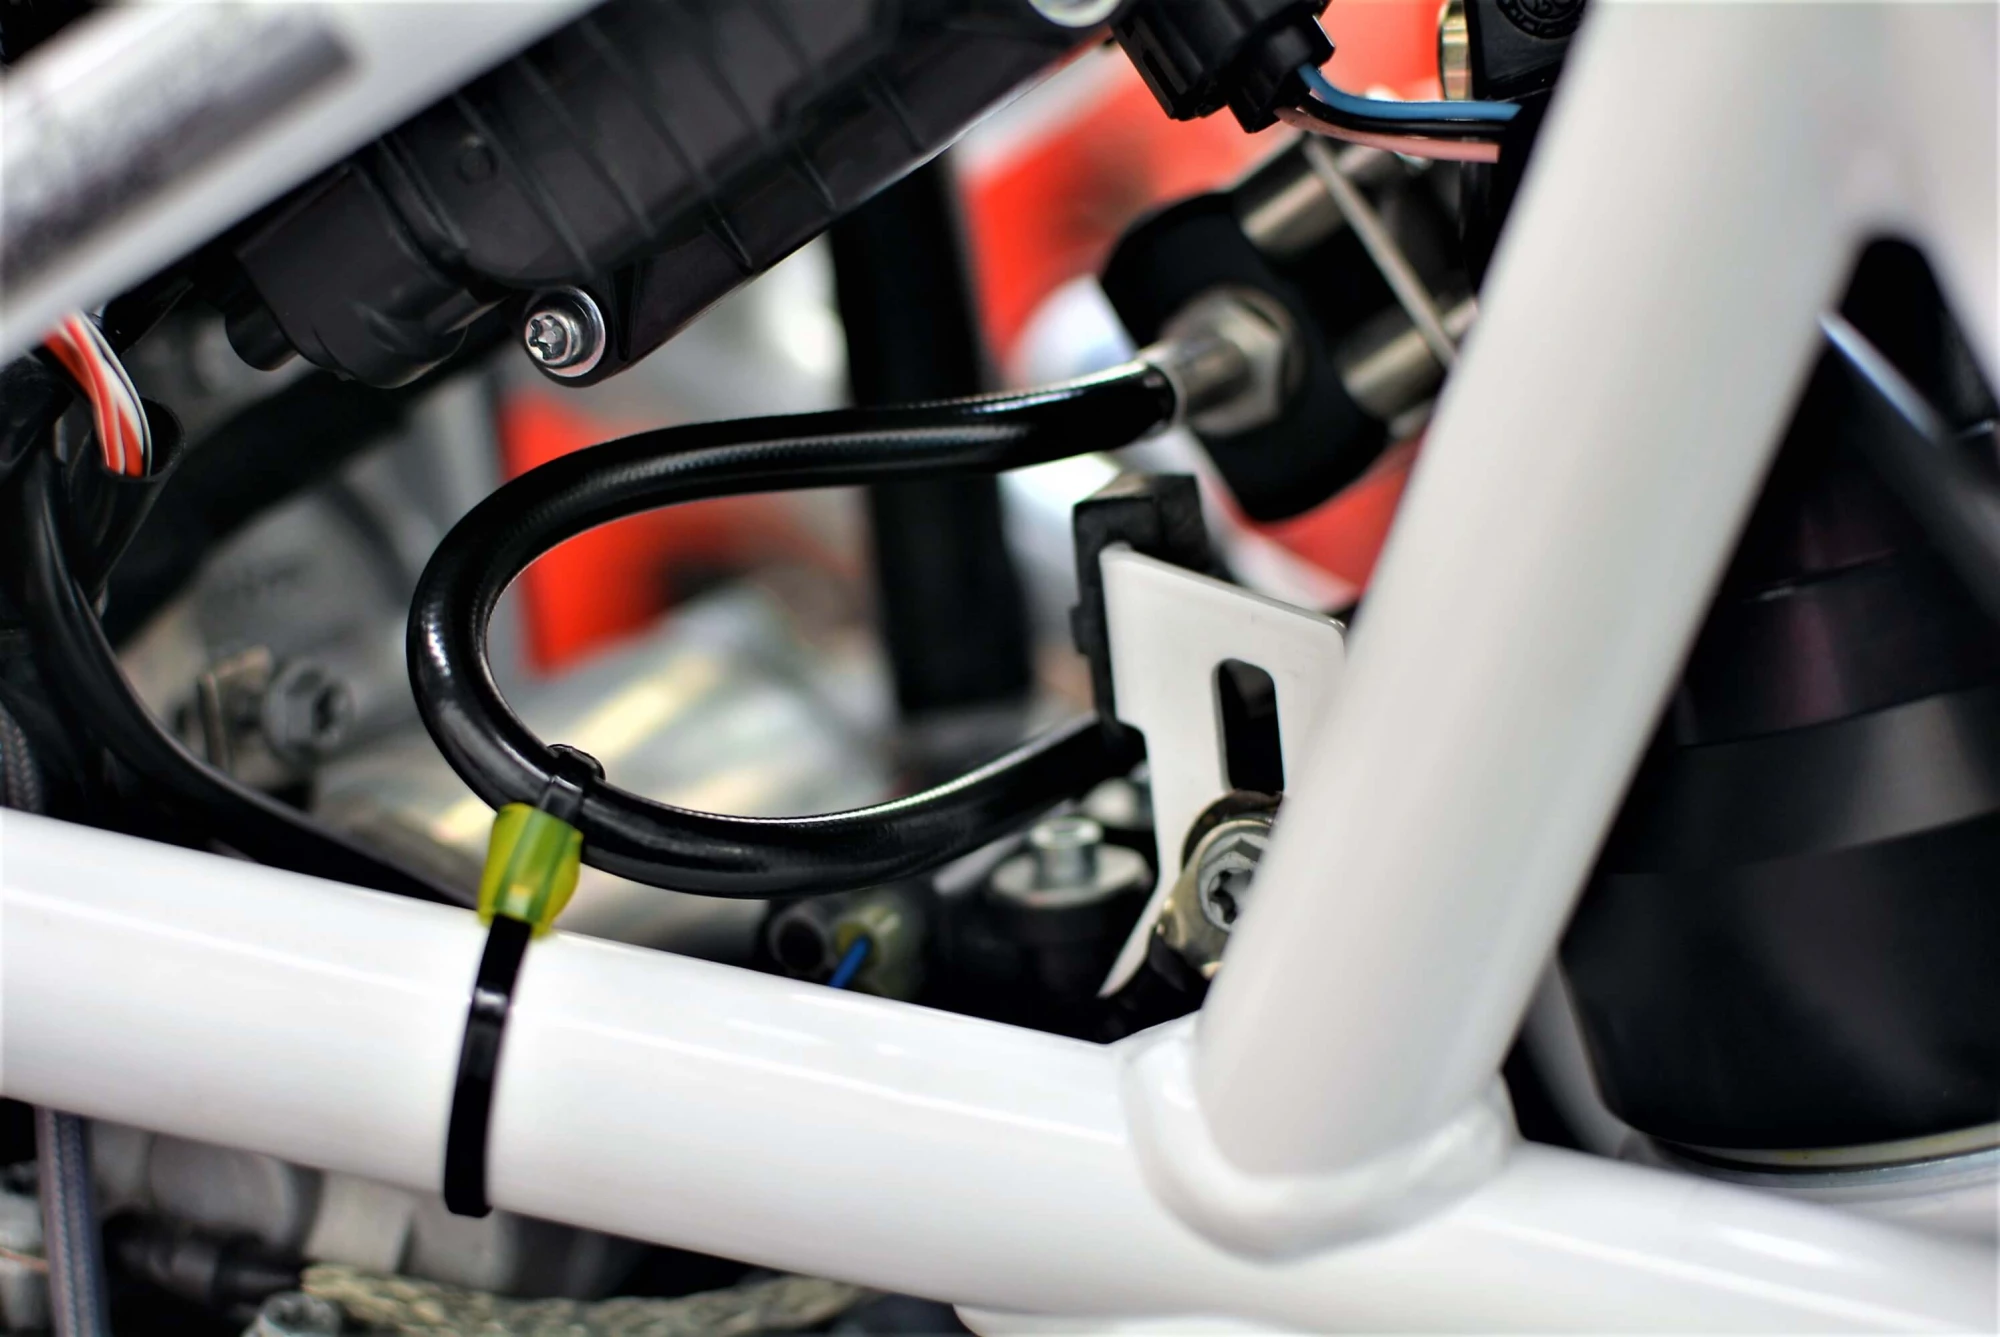
Konflict also added a remote spring preload adjuster to the mix which is a bit more important on this bike. Because the fuel tank is so rear biased, the balance of the chassis is constantly shifting to the front as fuel is consumed and with some quick adjustments the balance can be regained for a more consistent feel. It is also quite helpful when our soft luggage has been strapped on. Further upsetting the overall balance of the already rear biased machine. In addition, once the full rally kit is installed the stock preload adjuster on the 701 is almost impossible to access, further helping in the decision to opt for the remote adjuster.
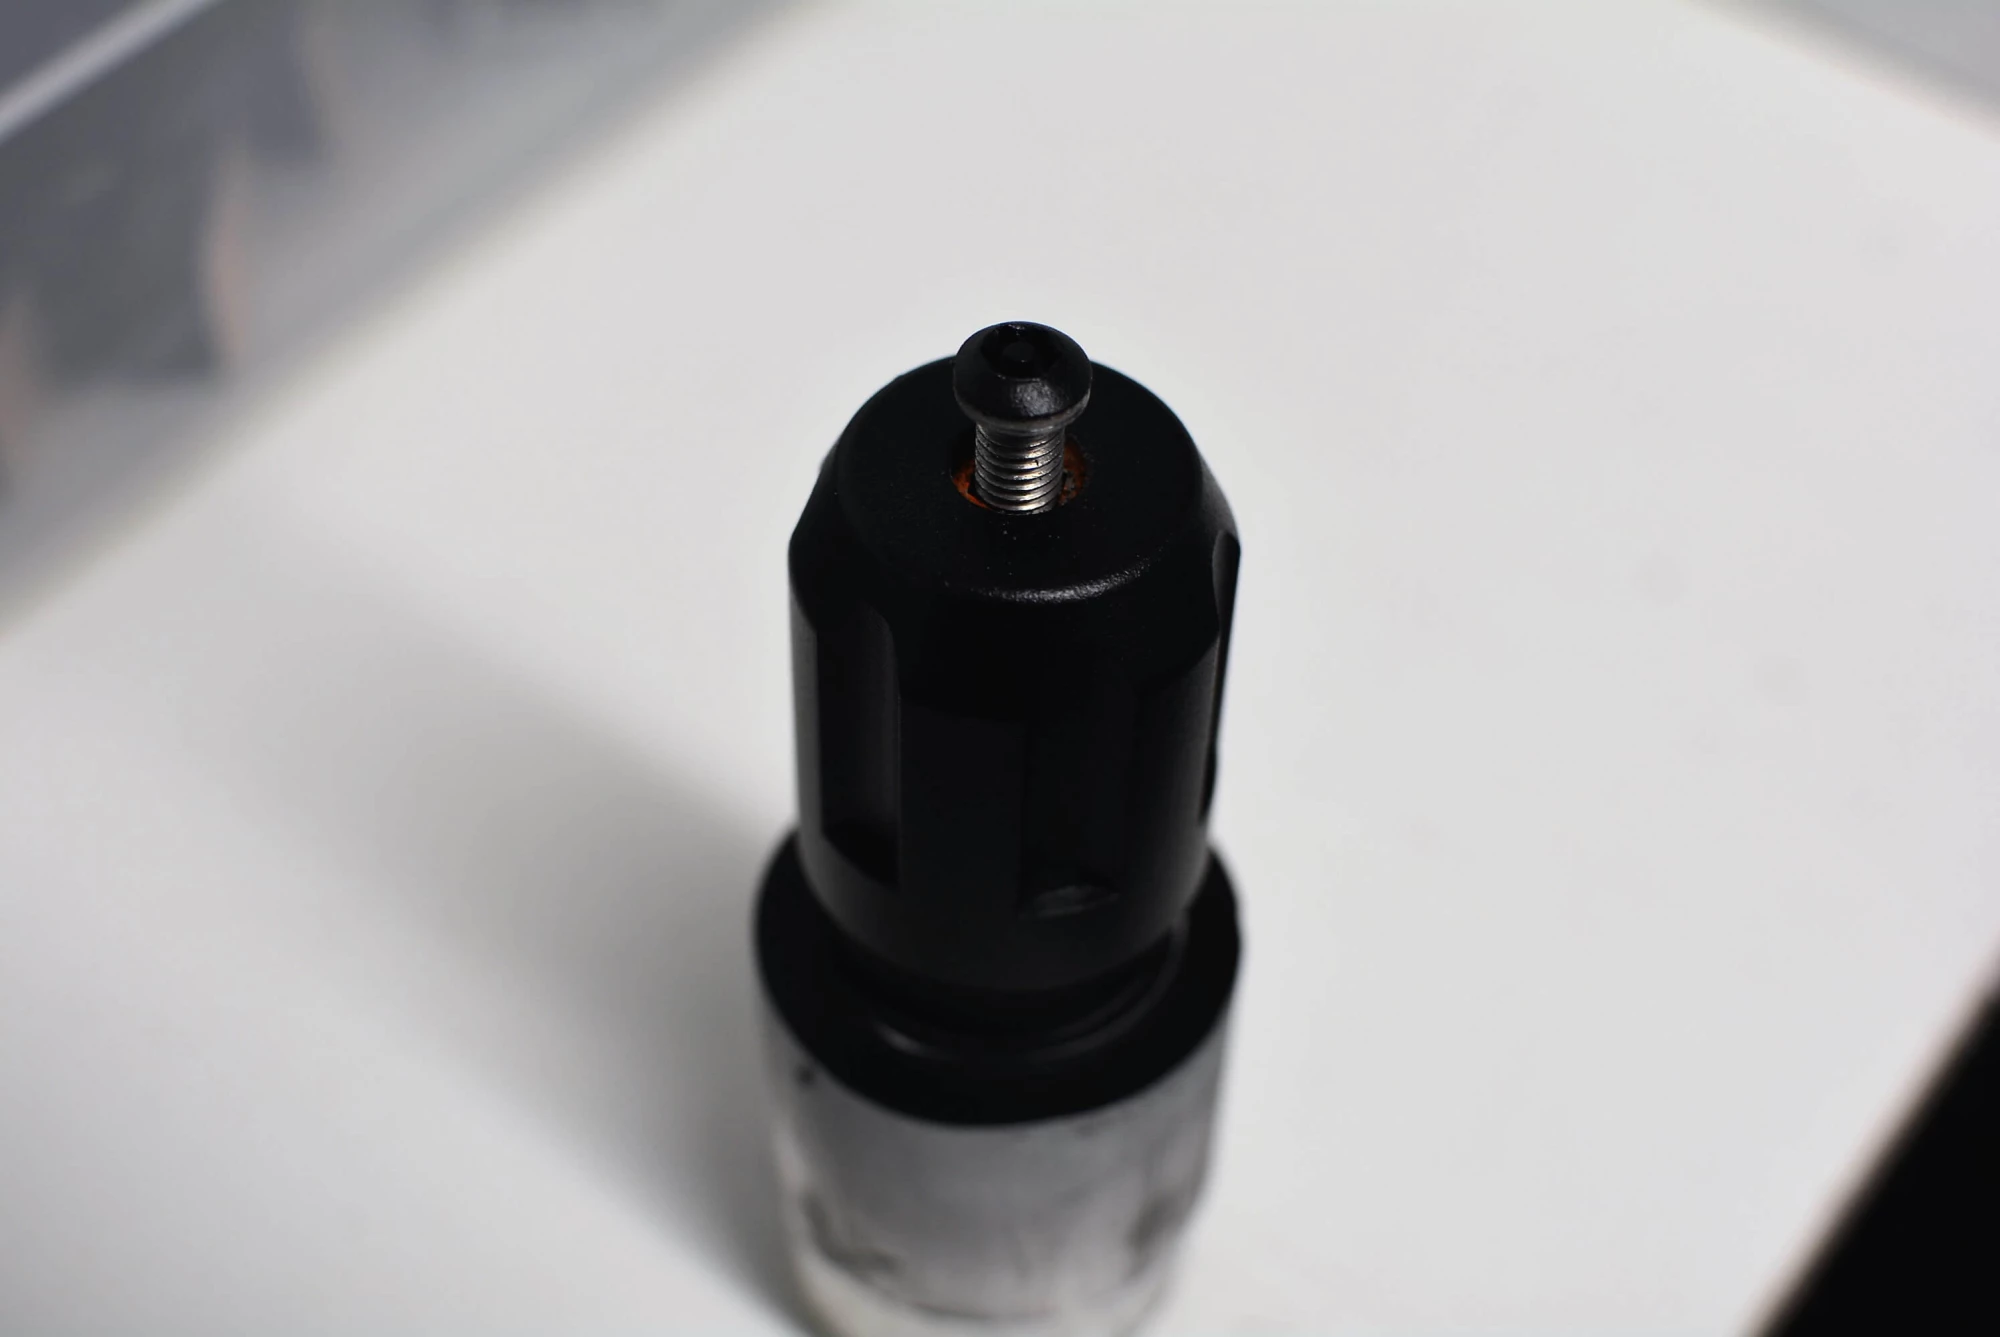
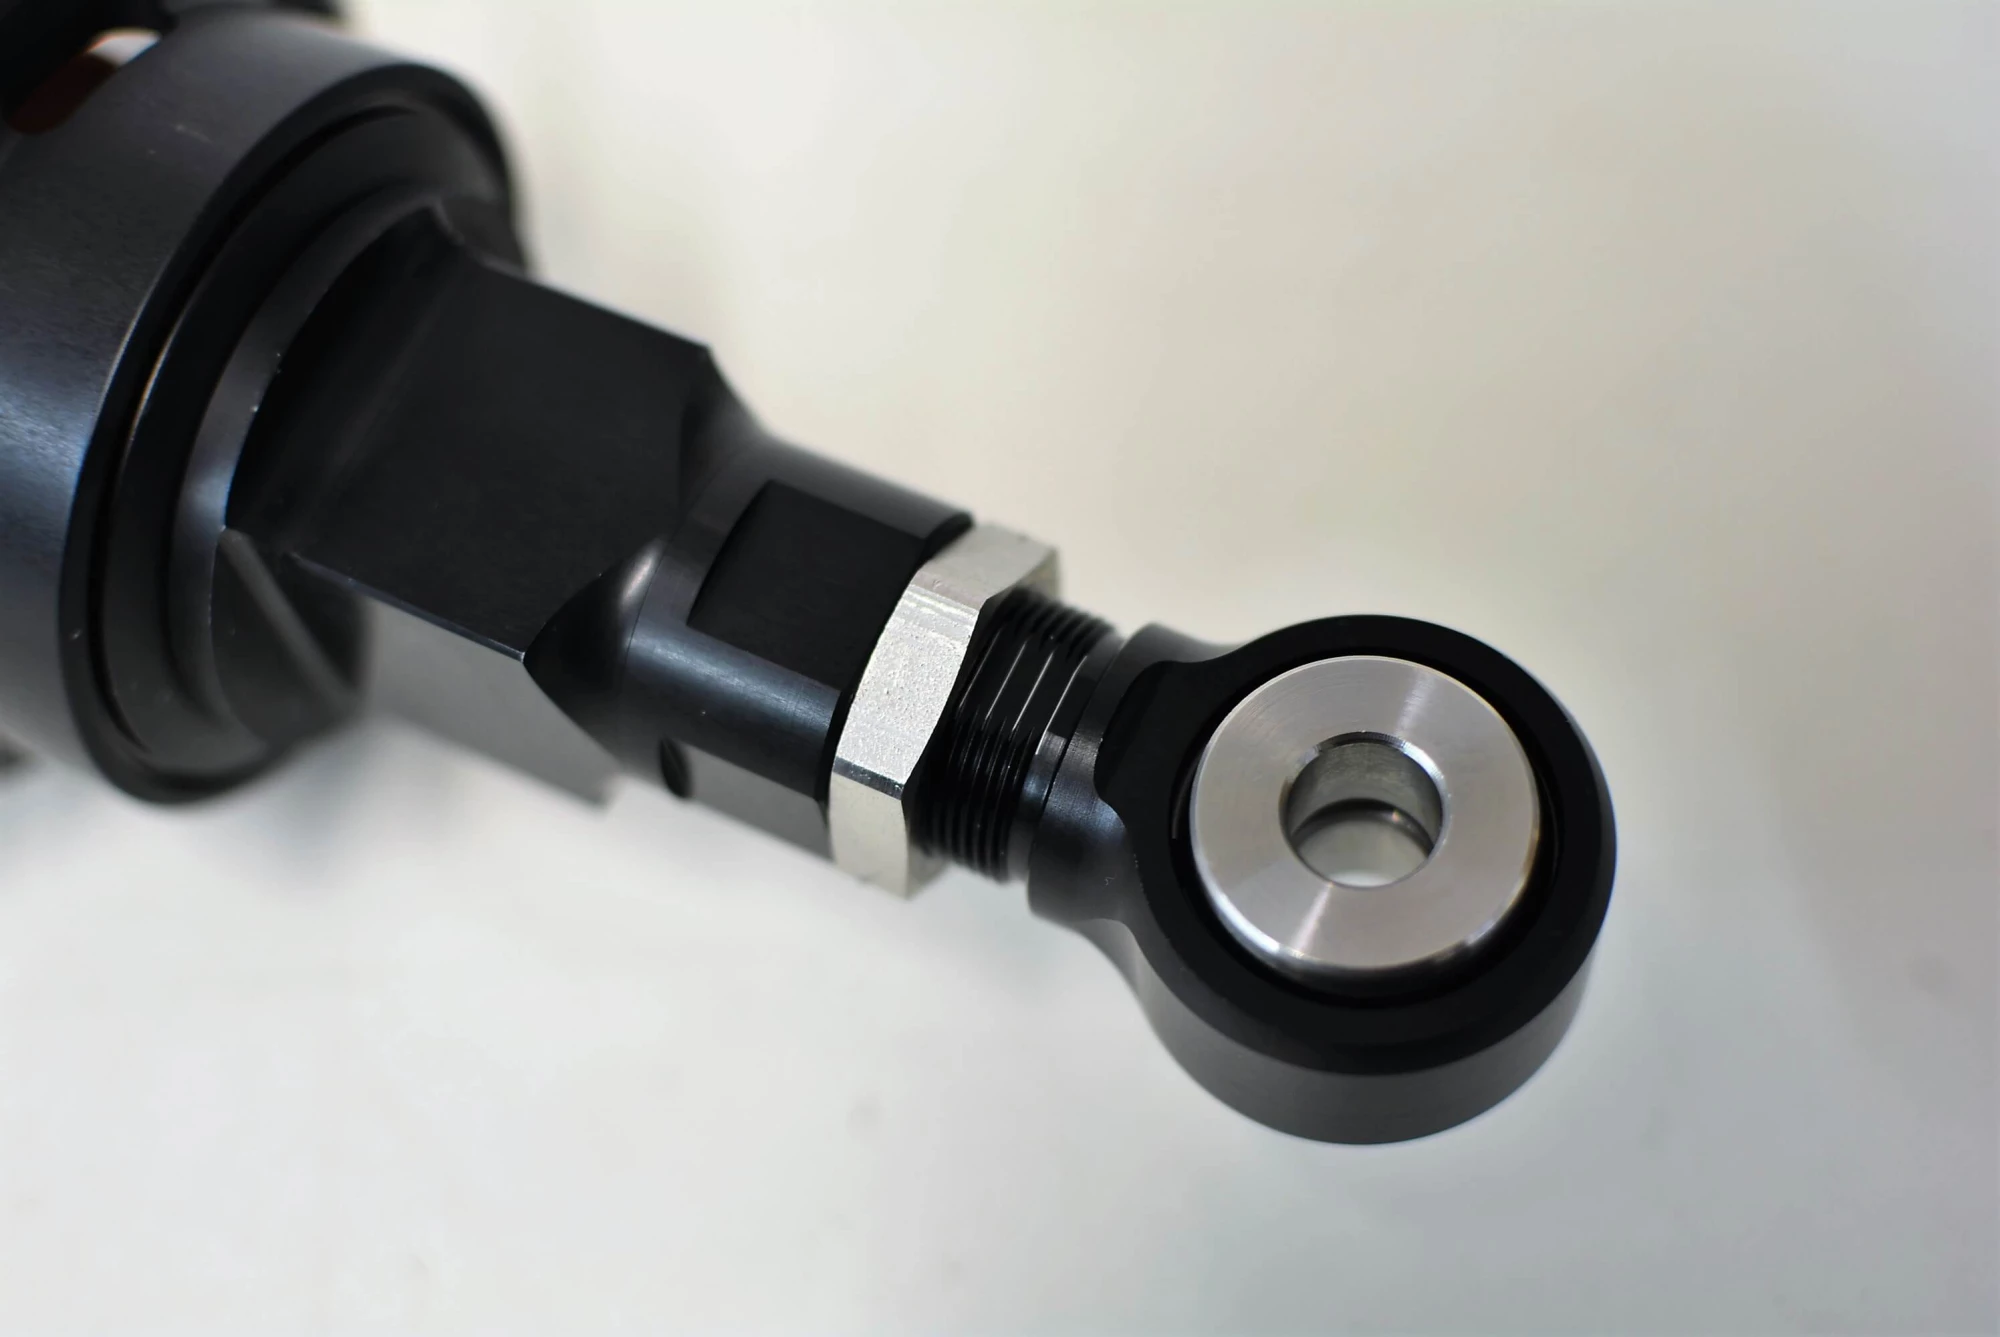
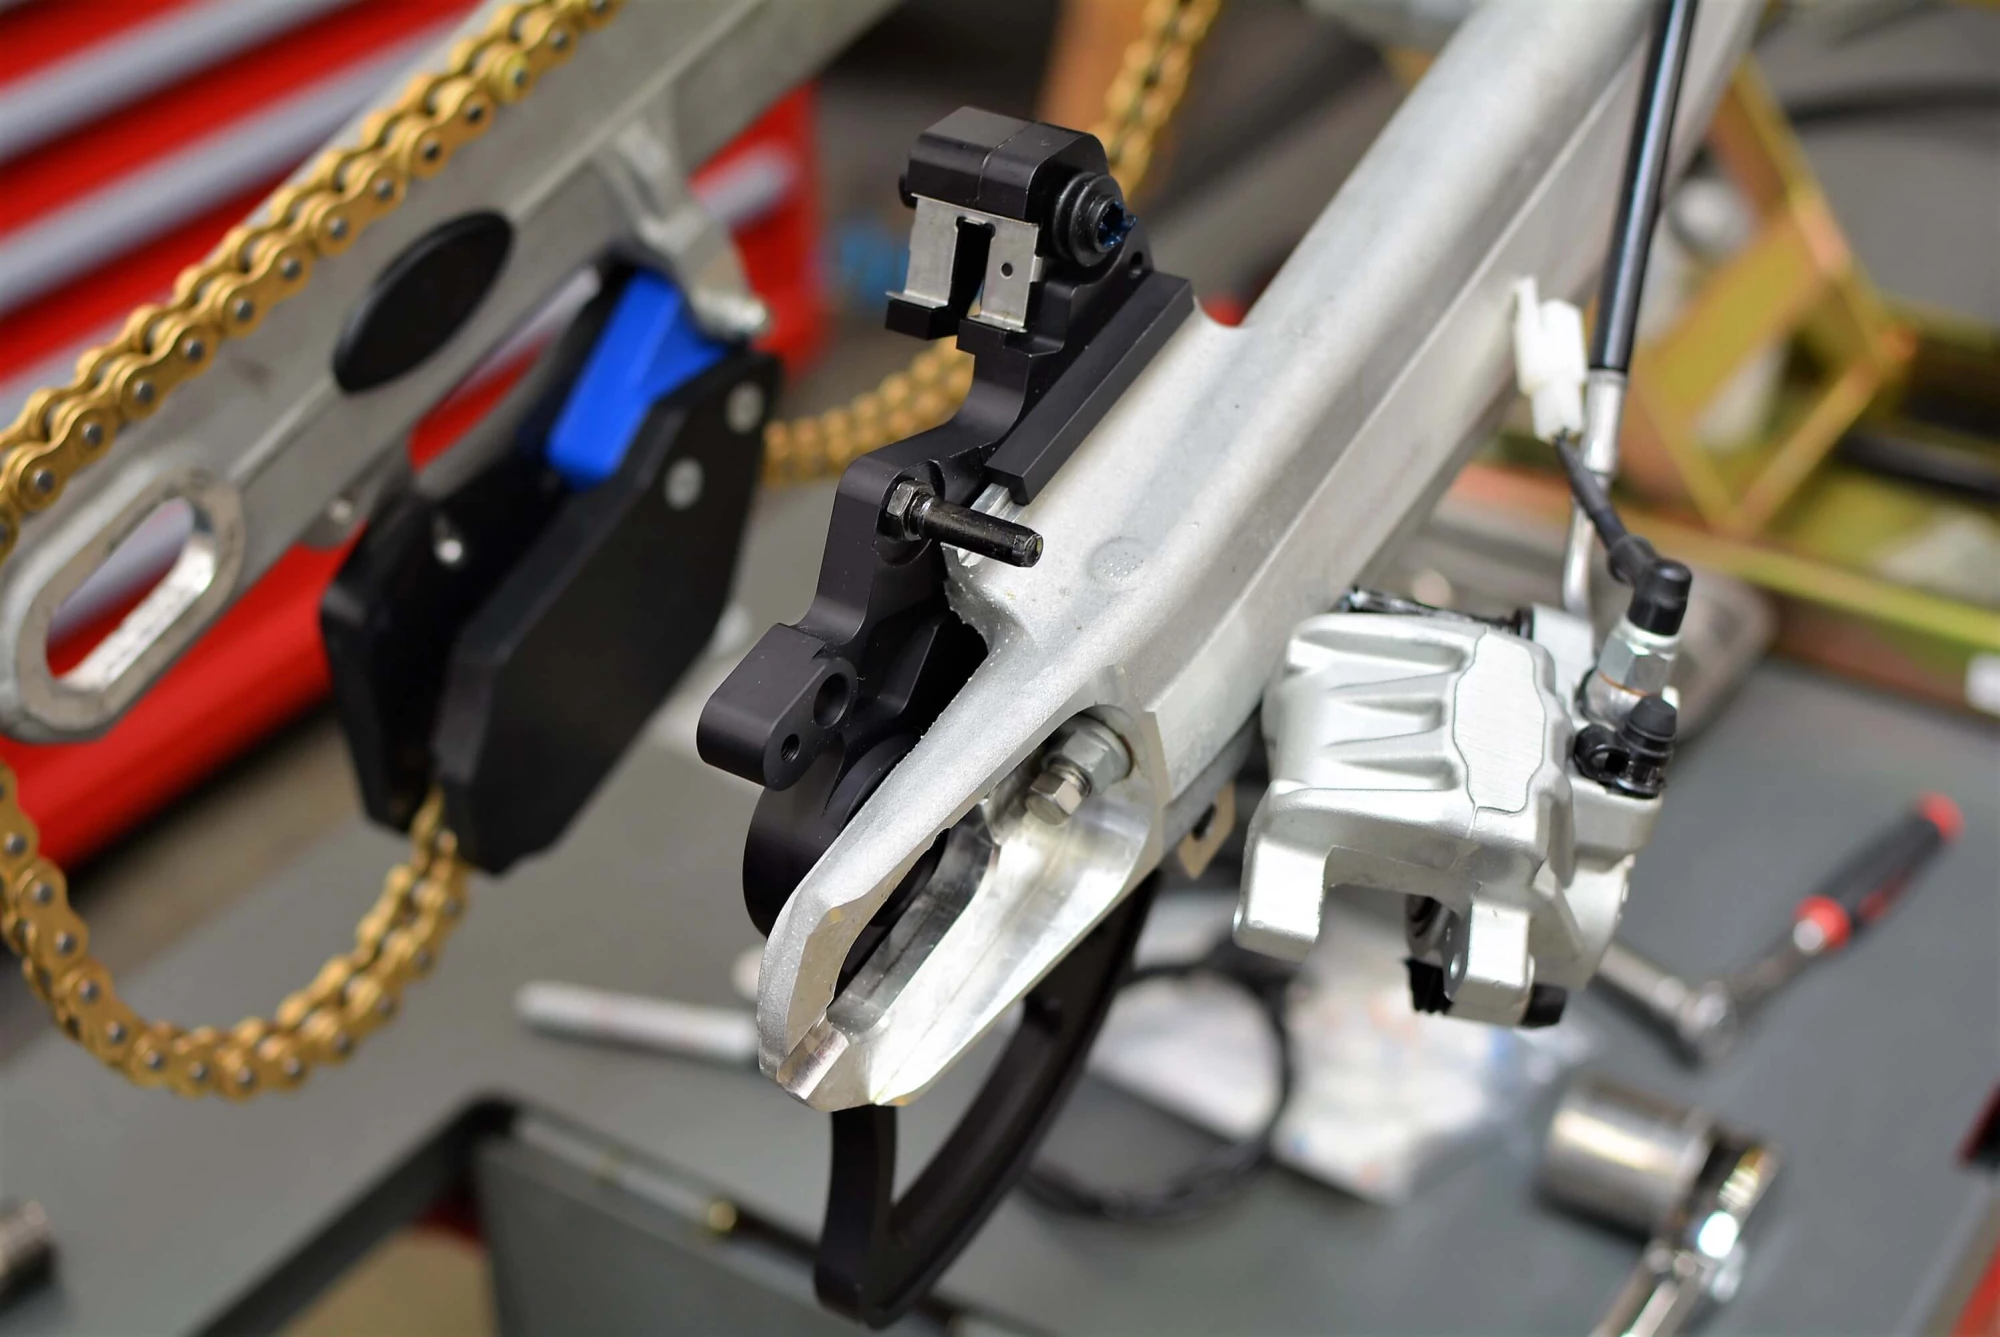
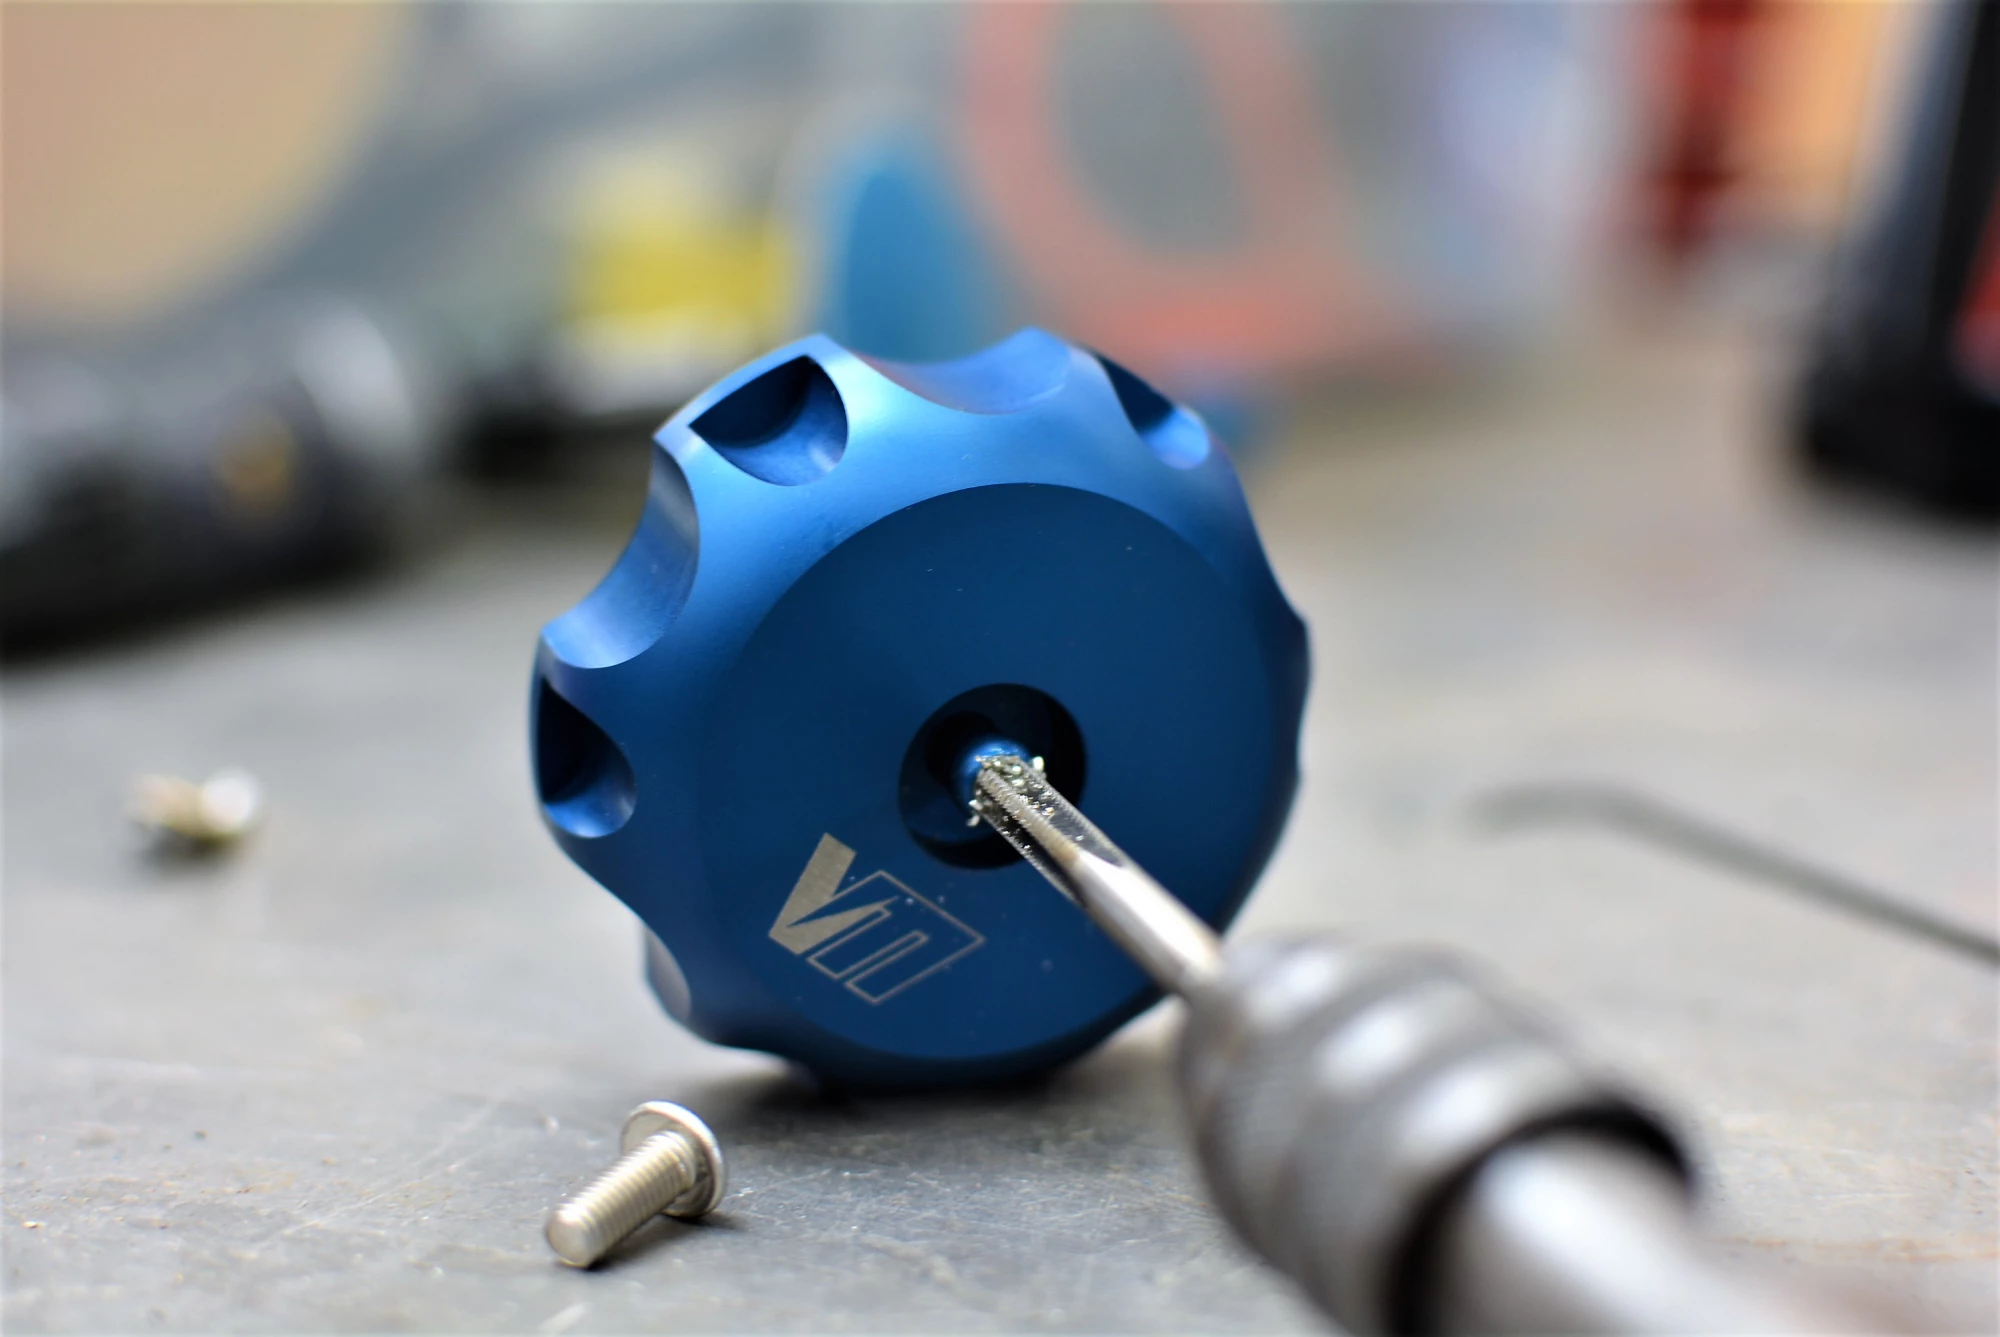
In this picture it was attached to the stock shock for fitment purposes, but then migrated to the Tractive shock once it was available. To be honest we just couldn't stand the bright orange knob so a tool was machined and it was sent for texture black powder-coat.
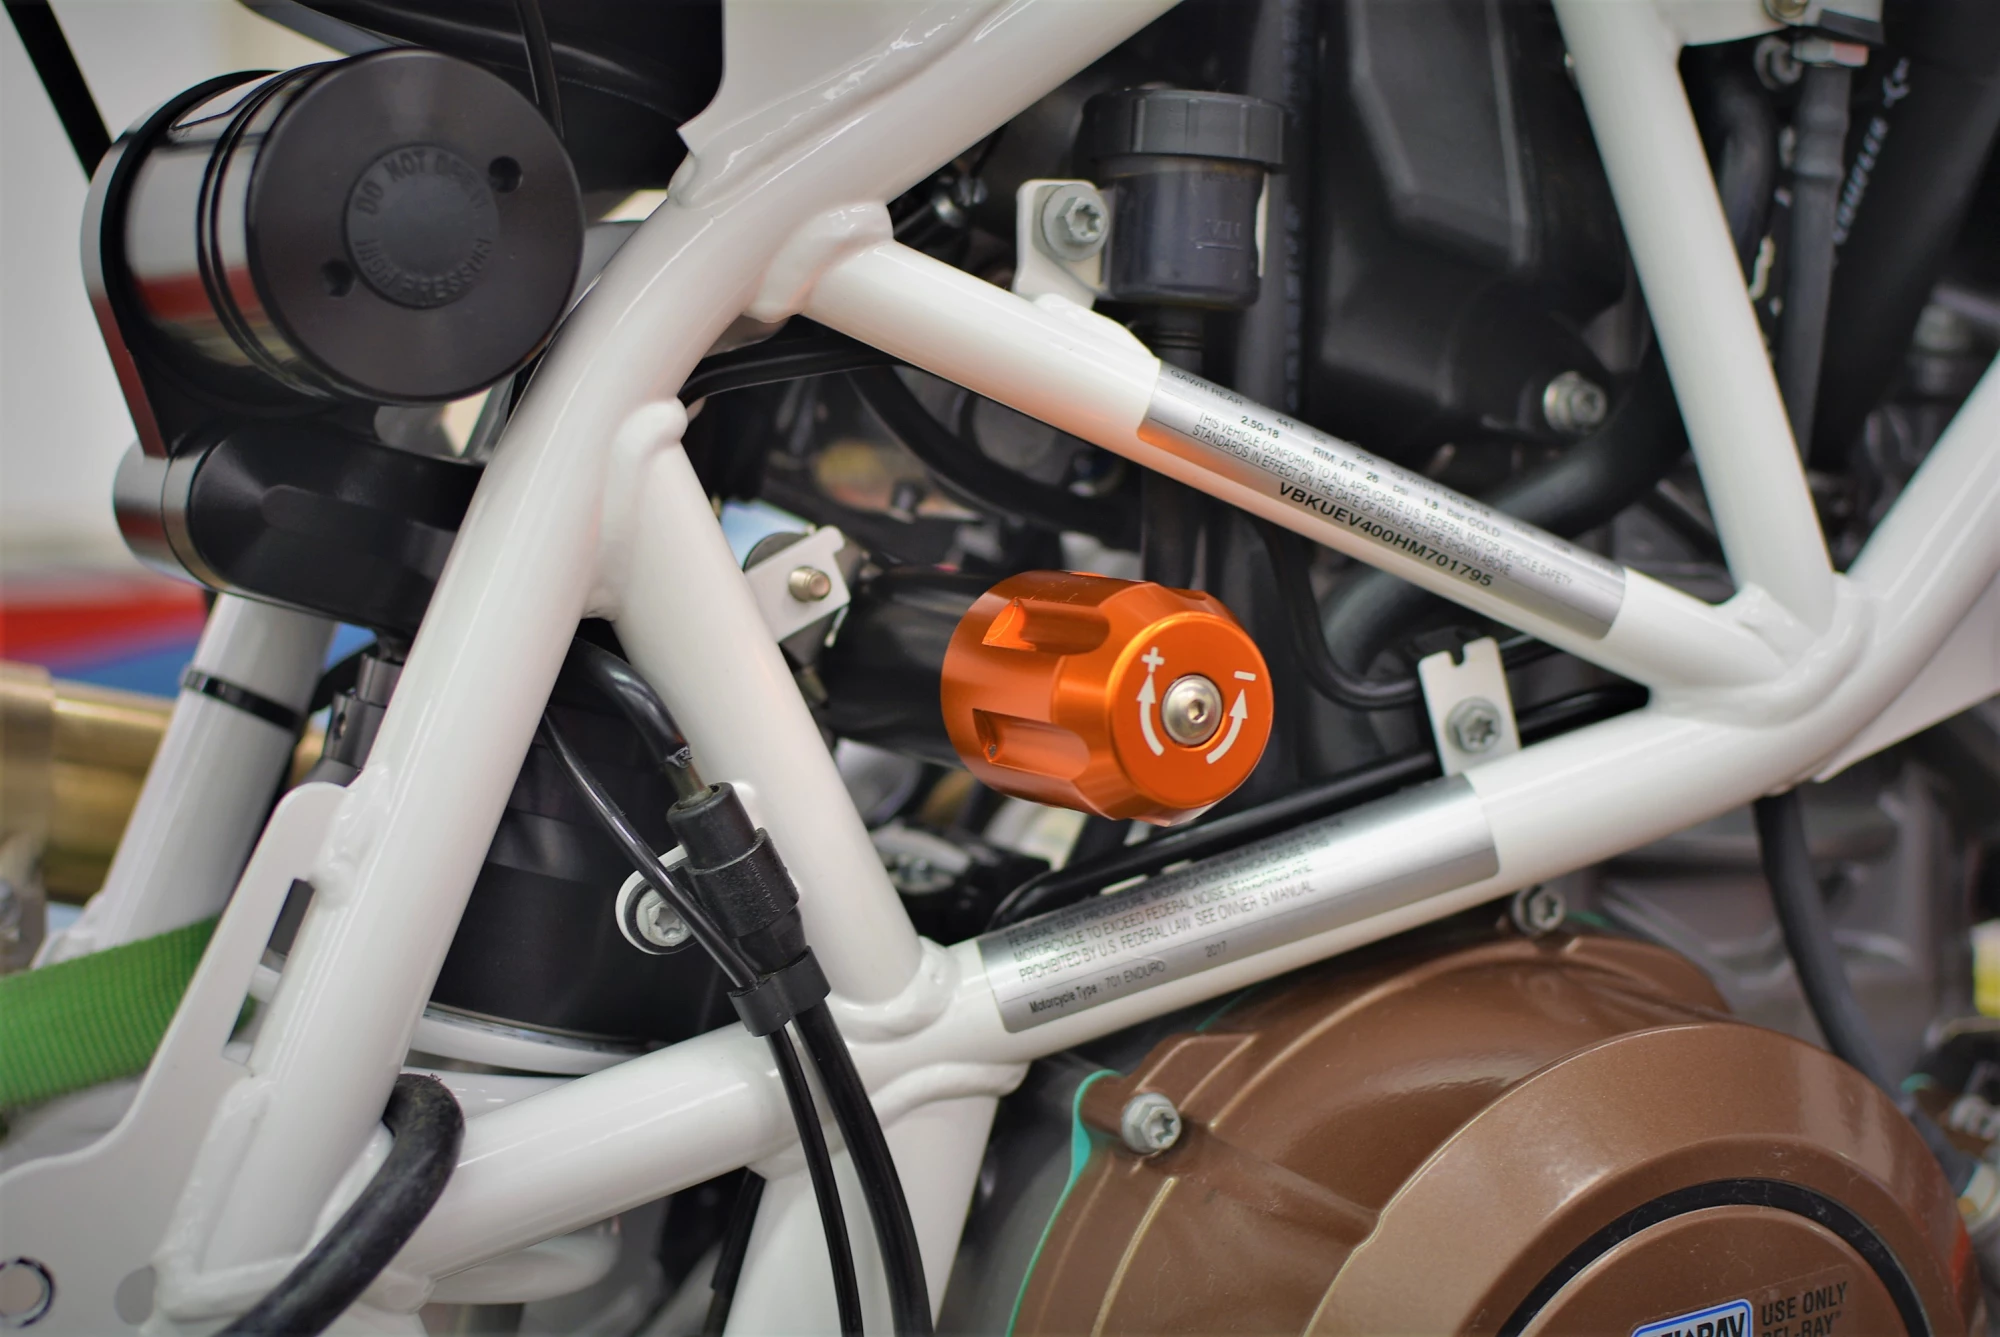
A small tool was machined to preserve the anodize on the inside for the grease and seals when it was powdercoated but the orange anodize just had to go on this particular build.
The rear adjuster system is a tricky fit and takes some finesse to get it positioned correctly but once done, owners of a bike like this will be happy when it comes time to make some necessary adjustments. This method of threading a zip tie through a small piece of hose to create a flexible mounting point had been one of my favorites since my years spent prepping off road race cars for Baja. Simple, effective and clean.
An adjustable lower pivot allowed us to even further adjust the balance and ride height of the bike. We found that with careful use, this could be adjusted on the bike without removing the hybrid 690/701 linkage system. With the extended travel, this 701 is not for the feint of inseam, so careful adjustment allowed us to get the balance just right.
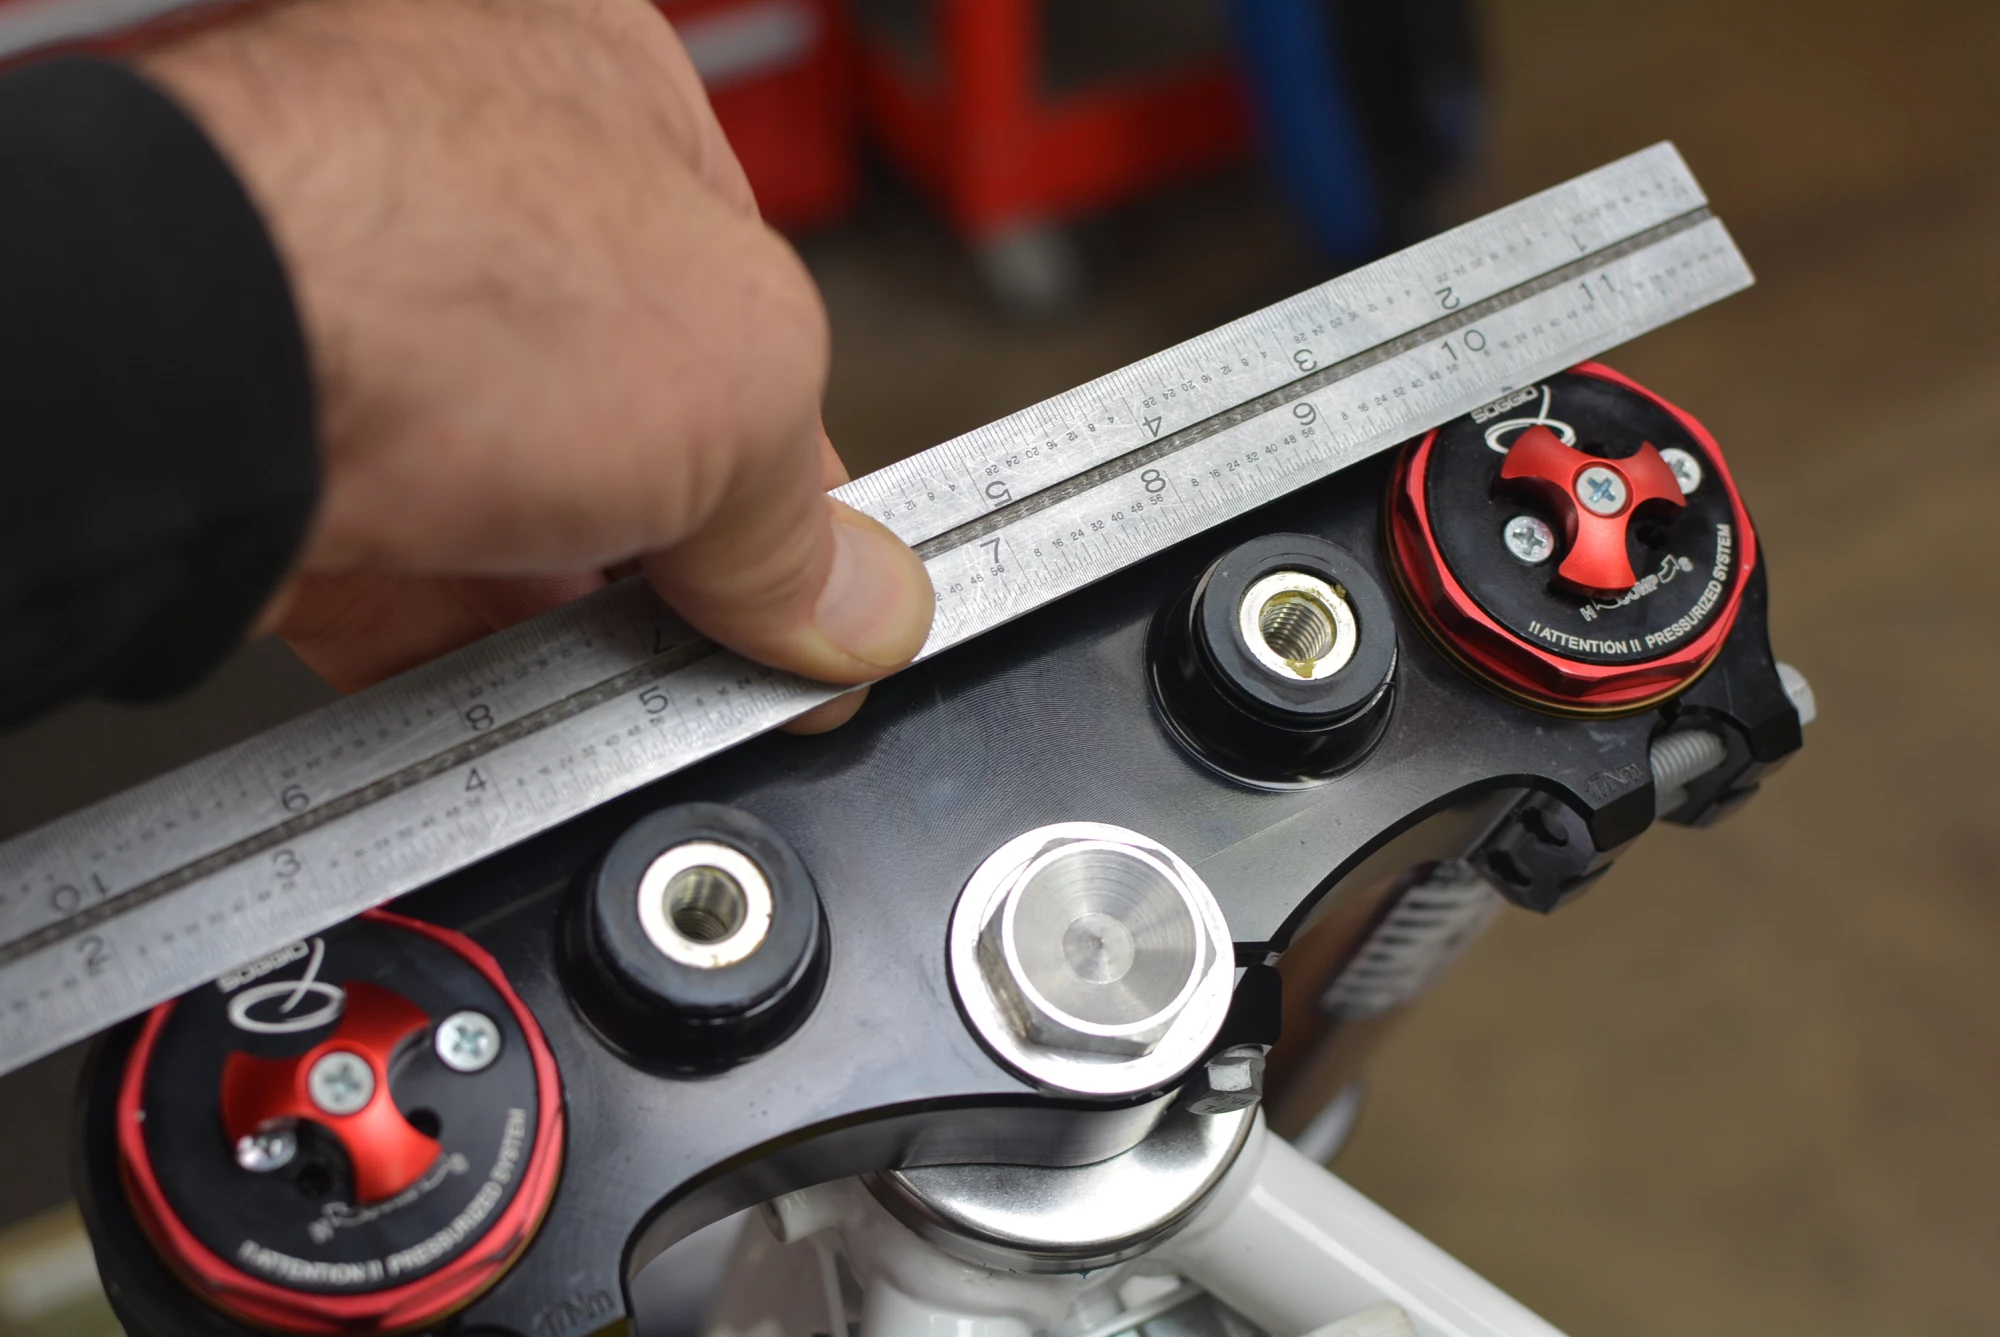
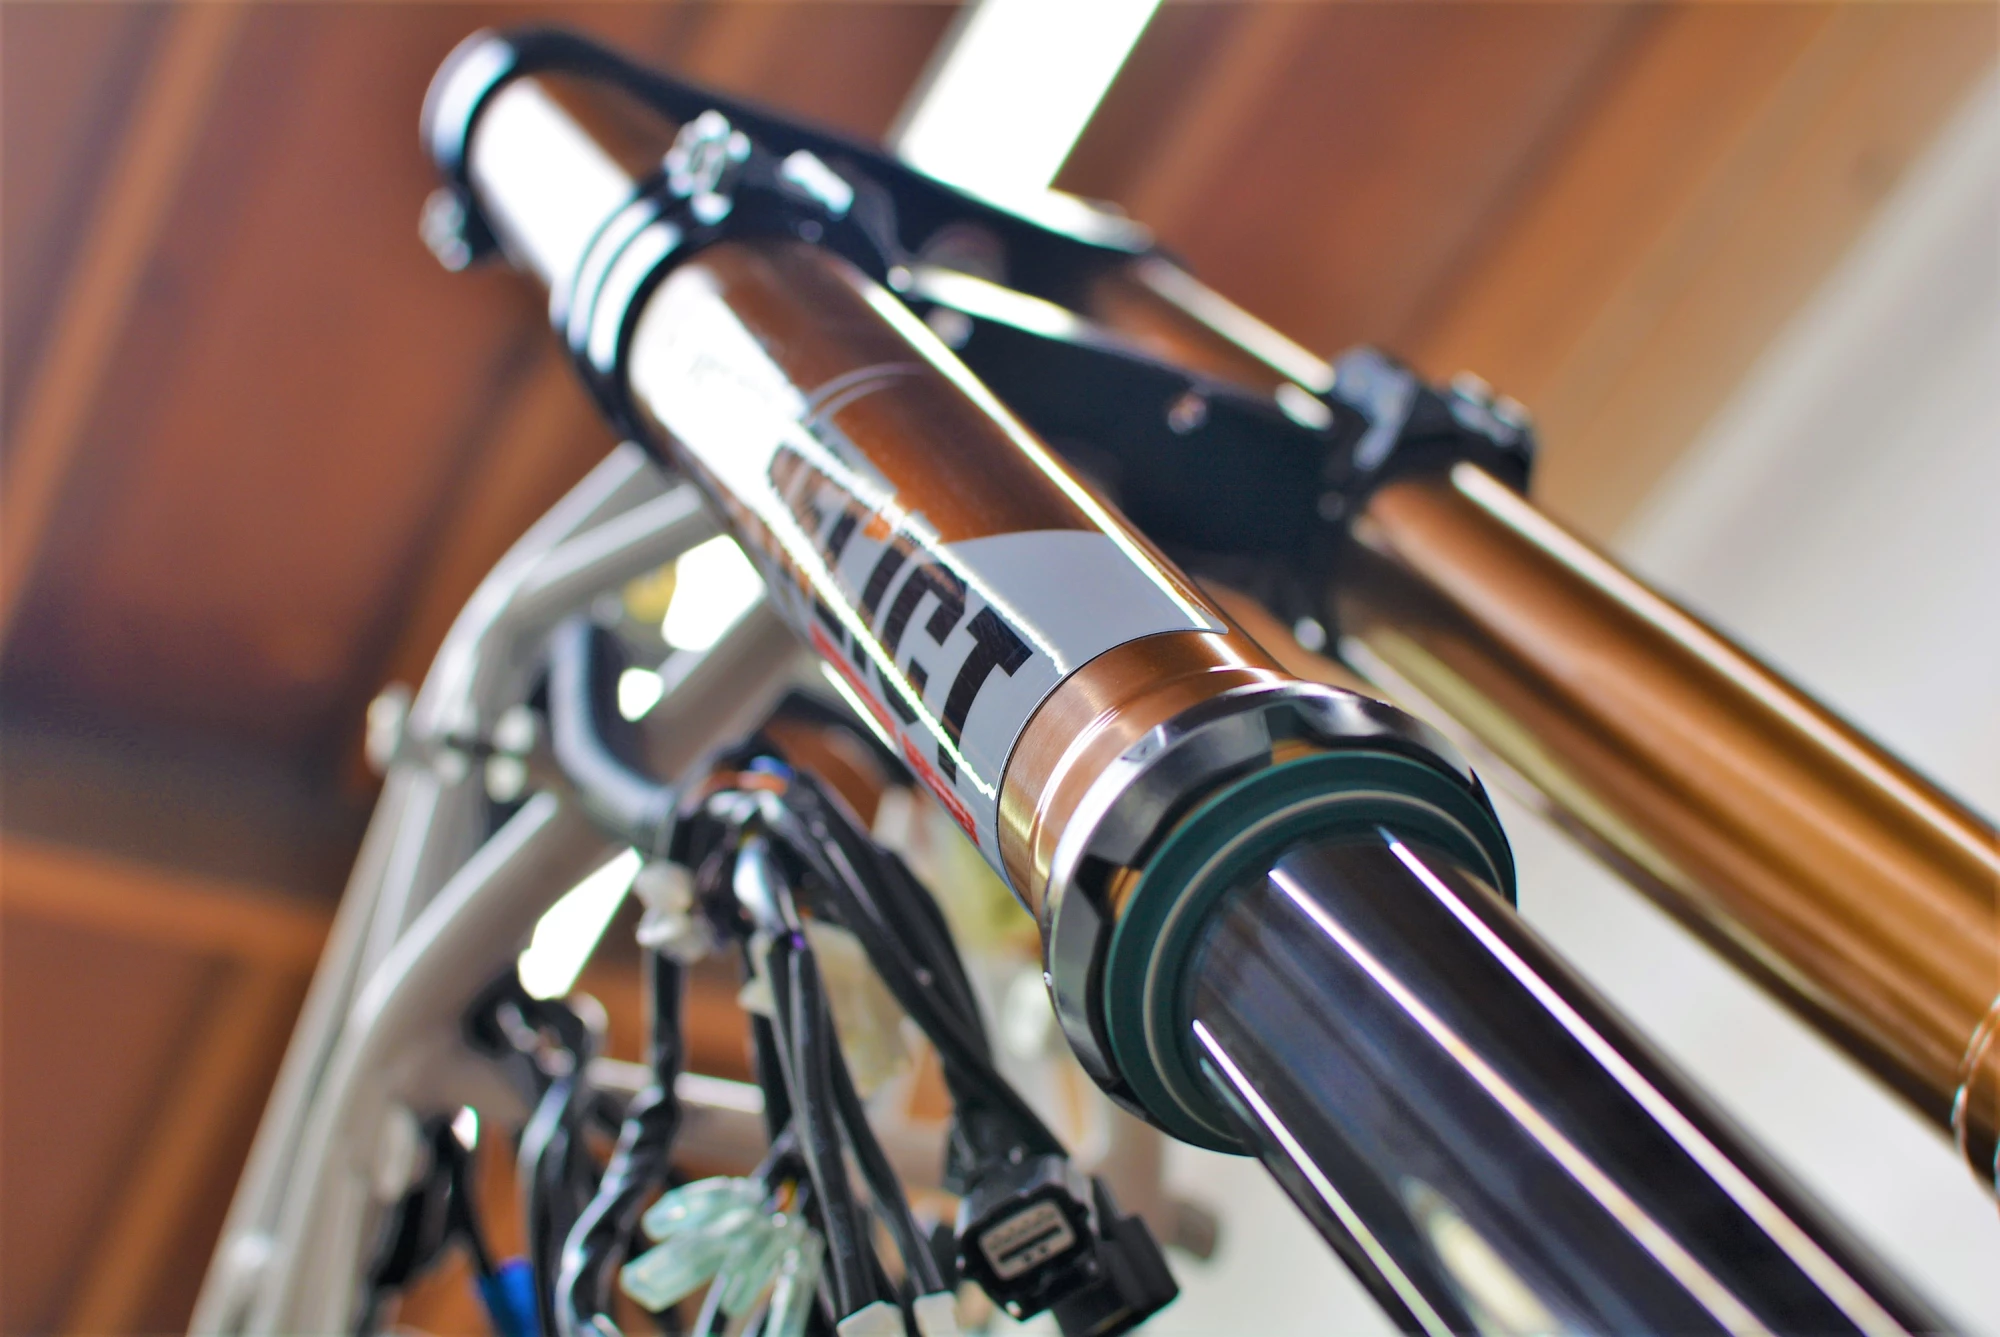
Moving to the front we chose a triple dose of perfection. Dal Soggio cartridges from Italy, Kashima coating from Japan, and DLC (Diamond Like Coating) from the U.S. on the fork legs. We spared no piece of this puzzle and wanted each and every part to perform as flawlessly as it possibly could without compromise.
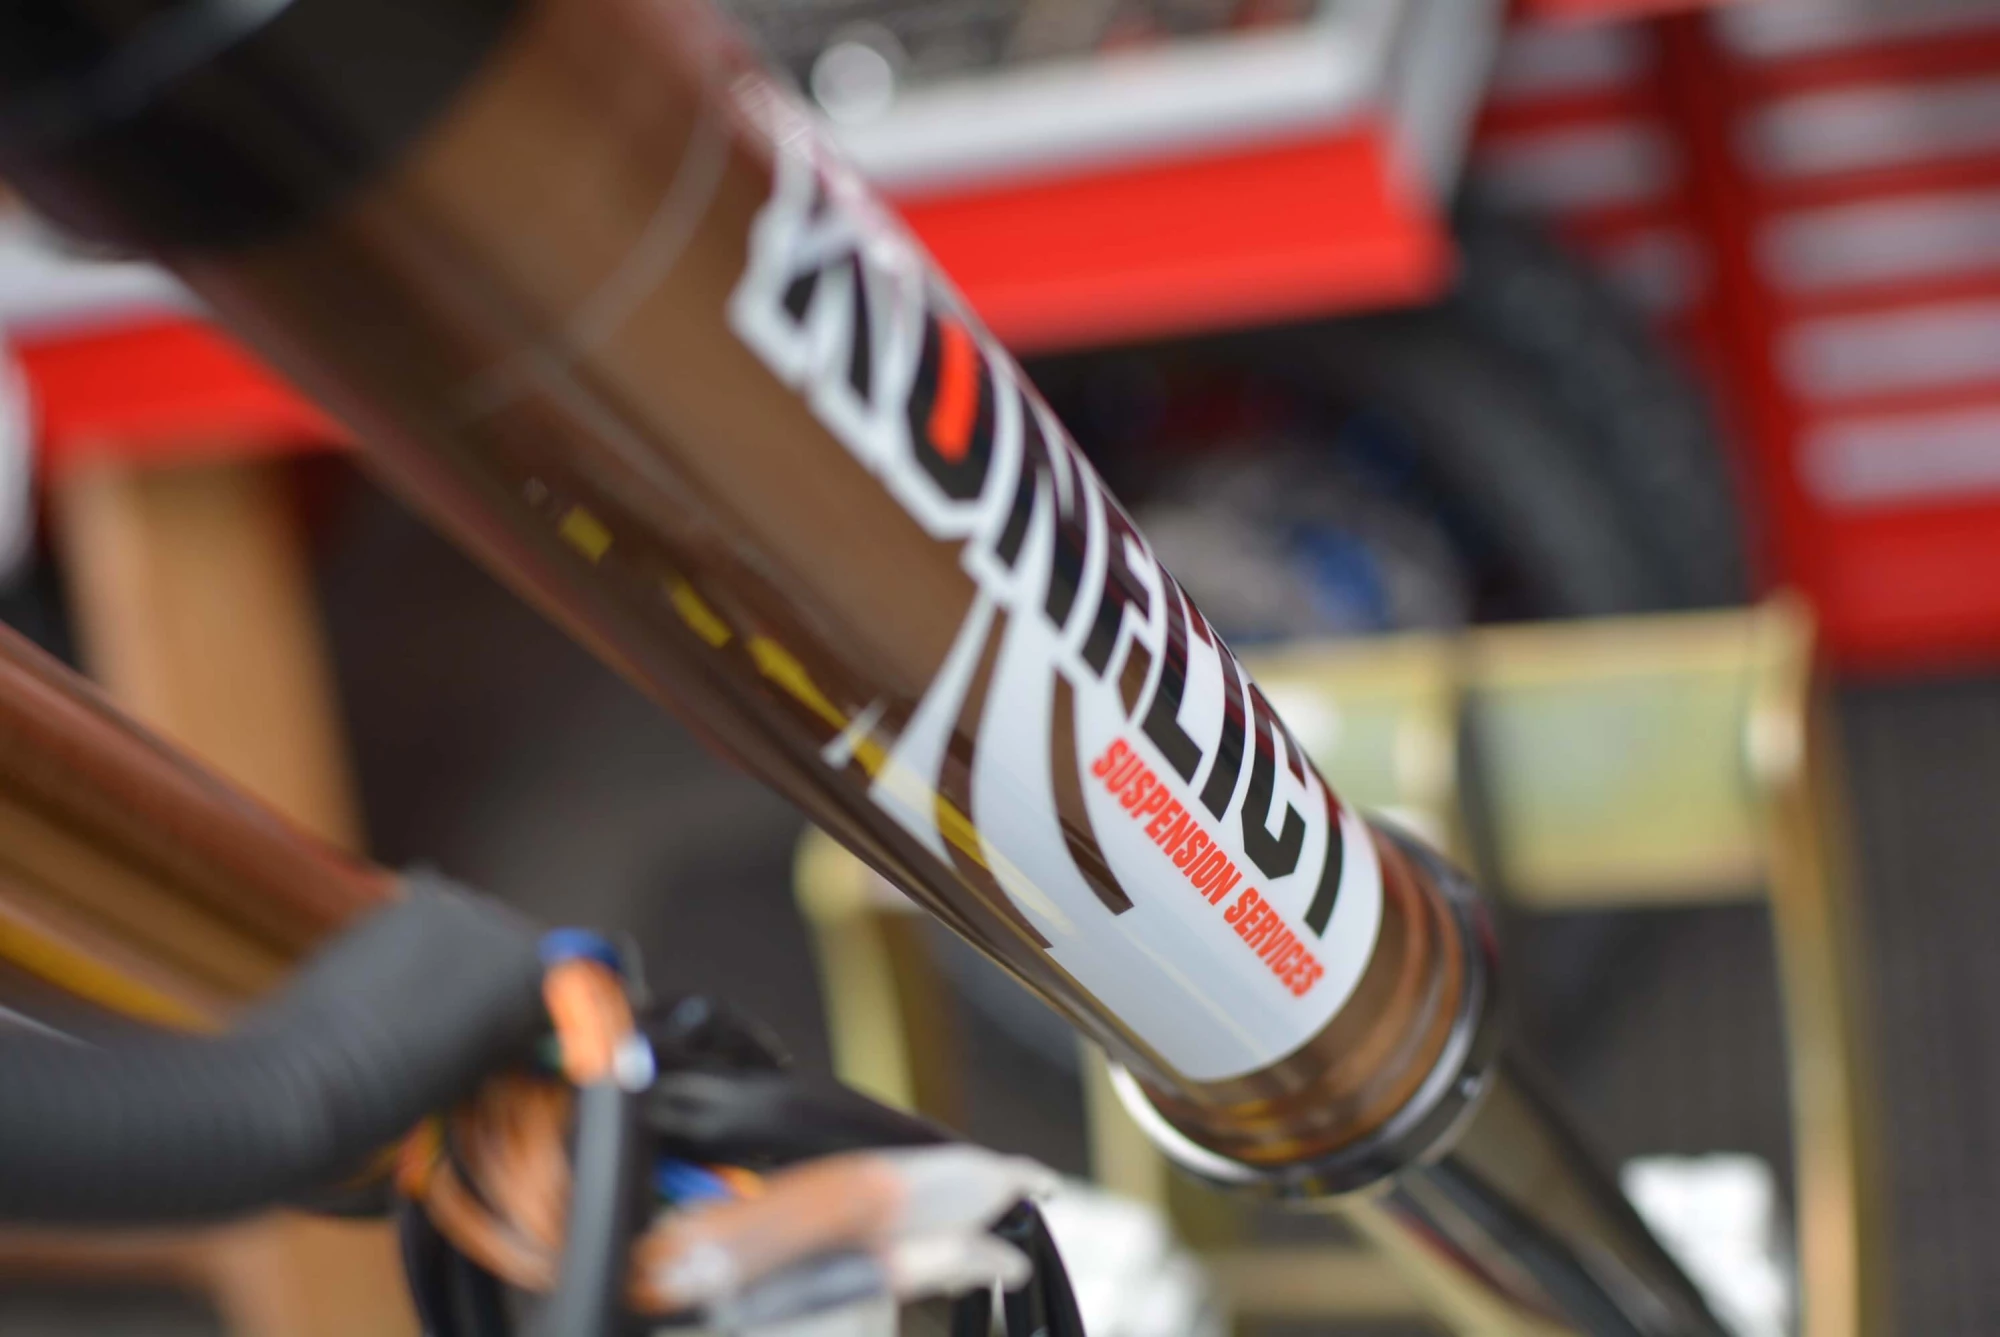
Dal Soggio drop in cartridges for the front forks and ditched the horrible 4CS internals. Dal Soggio is known for their 'Ball Valve' technology. What does that mean? Well, you'll have to ask Alex at Konflict and yes, we used a scale to make sure the logos were lined up correctly. It's how we roll...
Aside from the performance of the coatings, they certainly do make the bike stand out and in the case of a build like this, that is never a bad thing at all!
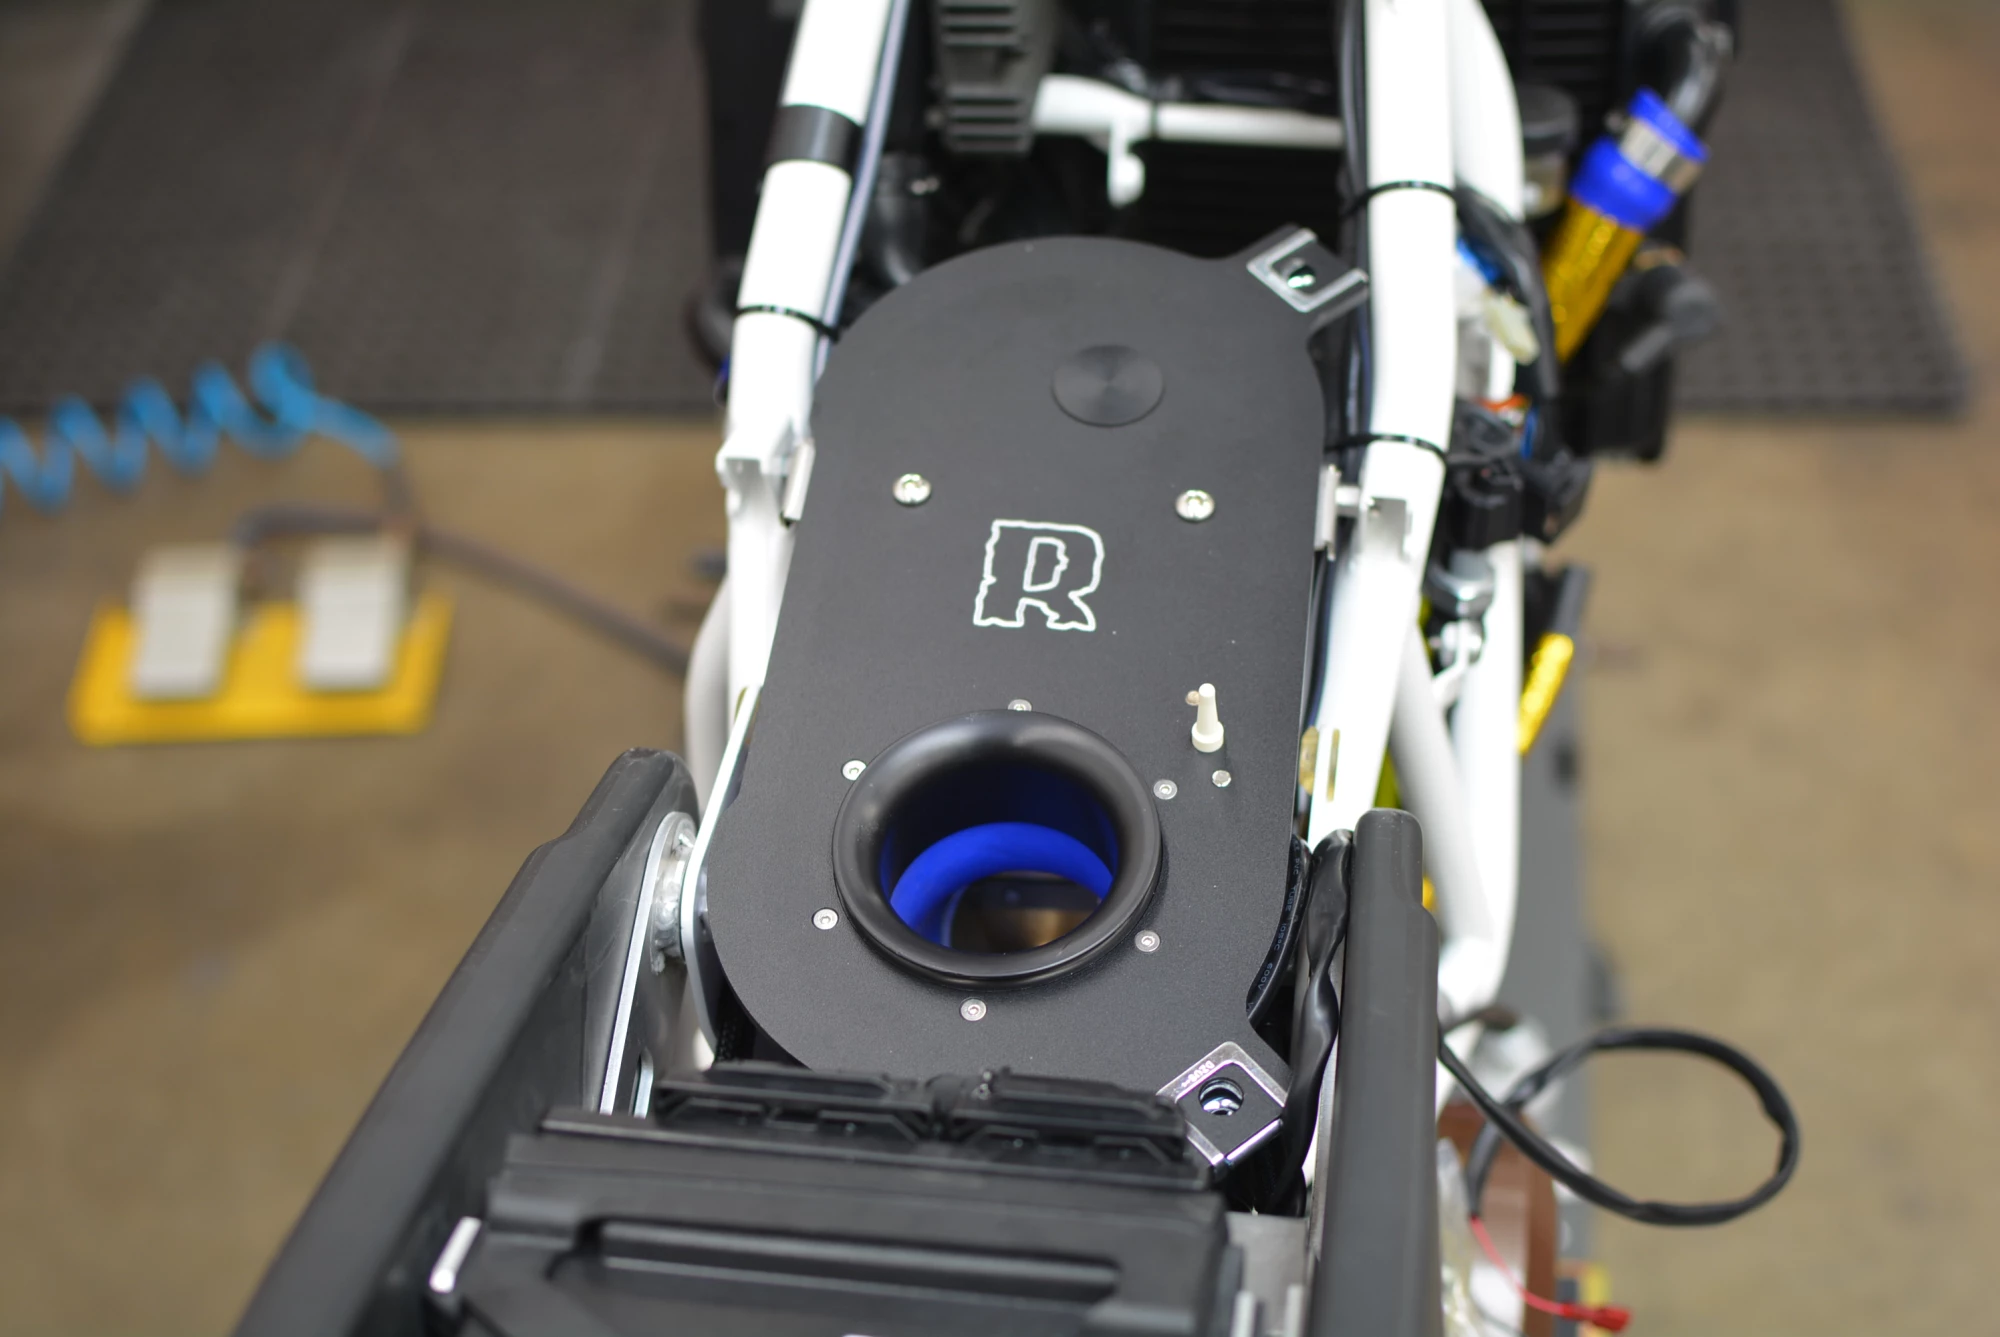
ROTTWEILER PERFORMANCE INTAKE
None of our builds would or could be complete without some serious love at the intake side of things. As you probably already know, the stock air-box is heavy, bulky and robs the engine of a great deal of horsepower, not to mention famous for leaking dust.
We approach horsepower in three steps. A beginning, middle and an end or 'Intake - Fueling - and Exhaust'. Interestingly enough the amount of horsepower gains from largest to smallest comes in the same order. The beginning and most significant would be the intake system. The Rottweiler Performance Intake for the 690/701 engines will remove the bulky stock air-box and replace it with a large area foam element system that allows for a more direct and immediate charge of air that flows roughly 300 CFM more than the stock paper element. This translates into a huge increase in ride-ability, power and torque with a much smoother transition from bottom to top.
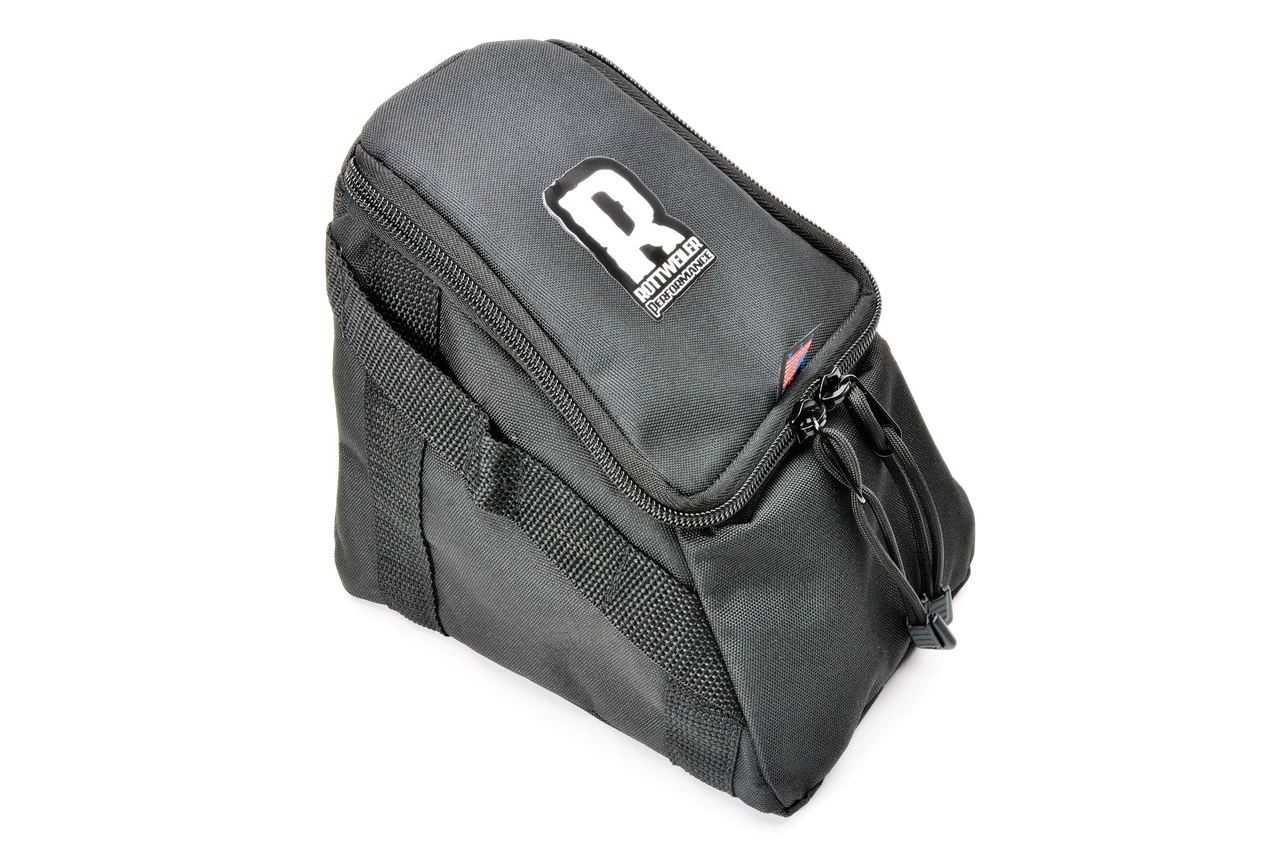
SO WHERE DO I PUT IT?
Storage is a hot commodity on the 701 models and doesn't come by easily so when we first designed our Rottweiler Intake System for the Husky 701, the opportunity to remedy this problem manifested itself from the big black hole left over in the front of the intake system where the stock air-box used to be. The bag below is zip tied to the upper frame rails and can secretly hold just about anything you can think and totally out of the sight of prying eyes.
3D PRINTED?
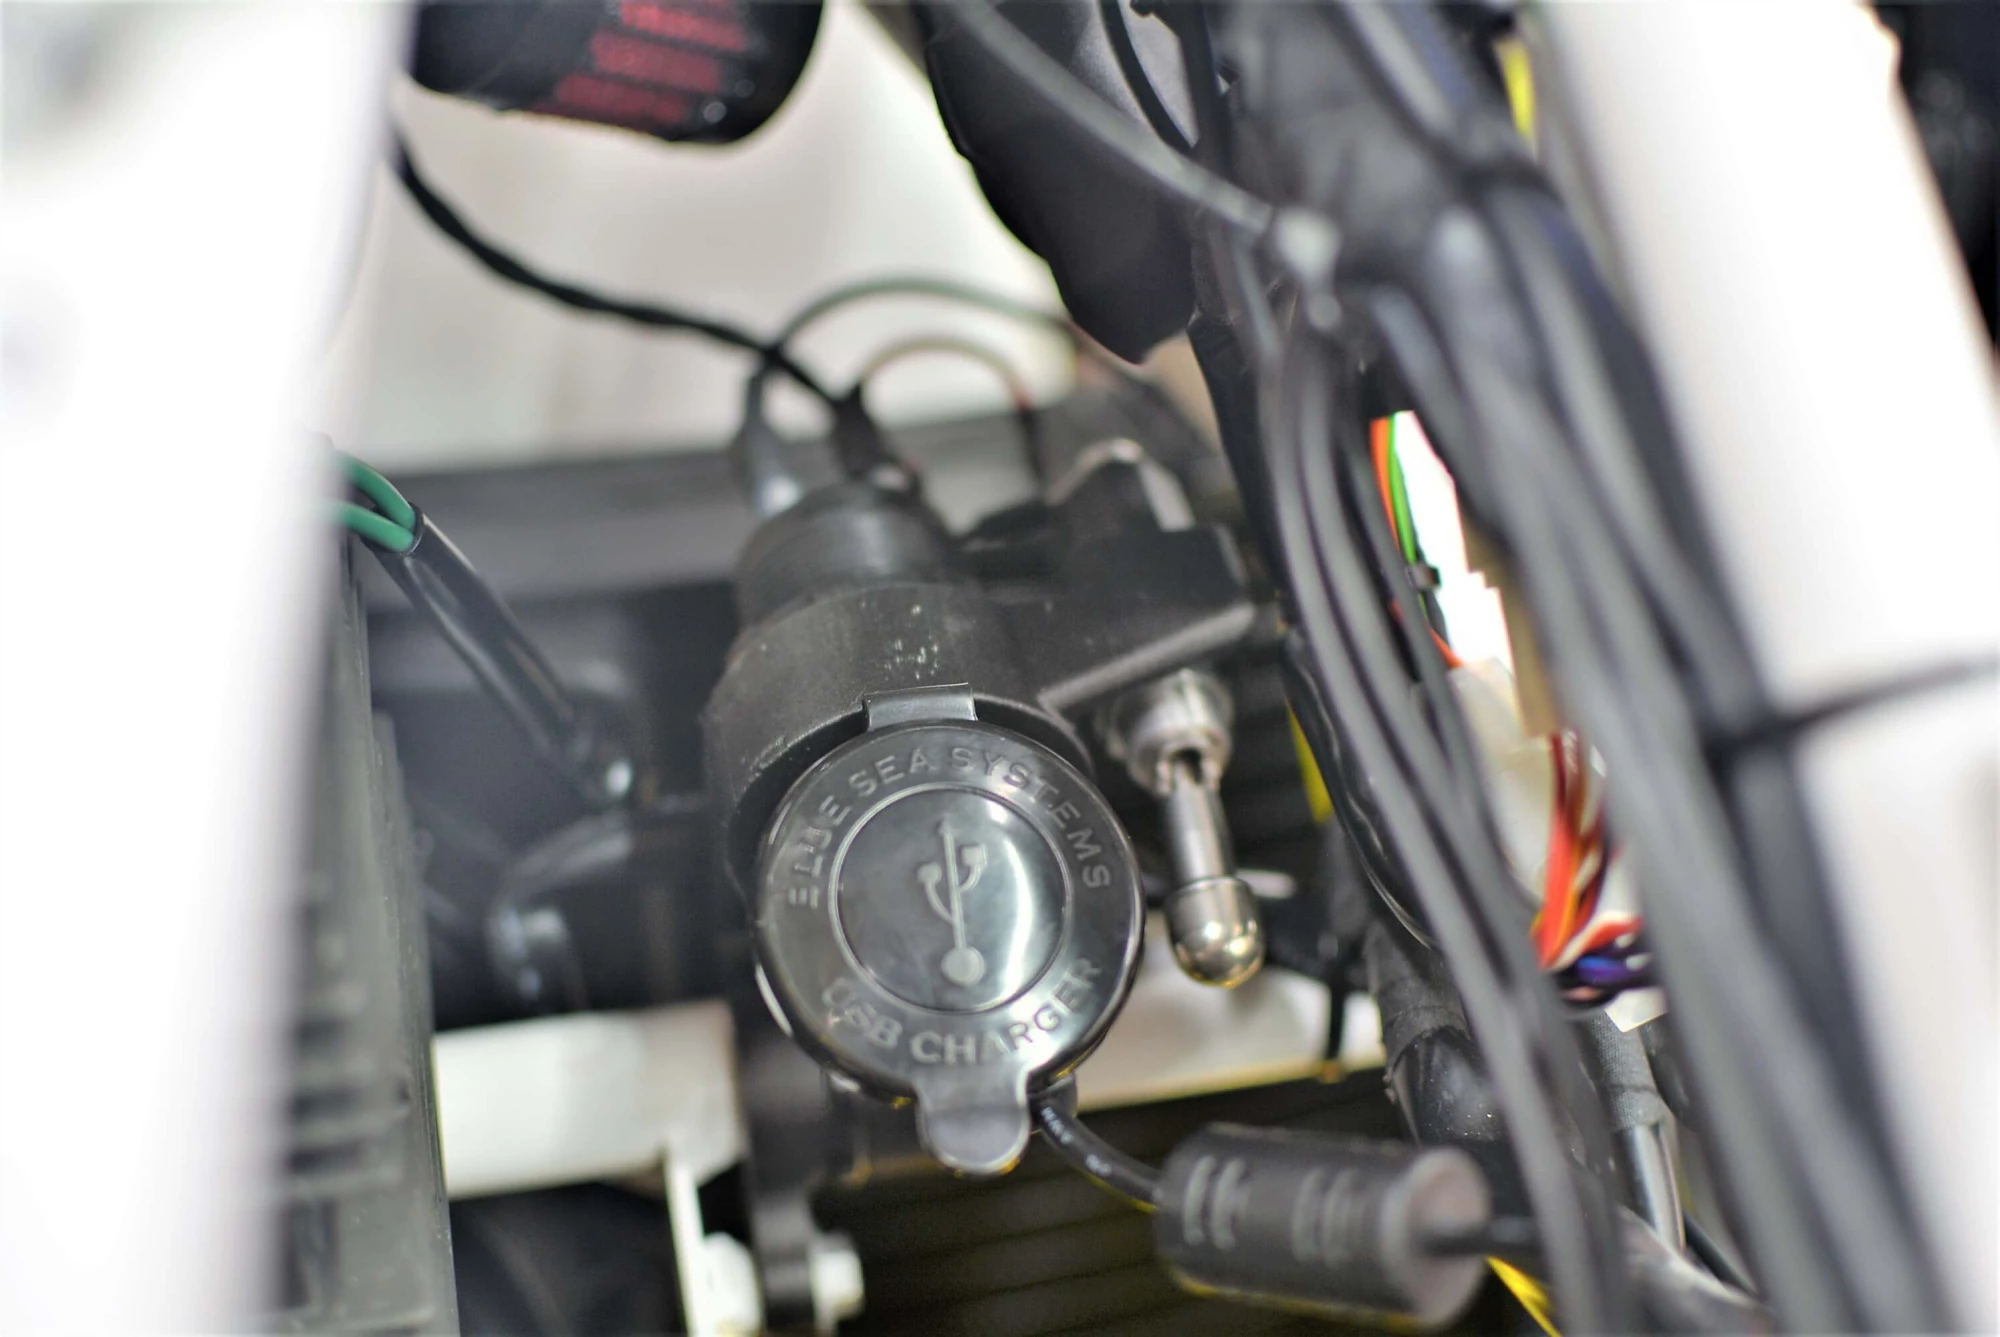
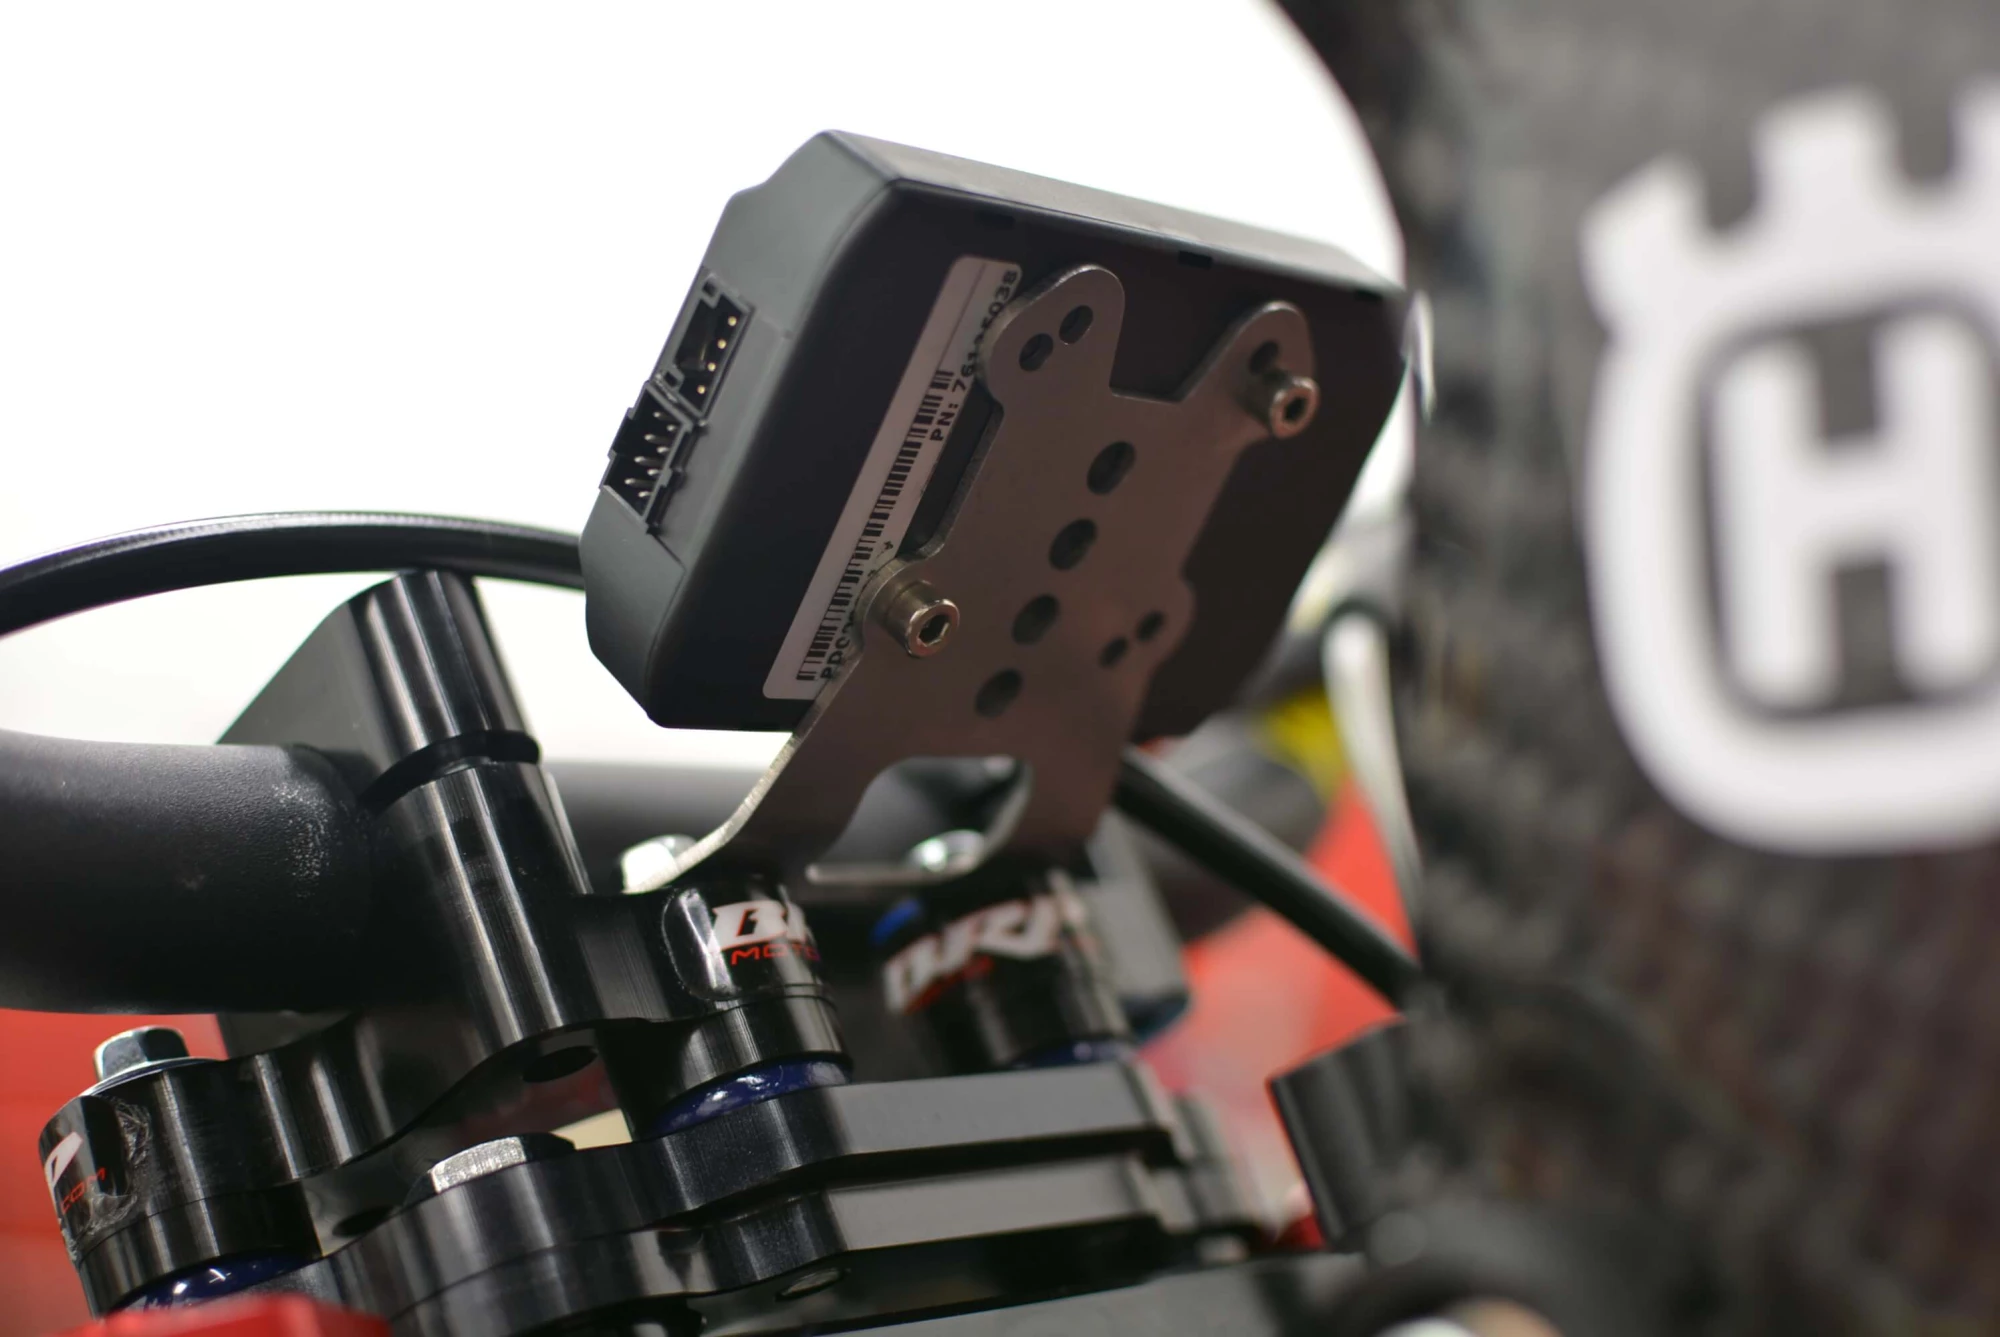
Before we installed the bag we had to address the question of charging devices. I didn't want anything on the bars that would detract from the pure race look the bike already had, and it just so happened that our 3D printer had arrived necessitating it's uses and understanding.
We set forth to literally 3D print a USB mount using a carbon filament material interwoven with fiberglass for strength. The end products was a fun project that also helped with our learning curve.
Below is the third our of four generations we tried. It was to clip on to the lower frame rail just in front of the storage bag above.

3D view of where the fiberglass for strength was woven. With this method, you can actually make usable parts to test.
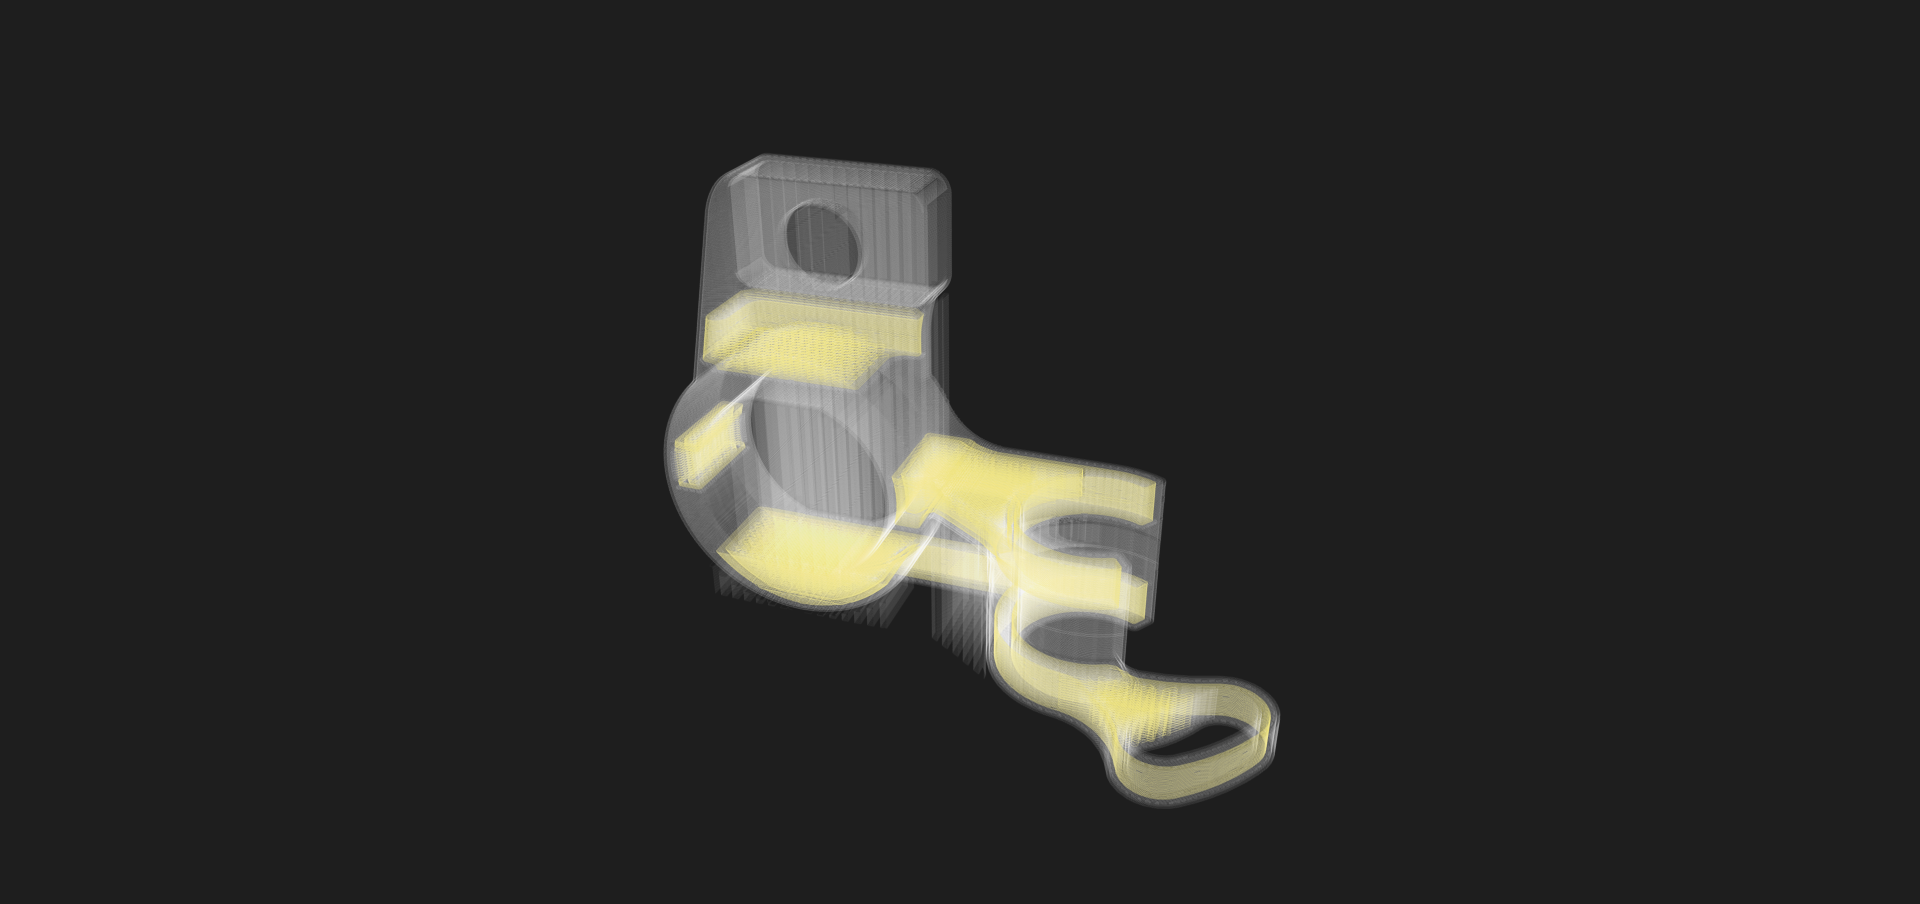
Iteration 1 through 4. You can literally see the learning curve grow during this process.
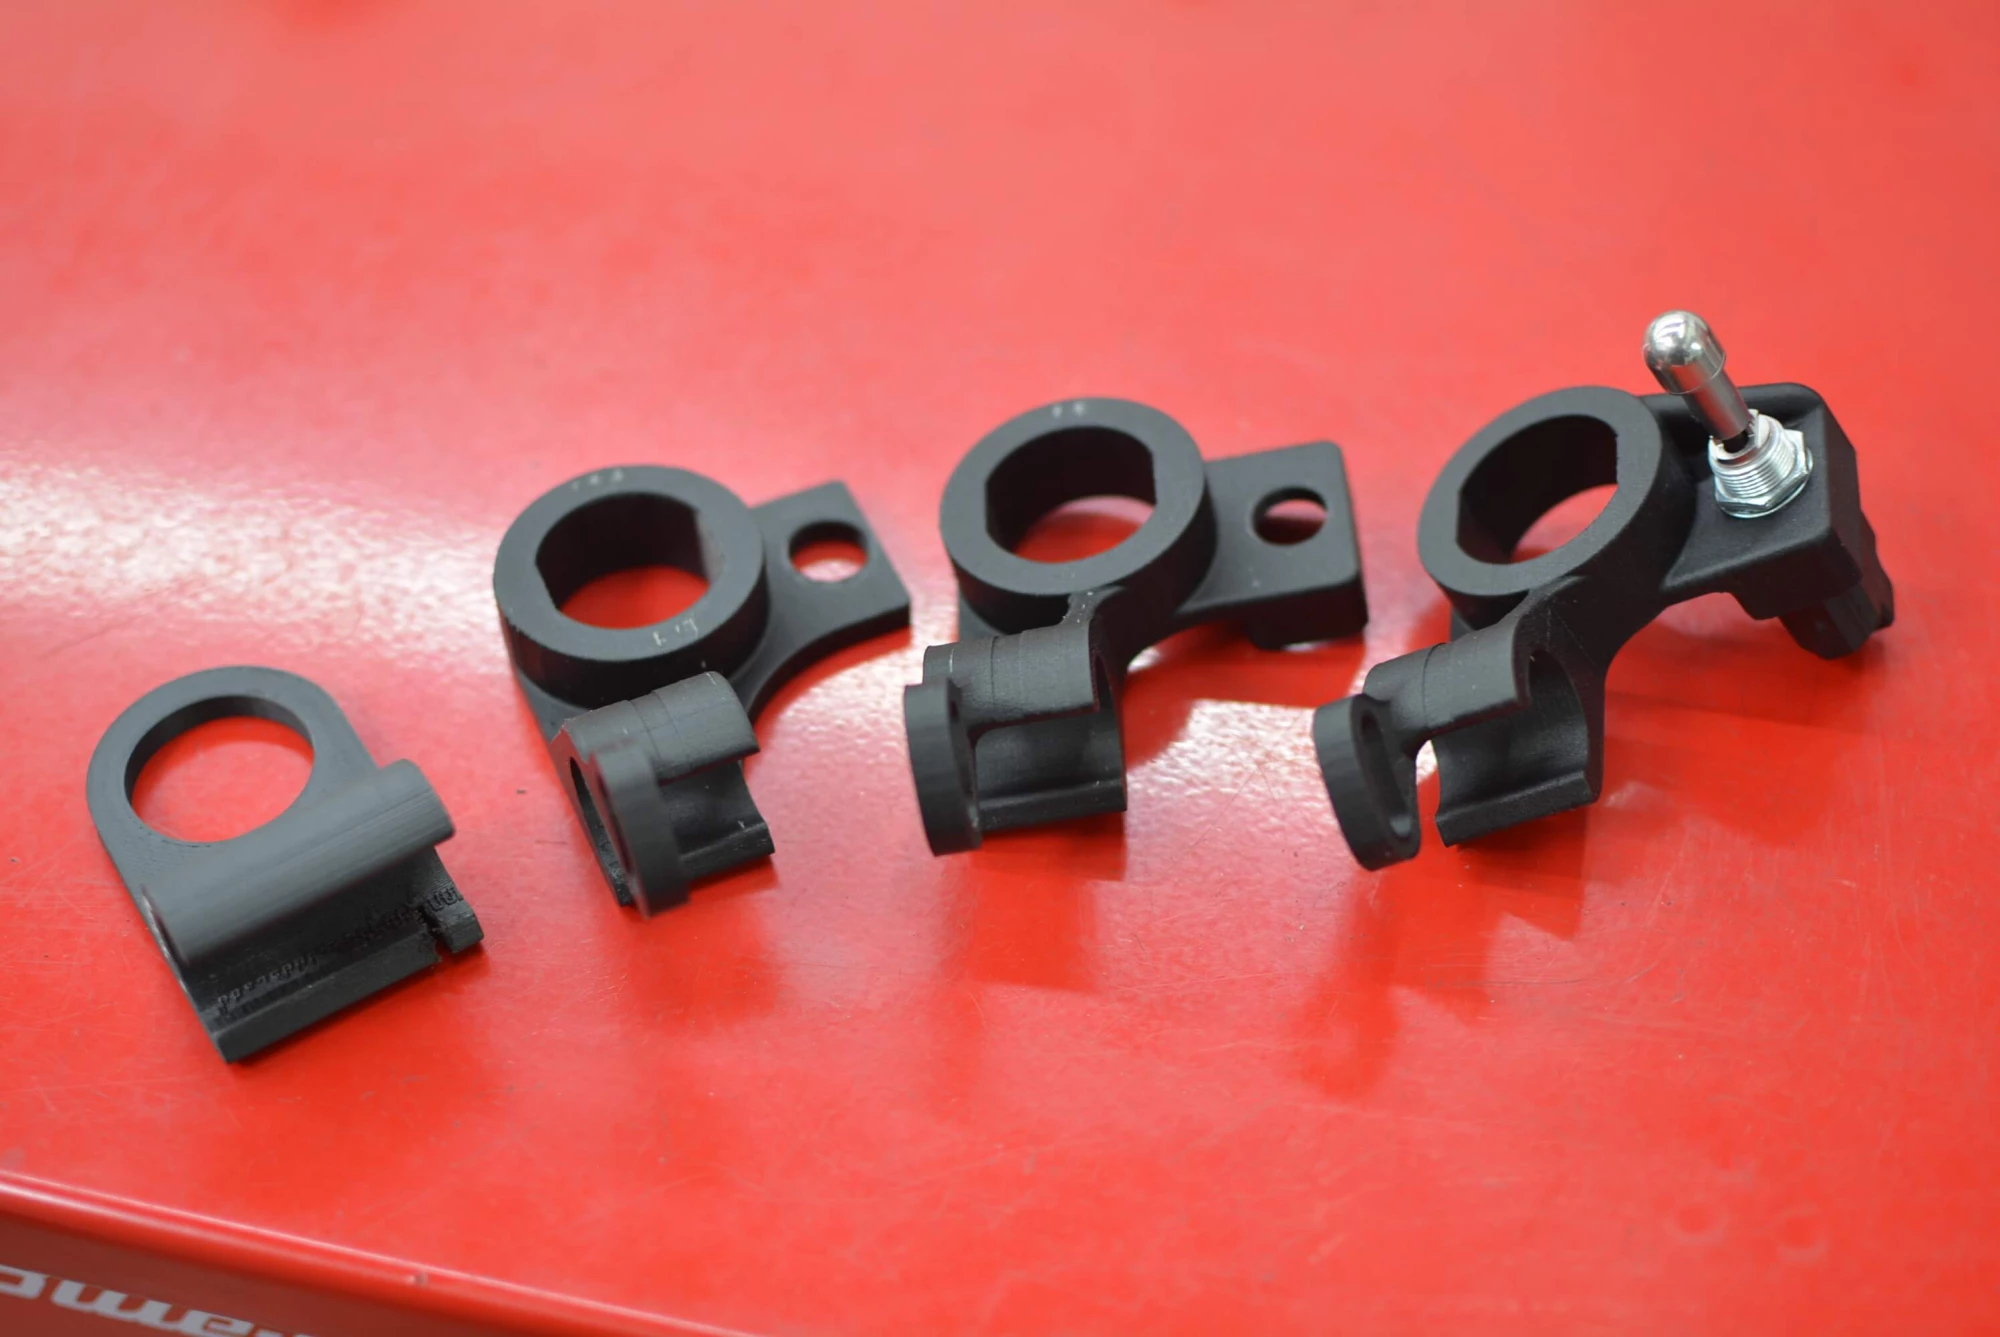
A bit hard to see, the final product with a 3 position switch to either turn it off, run with the switch or run with the switch off if necessary. We like options.
THE MAPPING: GETTING THE FUEL IN JUST RIGHT
These days (largely in part from emissions regulations and secondly for efficiency), fuel injection is the rule rather than the exception. Fuel injection provides the ability for the stock computer to easily comply with ever increasing emissions regulations by allowing for constant and automatic alterations to the fuel delivery in changing conditions. This is called 'Closed Loop' and it is not your friend when shooting for a smooth and powerful output of power. The downside is that these alterations are, for most of the fuel map, designed to keep the bike quite lean, thus delivering a jerky power delivery, lower power outputs not taking advantage of the engines capabilities, and worst of all, a hot running engine.
The upside is that through 'Piggyback Modules' like a Powercommander V, we also have the ability to change any of this at will or while the bike is being ridden via Auto Tune. This is done by simply 'hijacking' the signal the ECU is sending to the fuel injectors and adding (enriching) or subtracting (leaning) to the pulse width being sent. The end result is fuel delivery that the engineers intended before the bike goes through the 'government filter'.
Rottweiler Performance offers pre-made maps for free (with the purchase of any Powercommander V), can pre-set an Auto Tune before shipment for free (Just let us know what you want done in the notes in your order), and/or can fully custom dyno tune your motorcycle if you live close enough to bring us your ride. THE MESSAGE?: We have you completely covered no matter what the level of performance you are looking for. Rottweiler Performance is well established as the #1 choice for knowledge and assistance when it comes to getting your bike just right and maximizing the fun factor.
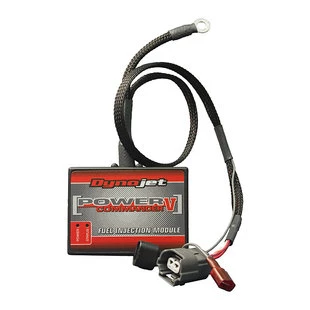
THE STARTING POINT: POWERCOMMANDER V
For 'The Middle' (the fuel) we used a combination of a Dynojet Powercommander V (or PCV for short) coupled with an Auto Tune module (described below). The Powercommander V for this model also includes the ability to alter ignition trims as a bonus so a bit more spark was added, adding about 4 advanced degrees to bump horsepower and ride-ability even more. This is purely optional and easy to reverse via laptop or by having us load dual maps before shipment with a Dynojet map switch and running one map with advance and one without. The advanced spark is not enough to put any unnecessary load on the engine and the only time you don't want it is when forced to run very low octane.
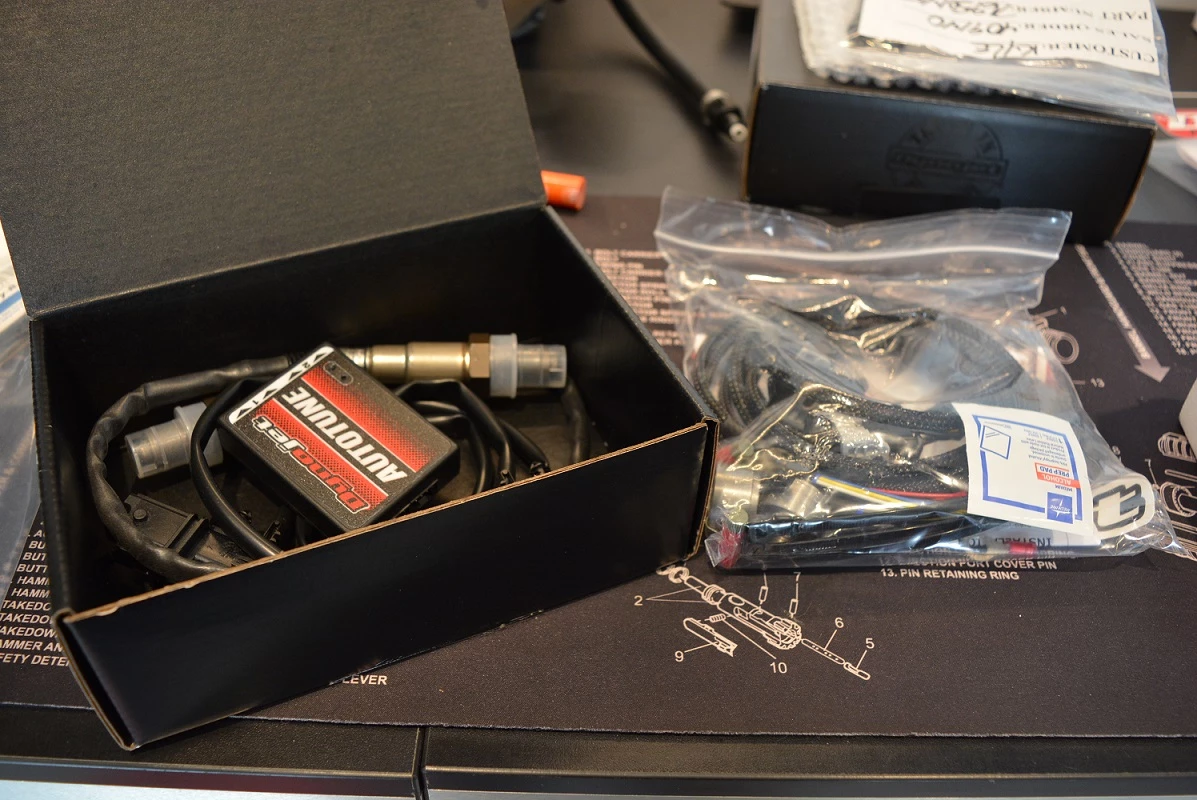
AUTO TUNE
The addition of an Auto Tune module allows the user (or us before shipment) to pre-define their desired air fuel ratio (AFR) within the easy to use software and once it is set, the mapping becomes what we like to call 'dynamic', meaning that your fueling map will be in a constant state of live tune and adjust itself to every condition. The result is a fuel map that is always near perfect no matter the altitude, modification(s) to the bike, humidity etc. If you feel a 'hole' or 'lazy part' of the power curve with your particular map, chances are it will go away within minutes with an Auto tune.
PHYSICALLY:
You'll need to install the Auto Tune module in tandem with the Powercommander V module somewhere on the bike. We have found that underneath the seat there is plenty of room on almost all bikes. Connect the PCV and Auto Tune via supplied CAN cable and then install the supplied 18mm bung in the header roughly around where the stock 12mm narrow band O2 is located. Rottweiler Performance can help you with the fabrication by calling in, setting up the order and shipping us your header. For a nominal fee we will expertly TIG weld the new 18mm bung, fully purged with argon gas, and ship it back to you fast. Whether it be mild steel, stainless steel, or titanium, our ace fabricator James will perform magic with his TIG torch.
DIGITALLY:
You simply enable Auto Tune by plugging the supplied USB cable from the PCV to a PC that has the free Powercommander V software installed, set your AFR tables and enrich/enlean parameters and you are done.
Rottweiler Performance will also set all of this up for you free of charge when purchased together and instructed to do so. A custom setup sheet with the customer name and serial number will be provided to show the user that all is 'plug and play' and ready to go. All you need to worry about is the physical installation itself. If you are local in Southern California, we can also assist with any installations you my need. Just give us a call @ 844-768-7373 and one of our technicians can easily walk you through the easy process.
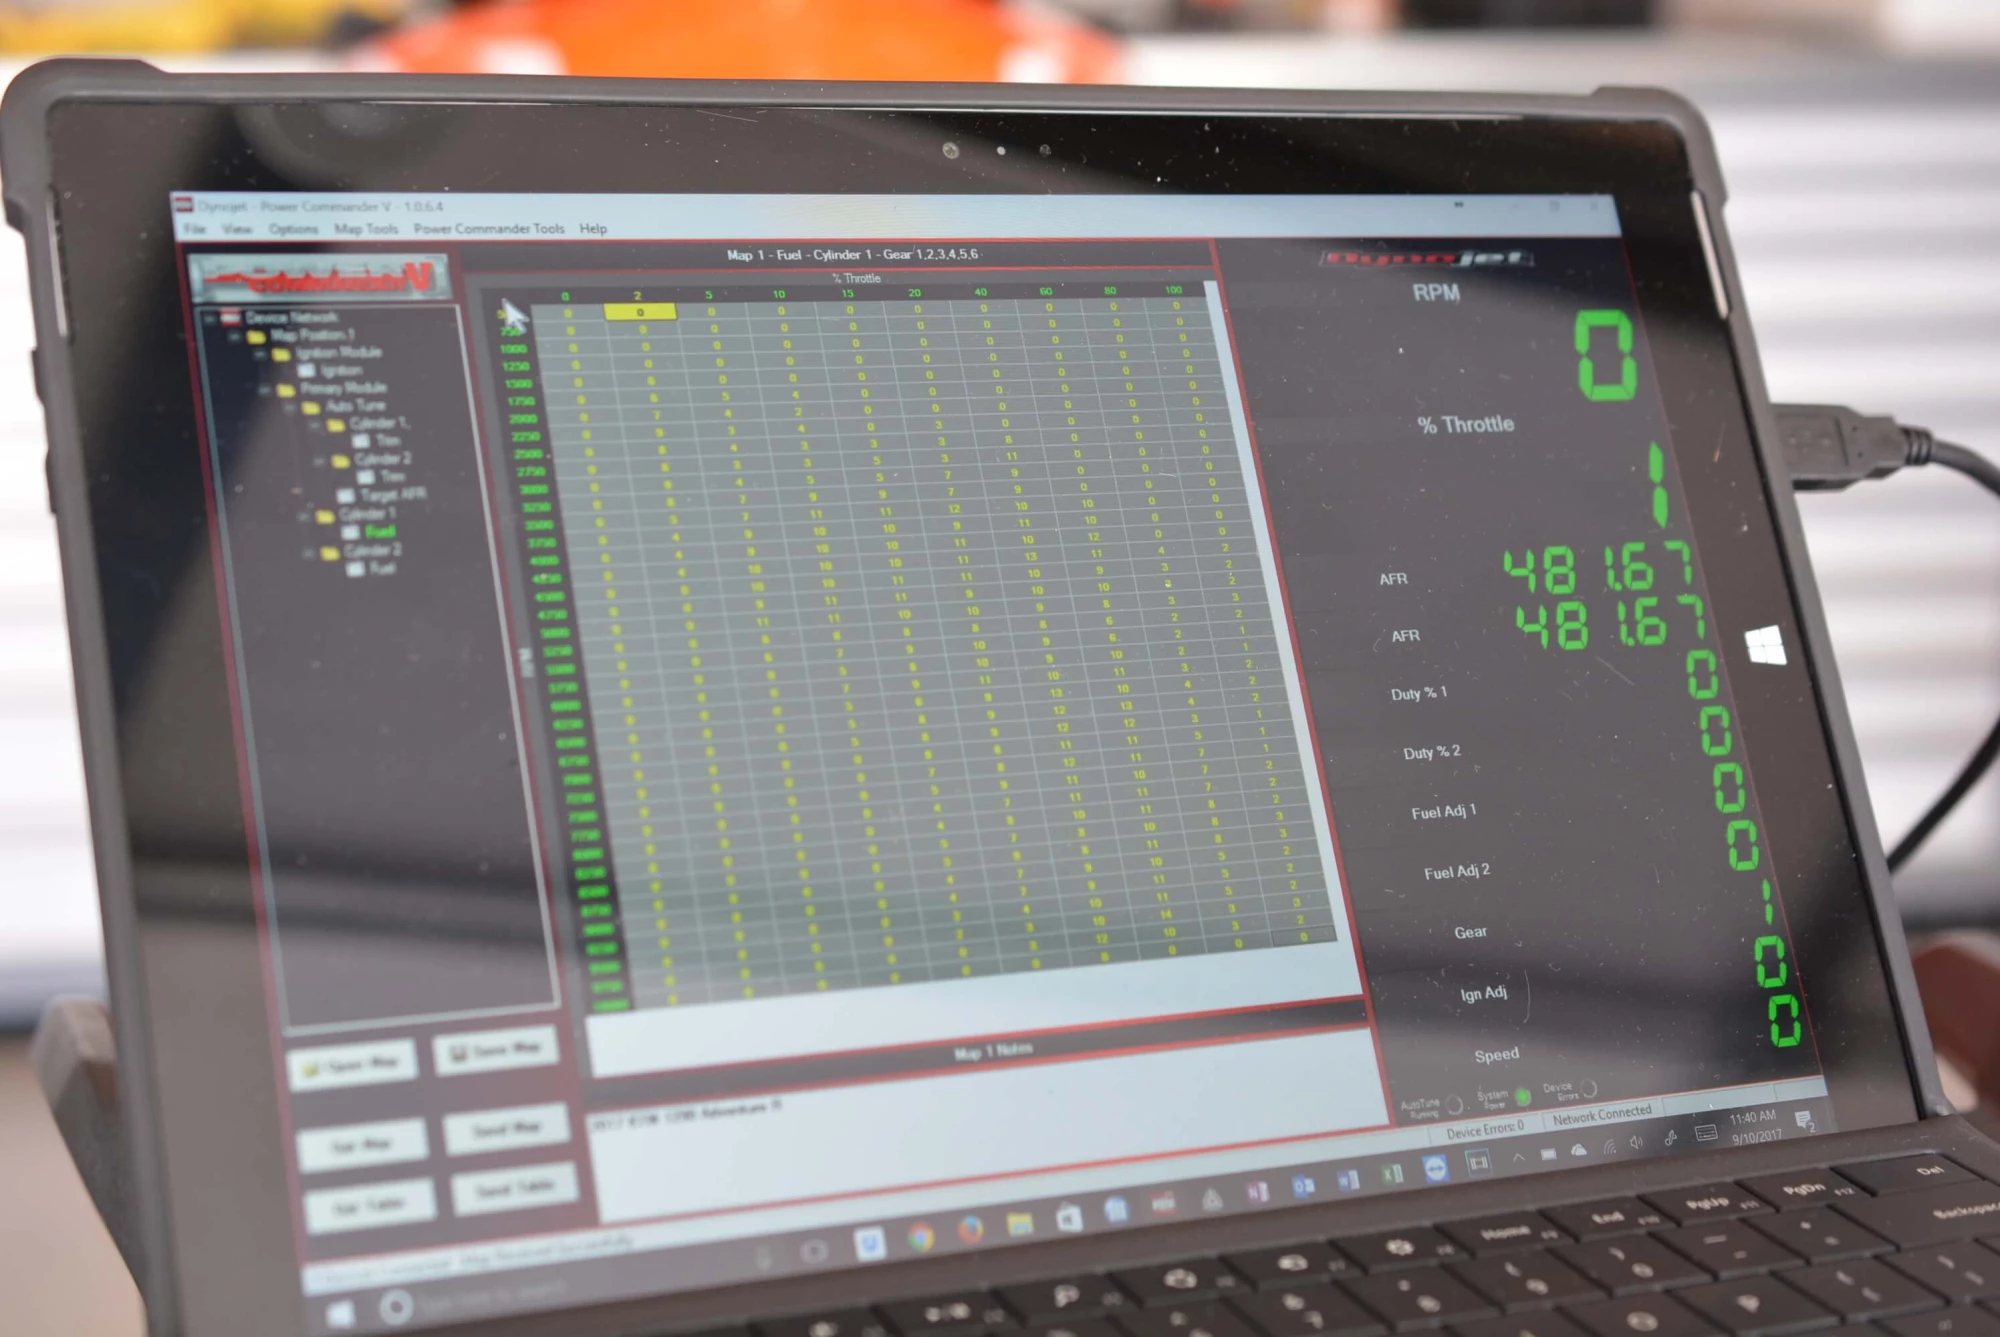
POD-300
With the POD-300, we have the ability to view every channel that can be traced in the PCV and Auto Tune. Things like throttle position, RPM, added fuel over stock, injector duty and air-fuel ratios are viewable in real time and right at your fingertips. This helps with visual cues that can be set up to show if the Auto Tune is doing what it is supposed to and that your mapping is where you want it. LED indicators are also available for any type of custom setup you wish to alert you of nearly anything. We chose to set them to glow green when the mapping is rich, orange when the mapping is spot on and red when it is too lean. With this you have constant affirmation that your bike is running exactly how it is intended and also allows the rider to deduce if there is an issue with fueling (like a clogged injector) immediately without any guesswork. This can be an invaluable tool in nearly any situation whether it's a rally race or just traveling. It's also kind of entertaining to know what the bike is doing but you have to be a bit of a geek to appreciate it. We are that geek.
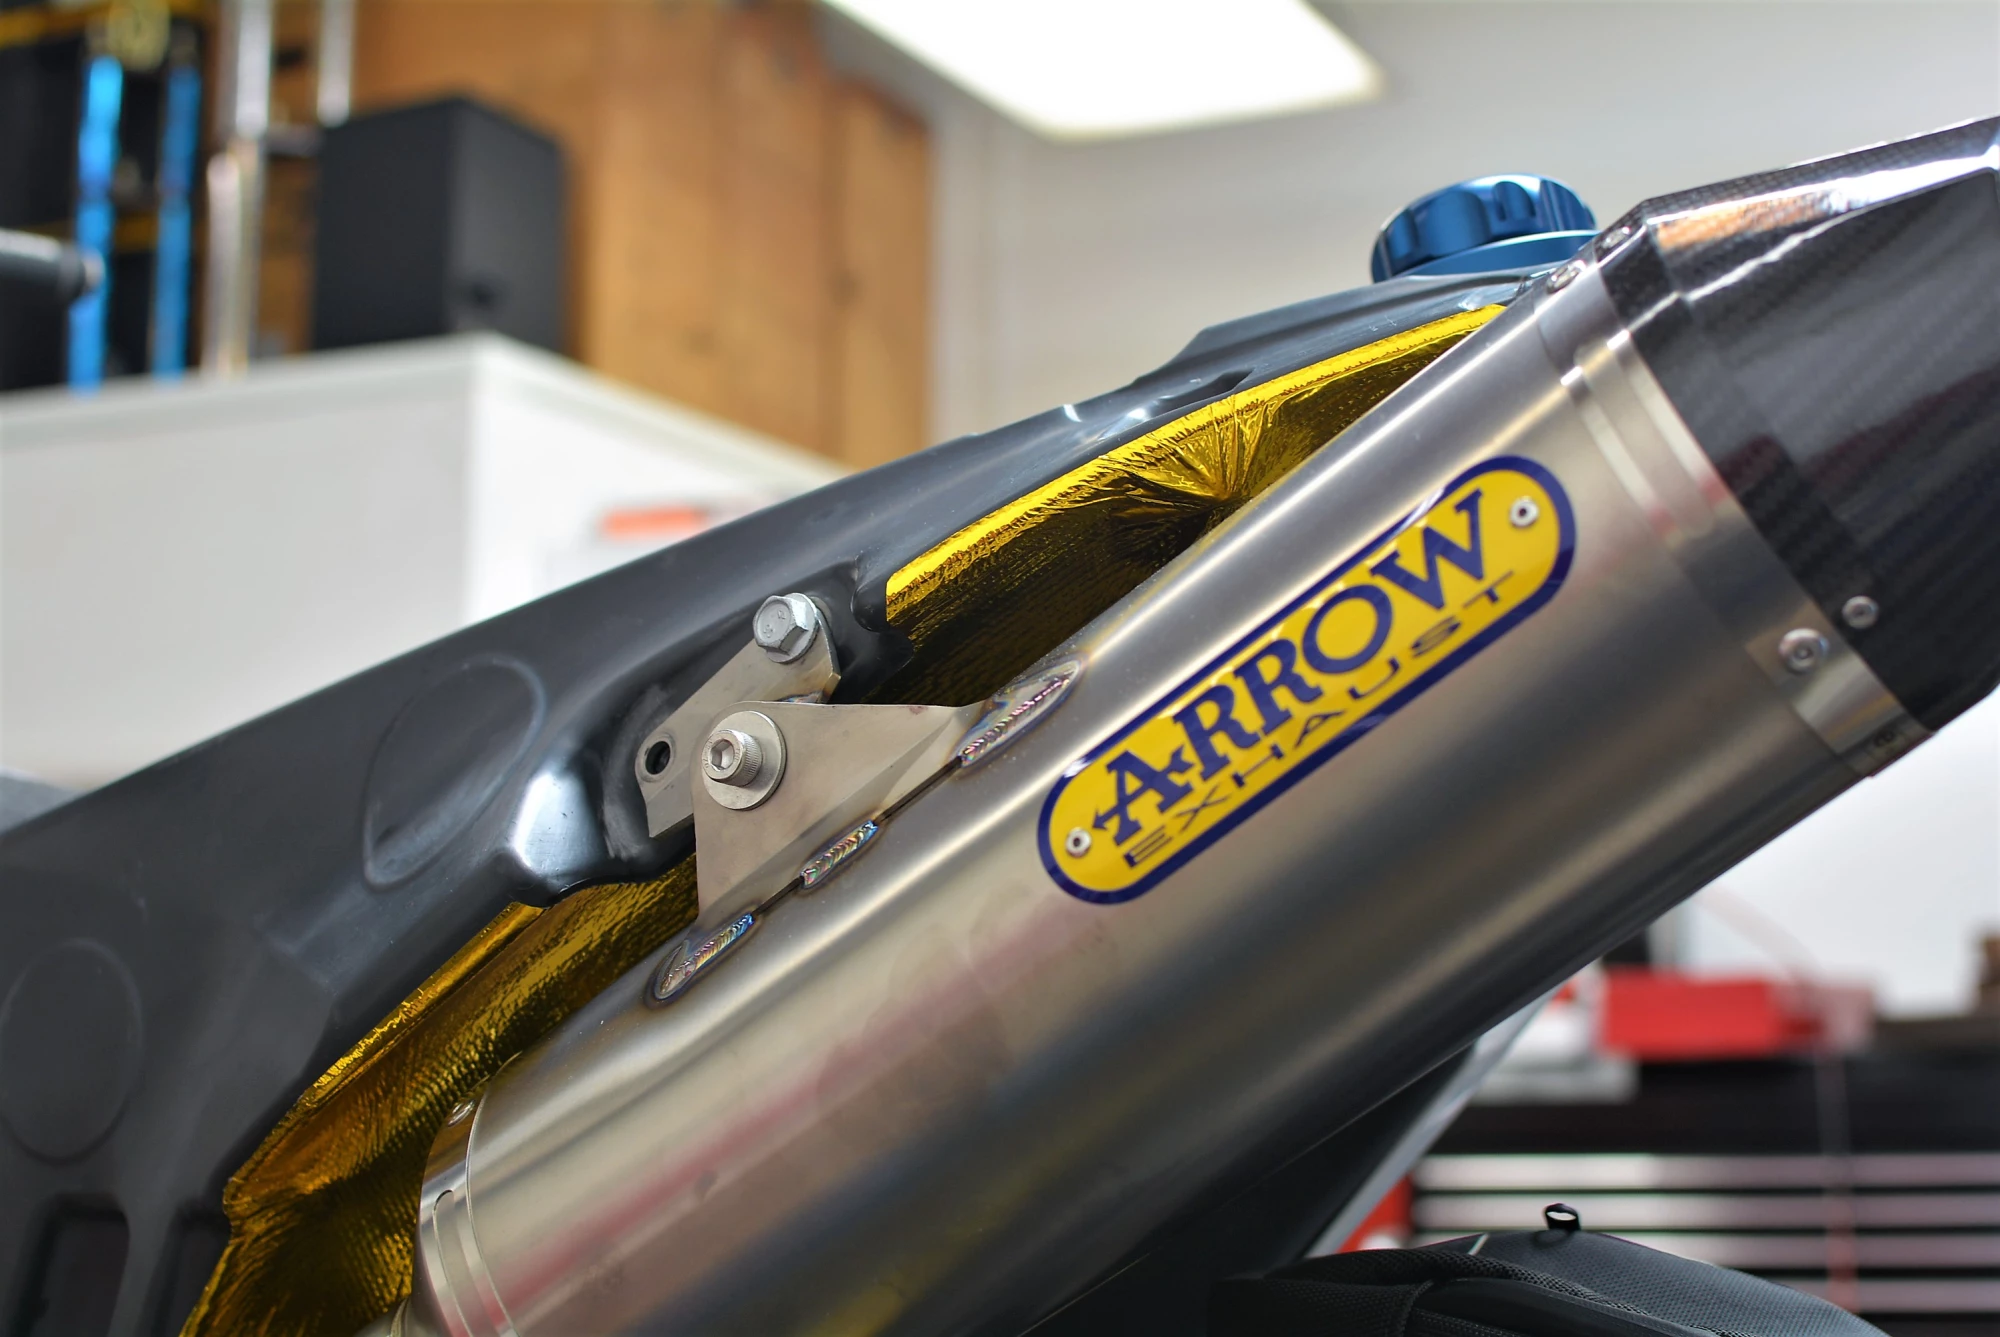
STRAIGHT TO THE POINT: ARROW EXHAUST
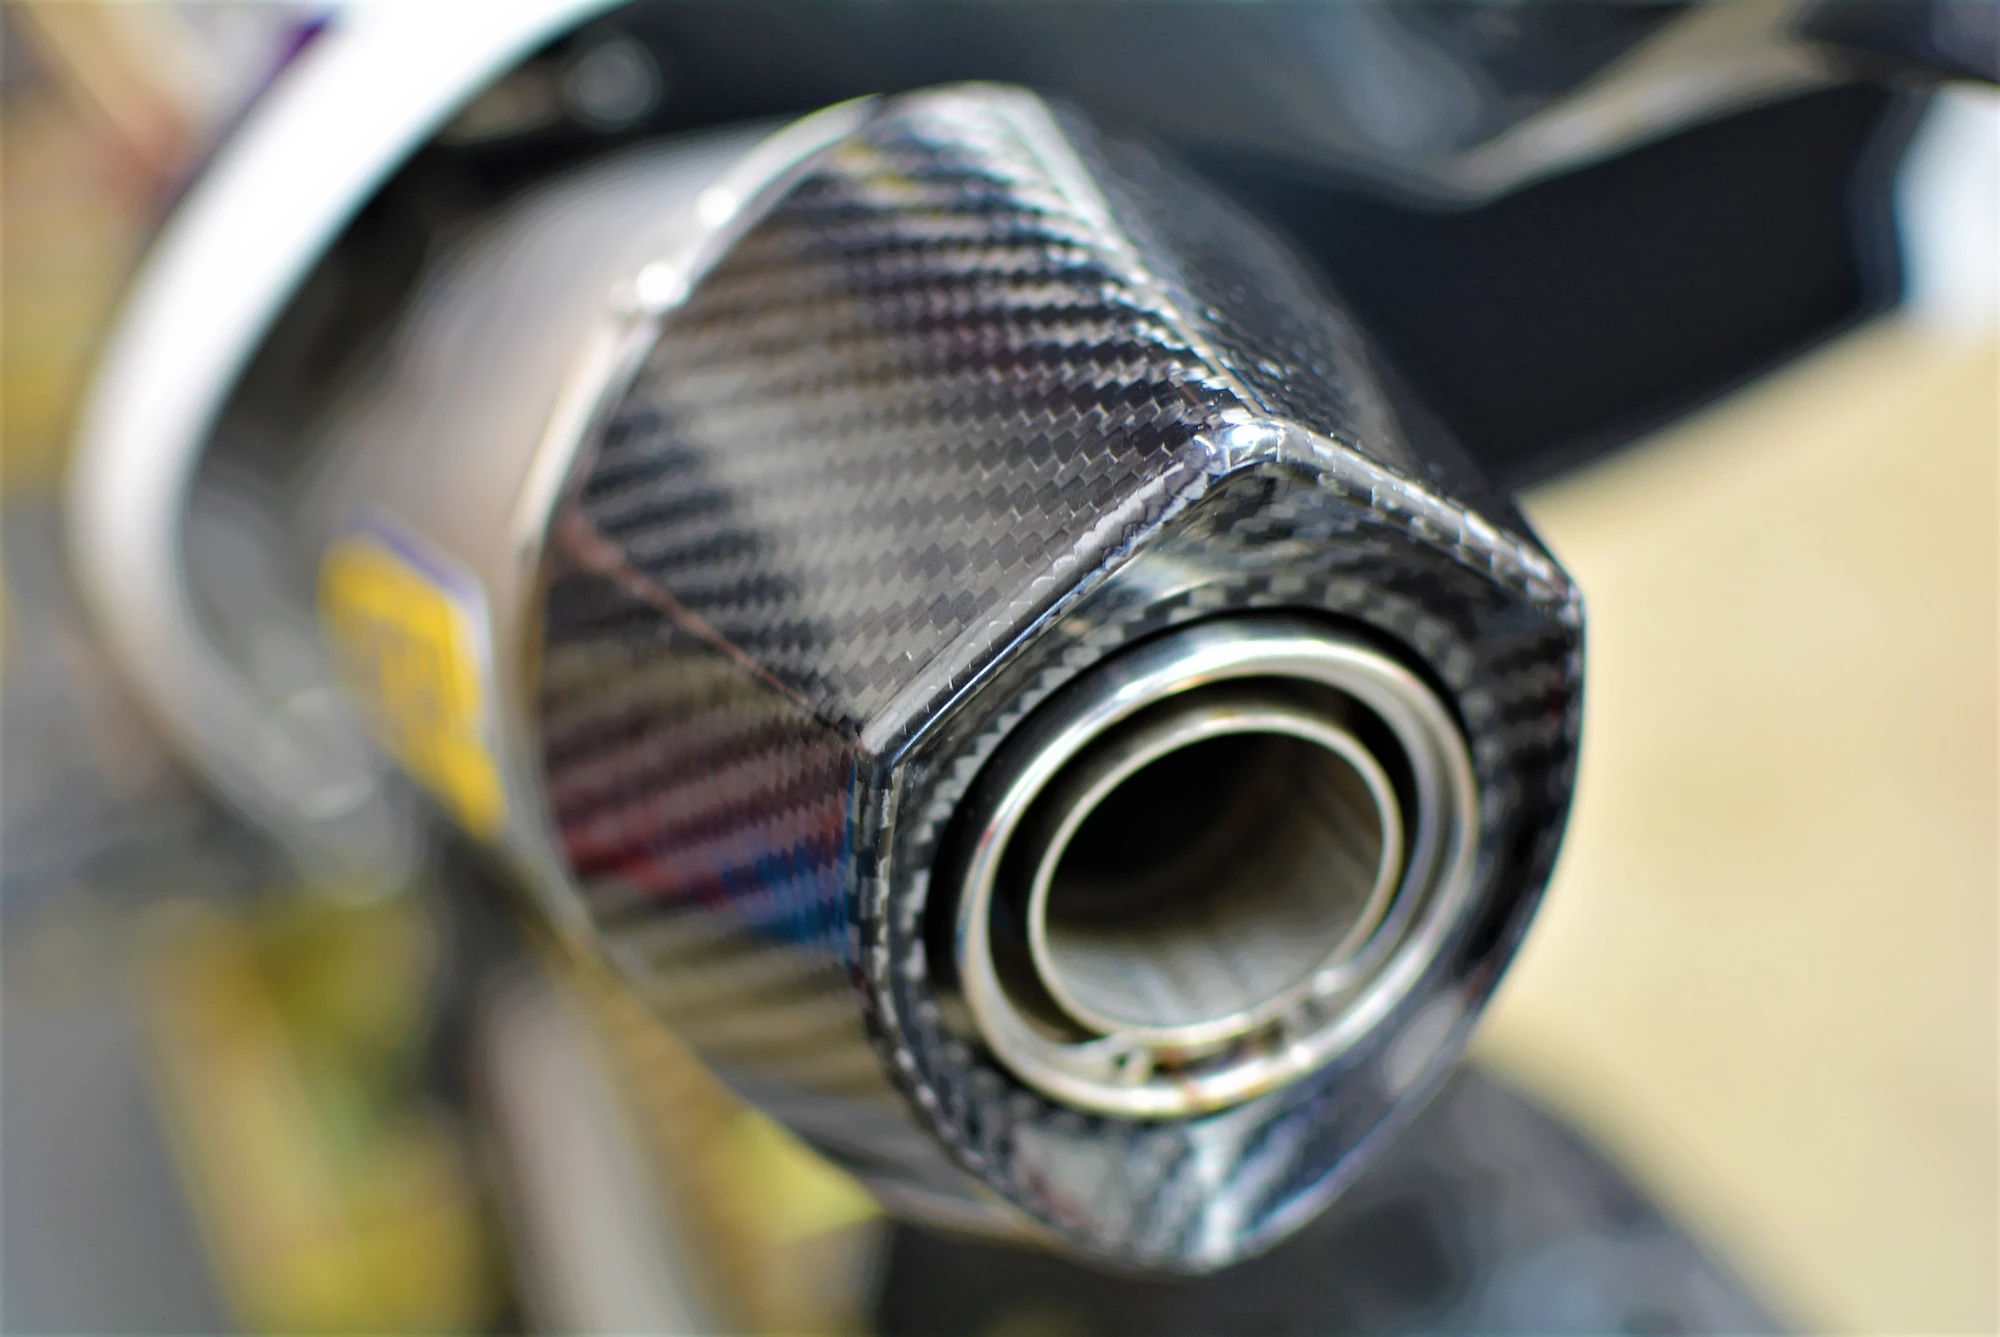
An Arrow Titanium muffler was installed as it is by far the lightest we can find for the 701. At a full pound less than it's aluminum siblings, the extra cost for this type of build is just worth it.
The carbon tip is a nice touch along with all of the other visible carbon on the Omega Kit.
NAVIGATING THE NAVIGATION EQUIPMENT, LIGHTING AND CONTROLS
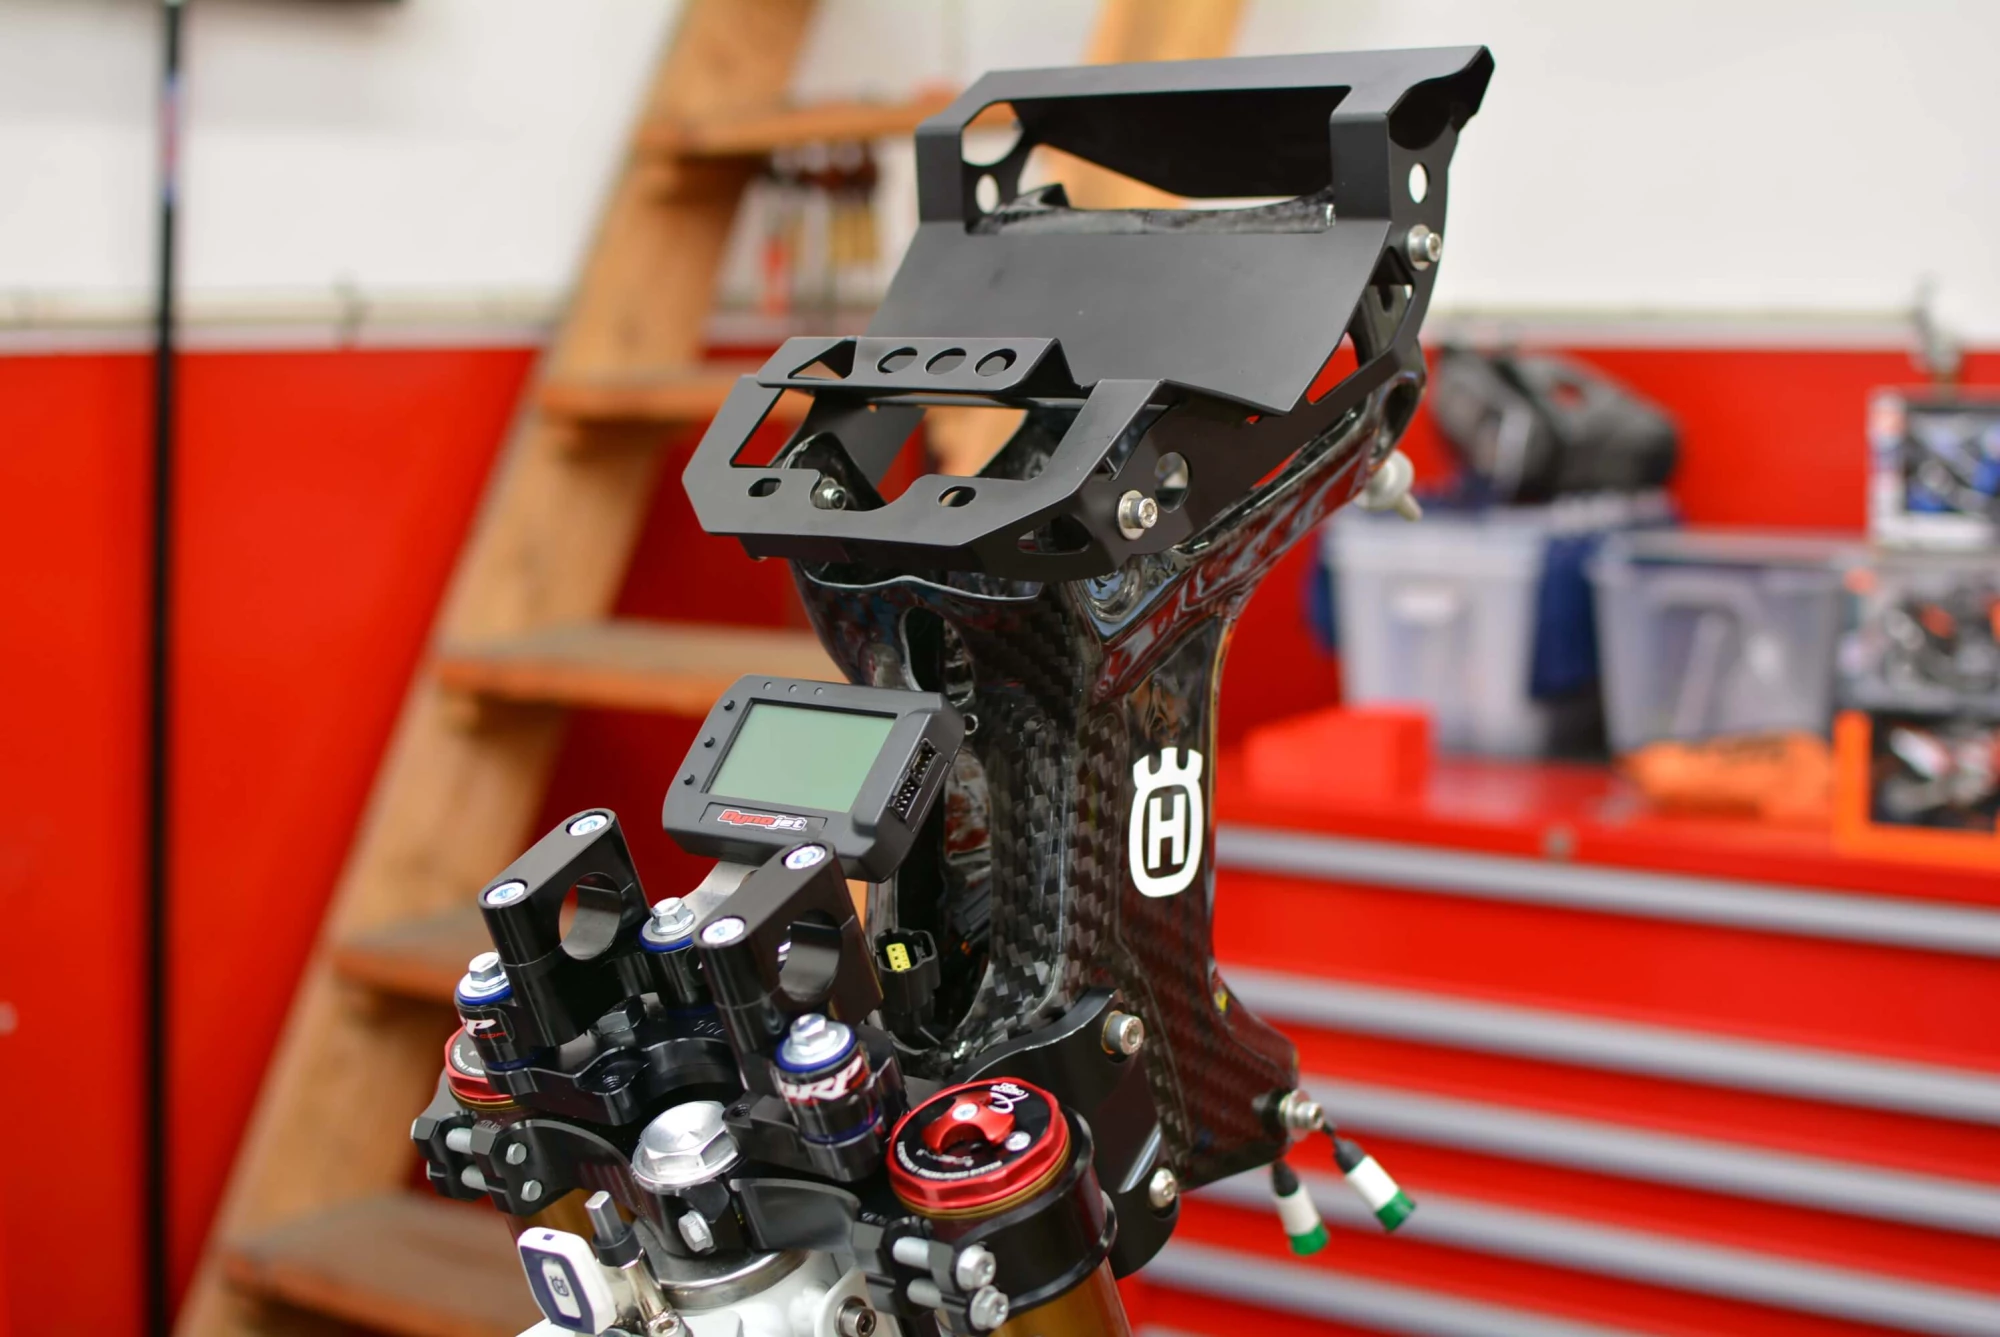
At this point we began the assembly of the navigation tower. A beautifully crafted masterpiece that by default becomes the jewel of the entire kit being that it is at eye level and at the front of the bike. The entire Omega kit comes complete with an aluminum 'blank slate' so to speak that you can build on with either actual nav equipment or your choice of GPS, iPad or the like.

The good news is that the kit doesn't rely on any funky fasteners at the head stock to mount the gear. The 701 already comes with four 6mm threaded inserts at the head-stock, allowing the crafters of the Omega kit to keep things nice and clean. The Omega kit borrows from some of the high quality rally gear available on a limited basis from KTM to attach the nav tower to the adapter bracket. The entire process is very clean.
What you see below is what you start with in terms of real estate for navigation equipment.
Since this bike was designed to become a true 'dual purpose' machine, meaning that we would only have use for a road book holder about 1% of the time, we opted to get a little crafty with the mounting by creating a quick release system for the road book so that it can be exchanged for a Trail Tech Voyager Pro in under a minute with only a flat bladed screwdriver or coin.
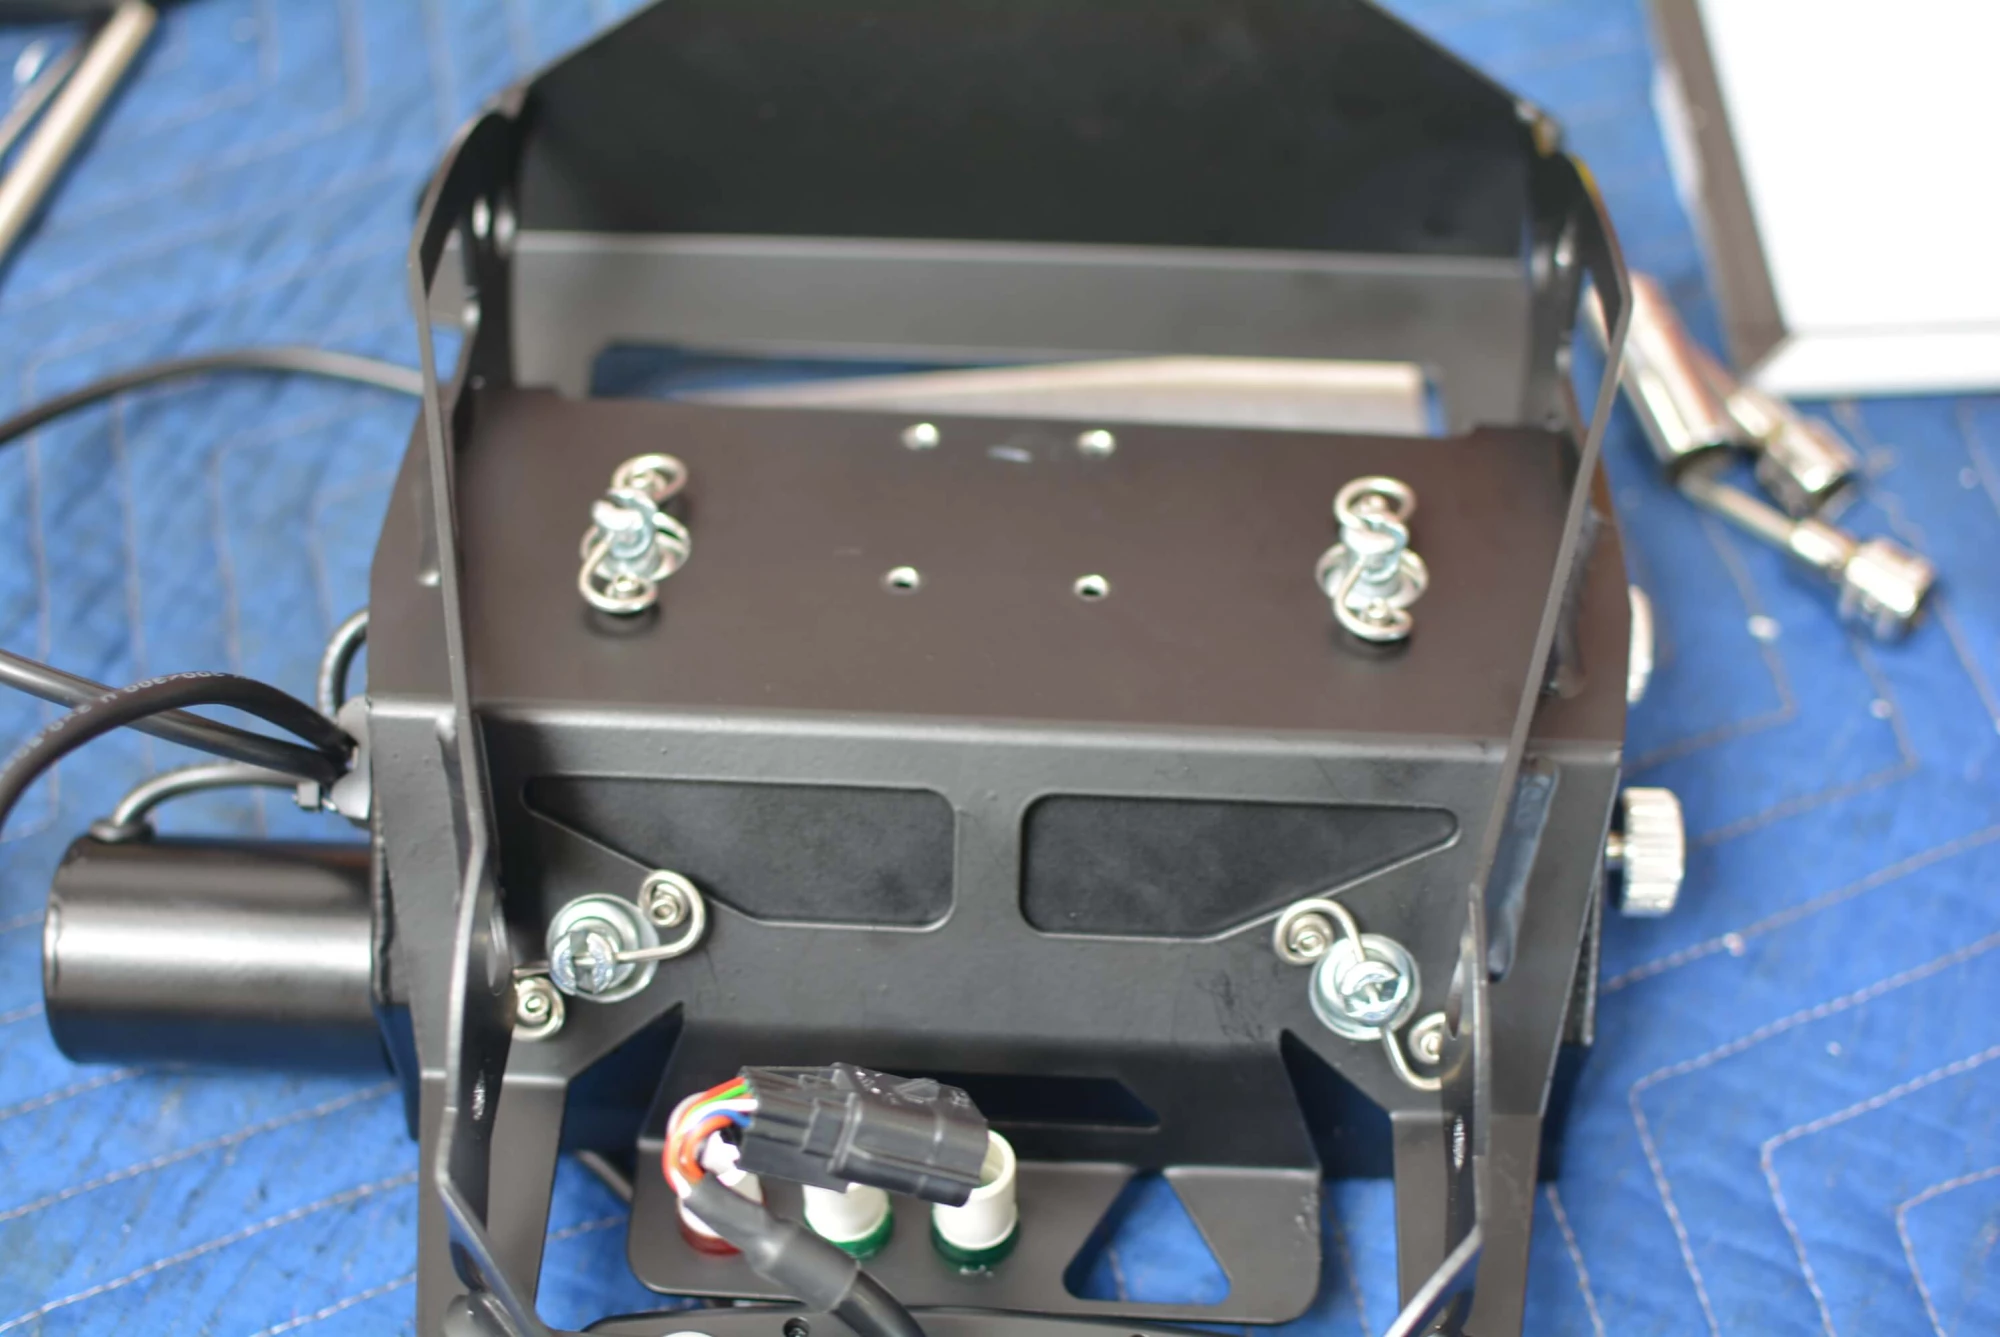
The back of the tower was riveted four Dzus tabs for the quick mounts and the captured quarter turn hardware was bolted to the road book holder.
Then came the surgery. A complete kit was sent to us with help from Alex at Konflict Motorsports and the operation began. This is the part where you need to be focused, calm and take your sweet time getting it all right. You can't afford a failure with this type of equipment so it all needs to be perfect.

The final products looked like something you could land a space shuttle with.
Top Left: ICO distance meter. Re-settable and adjustable for the occasional 'misguidance'.
Top Right: CAP heading or bearing meter. 0 being North, 180 being South and so on.
Second Row: Scrolling back-lit road book.
Third Row: The stock warning lights. The supplied tower had perfect provisions for them.
Fourth Row: Stock dash.
Fifth Row: POD-300 to keep me informed of everything the engine is up to via Dynojet products. I know my AFR's. I know my throttle position. I know my injector duties. I even get LED signals letting me know that the air fuel ratios are exactly where they need to be, helping me deduce possible clogged injectors.
Left Handlebar: Controls the road book paper advance, ICO meter distance, time, and display.
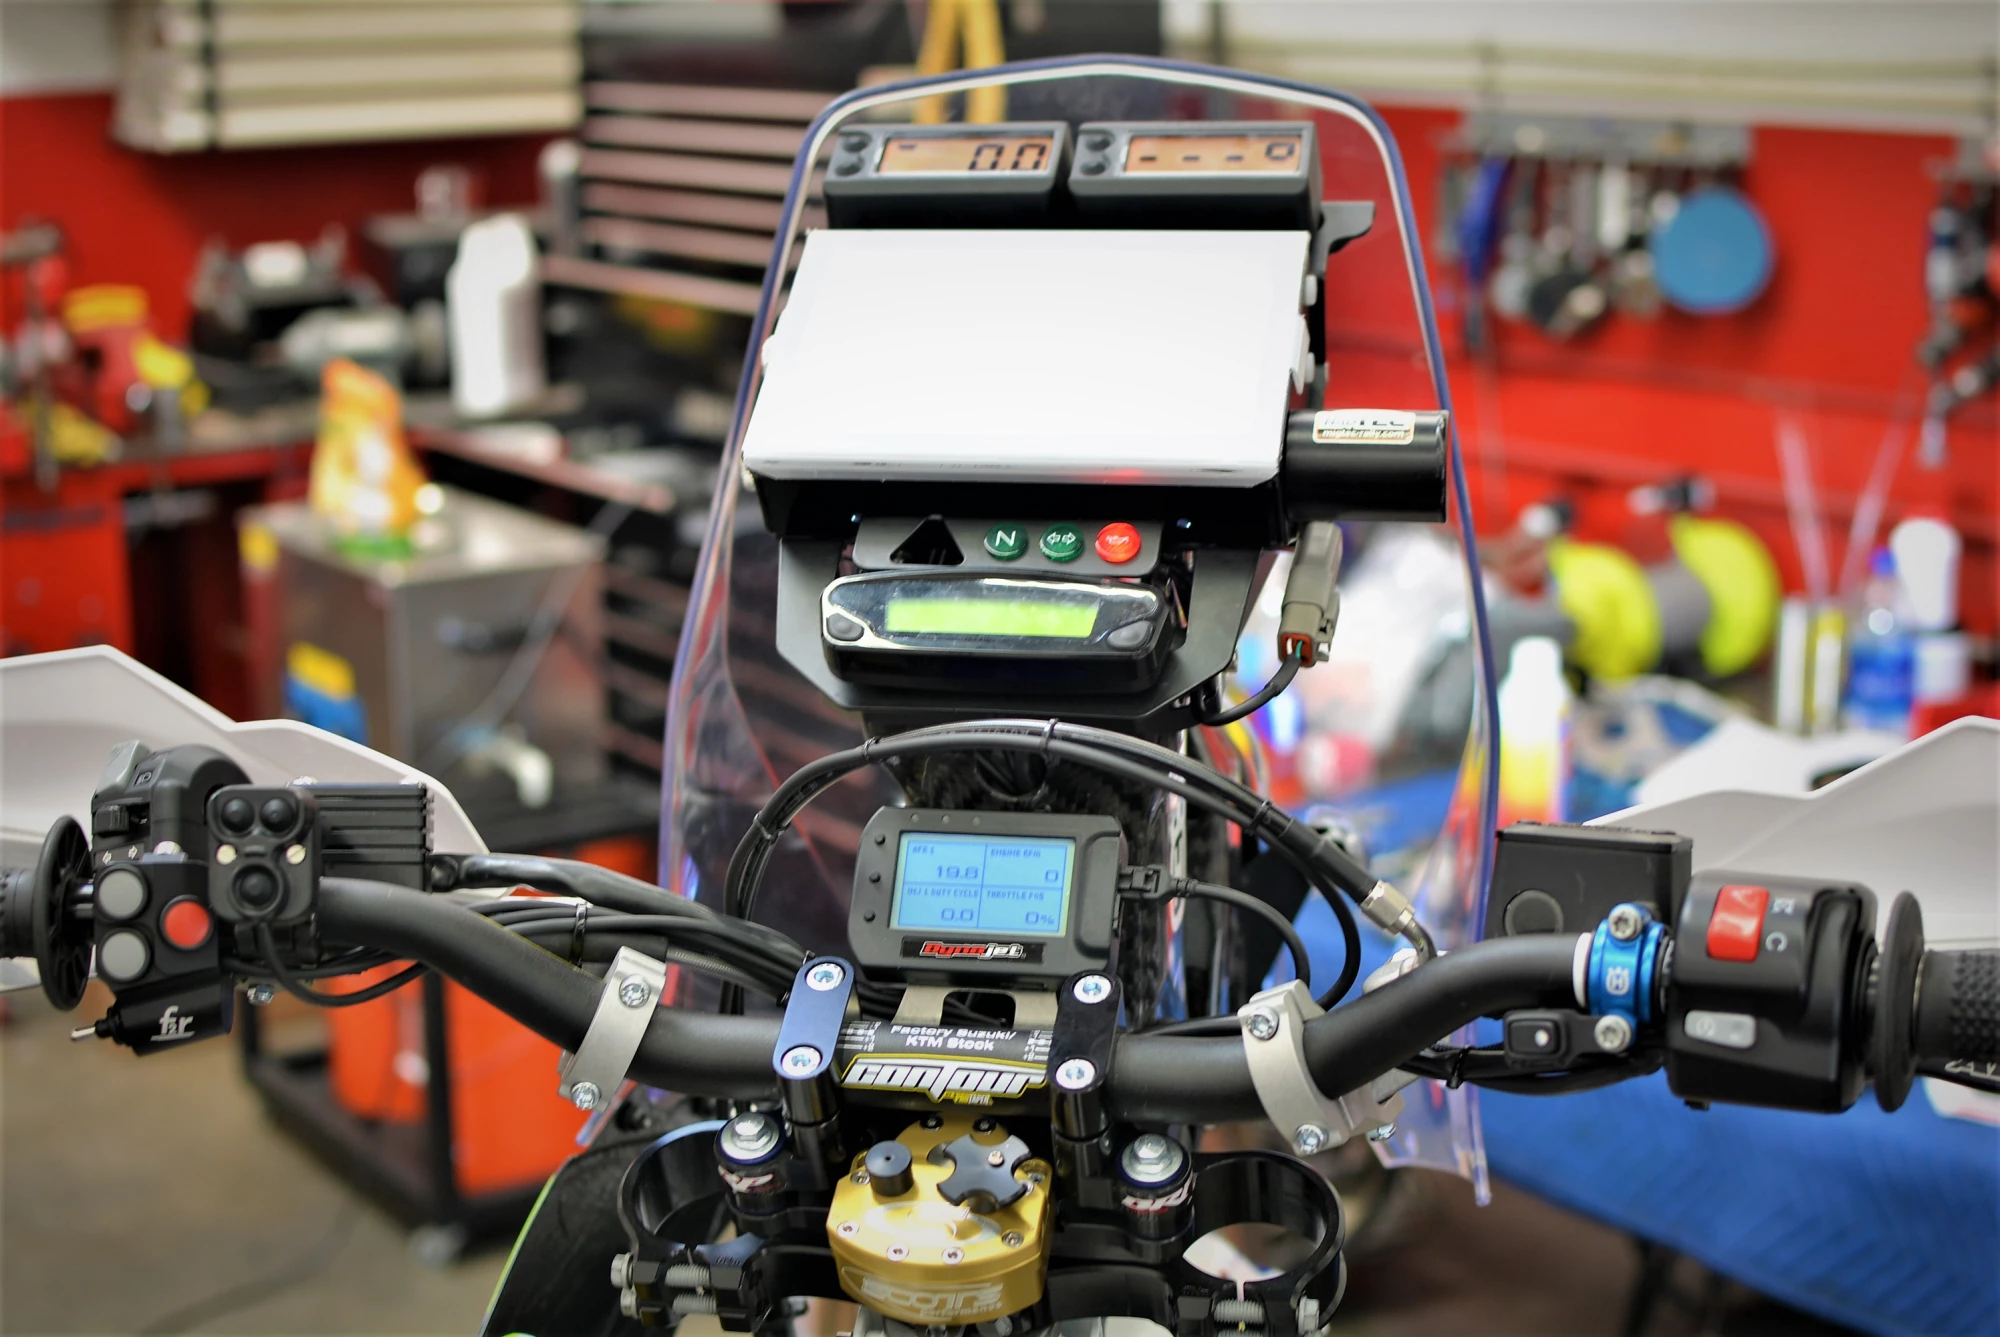
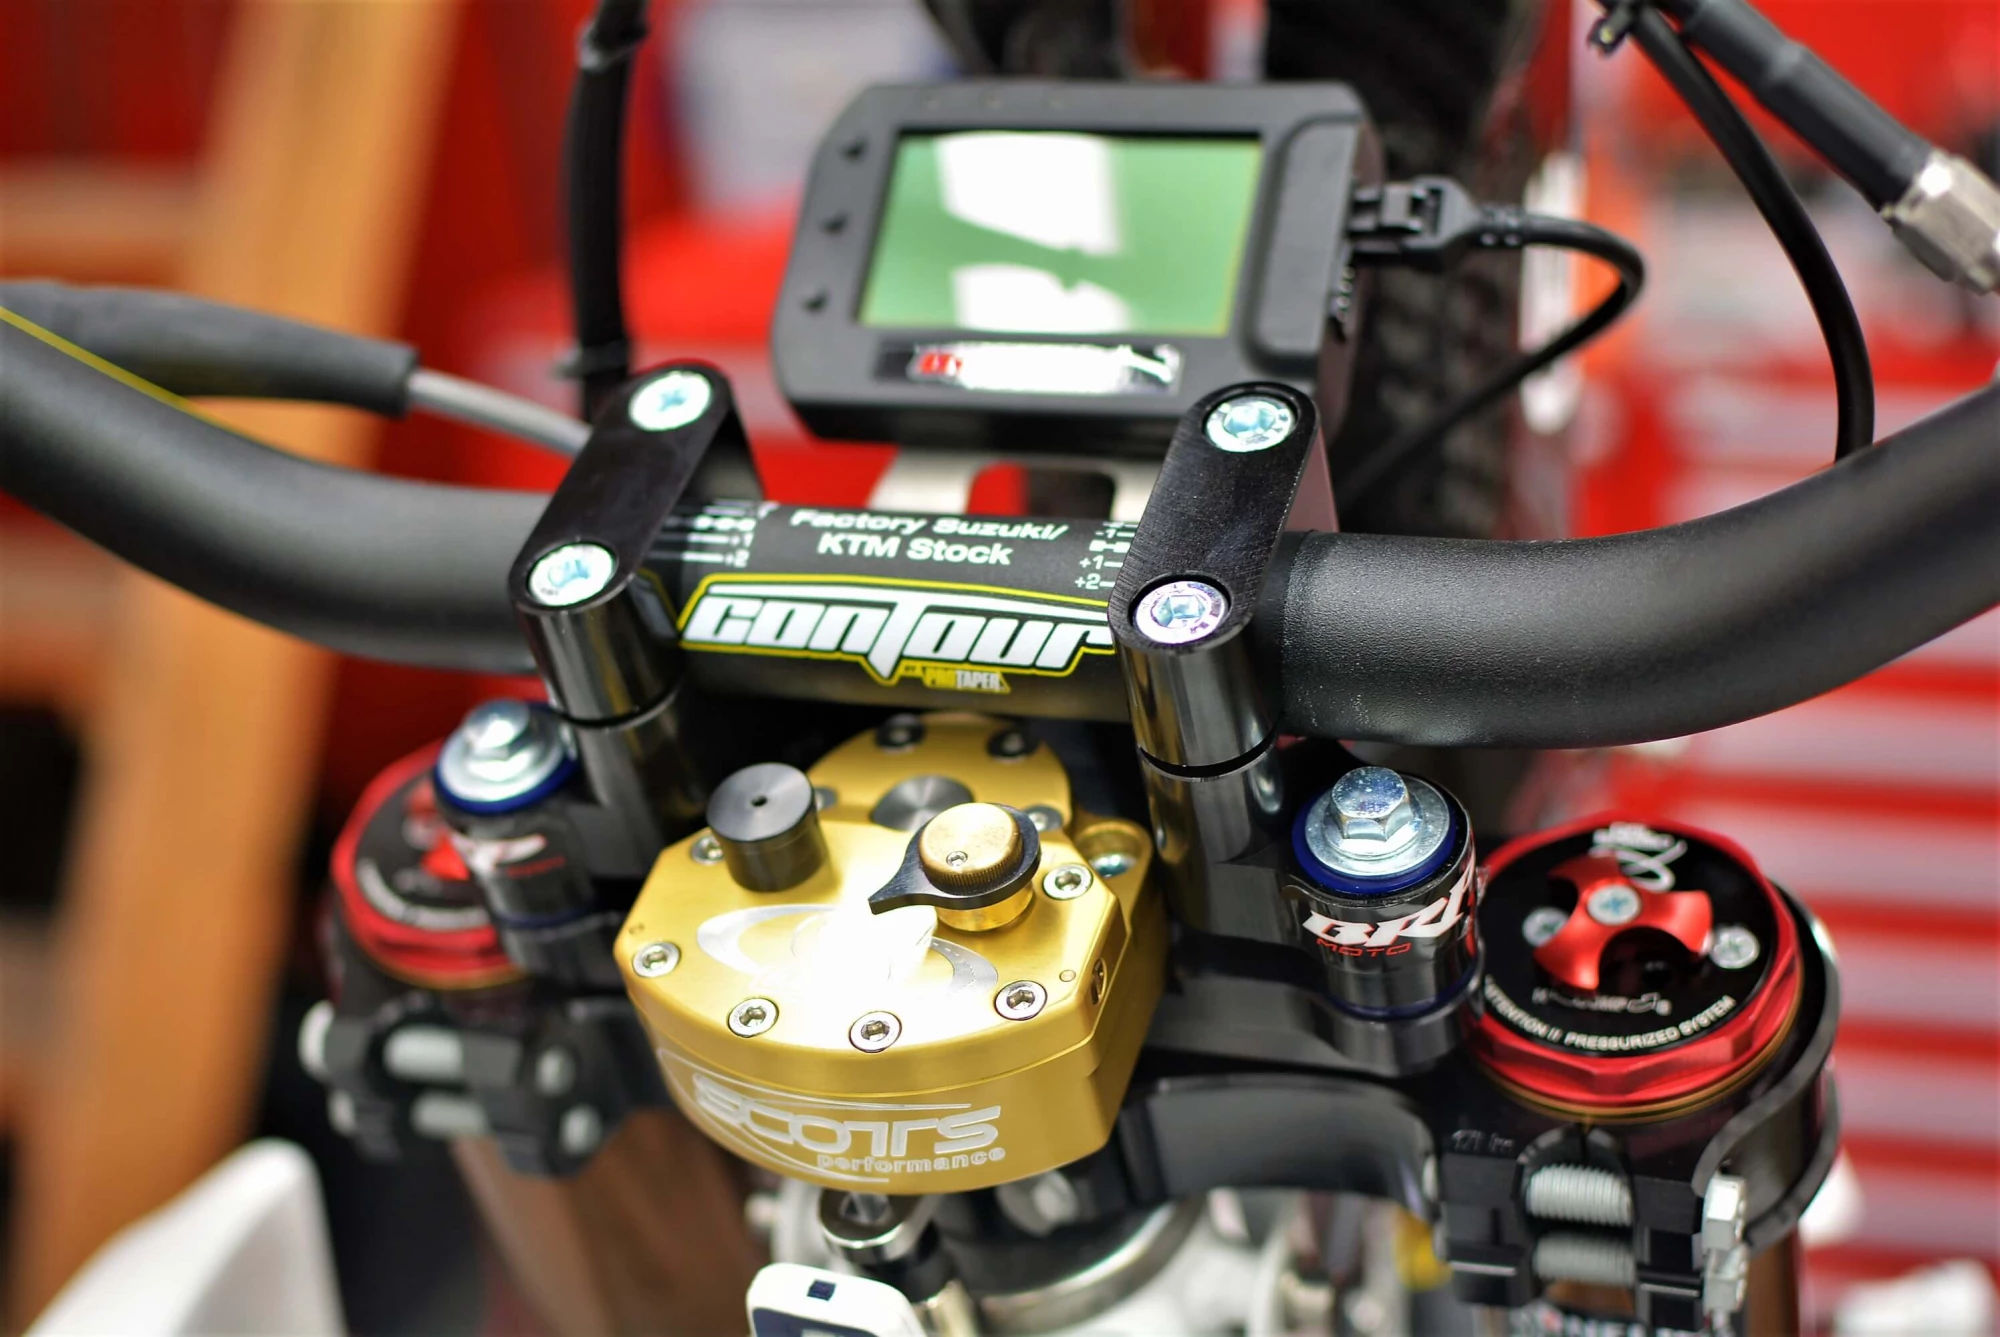
Sitting below all of the nav gear is one of BRP's vibration isolation Scotts Damper mounts. These beautifully straightforward pieces really help with the vibration issues of the big single and hold your Scotts damper (a must off road) cleanly under the bars. As a byproduct, the bars are also raised about an inch, something many riders simply want anyway.
Sitting forward from that is our simple device we call the 'AMPS Mount'. It uses the two forward BRP vibrationi isolation mounts to attach many different types of devices that incorporate the popular AMP bolt pattern in both landscape and portrait. This includes the POD-300 (shown below), Garmin, Magelin, RAM Mount, and many more.
At the front of the tower two projector housings are included with the Omega kit. While they come with incandescent bulbs, we opted to add a pair of Cyclops replacements for added light. While this isn't something we normally carry due to the rarity of the need, they are available for any build if the customer wants them.
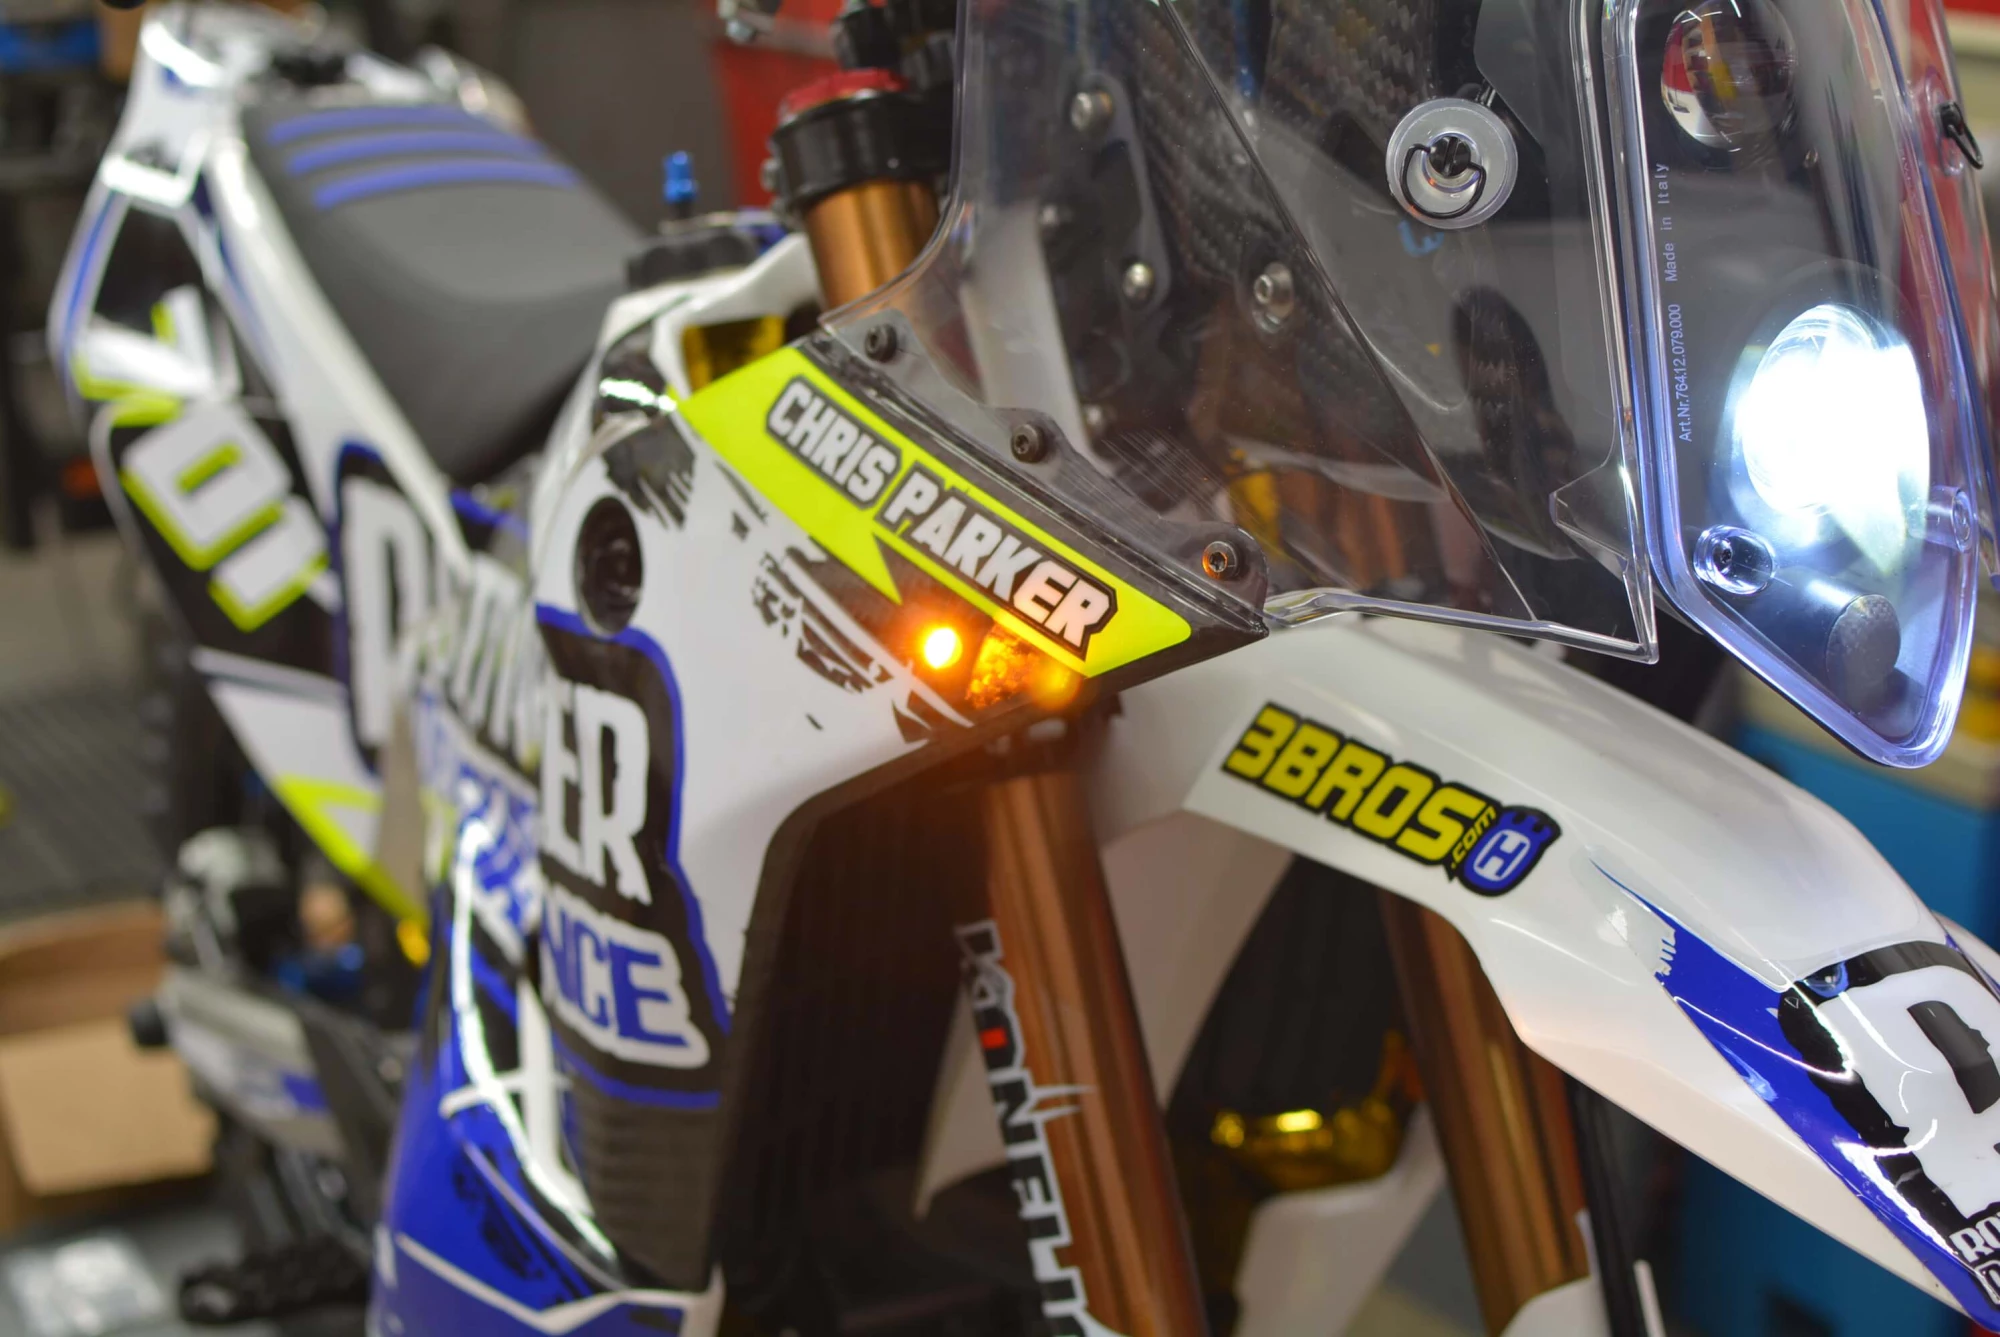
The turn signals are Watsen Design and are also available upon request. At $160 a pair, they are not for the faint of wallet, but they are tiny, durable, and almost imperceptible. Most people who have seen this bike in person don't even notice them. Remember, the goal was to build a race bike that was legitimately street legal, and these help maintain that awesome race look, while keeping the bike on the 'up and up. These lights are tough to get but are available and in stock upon request.
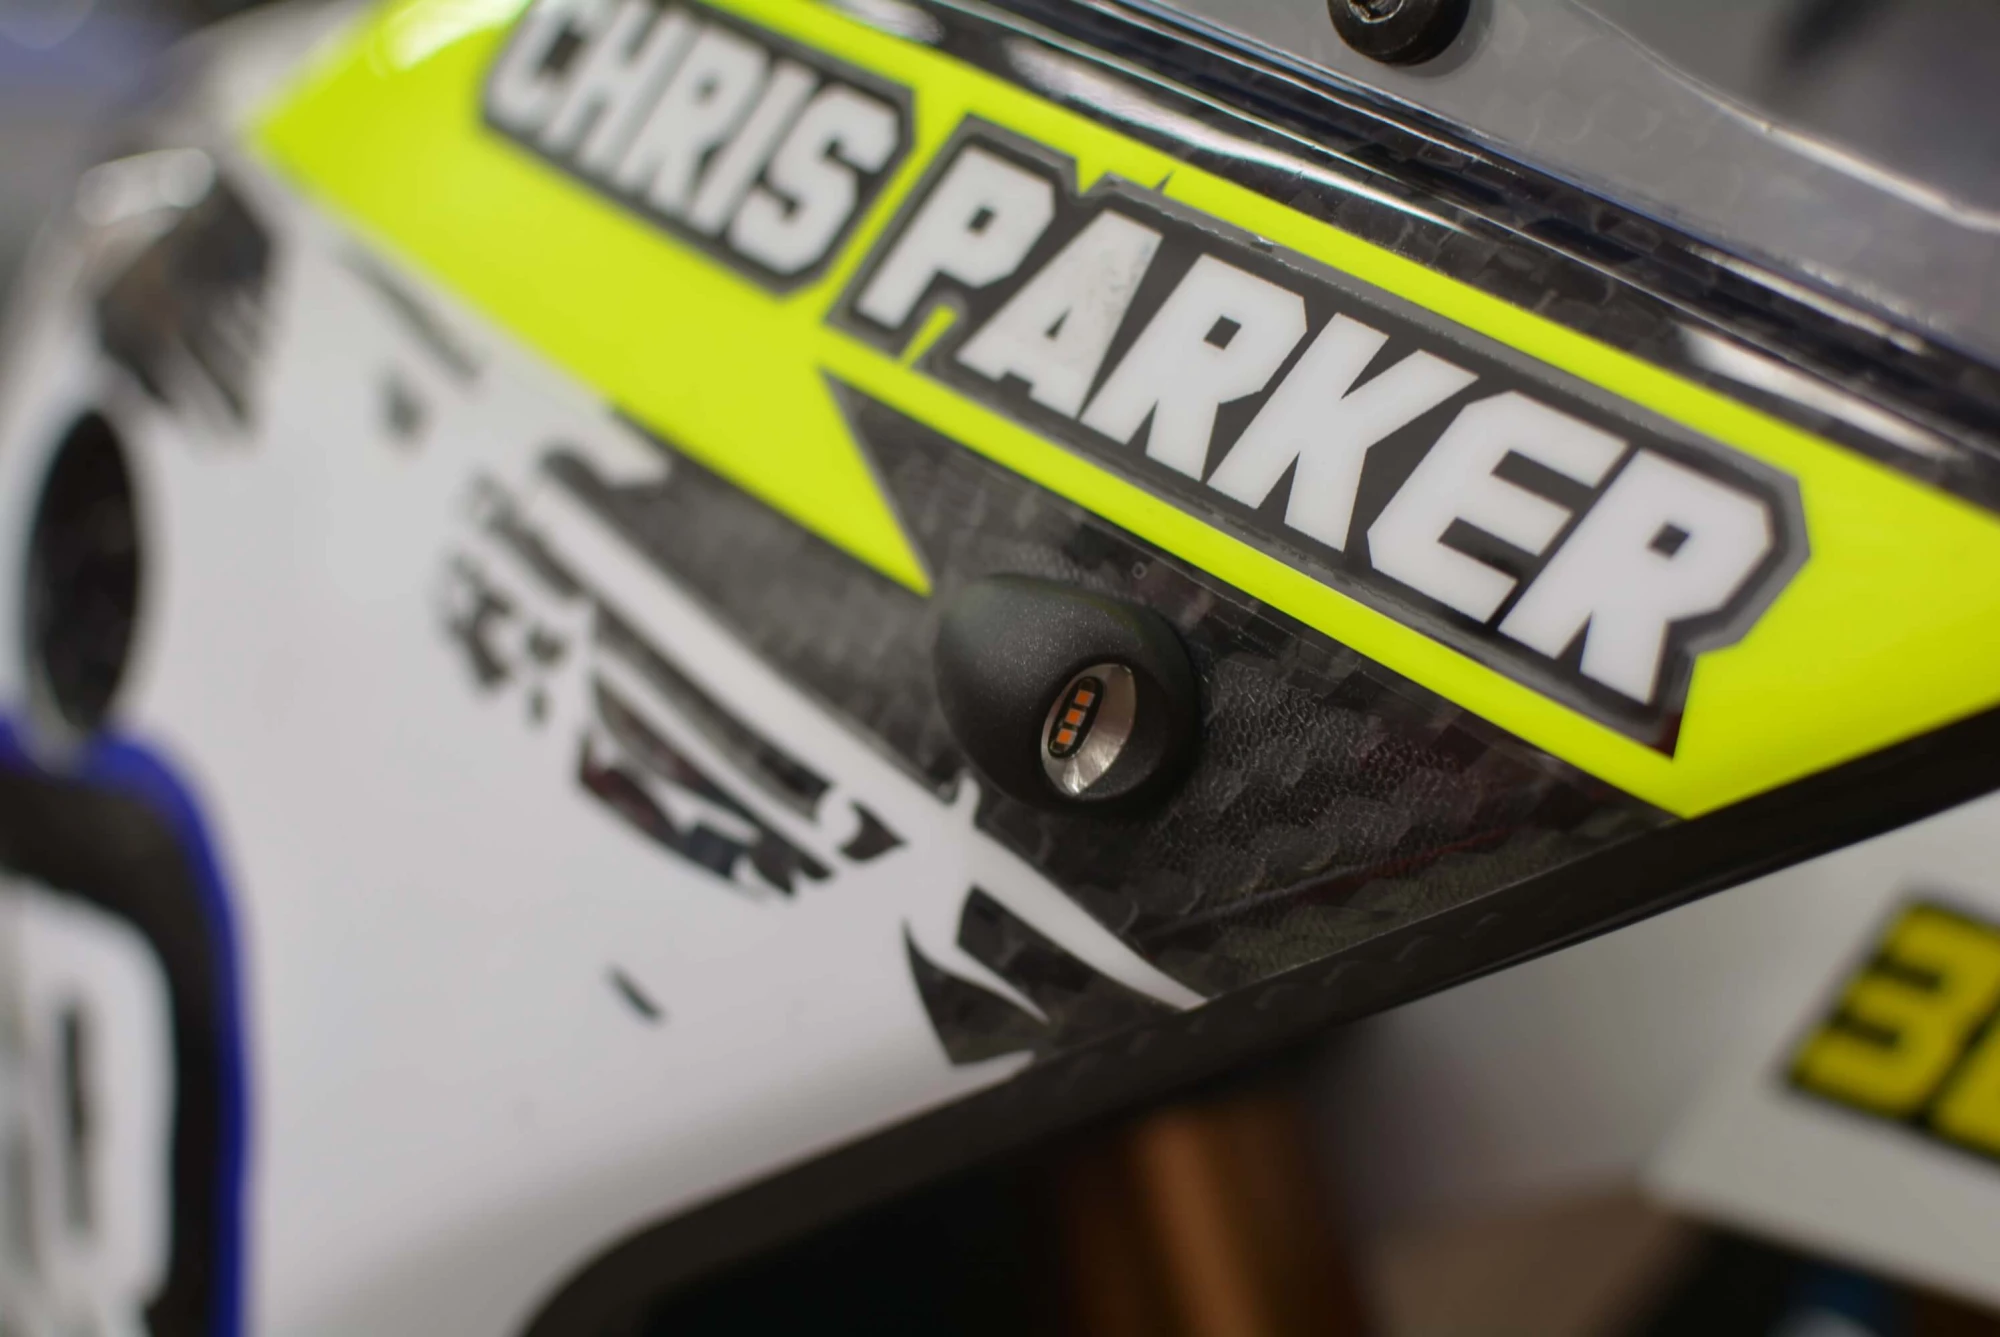
Did we say they were bright? They almost hurt your eyes from the front. Something we don't mind when it comes to people noticing where we are intending to go!

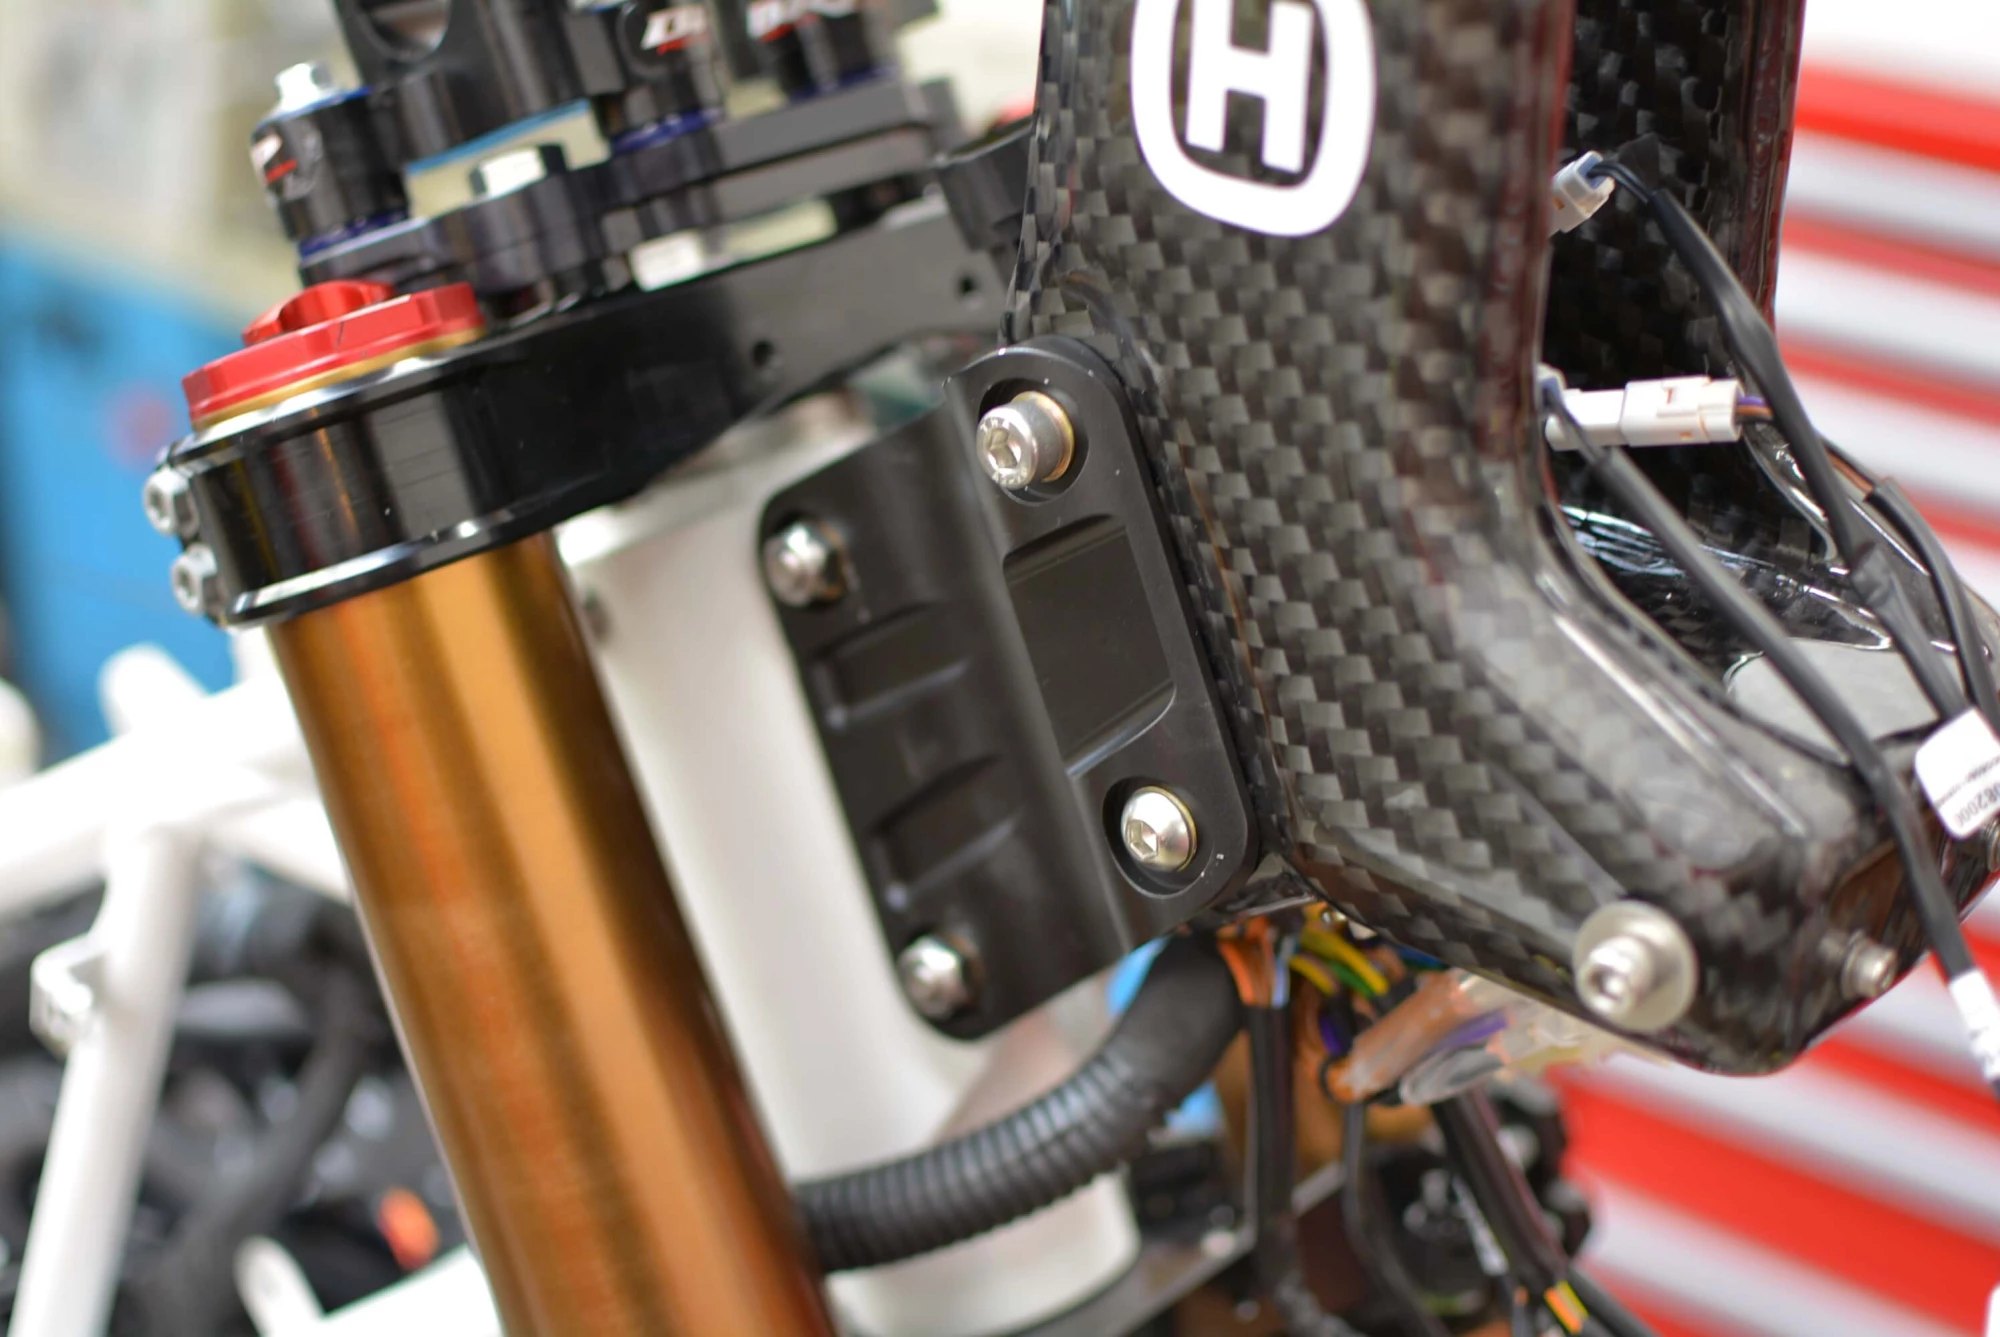
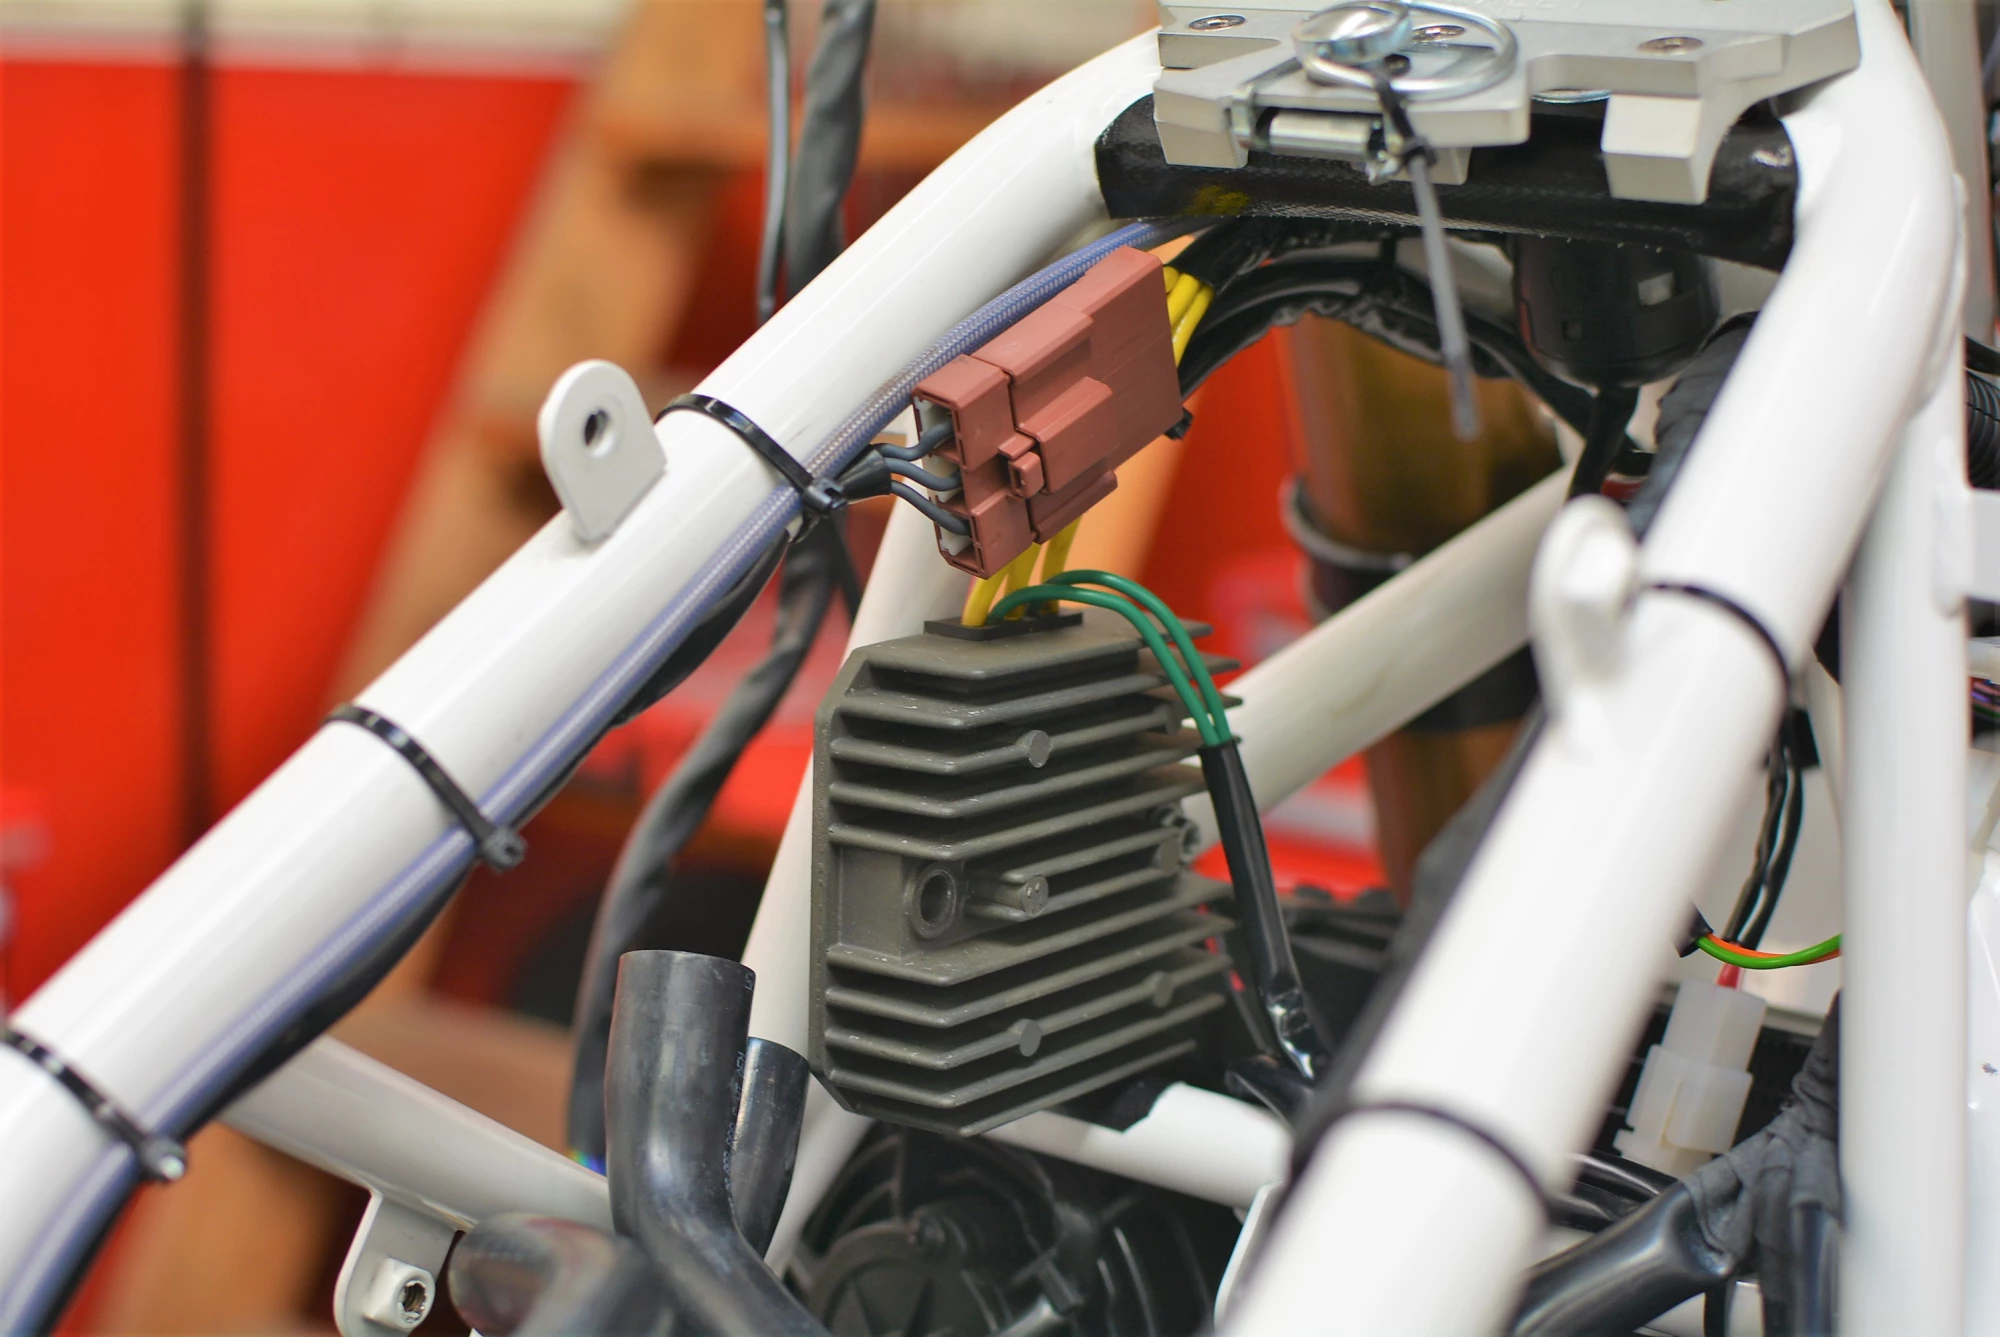
The regulator rectifier was relocated to the upper part of the frame just under the head stock. The Rottweiler Intake System remove allot of unnecessary air-box, leaving plenty of room for creative practices. It was bolted to the frame using the forward-left air box mount. This kept it high, away from danger and in the air stream.
The Decision To Remove The ABS, And How We Ran The Lines.
The decision to remove the ABS was undoubtedly a serious labor of love. EVERYTHING runs through the ABS unit for the stock dash, so this was going to get tricky. The good news is these big singles are not as temperamental as their larger twin cousins when it comes to electronics. They are still more complicated than bikes int he past, but they won't grind you to a stop if certain items are removed or don't constantly tell the ECU that they still exist.
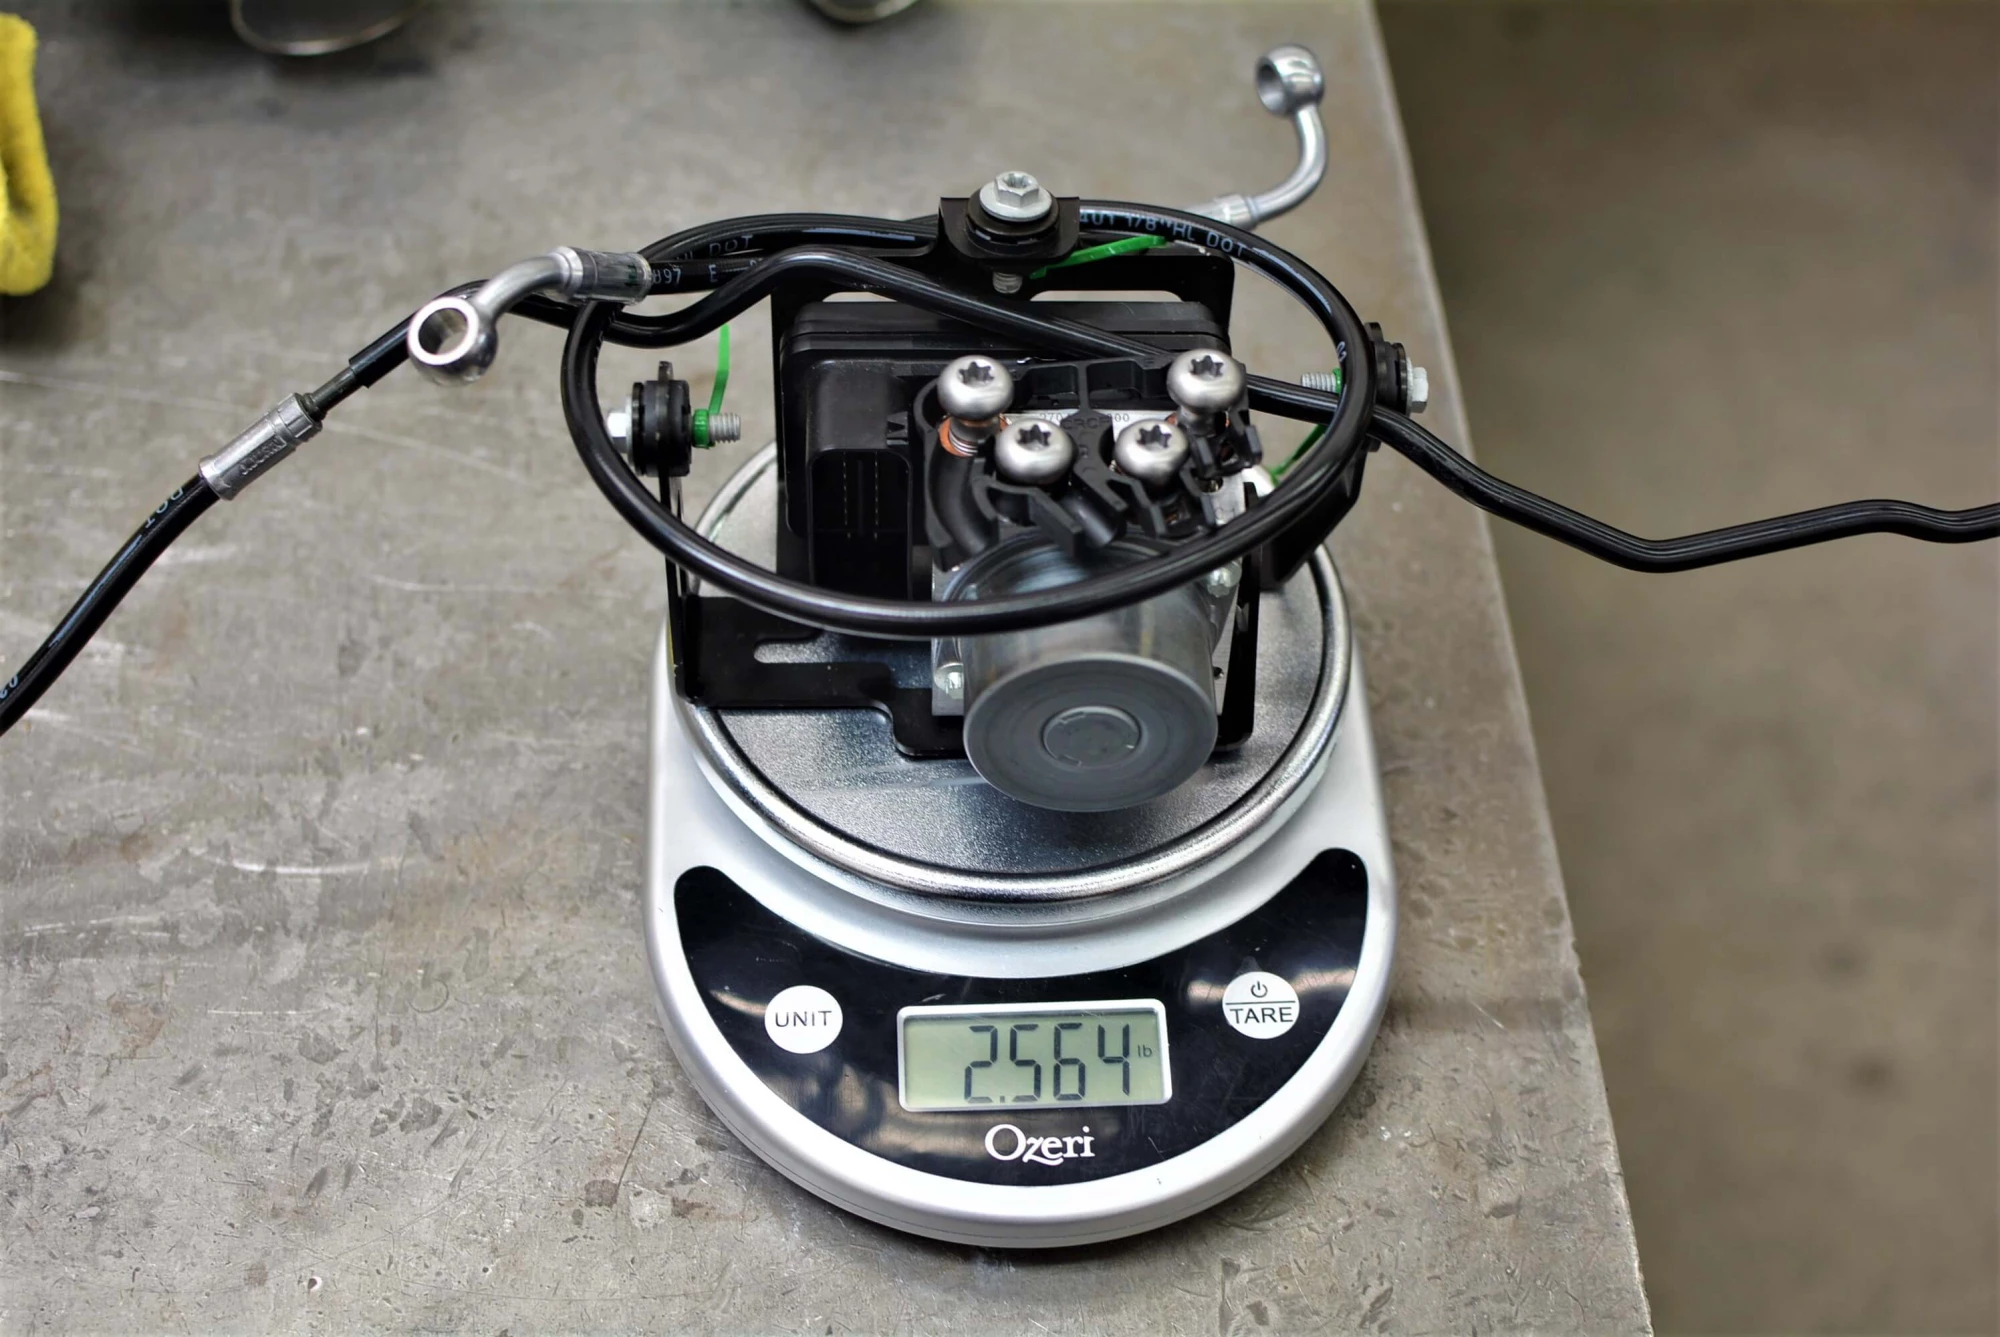
Extracting the ABS only really elicited a 2.56 lb weight reduction. We were hoping for more but it's still something. At this point in the story our stock dash does not operate anymore as all of the signals travel through the electronics below, but with all of the nav gear, we really don't need it. The goal was to separate the electronics from the actual motor, which is really the heavy part, but to date (we will update this) we have not been able to separate them without damaging the computer. Although we have them slightly parted, something has a death grip inside.
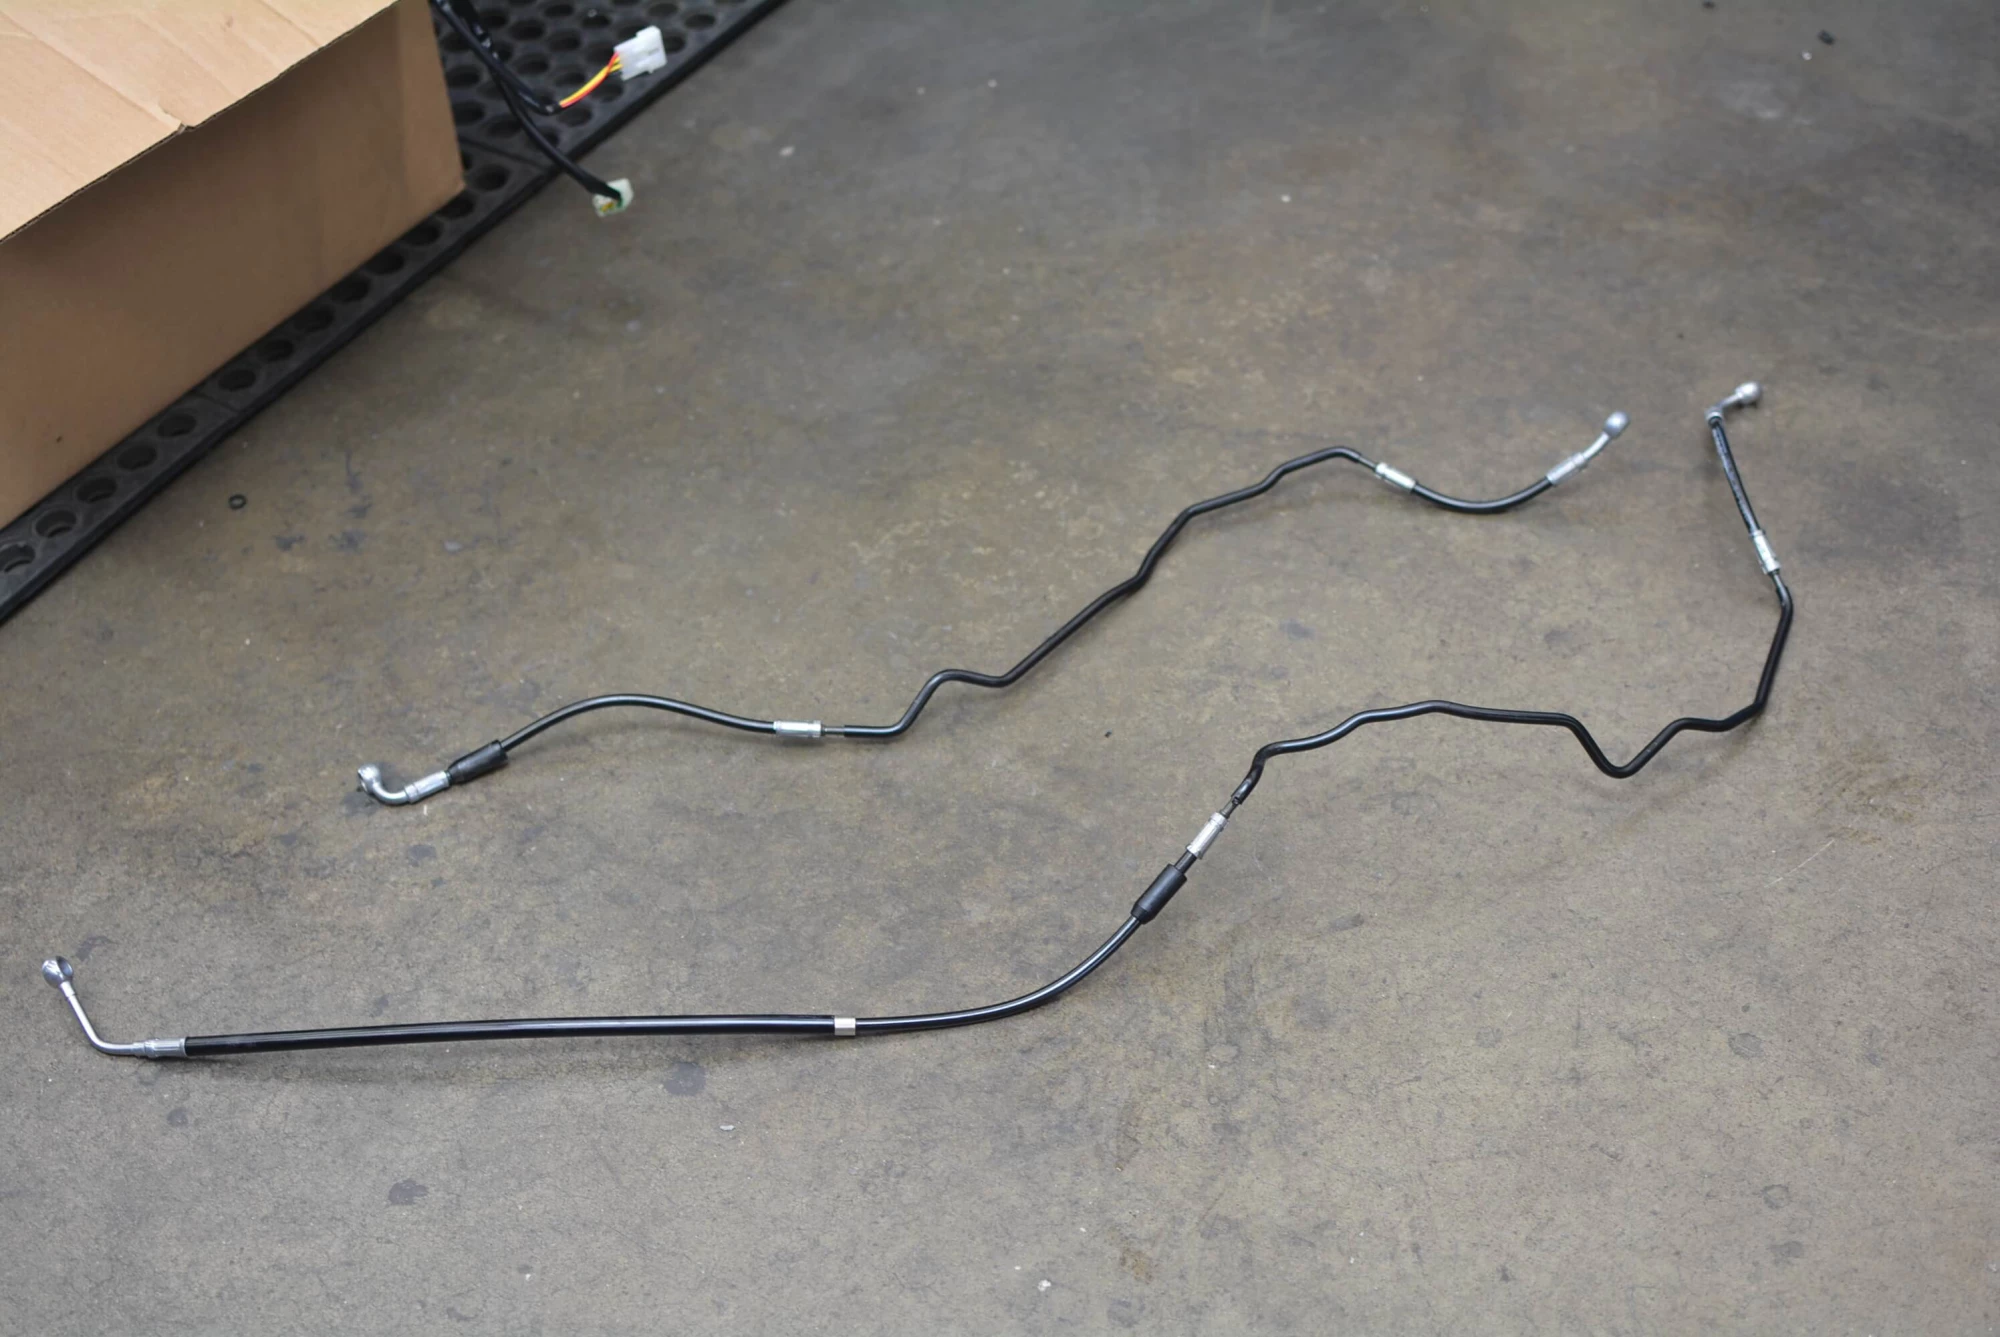
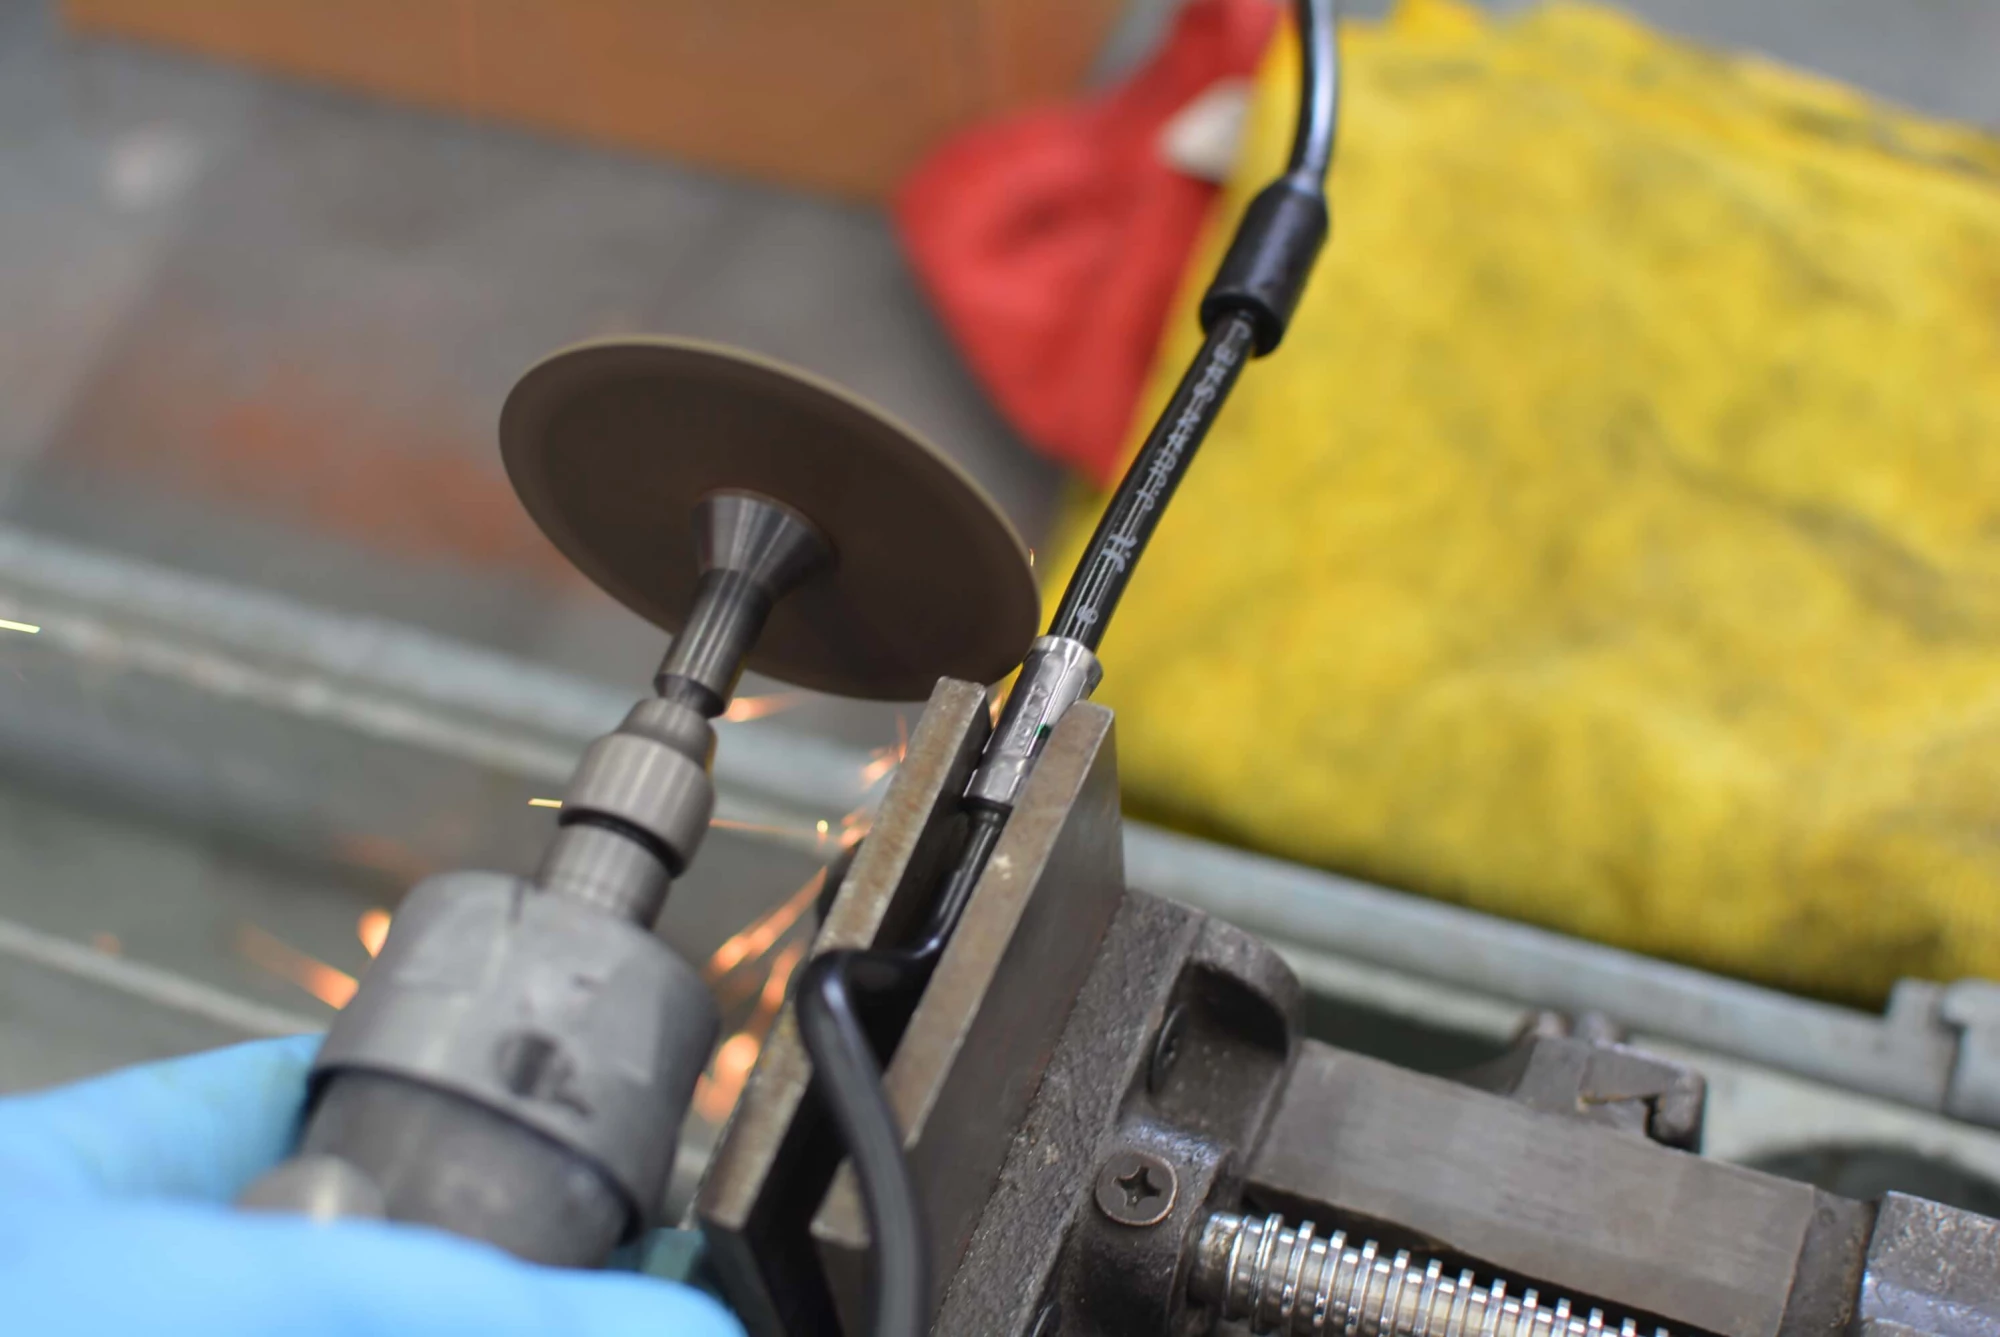
Removing the hard lines was also interesting. Due to the confined nature of the center of this bike, they had to be bent by hand to get them out so make sure that if you decide to do this, that you recognize that there won't be any turning back to stock.
Now it was time to remake the brake lines. Our first attempt was to utilize the stock lines that remained. We had plenty of leftover line to work with, but after having a new banjo end crimped to the stock line fail, superstition took over and we made the decision to craft a new set from scratch. Normally we would look to Galfer for this if it was an OEM replacement with better quality, but since there were total one off's that we needed allot of input on, we decided to run to our local line shop and make our own.
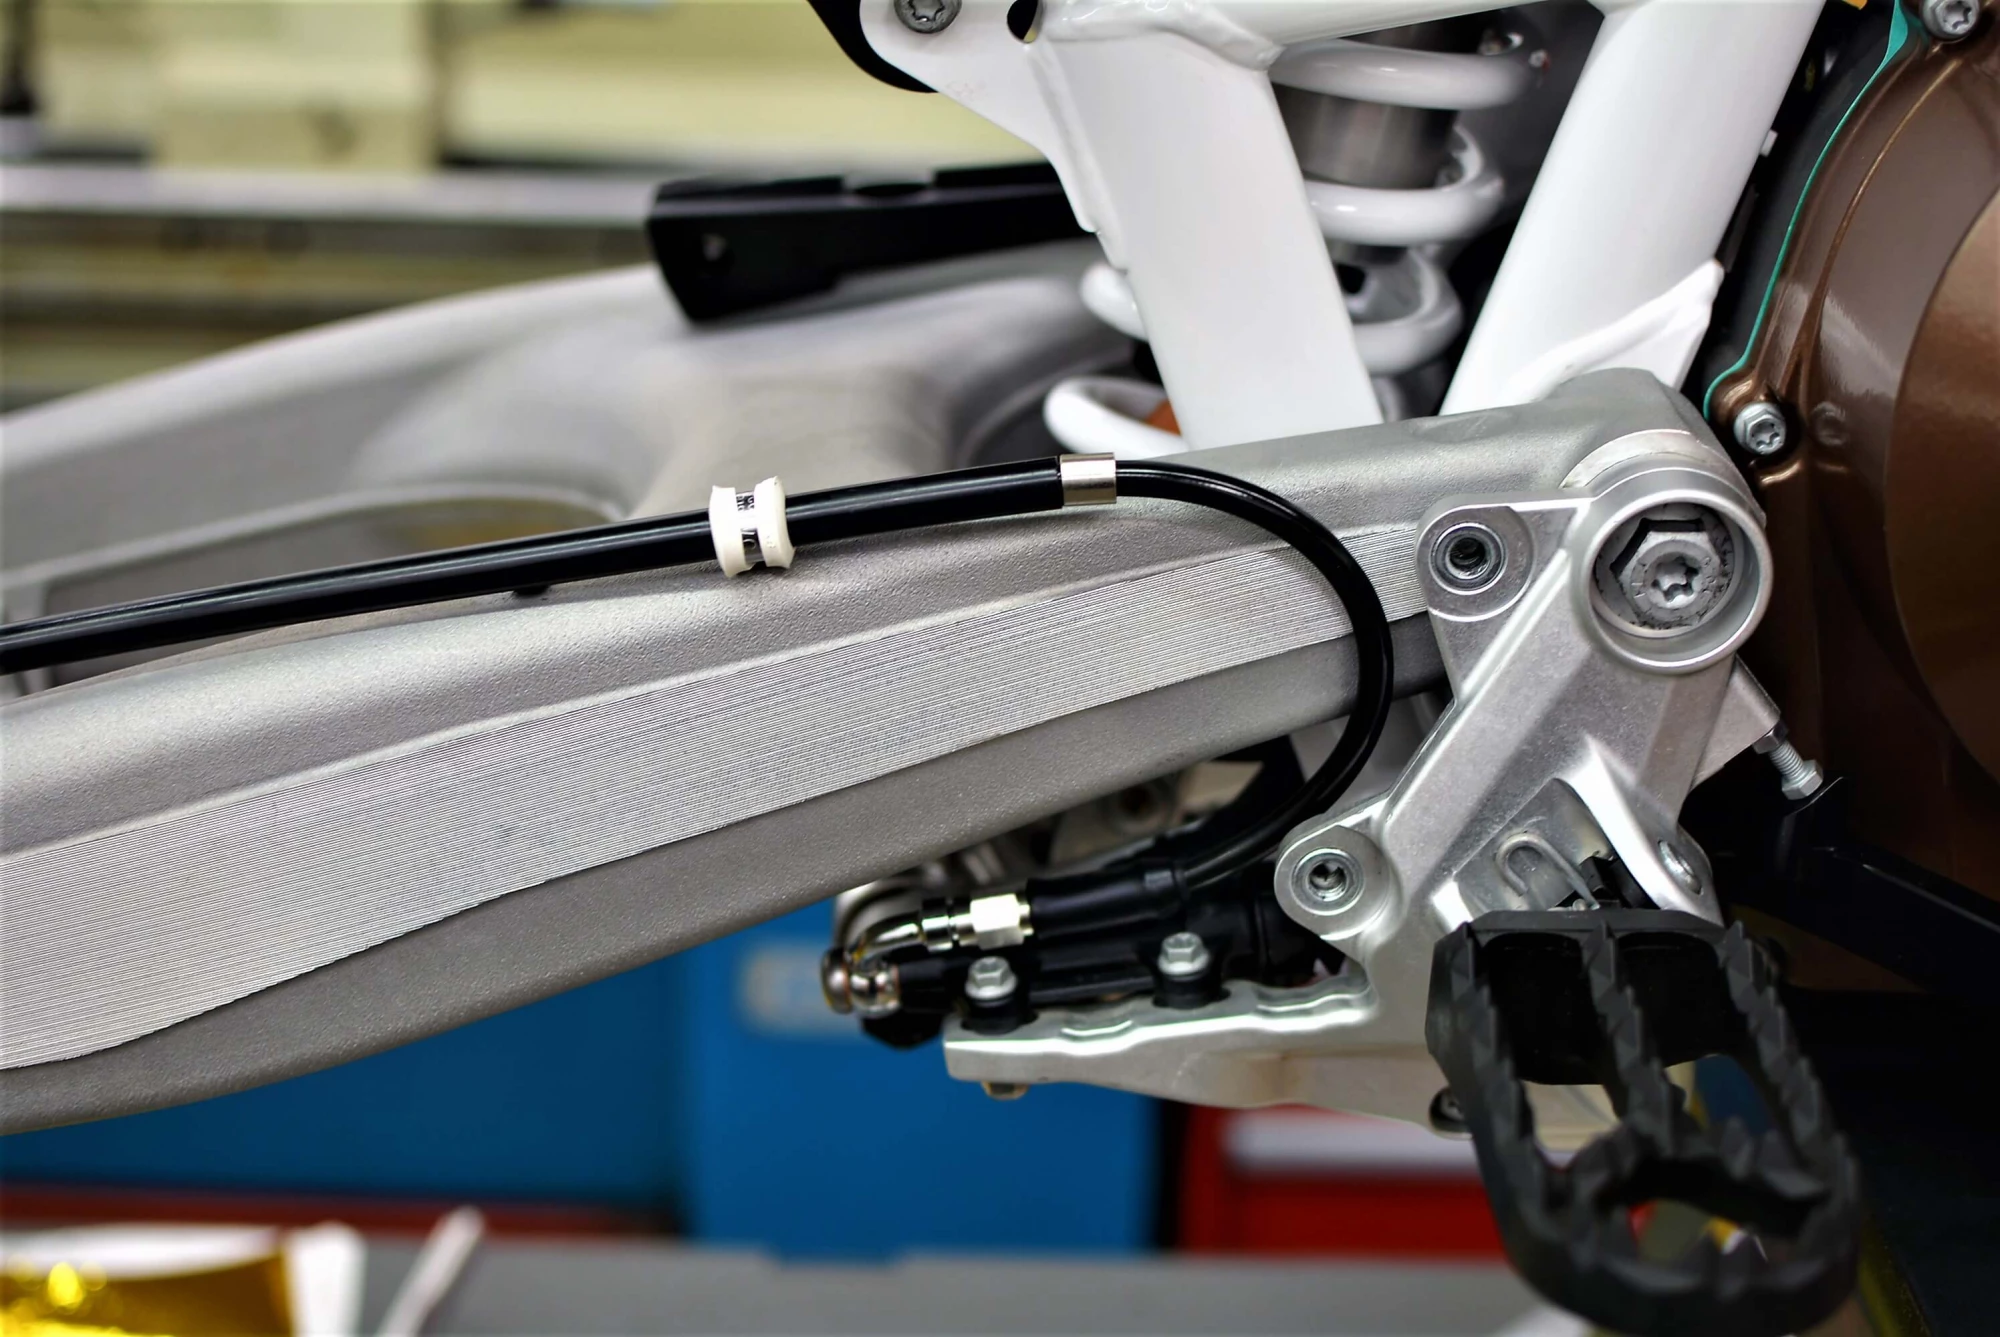
Below is our first shot with the stock lines to show the routing. The type of connection allowed us to clock the line so that is smoothly flexed with the swingarm travel and was protected once the heel guards were reinstalled.
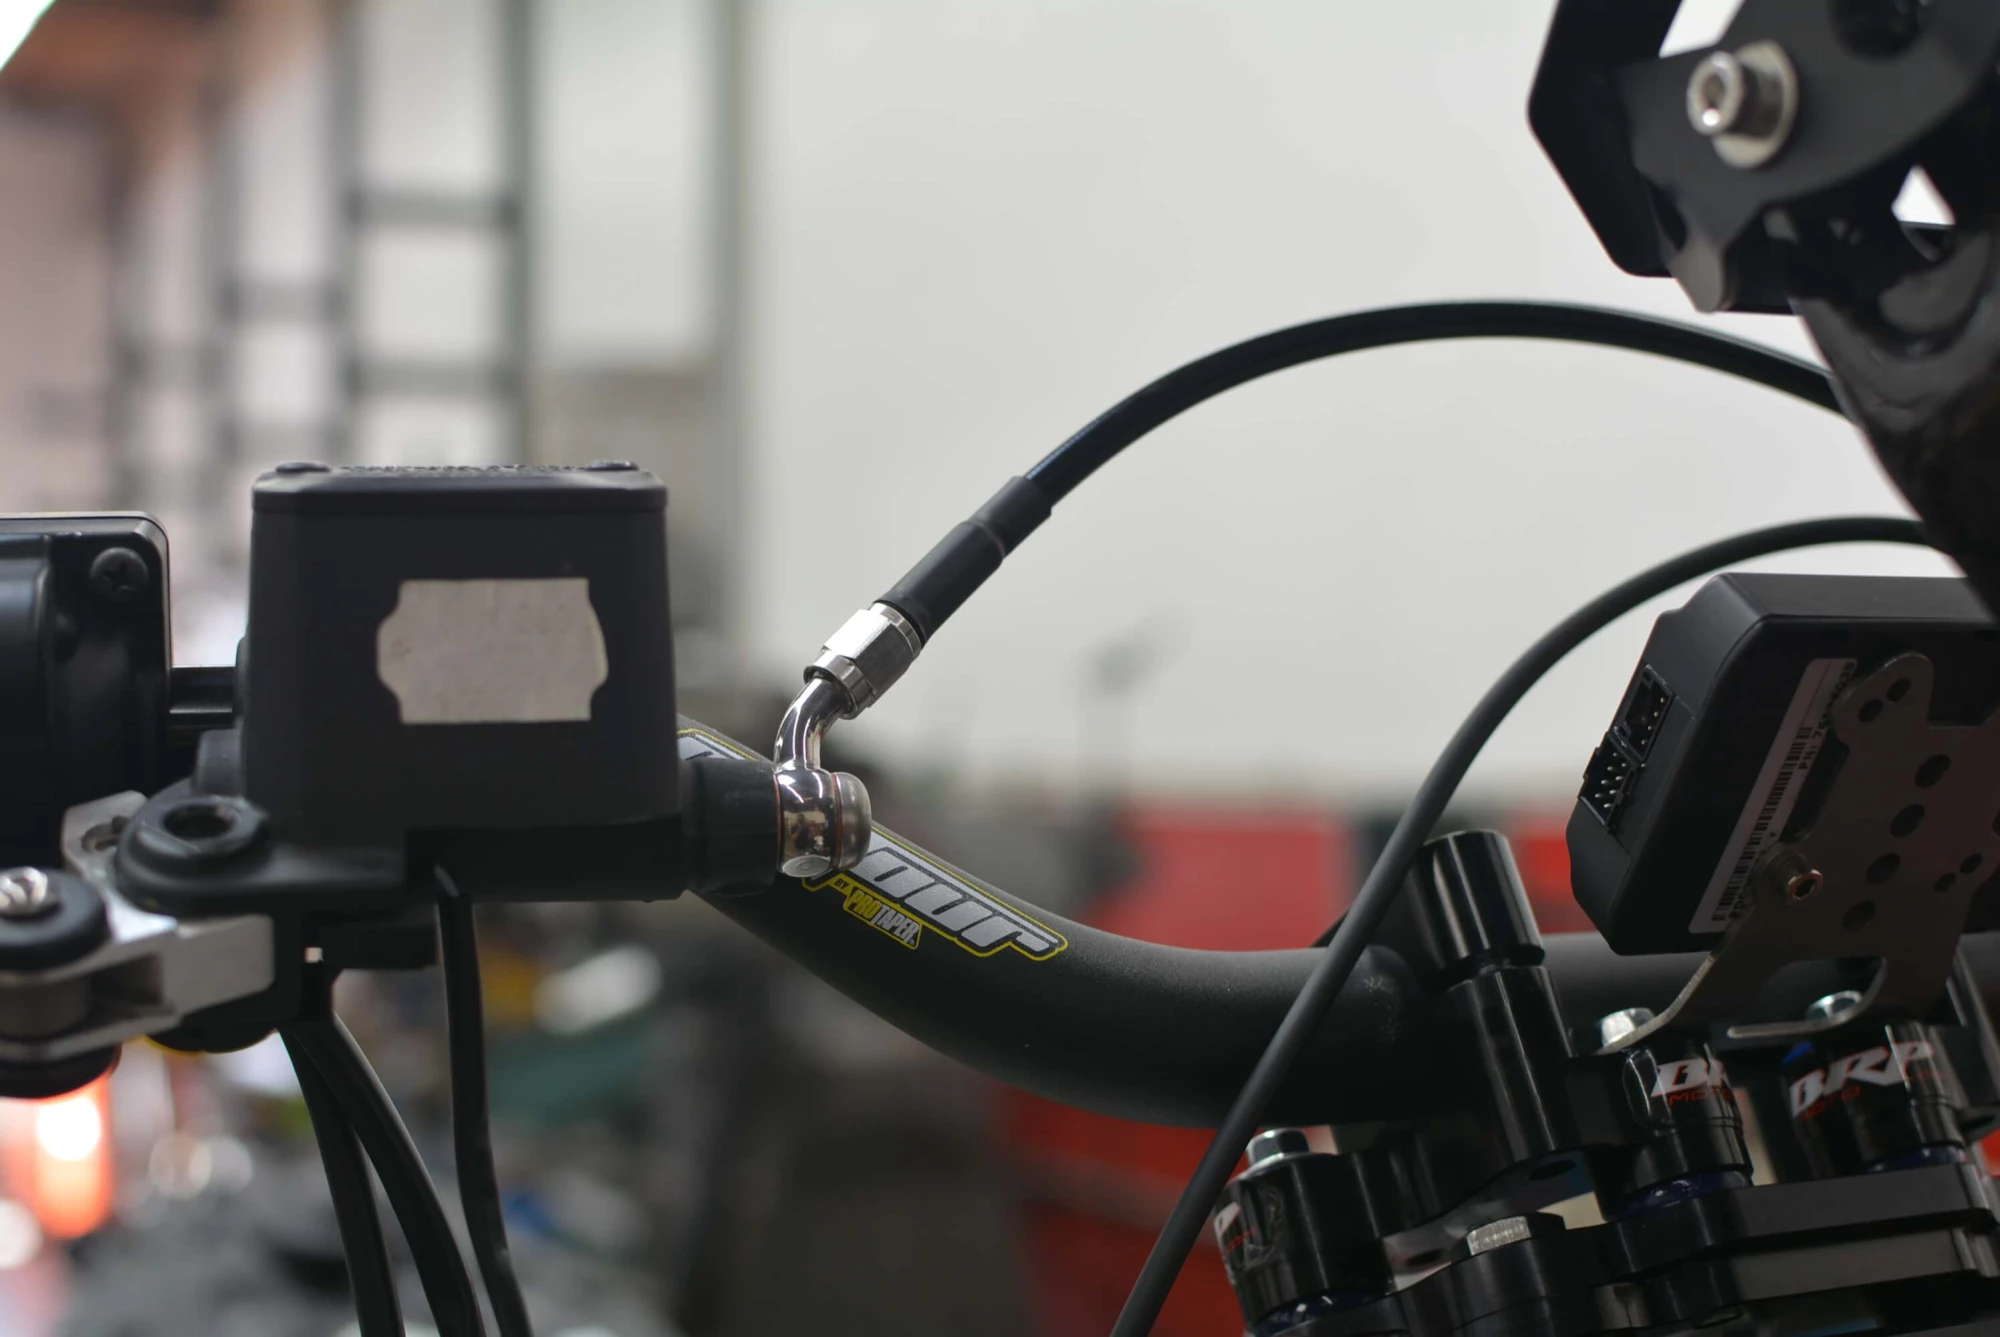
We made a conventional routing for the front lines, that worked quite well. With this type of setup, the line can be clocked to arc exactly where we wanted it as the line is a screw on type with a 45° 10mm banjo.
FALSE NEUTRALS SUCK
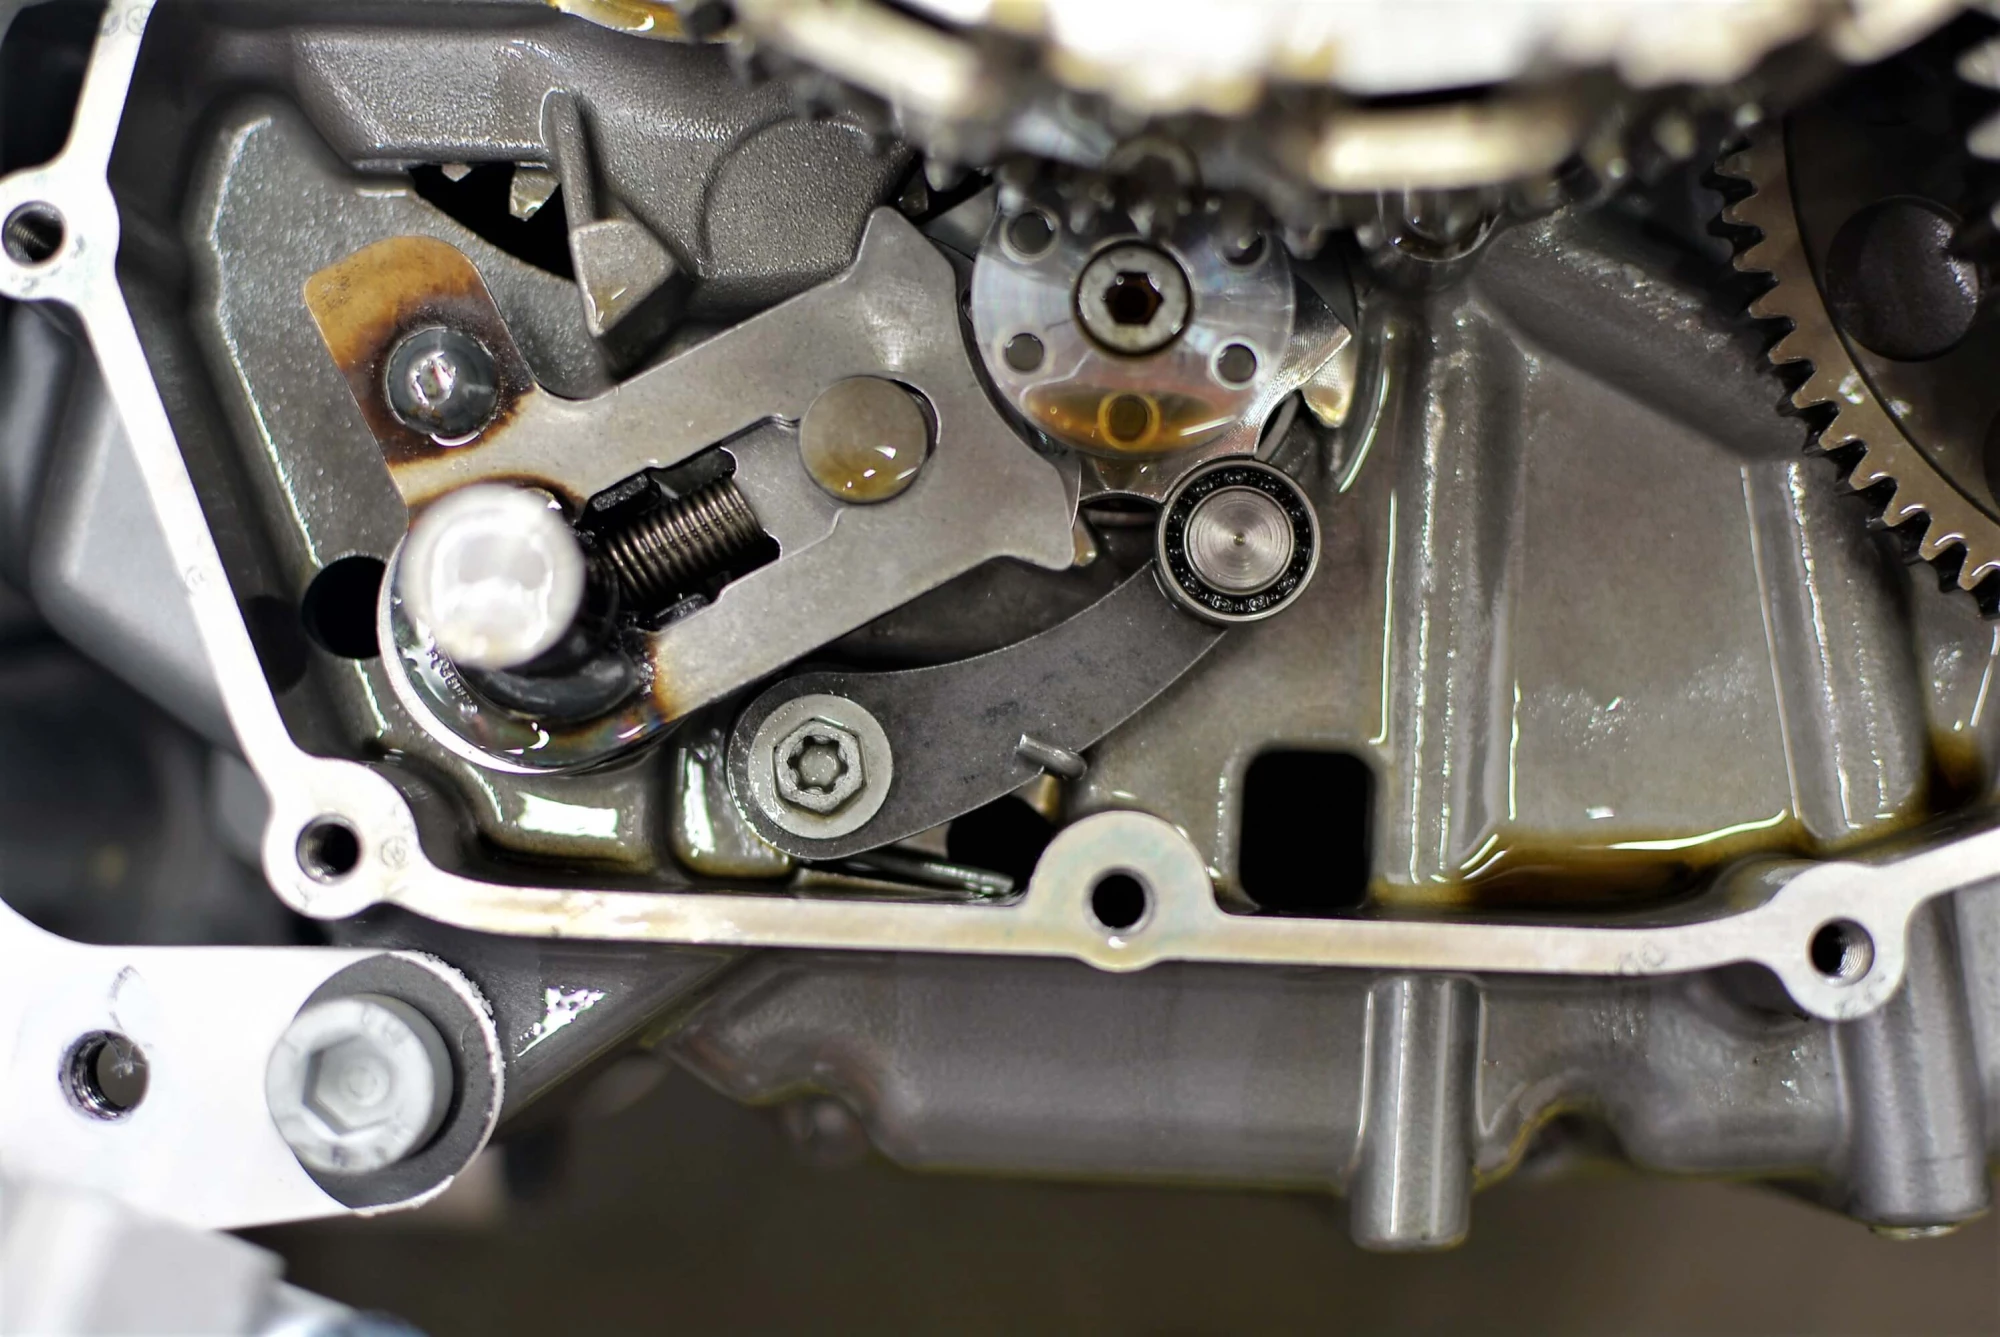
We have no other way to say it. Almost everyone hates the way the LC4 shifts. False neutrals are a way of life and can be extremely aggravating. After selling hundreds of Factory Pro Shift Kits, it was time to try one out for ourselves. The result? Way less false neutrals and more positive up and down shifts boosting confidence. False neutrals can happen with anything, but we still prefer in this situation that LESS is better!
When installing these, the clutch does not need to come out at all and they can be accessed by simply removing the side cover. You don't even have to drain the oil. Hint: Make sure the water pump gear is simply lined up on the inside of outer water pump driver and the cover will drop right on after this is installed. If any gears move, they will be misaligned and the cover will fight you a bit. Or, just remove the outer water pump cover so that you can manually rotate the water pump impeller so that they align with the driver. We don't have pictures of this, but it's quite easy and this will all make sense when you see it. If you did not know about this little trick, you may be wondering why the cover will not seat and hopefully aren't headed for a hammer!
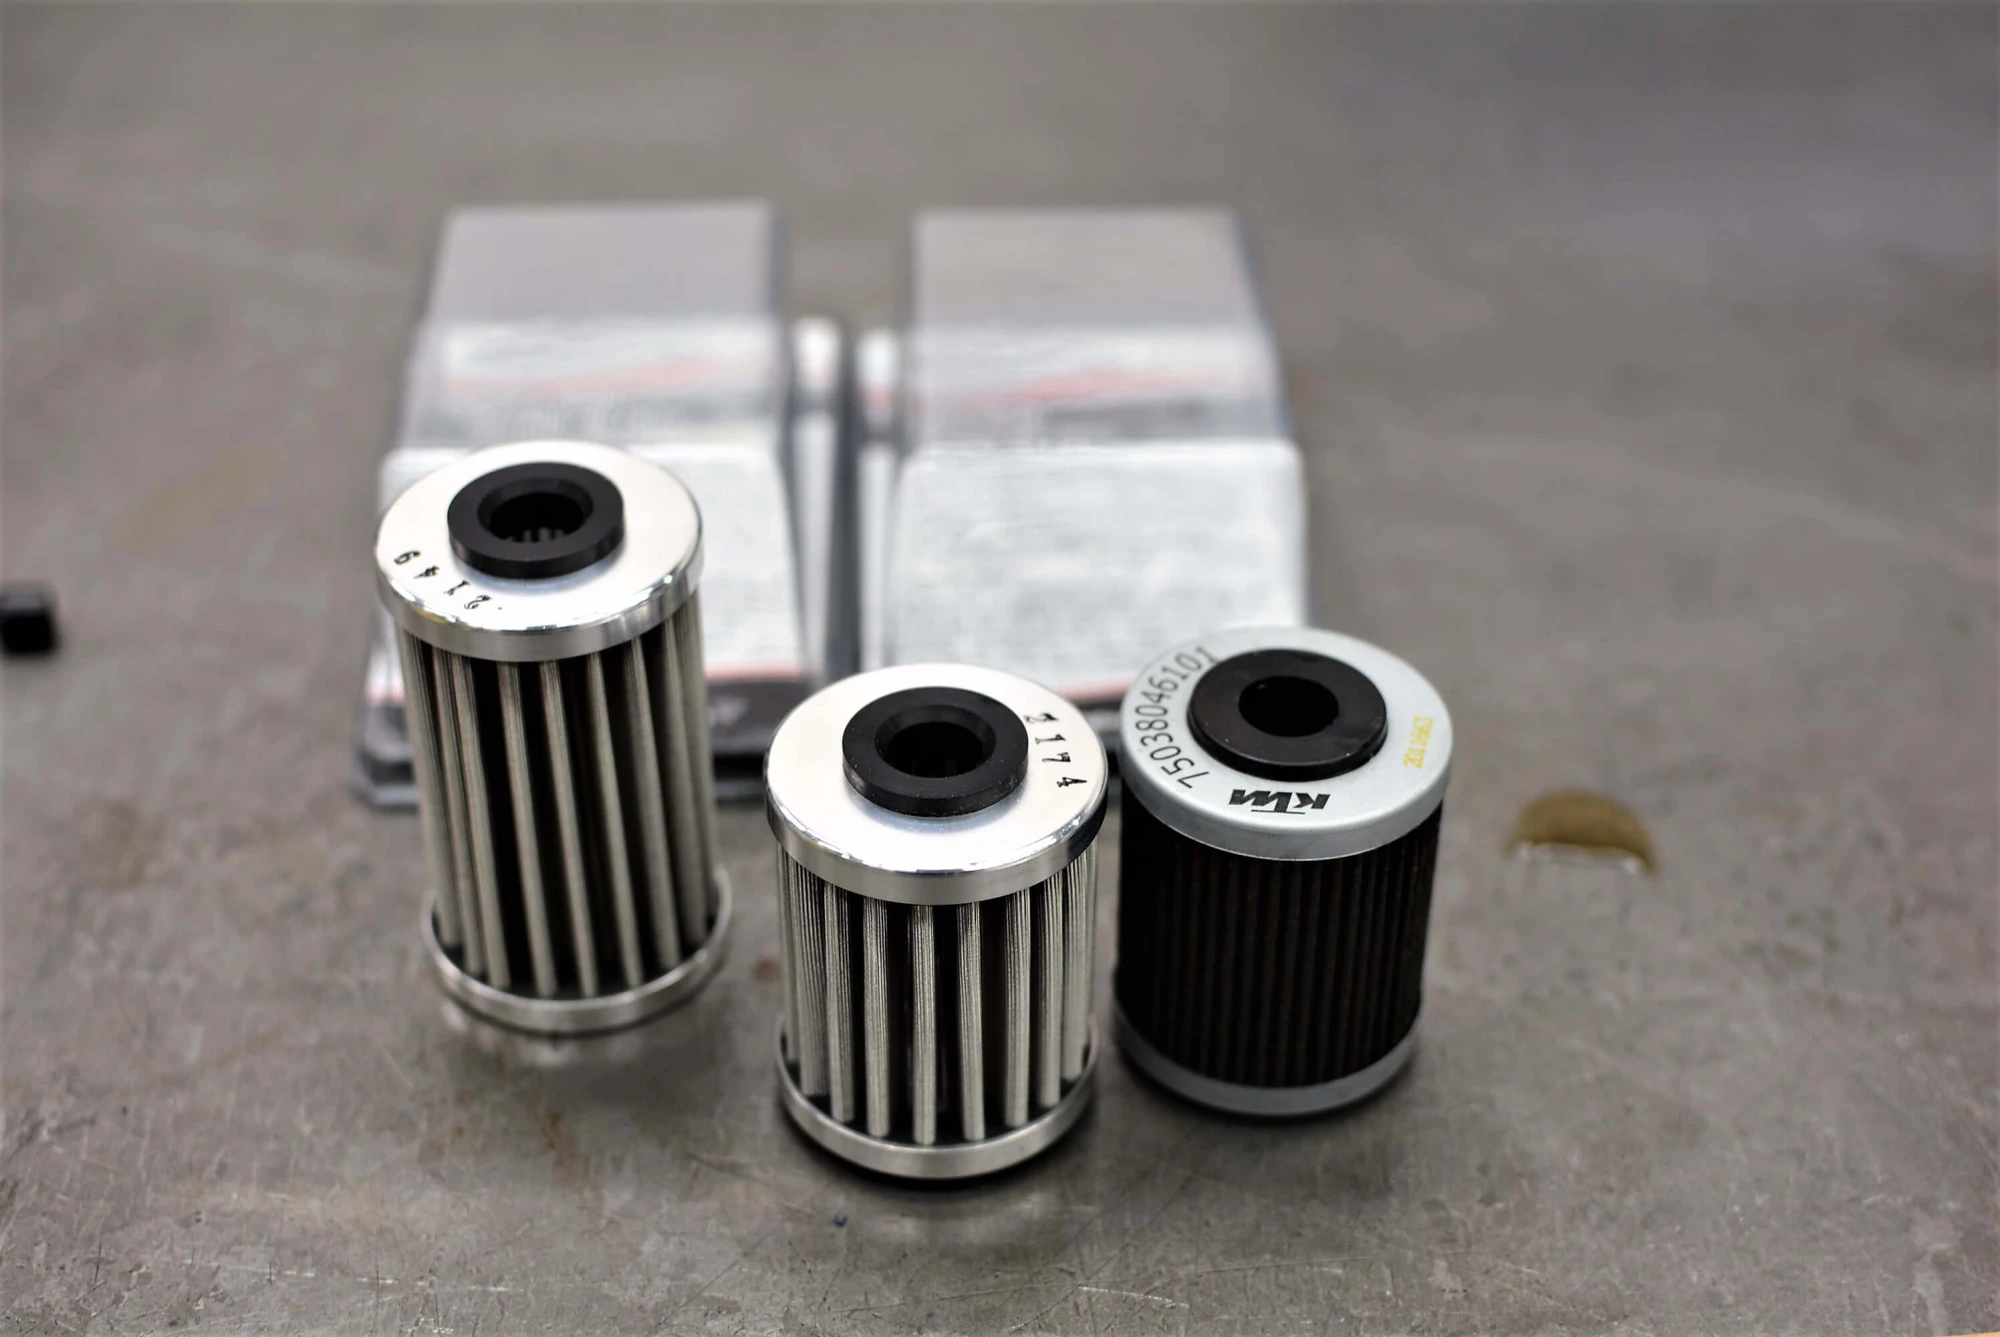
SCOTTS OIL FILTERS
While we were oily, we decided to swap out the stock paper oil filters (that can collapse or clog) for a set of Scotts Performance stainless reusable oil filters. People sometimes look at stainless oil filters with skepticism but there is simply nothing wrong with using them. After putting our ears to the ground for 20 years we simply have only heard good things about these and had that same experience ourselves so all of our builds get them.
In the LC4, there are two of them, and depending on the model of the engine one will change but that is all handled for you on the page if you are interested in picking up a set. Brake clean or carb cleaner work great, but if you have an ultrasonic tank, all the better.
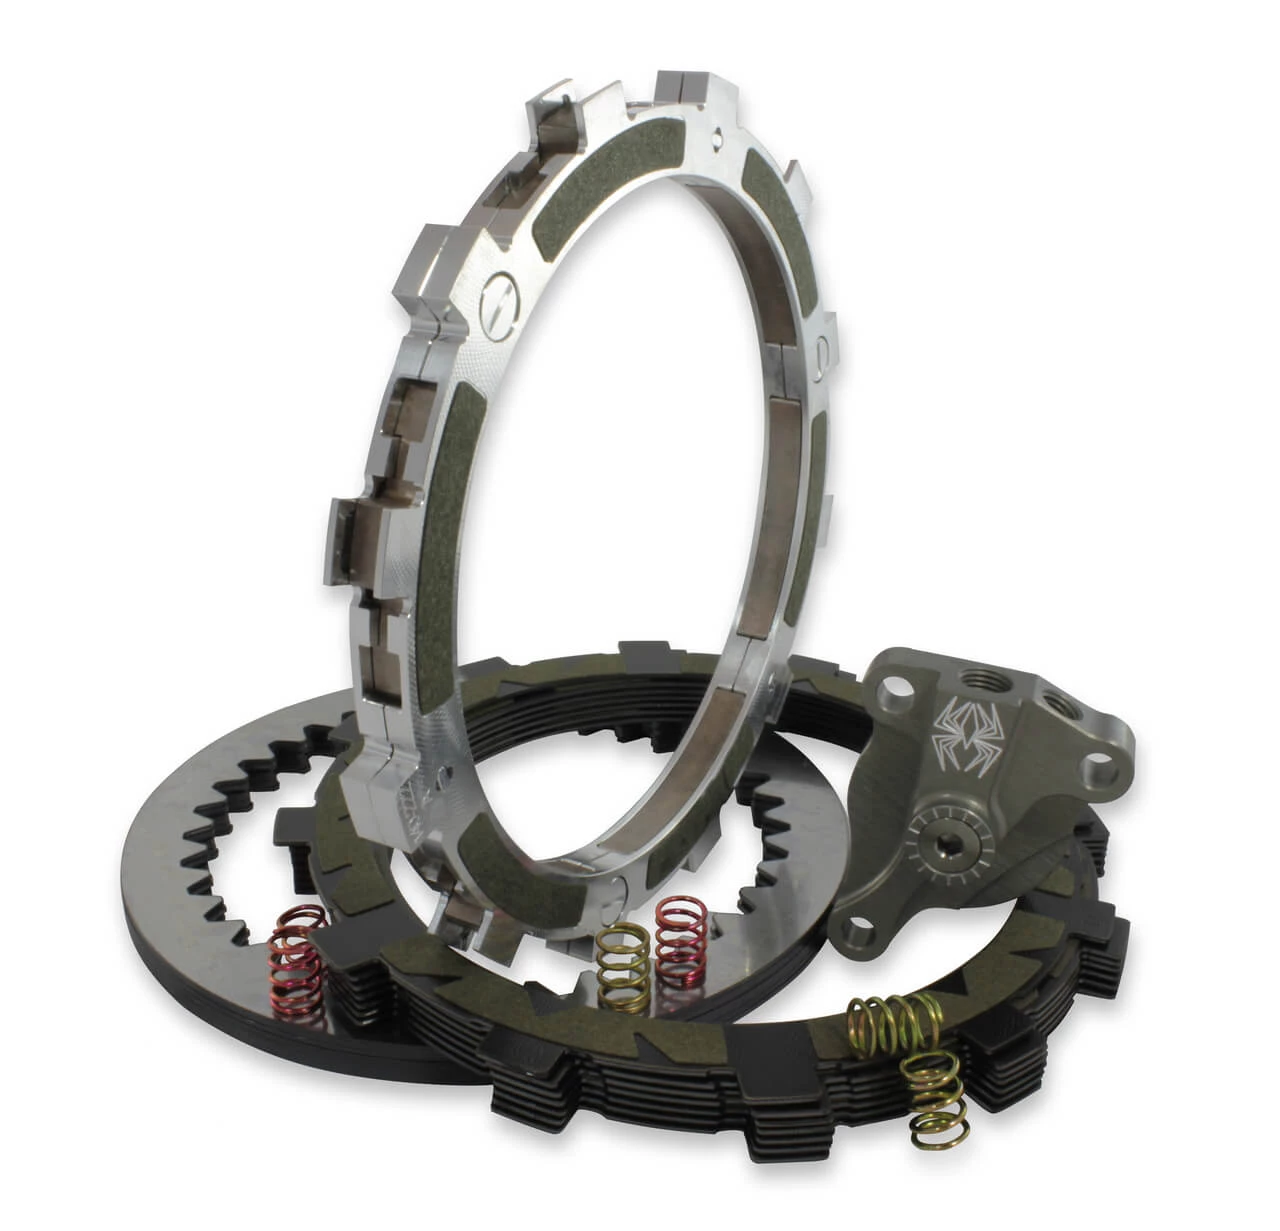
REKLUSE AUTO CLUTCH
Let's face it, we love Rekluse Auto clutches, and nearly every one of our dirt builds gets one. Even some of the street builds as well. We certainly don't NEED them, but they make life in the dirt so much more fun and enjoyable by allowing the rider to focus on what's important and let the clutch do all the heavy lifting when it comes to modulation. You just have to ride one to appreciate them and for technical, it's just plain cheating.
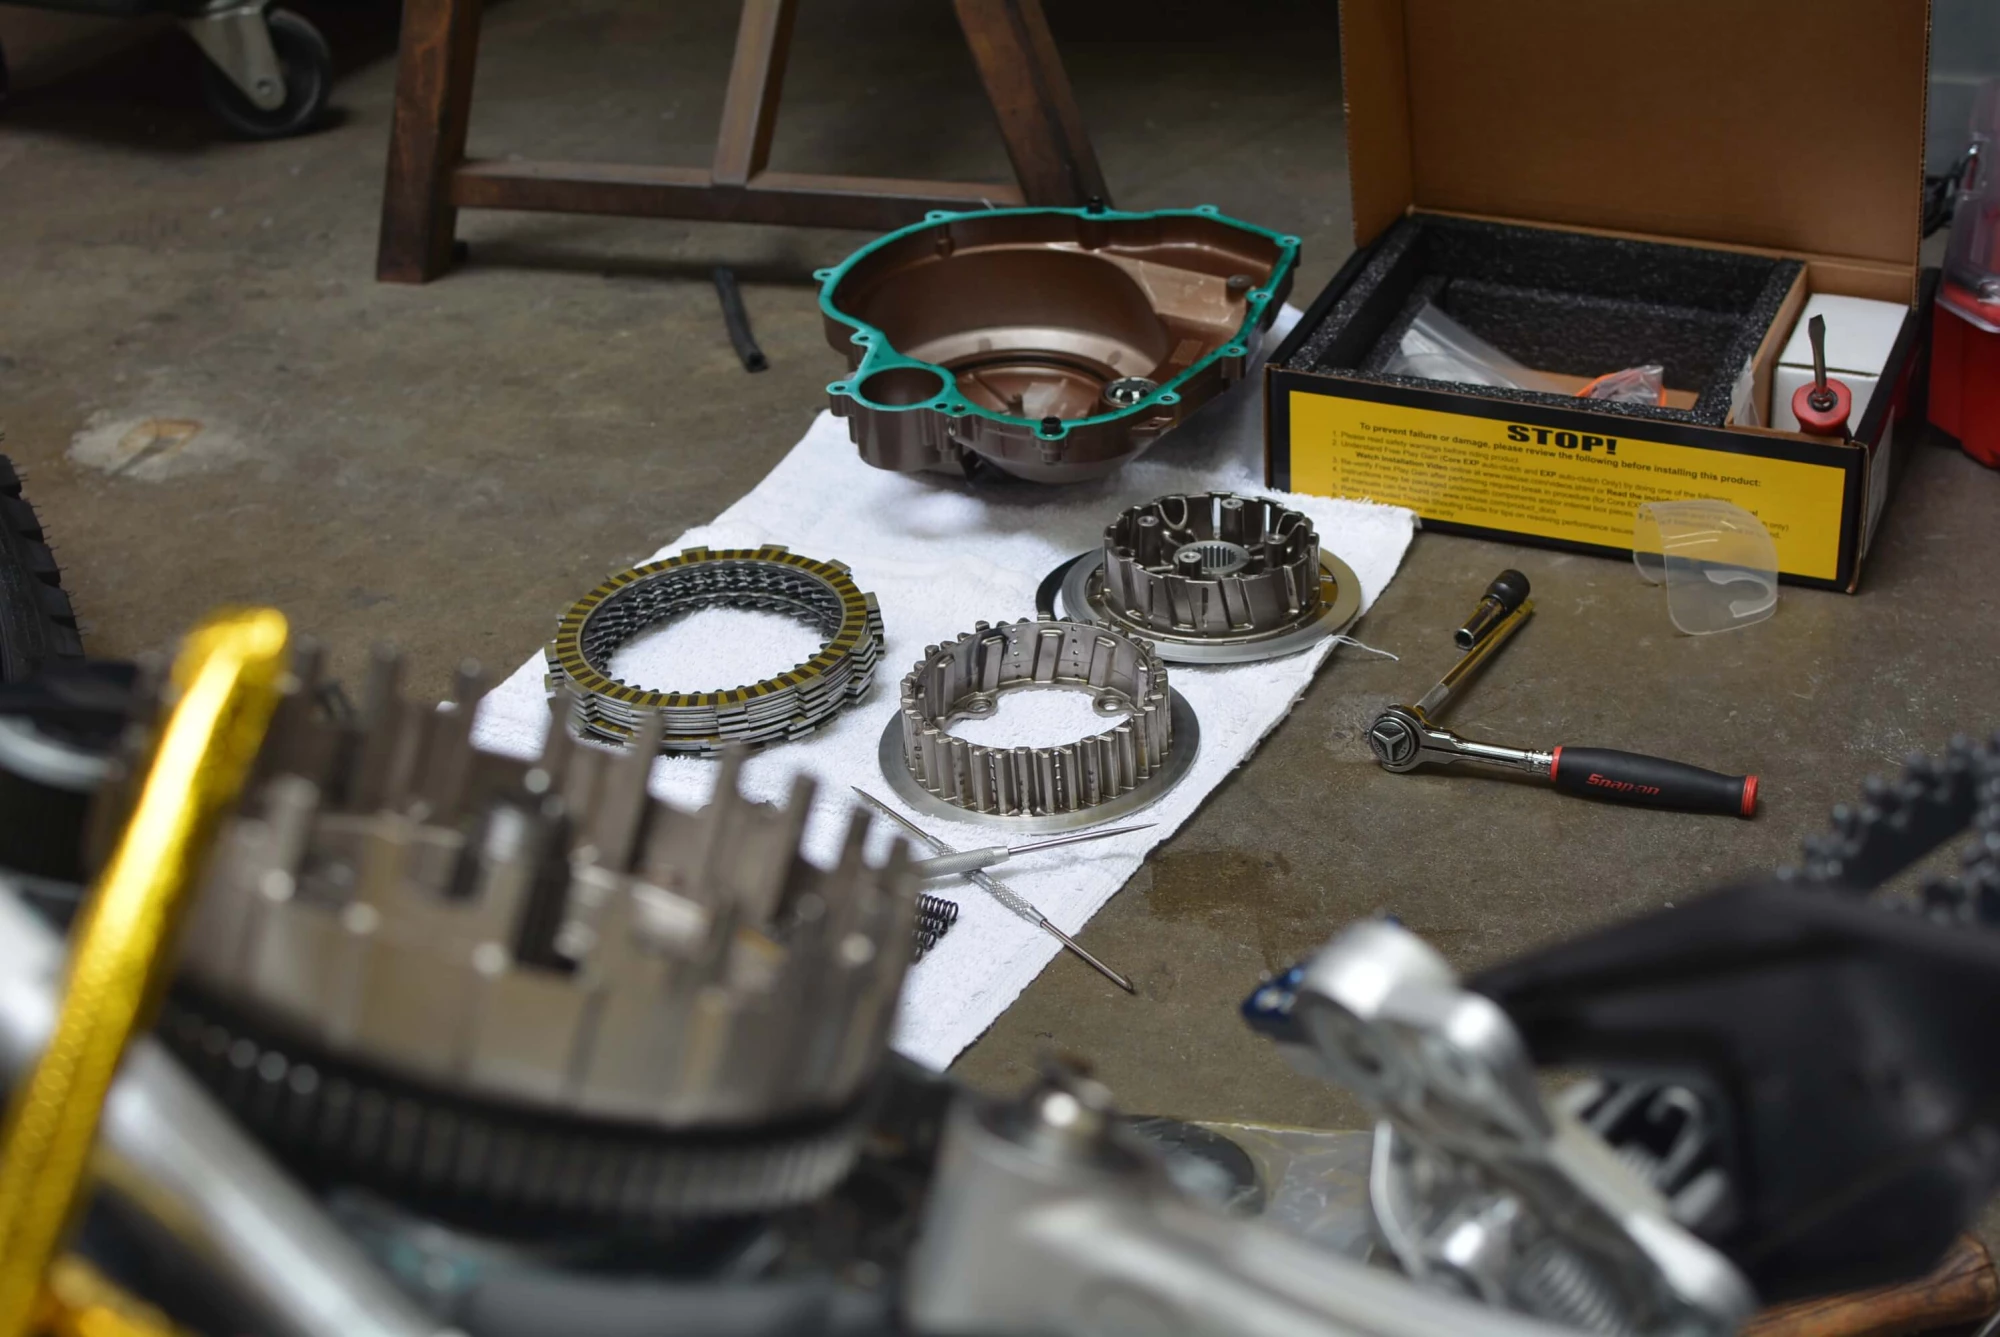
The Rekluse clutch for the LC4 consists of the main drive, an adjustable slave cylinder, plus some technology developed by Rekluse themselves that allows for more but thinner drive plates, adding much more surface area to the actual clutch pack itself. Since there are more thinner clutch plates instead of fewer thicker ones, you now have the problem of the thinner plates 'digging a trench' into the face of the aluminum stock clutch housing under power and over time, so Rekluse designed some very thin hardened steel basket face clips (not pictured) that simply insert into the outer portion of the aluminum clutch housing. This totally eliminates that common problem (with any clutch for that matter) and the user ends up with a bulletproof drive system with perks. A win win.
To date, we currently have a Rekluse Auto Clutch in our 2012 990 Adventure, 2014 1190 Adventure, 2017 1290 Adventure R, 2016 500 EXC, 2018 500 EXC, and this 2017 Husky 701. NONE of these bikes clutches has ever even whimpered or had one issue. We are big fans.
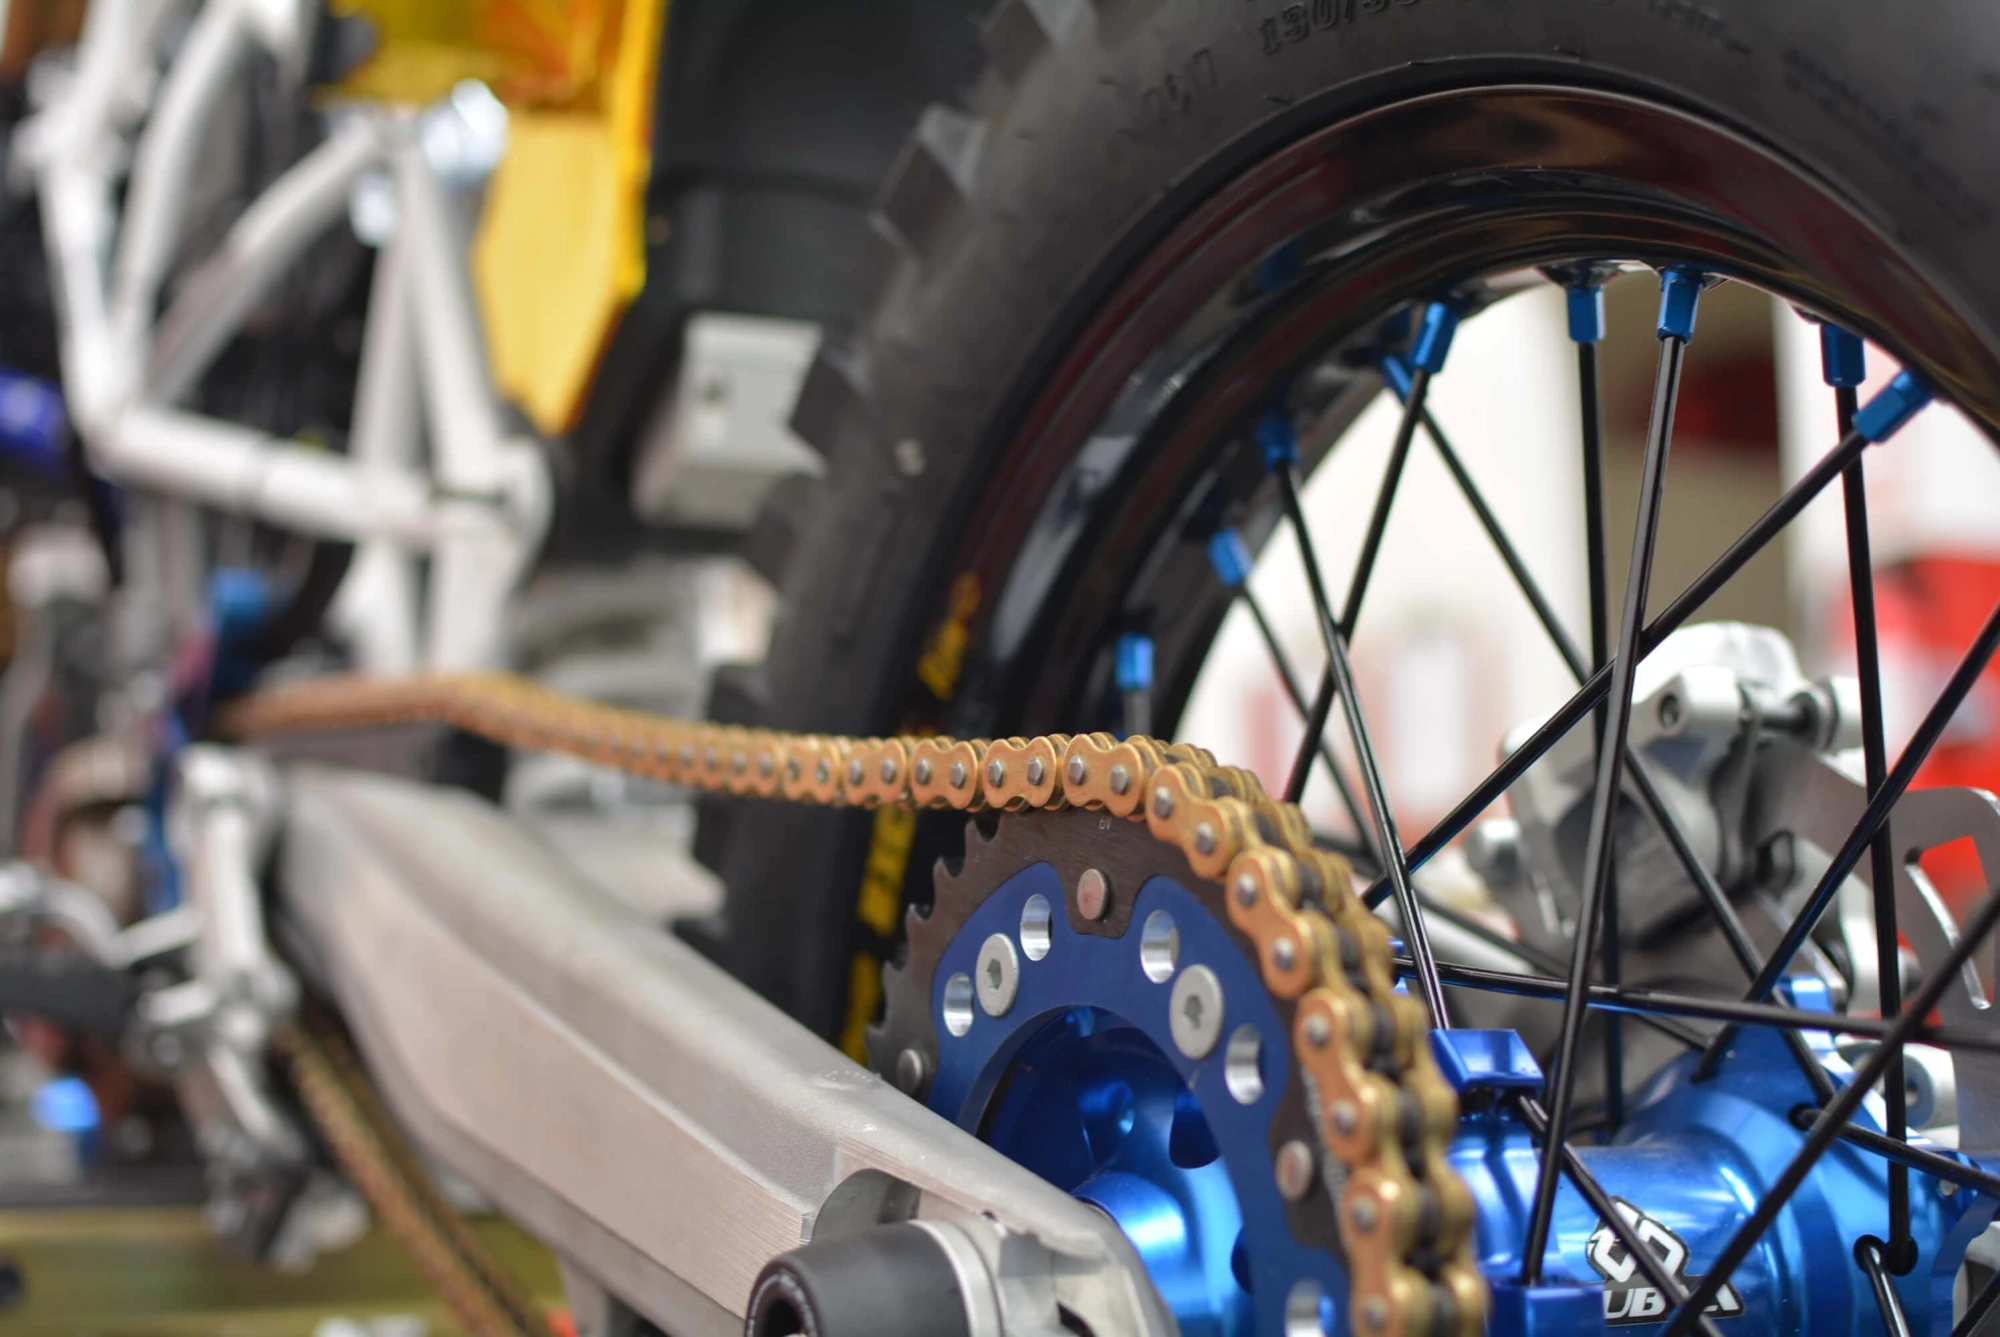
DRIVE BABY, DRIVE!
I don't think I have ever even run a stock chain more than from the dealership to the shop. While most of them are just fine, the life expectancy and maintenance with constant stretching and readjusting is just not on par with the reliability we built the rest of the bike for. I just don't want to get let down. Anywhere for that matter.
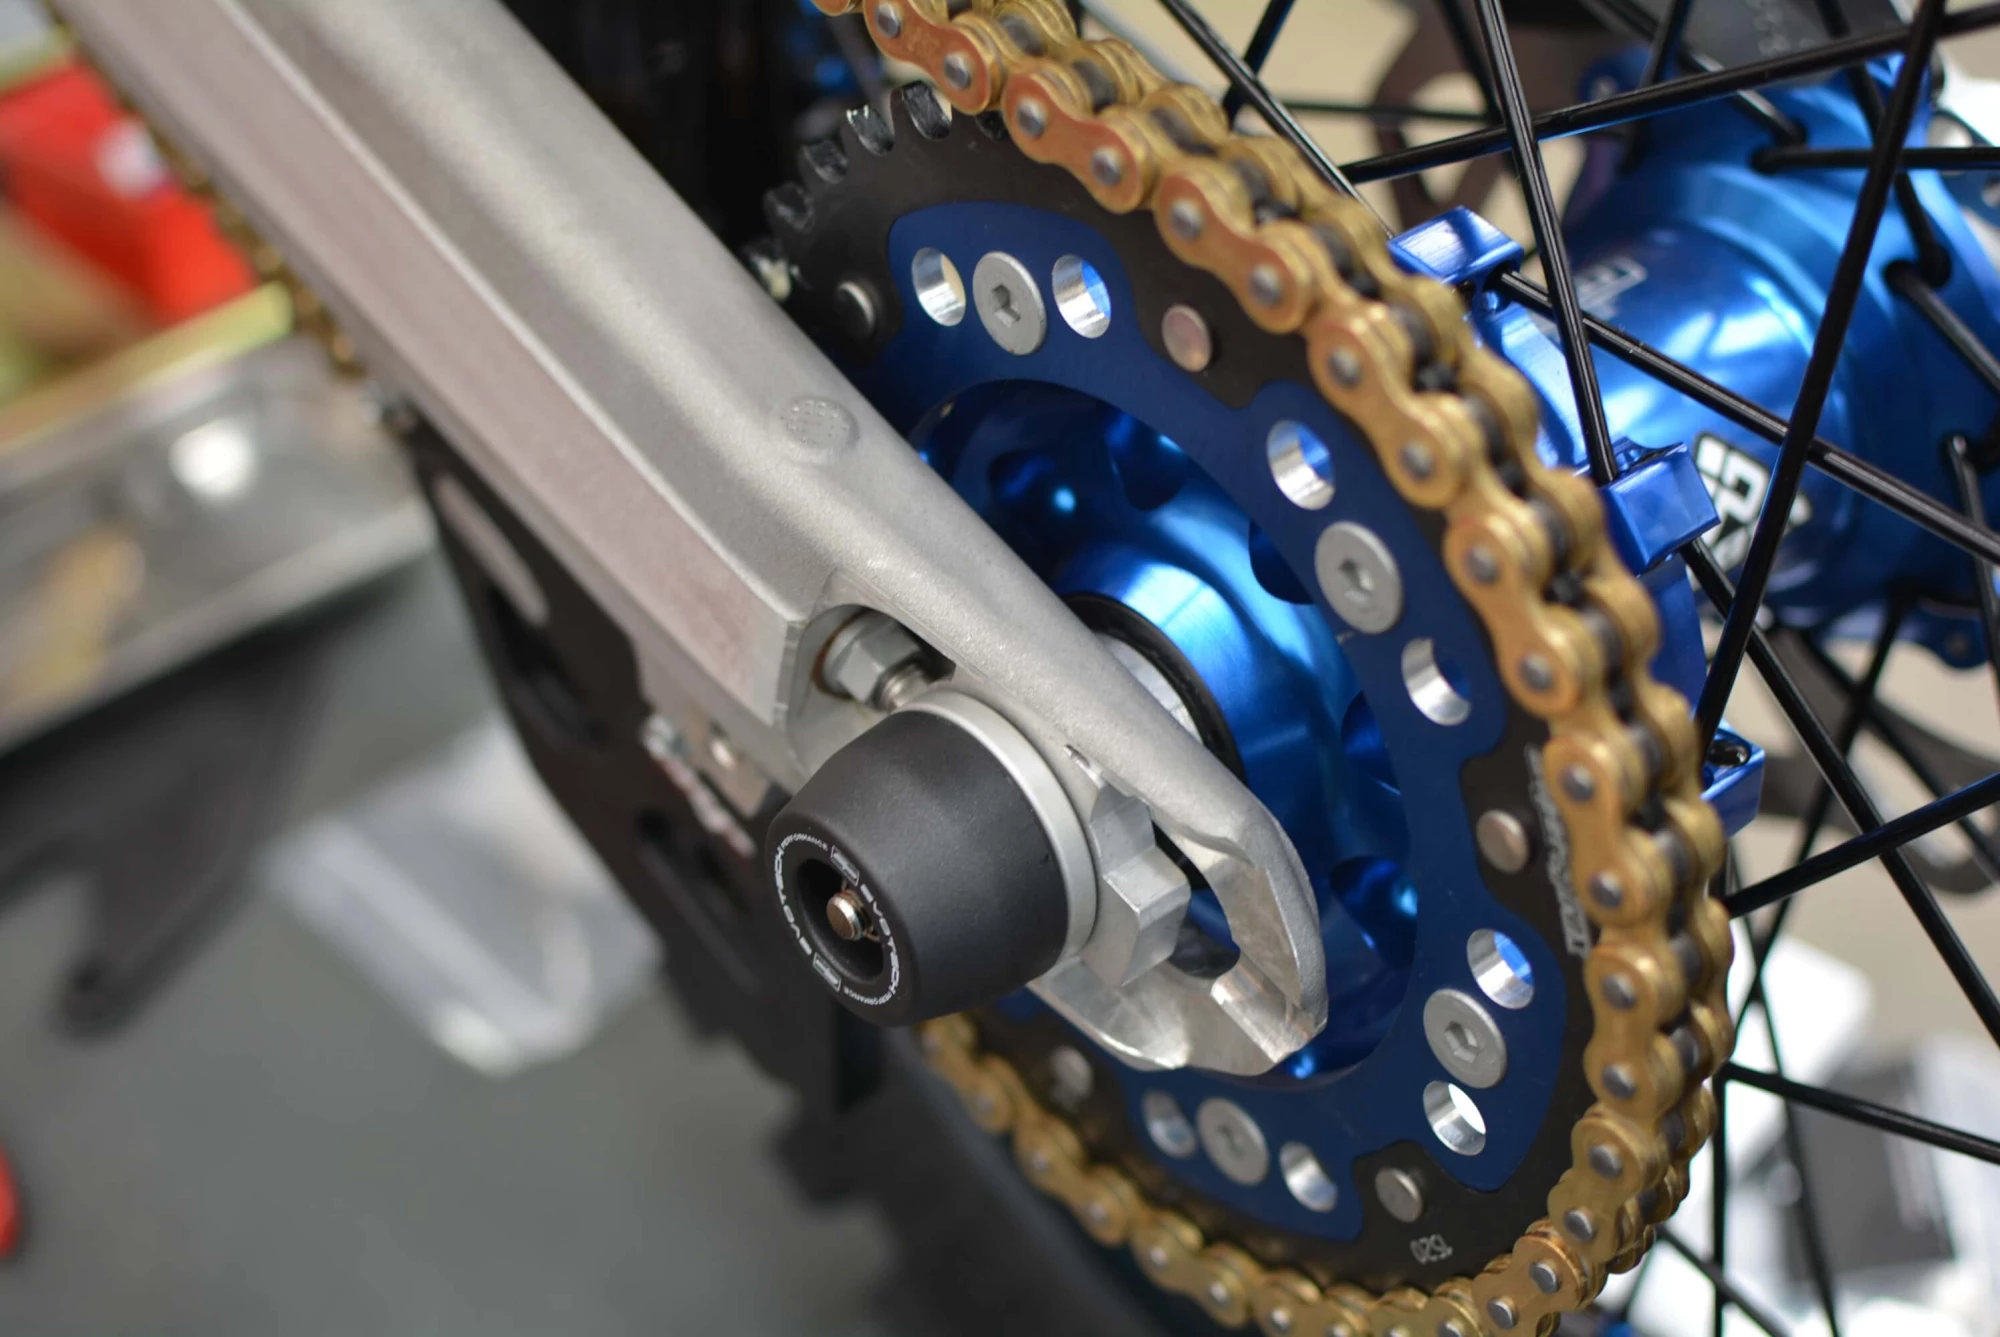
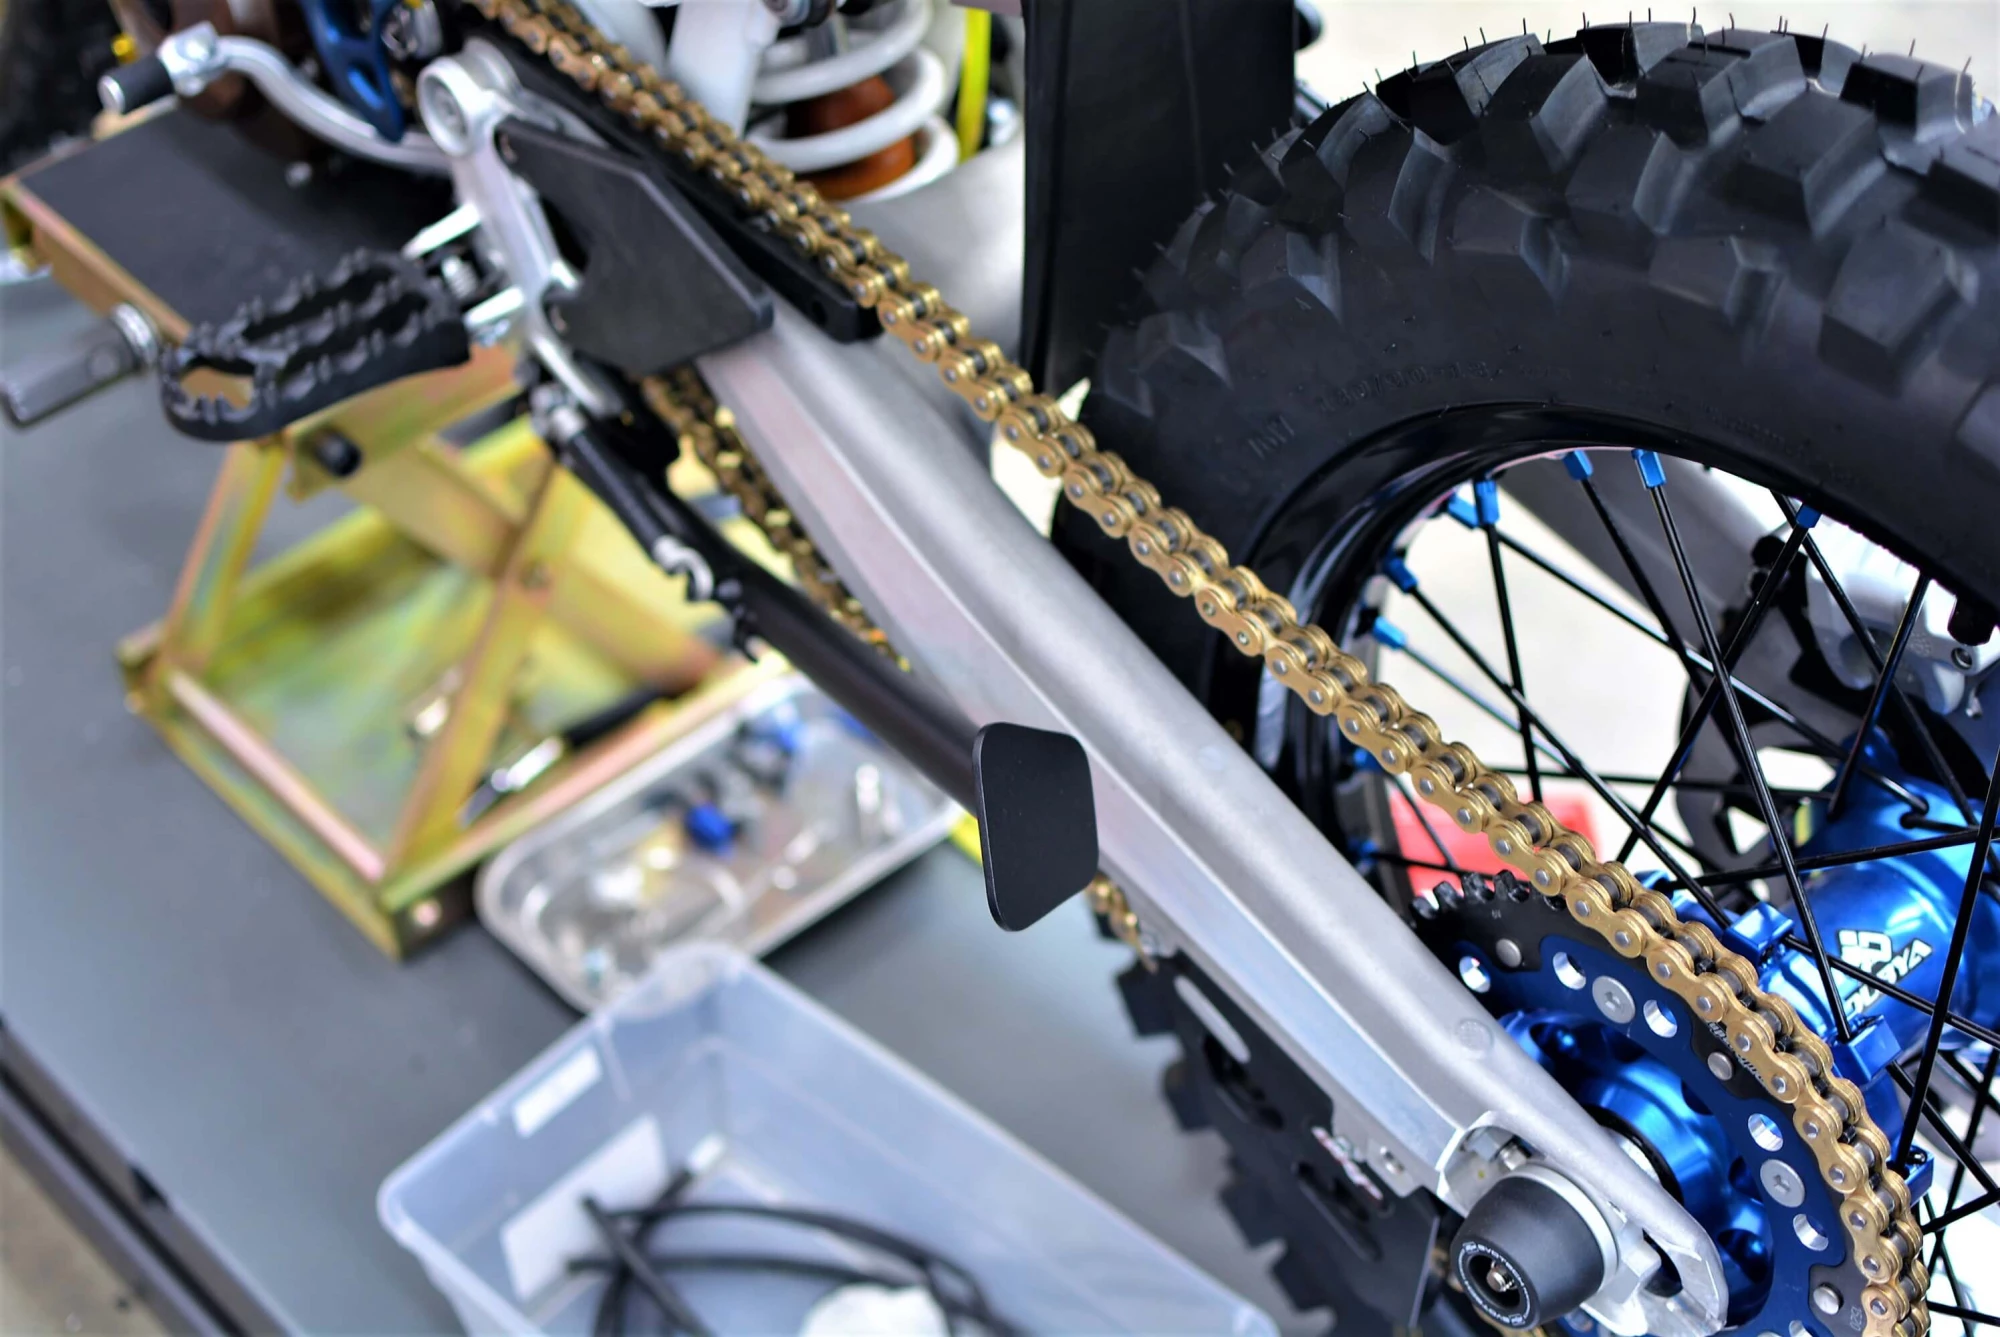
The stock chain was replaced with a DID ZVMX gold chain that is brutally strong with slightly larger pins and some different materials. Using this chain dates back to my days racing the Baja 1000 where we had zero chain failures during our 8 year campaign in the SCORE series. That was enough for me to stick with this brand and type and they continue to be the chain of choice.
The Super Sprox sprockets we initially tried were just way too low at 42 teeth. The stock 45 just seemed too low geared for high speed travel and while jumping to a 42 made for some great highway characteristics, the technical stuff was simply way to hard on the clutch and the gearing was just too tall. We swapped out for a 44 in the rear, just one tooth under stock for a bit more happiness on the highways. Even with the added weight of the rally kit, due to the intake and mapping mods the engine pulled this gearing just fine in the nastiest of the nasty so we feel that we achieved a perfect combination with this rally build. The front was replaced with a Super Sprox counter-shaft of the stock tooth count.
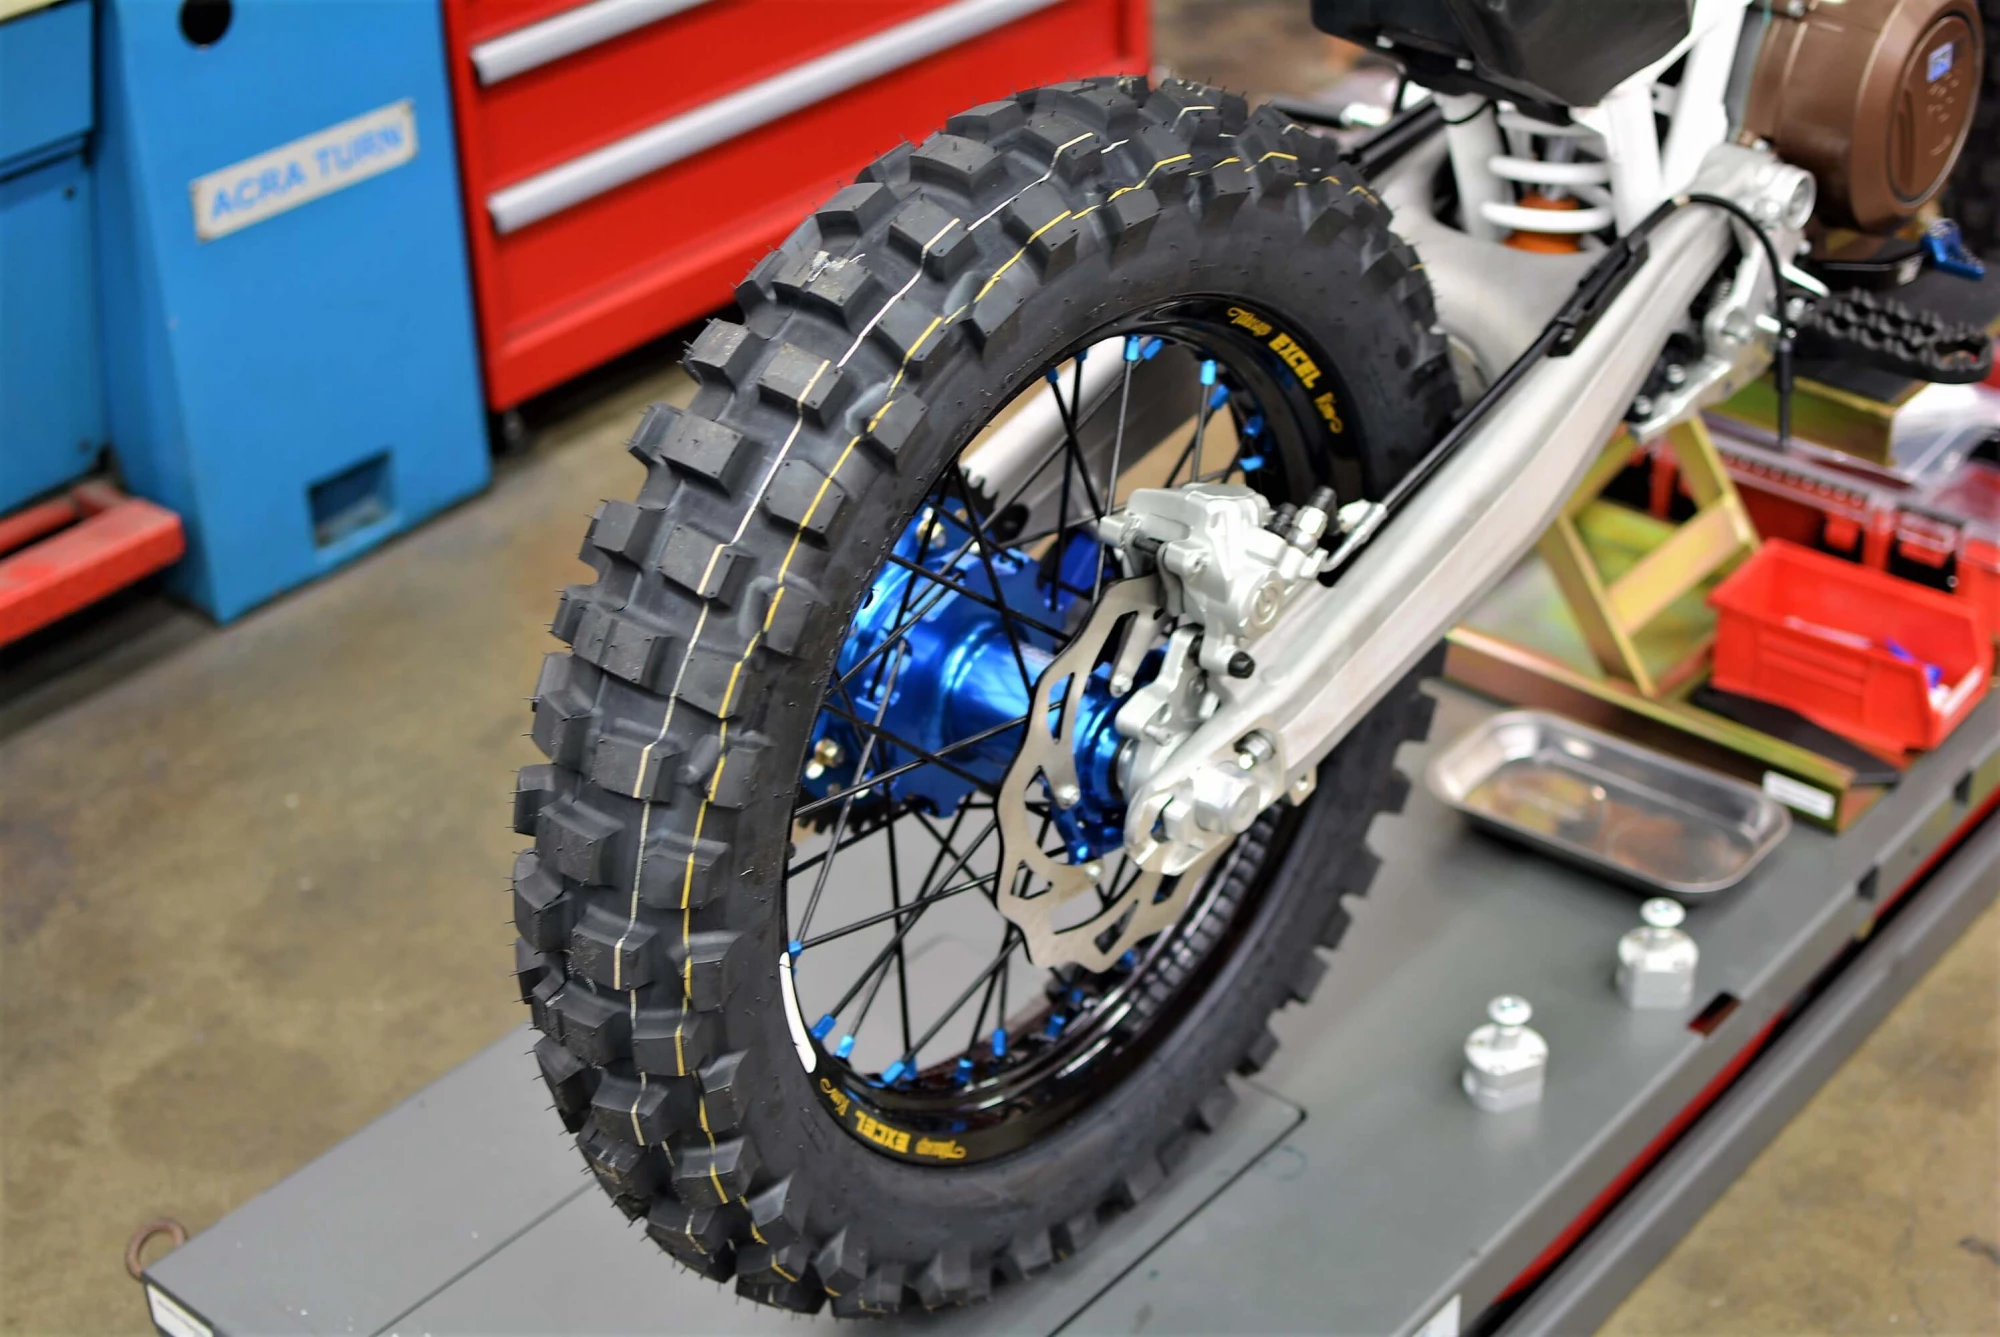
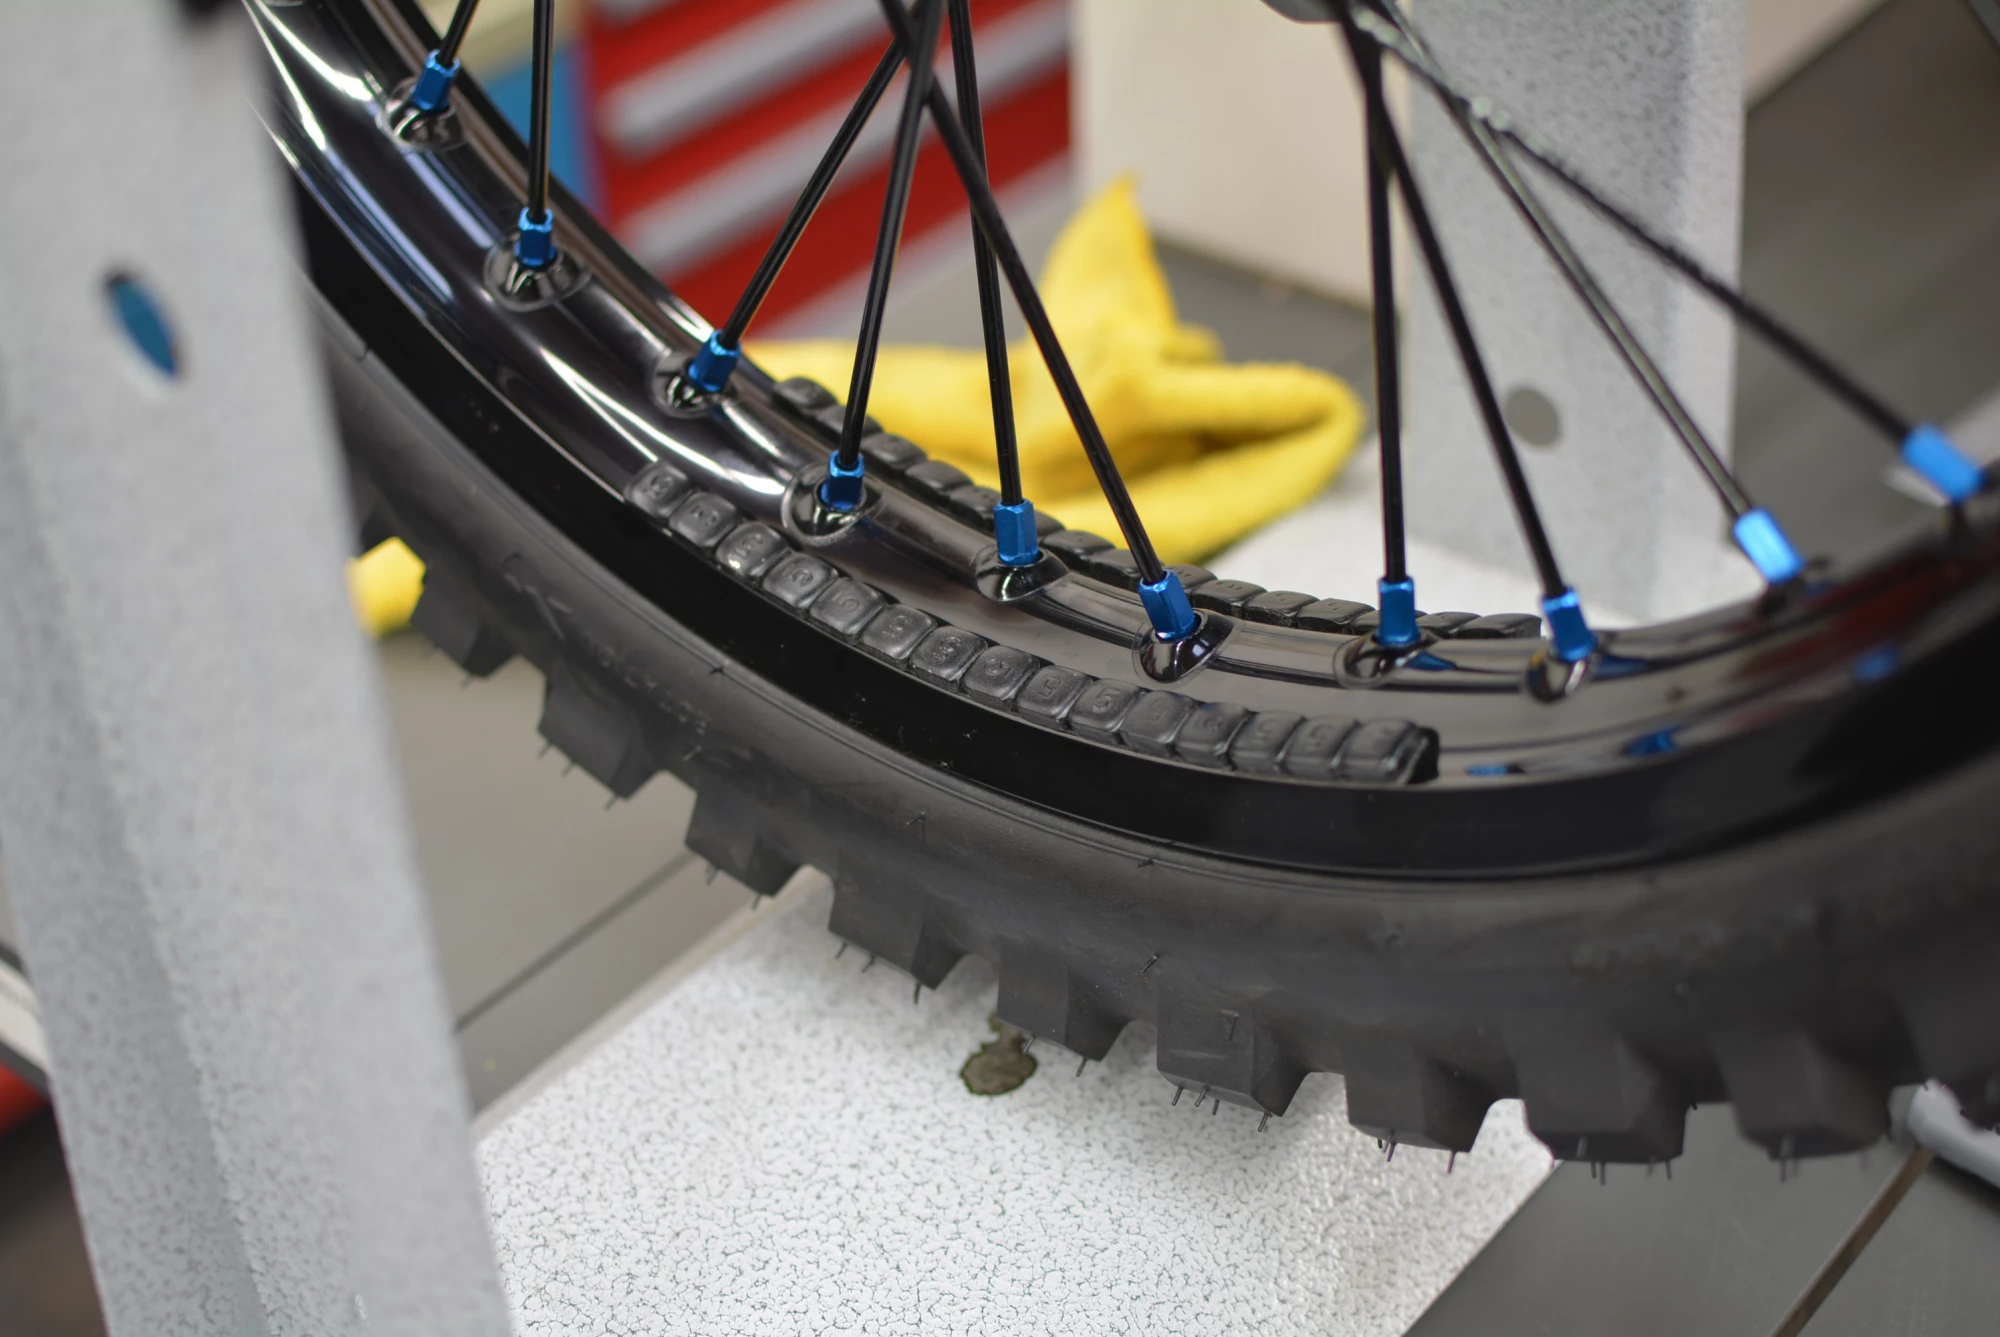
CUSTOM WHEELS
Rottweiler Performance is a strong distributor of custom made Dubya wheels, and with our strong relationship we have been able to create some very unique and distinguishable wheel sets.
Starting from the center, we chose a beautiful set of blue anodized Talon hubs, mated to black powder-coated heavy duty spokes. To accent the hubs we chose square blue anodized nipples mating it all to black Excel rims with Bridgestone Ultra Heavy Duty Tubes. The set was then clad in Dunlop D606 18x130 tires front and rear. If the bike were to be used in more technical terrain while still remaining on the highway from time to time we would have opted for a Dunlop 908 in the front.
The set was then balanced to keep the road travel irritation to a minimum. One has to live with the vibrations of a big single when pounding the pavement, but at least we can do something about the wheels being out of balance and driving the rider crazy with the on/off nature of different diameter wheels being out. Off road sets typically take A LOT of weight to get them right, but when they are, it can make all the difference in the world as far as fatigue goes at the end of a long day in the saddle.
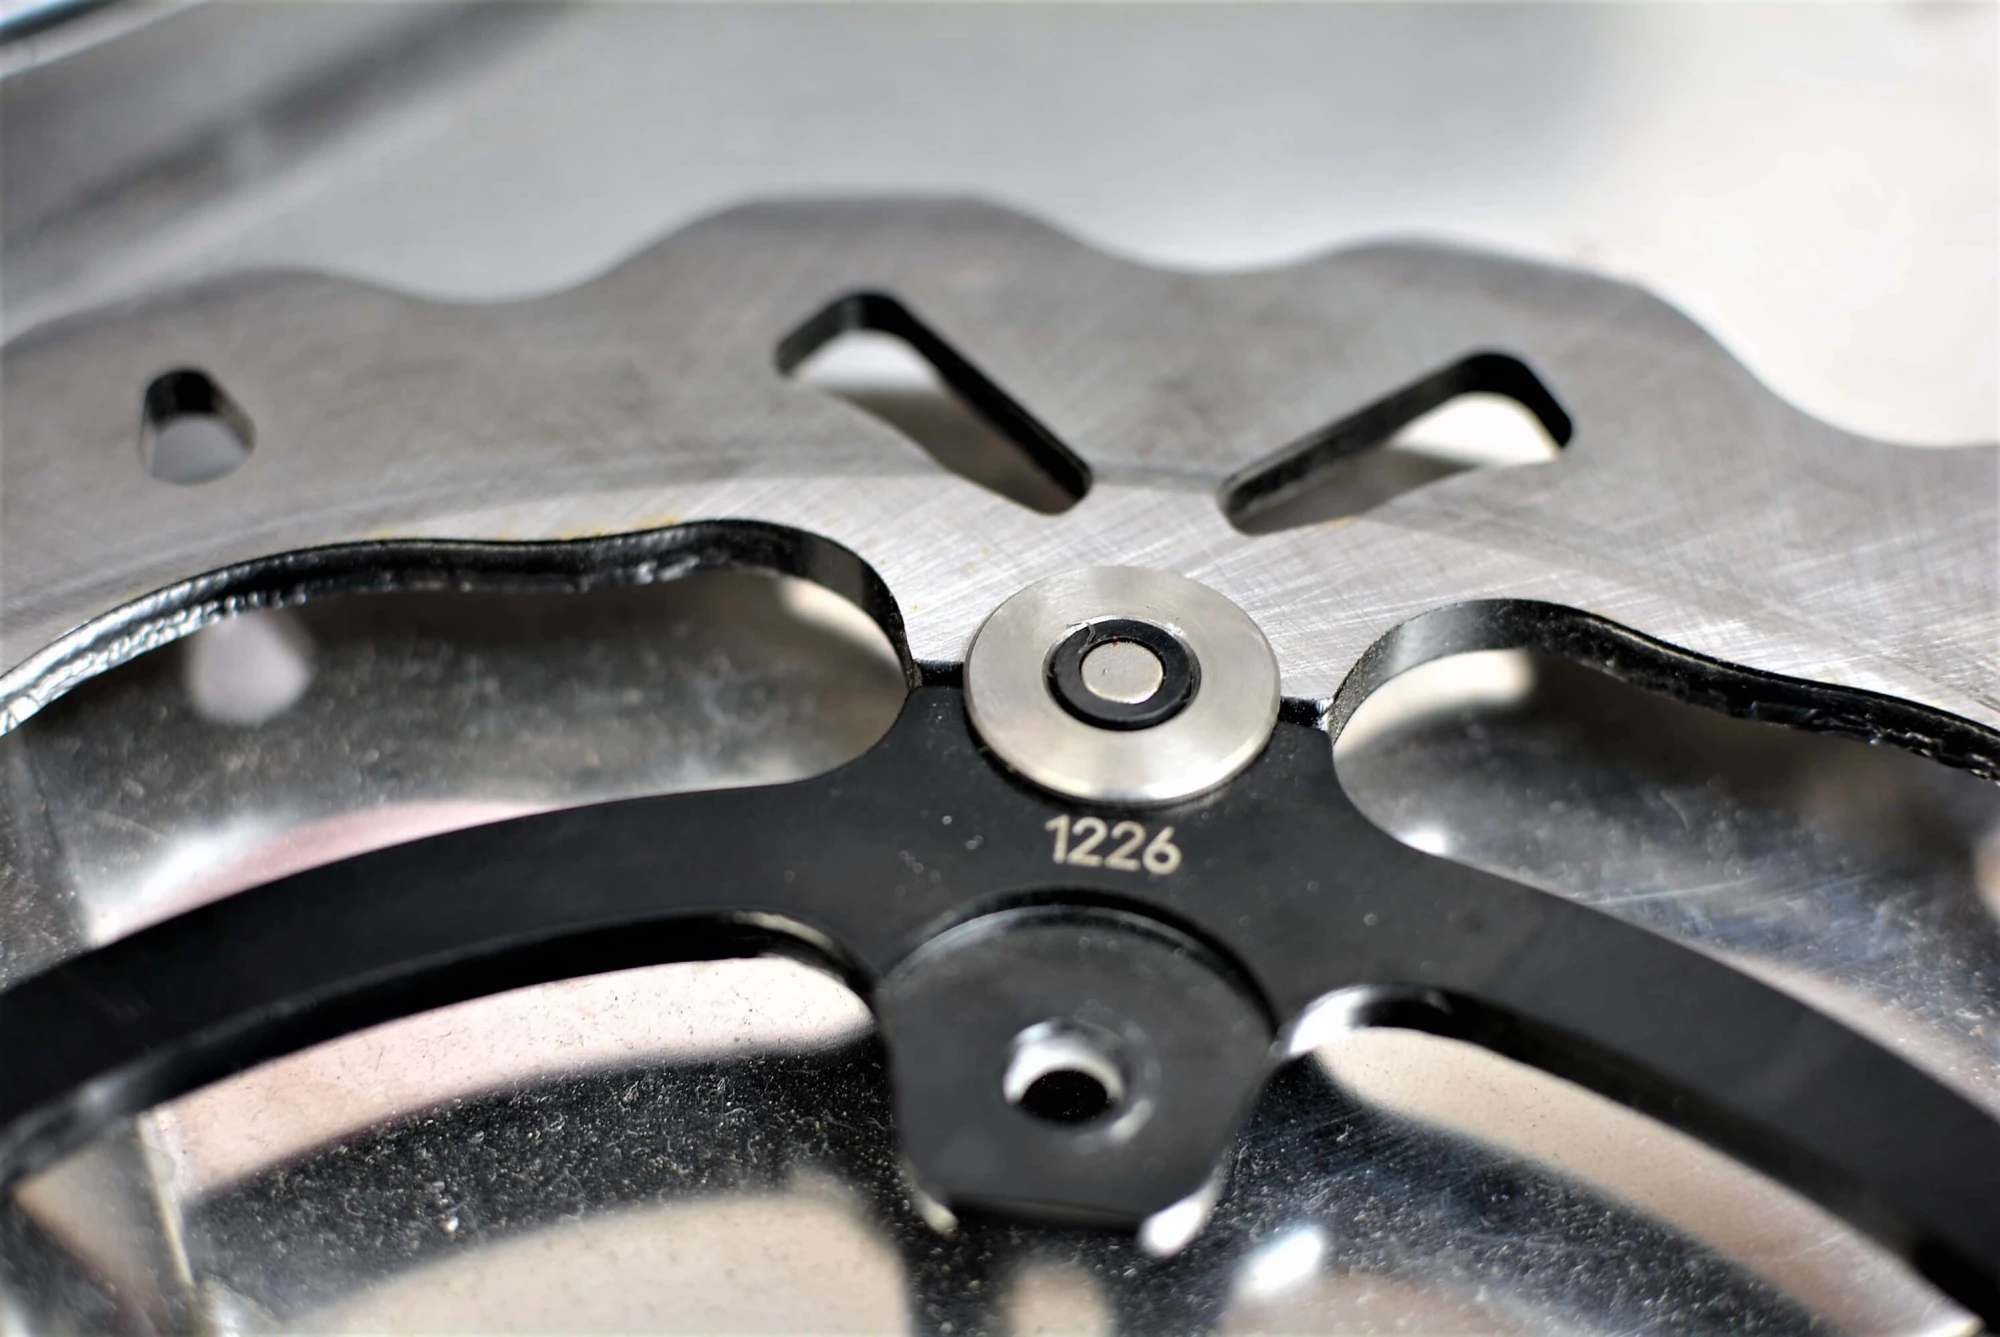
STOP!!
Galfer was the rotor of choice for us for many reasons as we have had fantastic luck with them both in stopping power and staying cool due to the wave design. A set front and rear was carefully torqued to the wheels with some red Loctite for that extra boost in confidence when on a long trip or competition.
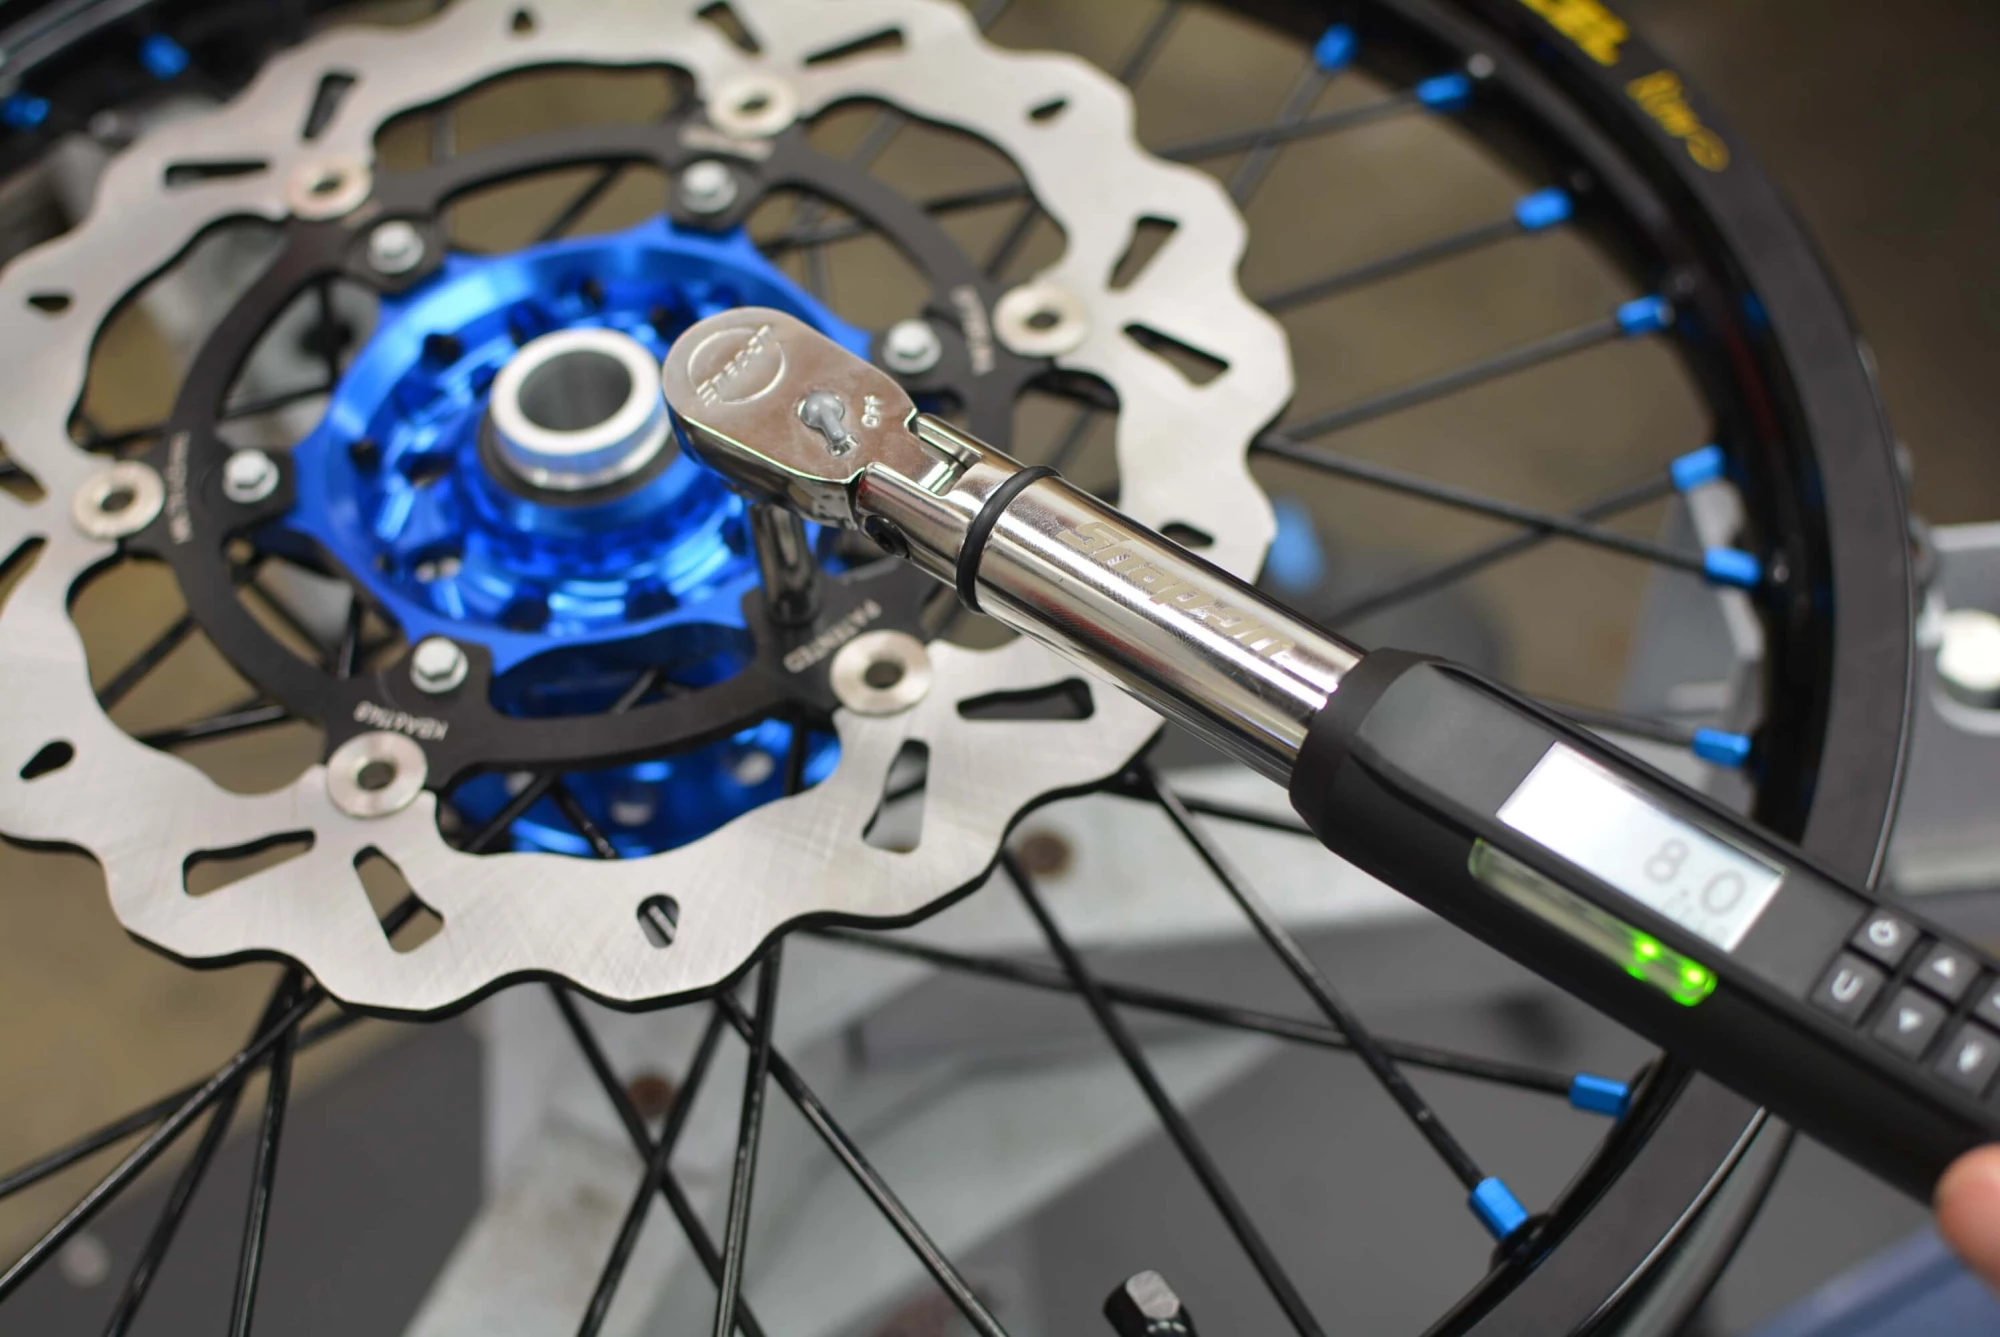
For the navigation devices, we needed to install a magnet into the rotor somewhere so we machined a small piece of black delrin plastic to allow us to press the small magnet into one of the pins on the front rotor.
CUSTOM PROTECTION
One nice thing about keeping a large stock of what we sell, is the ability to simply run to the inventory department, look to see if something we dreamed up was possible, and then make it so.
Evotech has a large line of protection products for quite a few KTM models, but to date have not made anything for the Husky 701 or KTM 690 Enduro so a quick jog up to the stocking shelves helped us discover that with the machining equipment that we had, we could easily alter the axle sliders designed for the KTM Adventure line and make them work to protect our rally investment.
First, the rear axle nut was machined down to accept the Evotech through bolt.

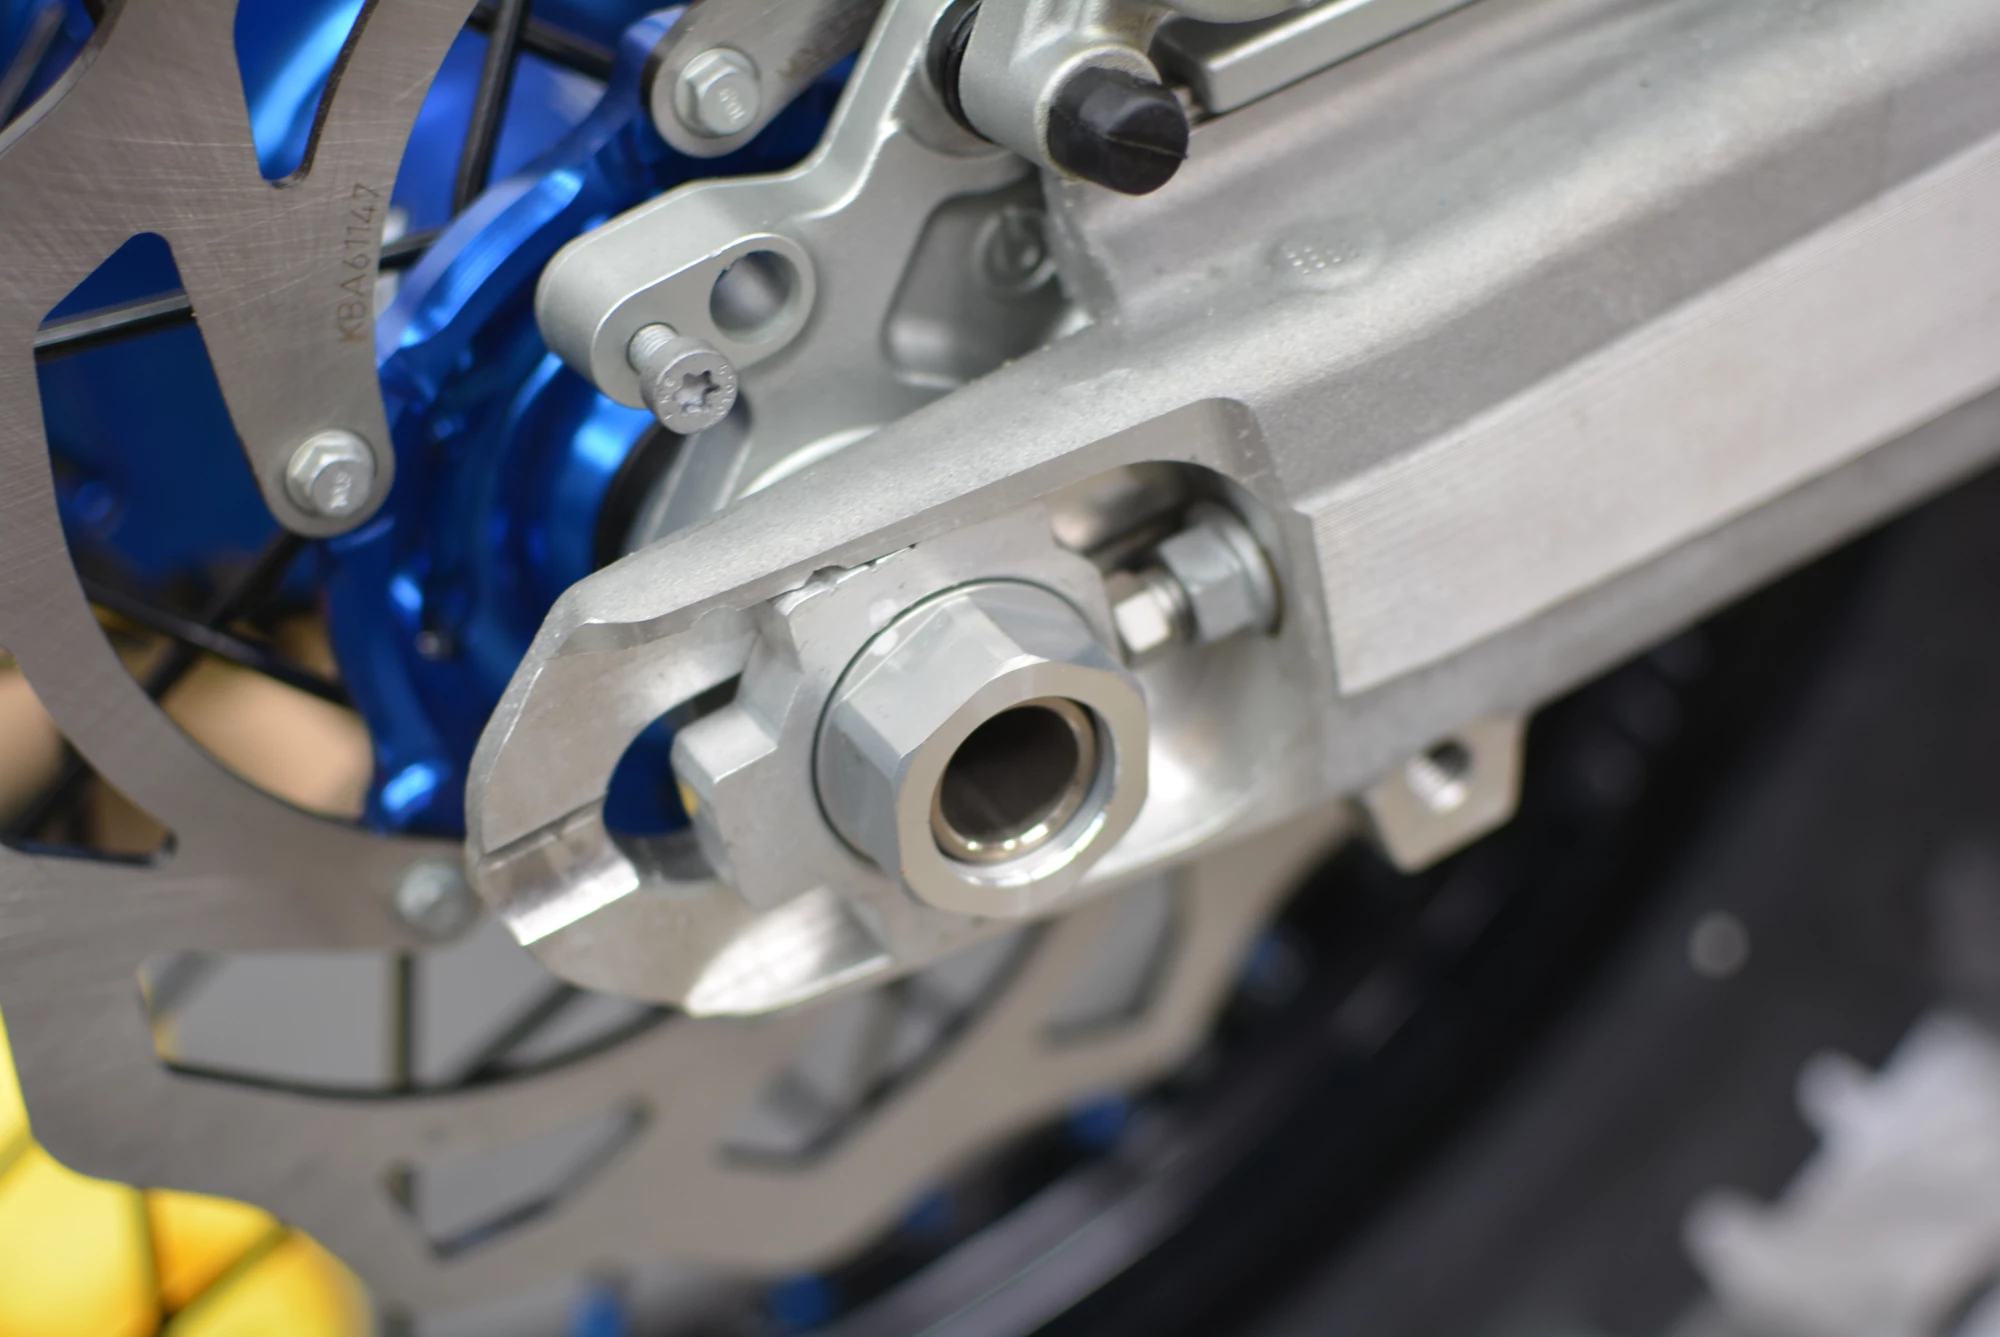
Then the threaded shaft was shortened and re-threaded.
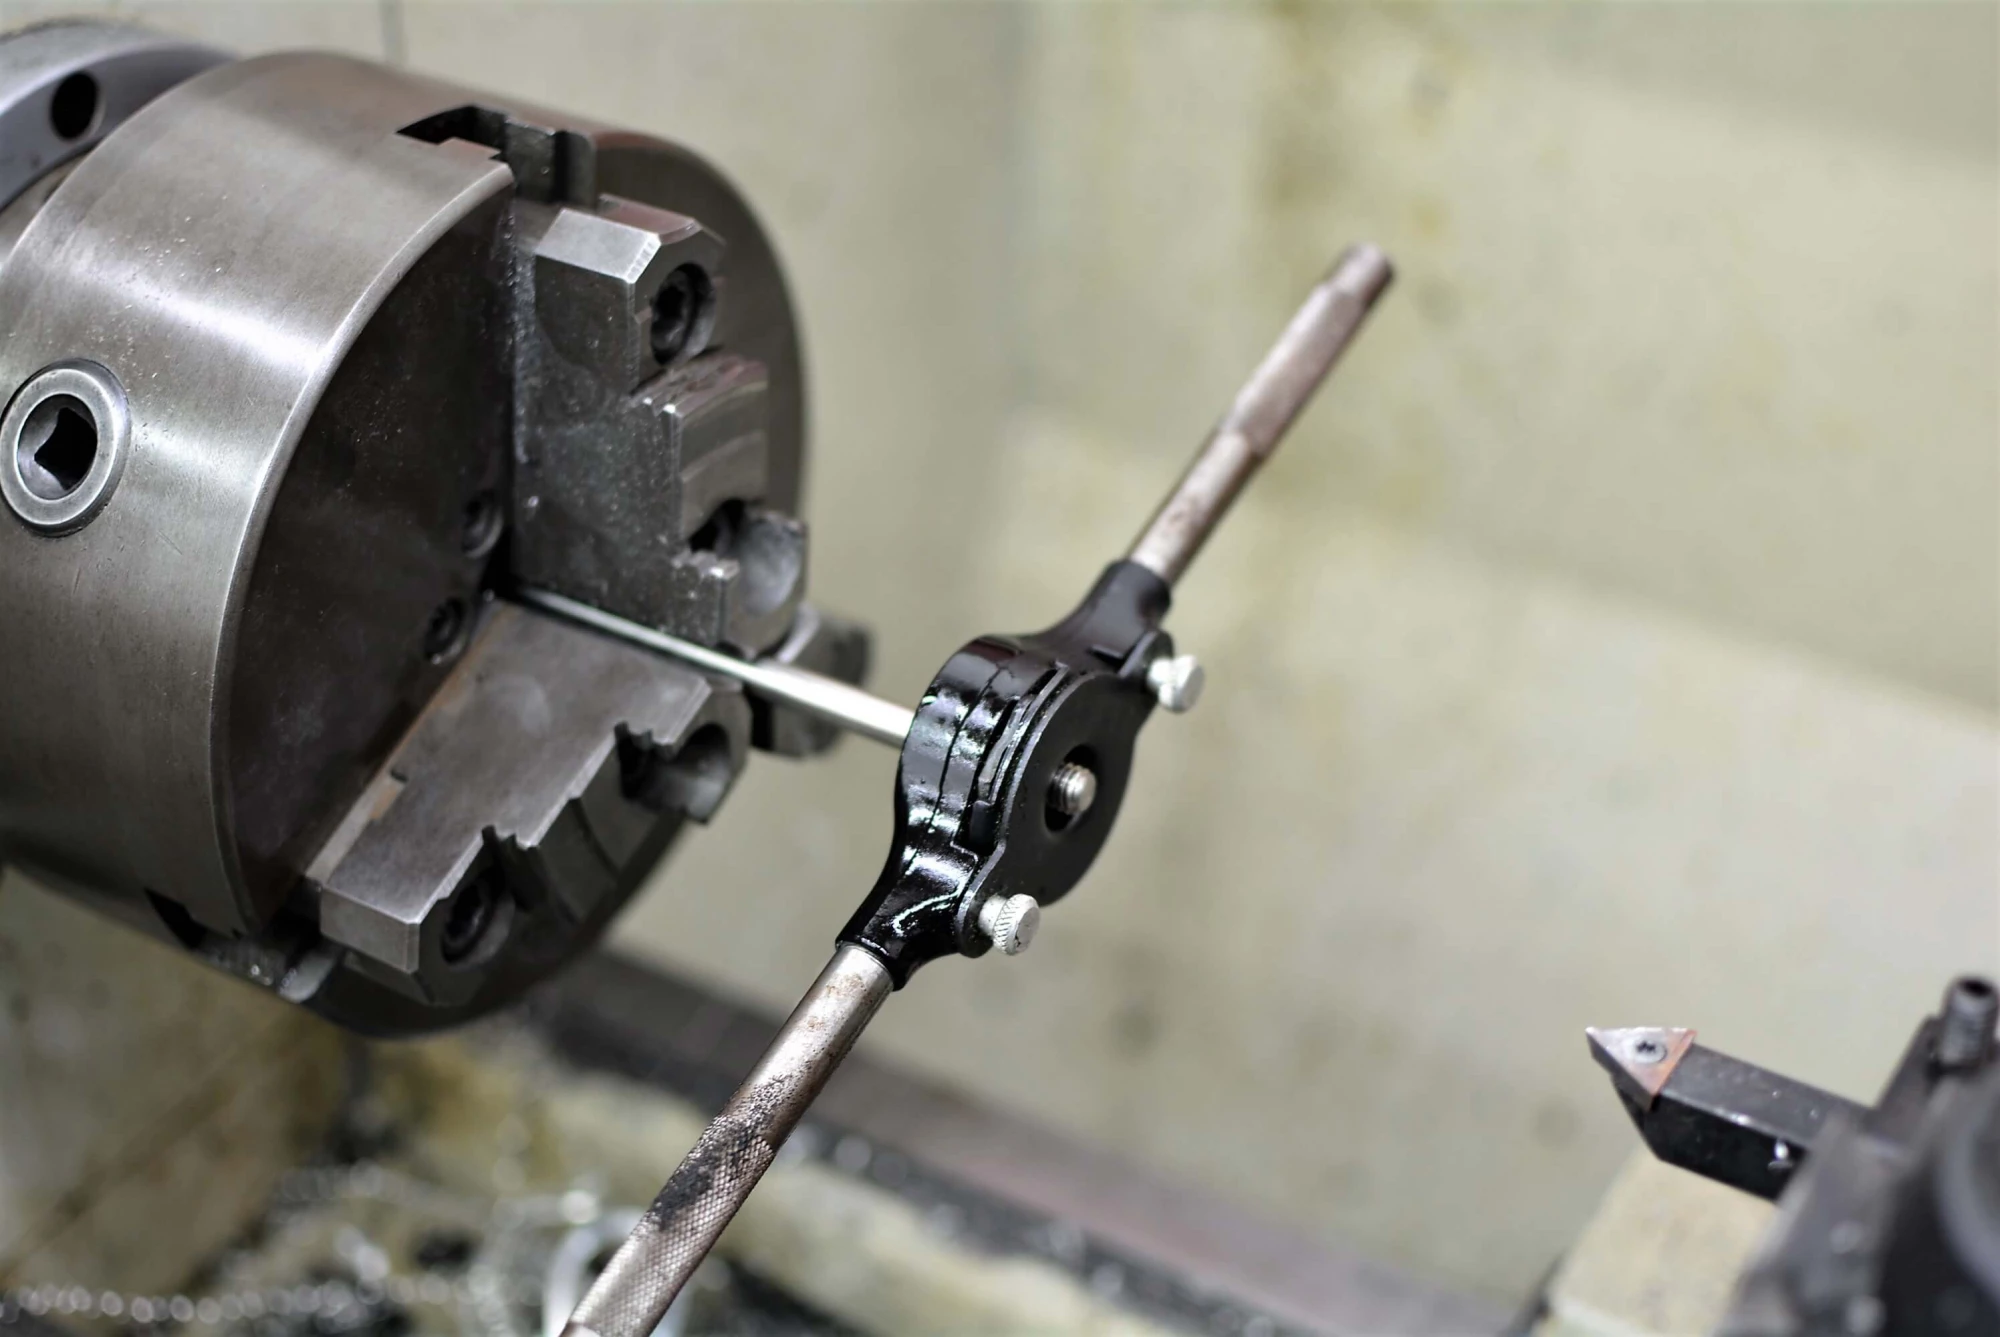
The final assembly was some nice swingarm protection with minimal effort. Hopefully this won't come into use anytime soon but you know how the saying goes, "I'd rather have it and not need it, then need it and not have it".
THE 'OTHER' HANDLEBARS.
There are probably gnomes somewhere that hoard discarded stock footpegs for good luck. This is not a hard concept to imagine as there are probably piles of them all around the world. Why footpegs have been so overlooked by the factories beyond us, but I have a feeling that there is a warehouse out there somewhere that is housing millions of these from a large purchase and they just need to run out before we get a change.
For now, we are relegated to the offerings of the aftermarket gods and for mid sized bikes like the 701, you can go one of two ways. A: You can go 'Oversize Moto' or B: You can go 'Adventure'. Since the bike is a middleweight, there really is no wrong choice but for our build, and since this bike was not destined to be ridden in deep motocross ruts or tight woods, we opted for the stainless steel IMS Rally pegs. Their mid size platform was just perfect for what we are trying to do and and you just stick to these like glue.

THE BILLET WORLD OF VANASCHE
The build would not be complete without a sprinkling of Vanashe Motorsports products. Not only do they look the part and allow for extra customization with varying color choices, they enhance usability, appearance, function and performance.
The first thing to go was the stock brake pedal. It's just a piece of spaghetti waiting to fold so not having that we swapped out the stocker for a much more beefy Vanashe pedal adorned with one of the four custom pedals that you can choose for it.

A 'Type 3' pedal is being used in conjunction with the Vanasche Motorsports arm below. You can also use the arm with the stock pedal, but why?
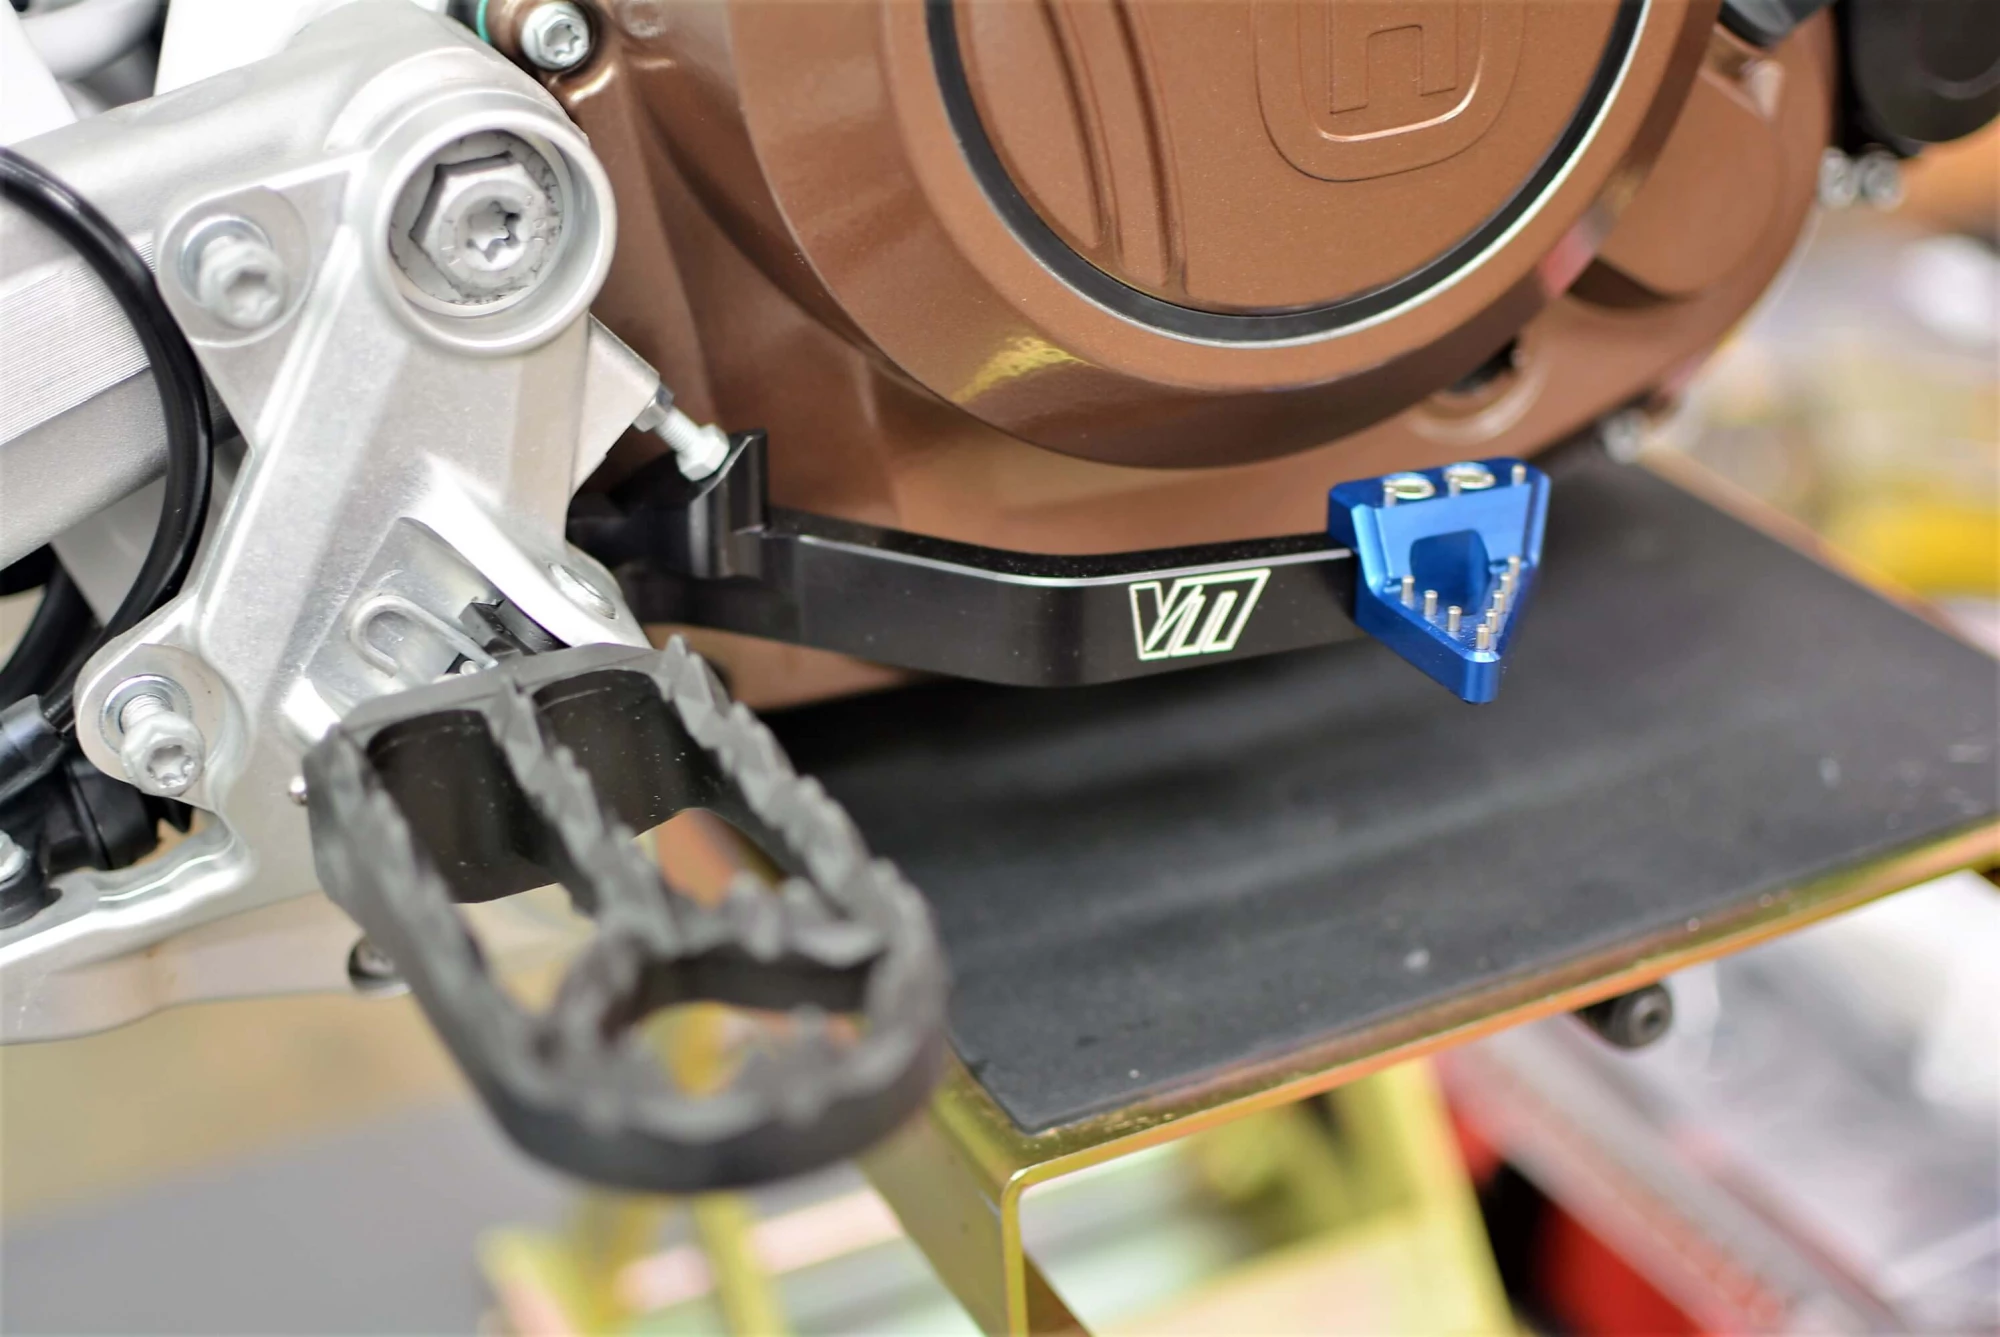
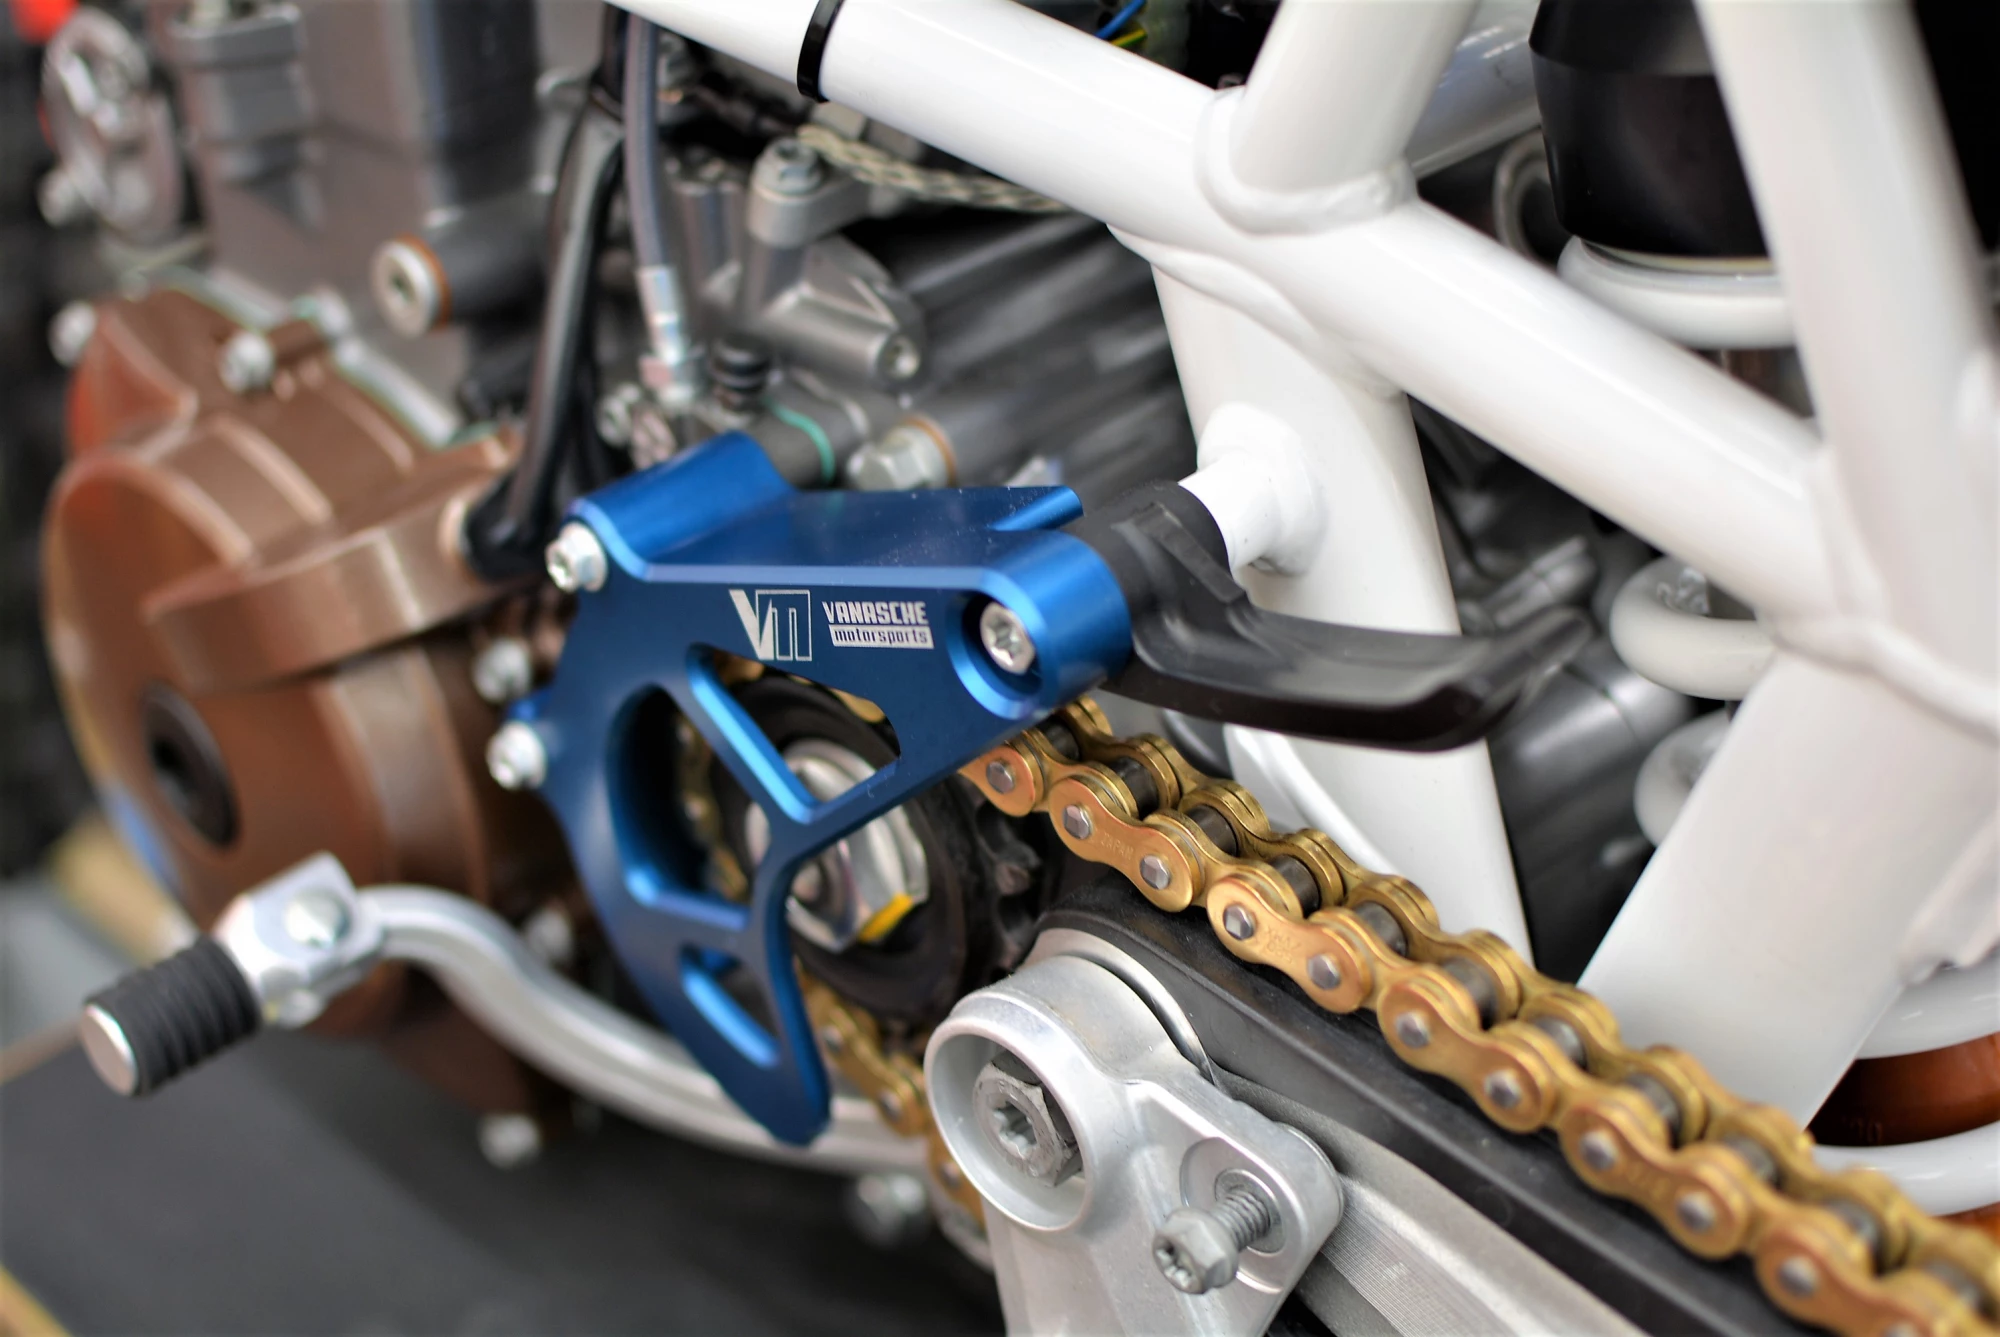
Next we focused on the chain cover. While we have the strongest chain available on this build, it never hurts to double down on the protection if it were to ever let go. A Vanasche piece replaces the wimpy stock plastic unit.
The rear billet disk protector is a sano piece that also gives you some piece of mine in case a piece of rock decides to brake you to pieces.
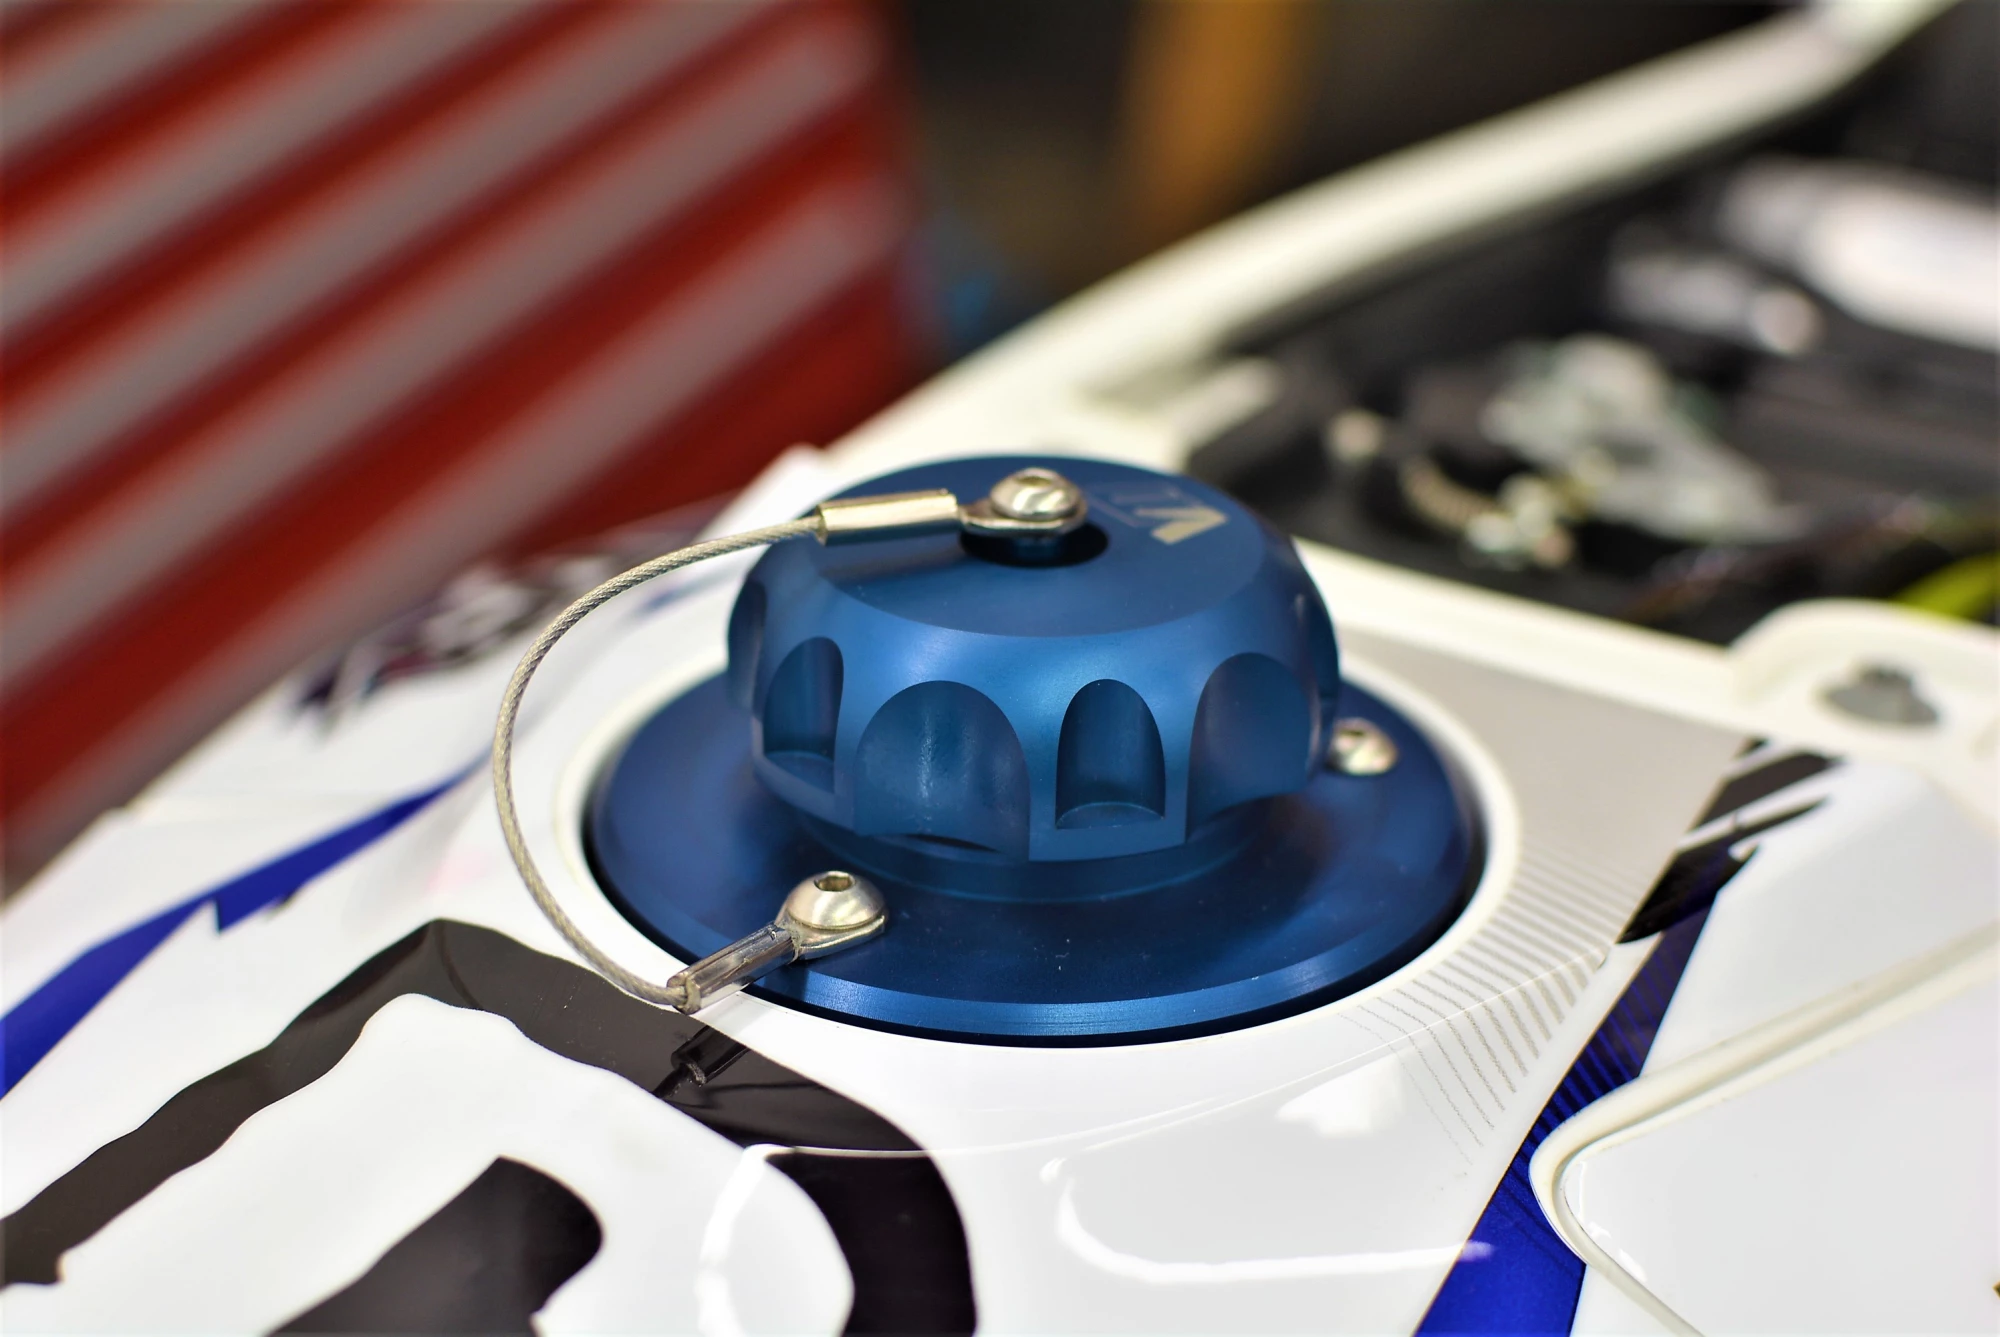
Rounding out the improvements is a billet (also available in black) fuel filler. At the time of this build Vanashe did not prep the caps with a thread in the top, so it was possible to drop the beautiful top cap on the pavement if not careful. We drilled and tapped the top and added a small silicon covered lanyard to stop that from ever happening and give it that 'thought out' look to boot.
Vanashe at our behest is now threading the top caps to allow the user to add a lanyard. A Twin Air fuel filter lies below this cap, keeping all of the bad bits out and letting the good stuff through.
LICENSE AND REGISTRATION PLEASE
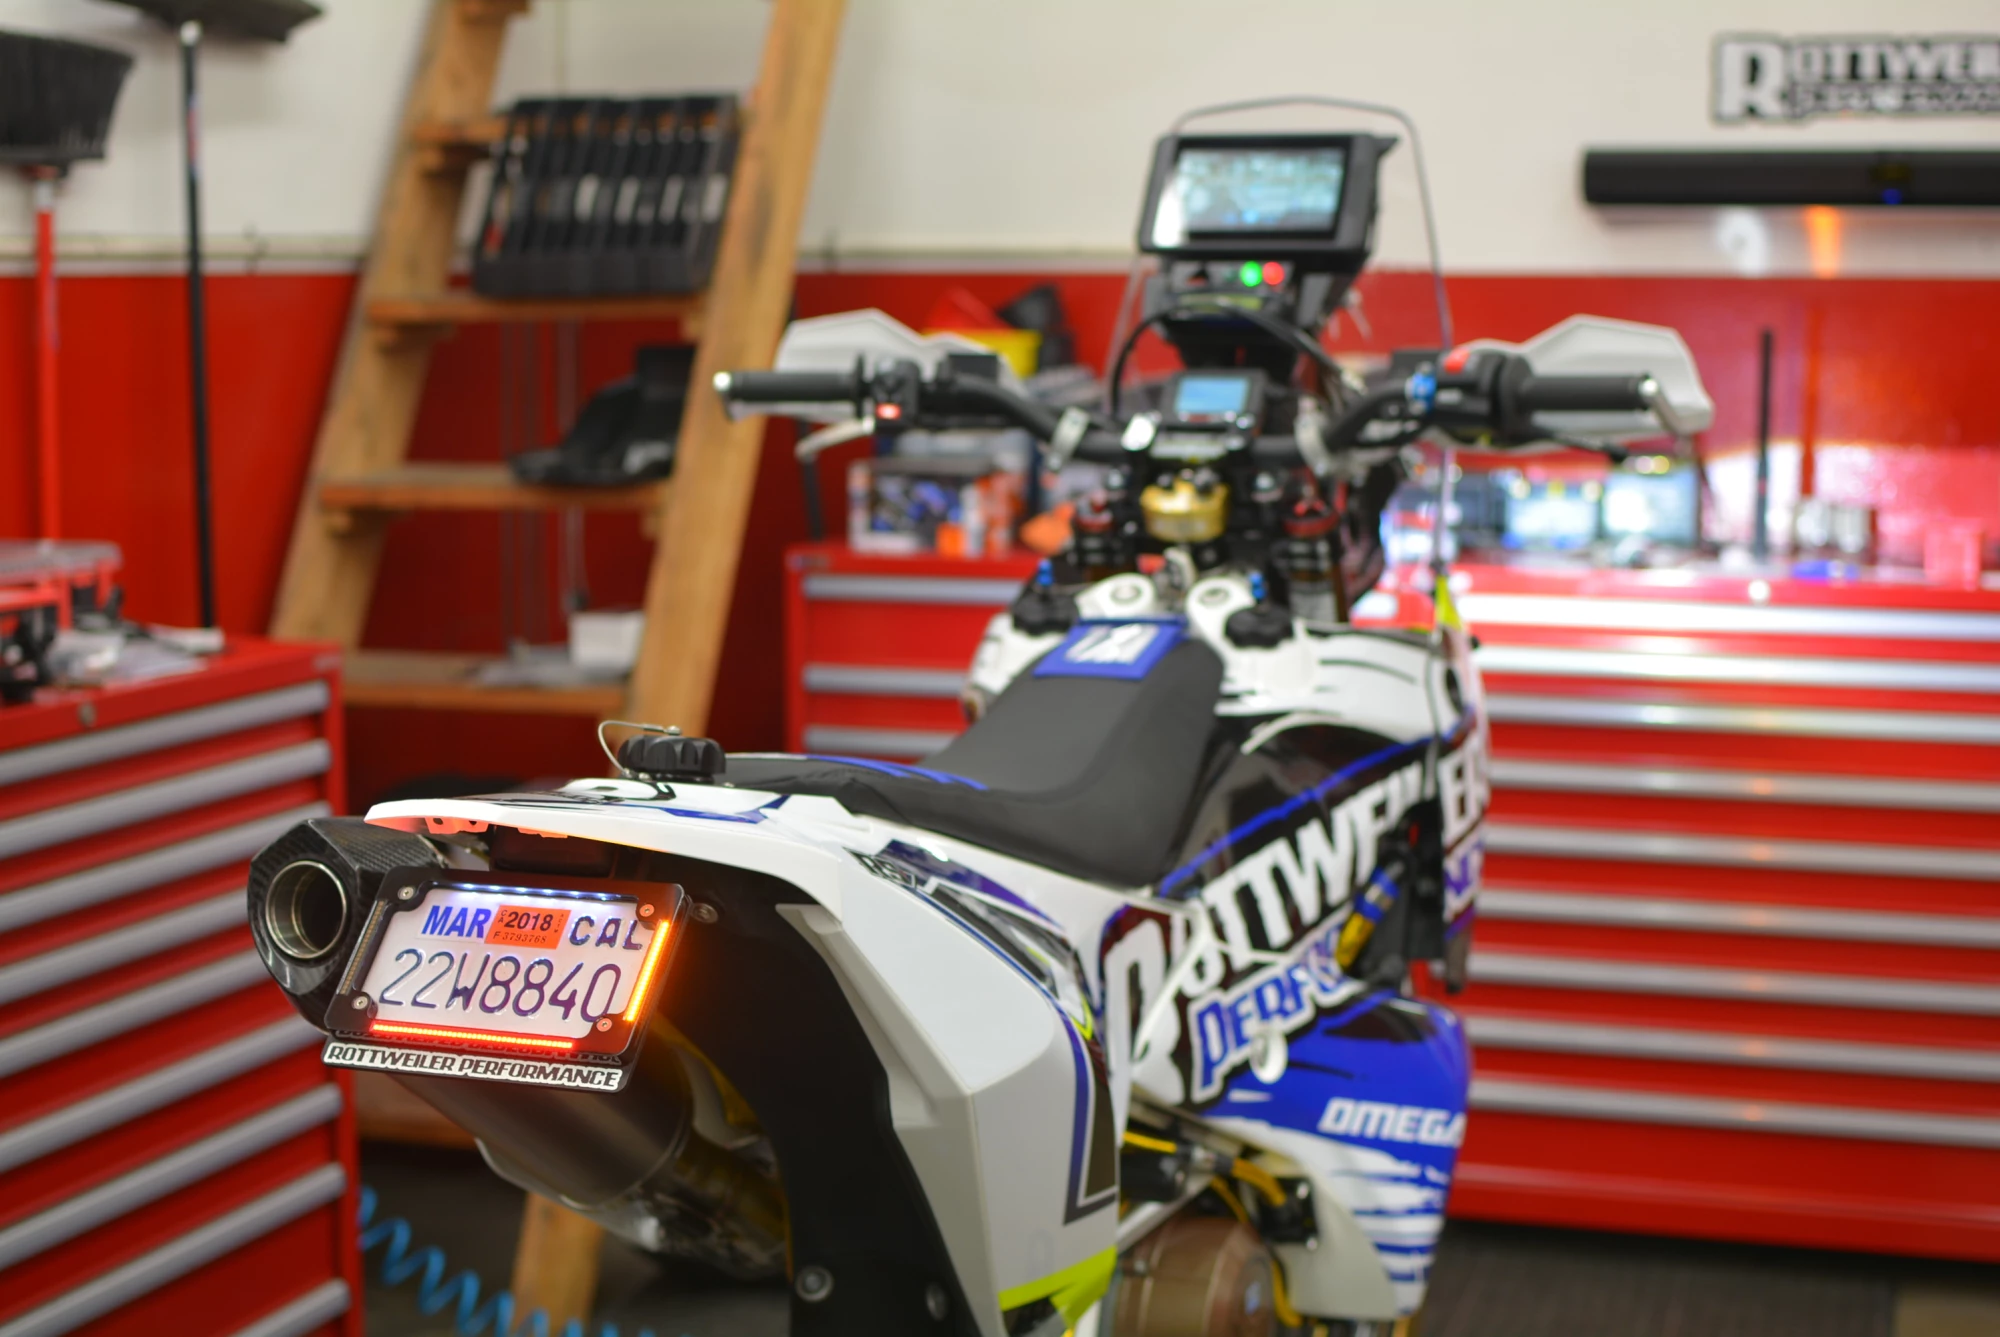
Stock tails are hideous. They always are, so we installed our Rottweiler Performance Husky 701 Tail Tidy in order to stay legit whilst destroying all of those golf courses and still looking like a race bike.
All of the lights are build right into one clean unit. The plate light on the top inside, the running and brake light is center back, and the turn signals are on either side making a tight ass out of you.
HAMMERED!
All motorcycles seem to be made for a size 10 shoe, so what do you size 8, 12 or 16 riders do? You switch to a custom Hammerhead shift lever specially crafted for all sizes and shapes of riders out there. A billet Hammerhead shift lever also replaced the stock cast unit for even more reliability.

HUSKY (KTM) AND THEIR STRANGELY LONG KICKSTANDS
It is a dimension as vast as space and as timeless as infinity. It is the middle ground between light and shadow, between science and superstition, and it lies between the pit of man's fears and the summit of his knowledge. This is the dimension of imagination. It is an area which we call: KTM Kickstands.
We will never figure out why KTM makes their kickstands so damn long. It just doesn't make any earthly sense but still they continue year after year to tip over bikes by the thousands. Maybe they have some good stock in throttle grips and right side hand-guards and that's how they plan on selling more of them. Who knows, but since we have the technology at RP, we are going to fix that.
In any other situation, we would use a Vanasche kickstand platform to keep the tiny stocker from digging it's way to China every time we stop in the sand. For this build, we simply took a height gauge and cut off about 25mm of the stock kickstand, making sure that the new angle matched the ground level.

We then TIG welded on our own 4130 chomemoly steel pad for lightweight and simplicity. The end result is a bike that leans the way it should and won't sink into the sand. Welds a'la James our lead fabricator.
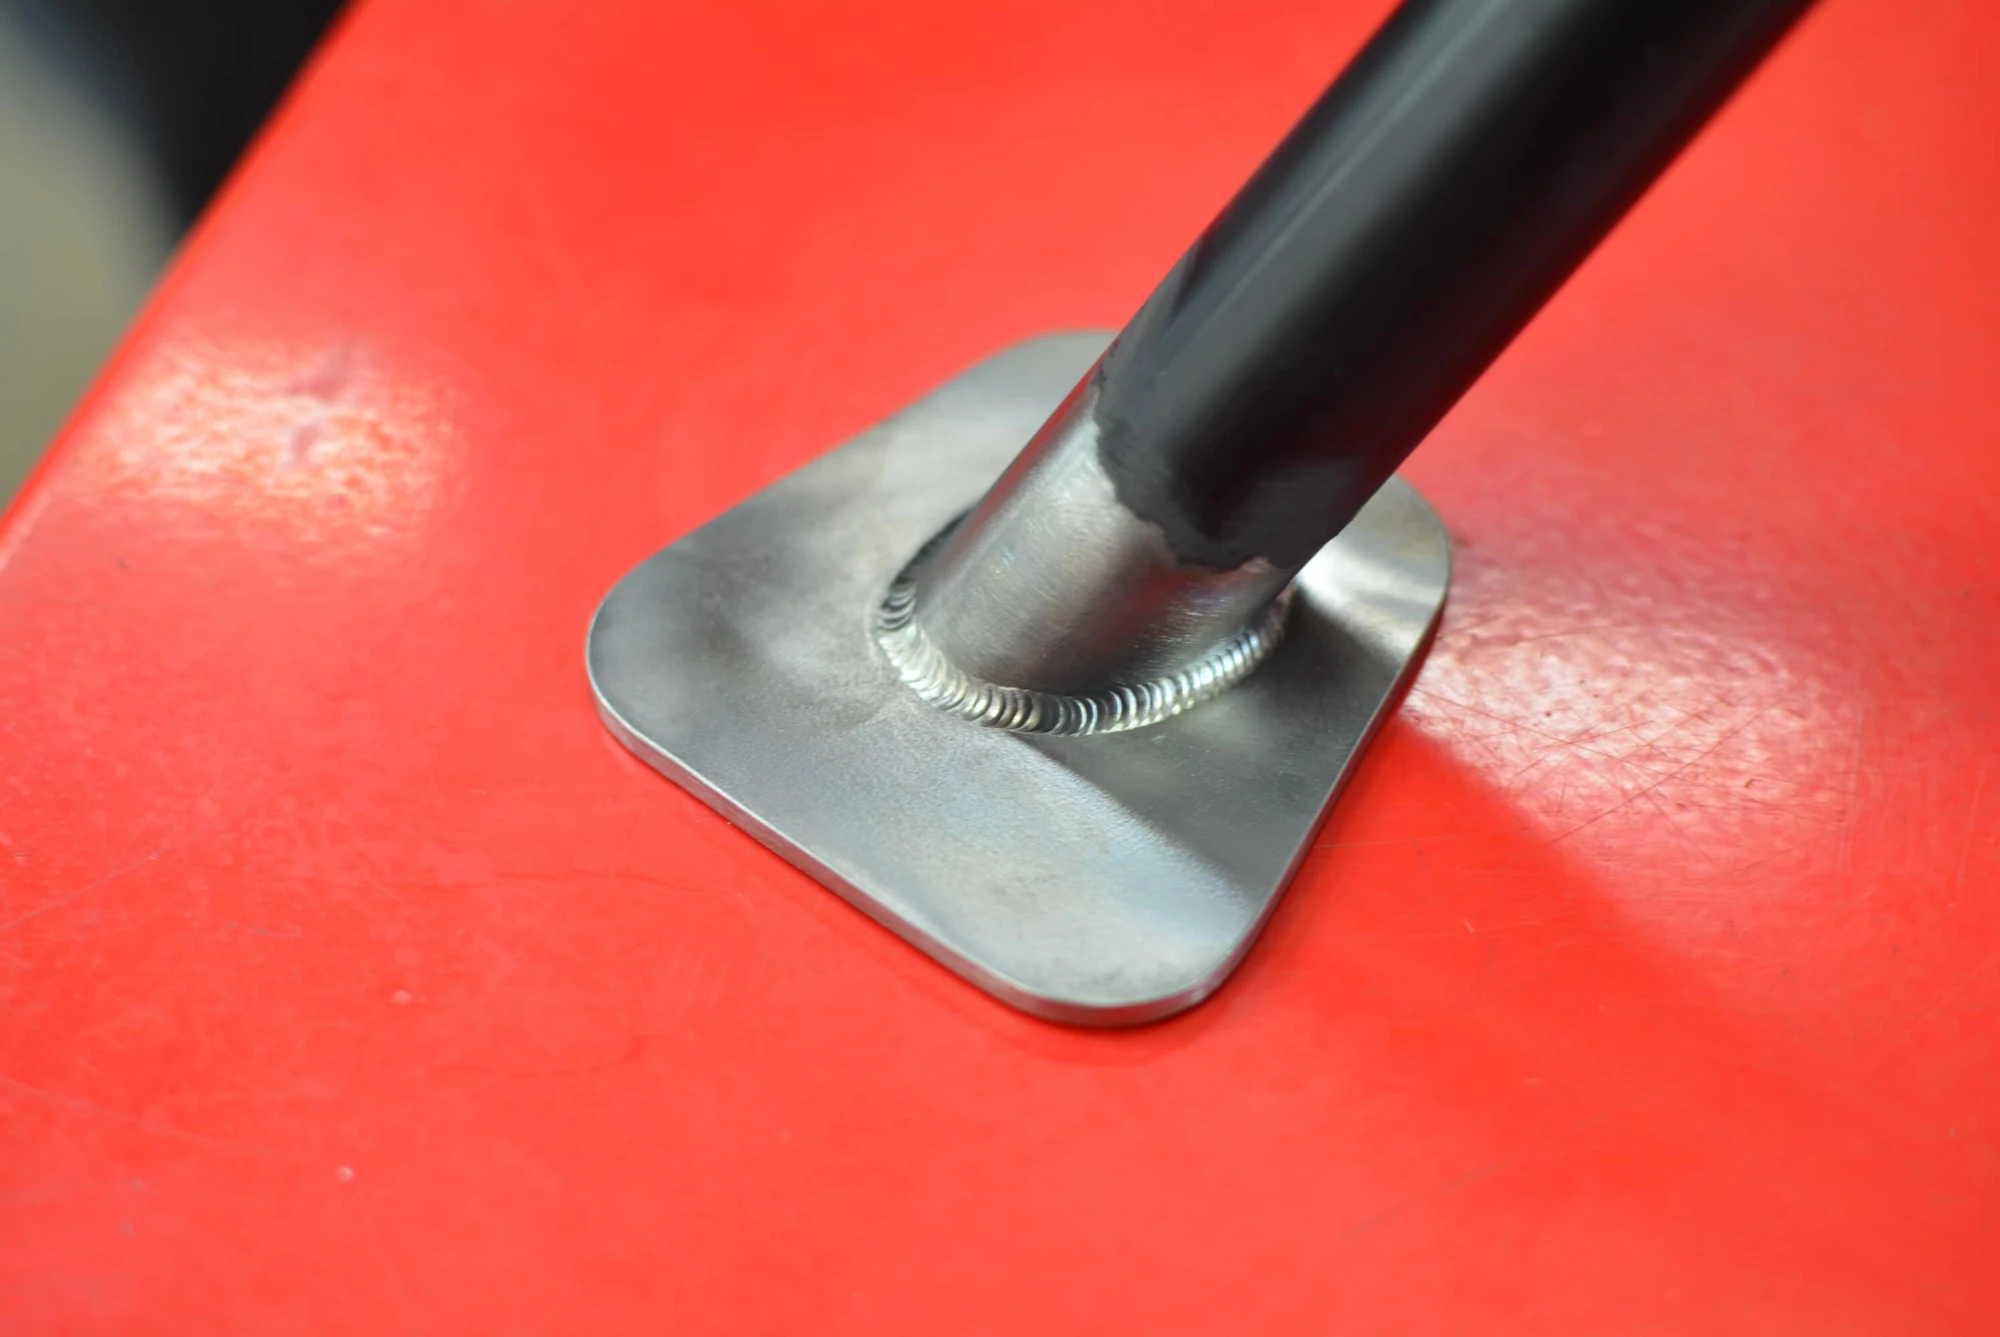
Nice and clean. The way we like it.
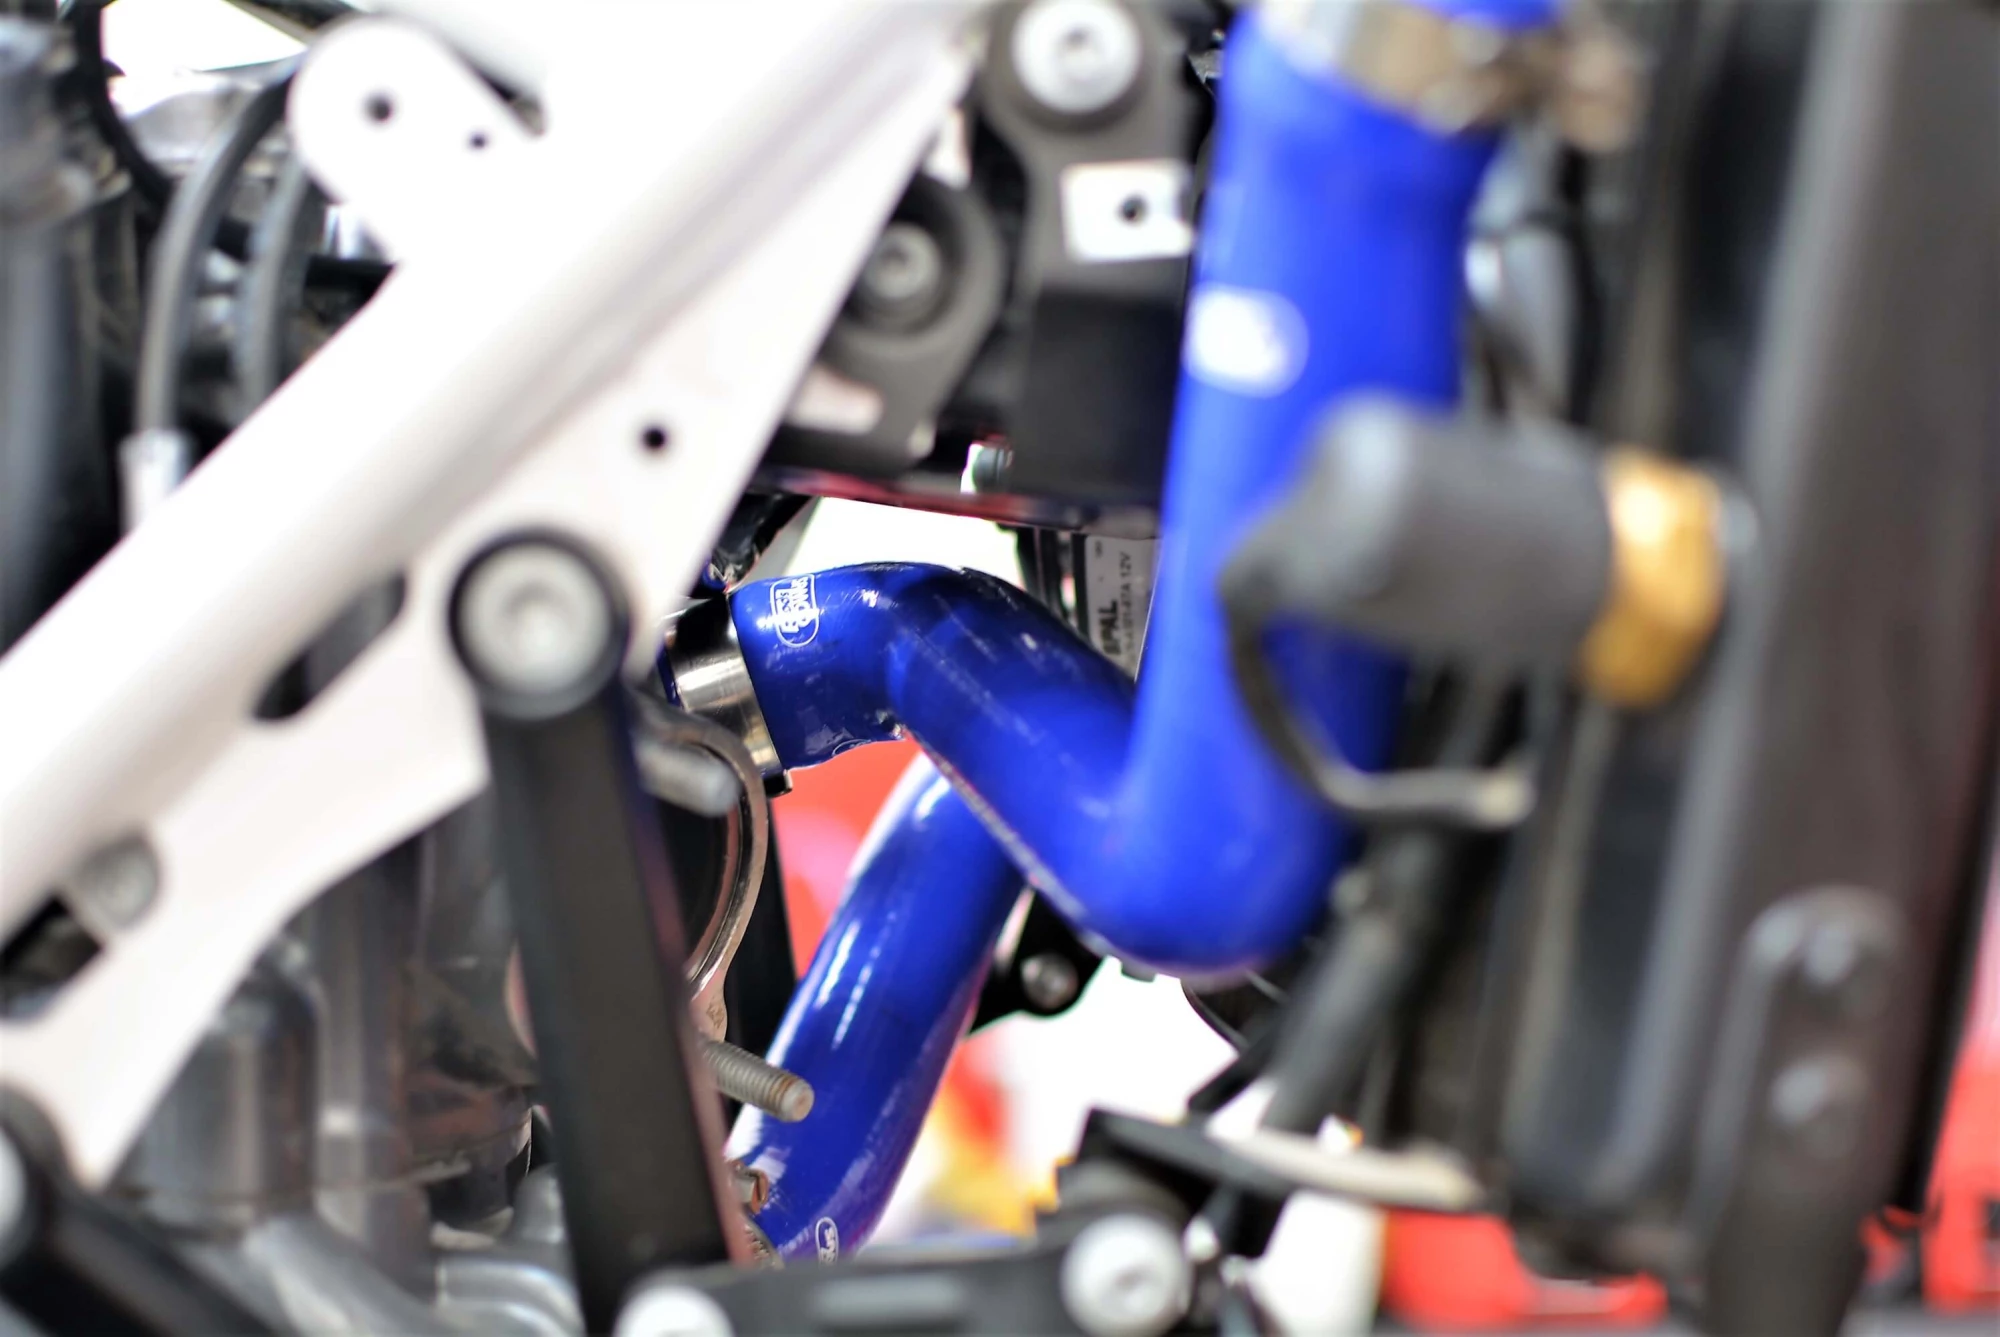
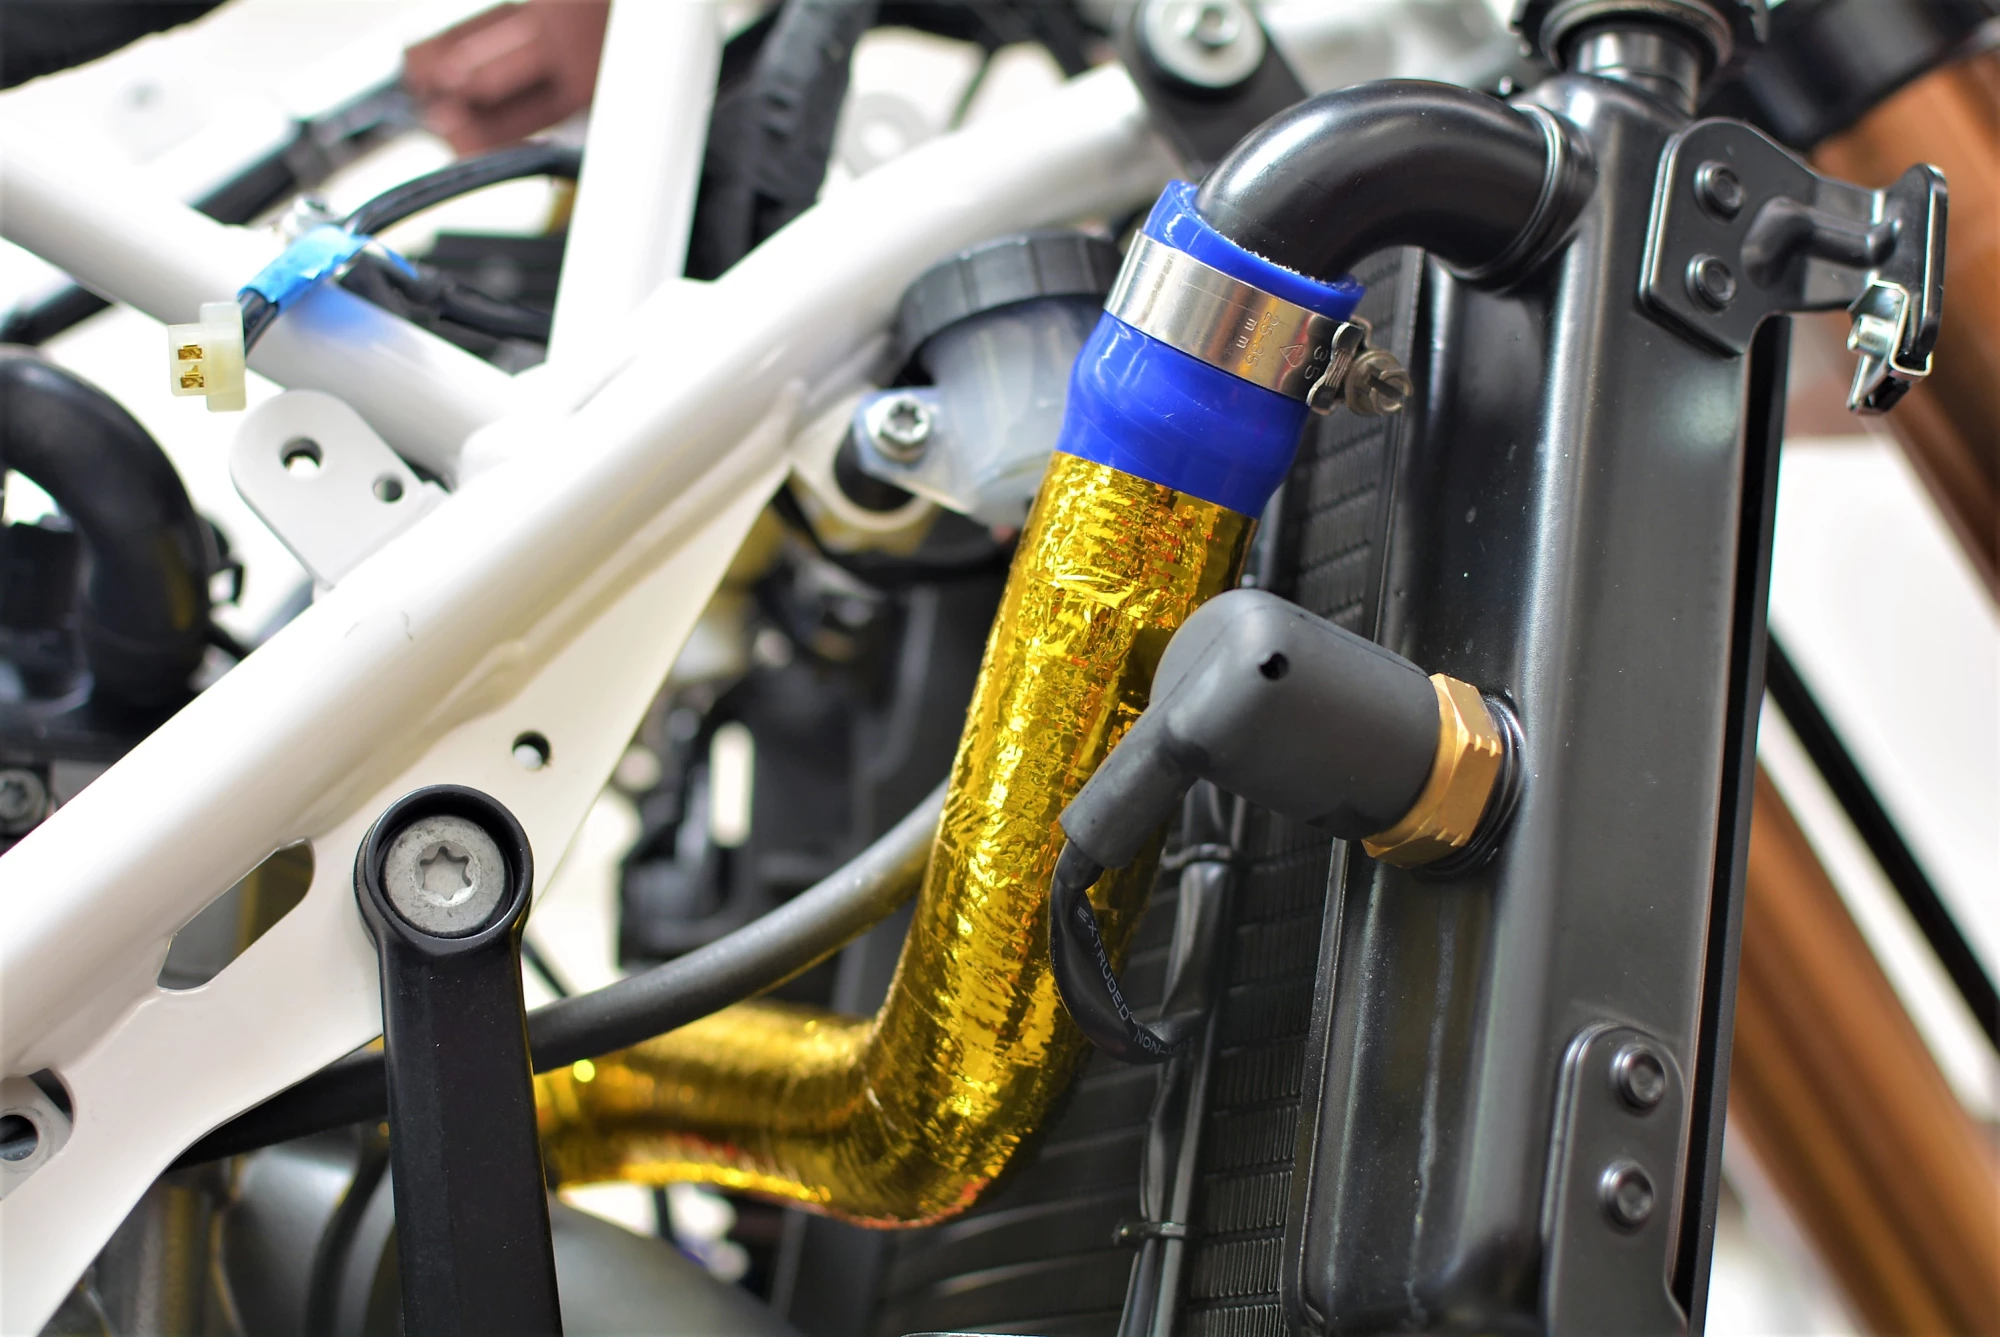
SAMCO SILICON RADIATOR LINES
Ever since some stock lines on an Adventure 990 completely opened up on me (fortunately in town locally), Samco lines have been a staple in any build where the focus is reliability. The UK company just makes nice stuff, and the silicon lines are not only beautiful, they are brutally tough so for not much dinero, you get an aesthetics upgrade along with knowing your engine's lifeline is pumping it's blood through the highest quality arteries on the planet.
THE FUEL SYSTEM AND WHAT CHANGES WITH THE OMEGA KIT
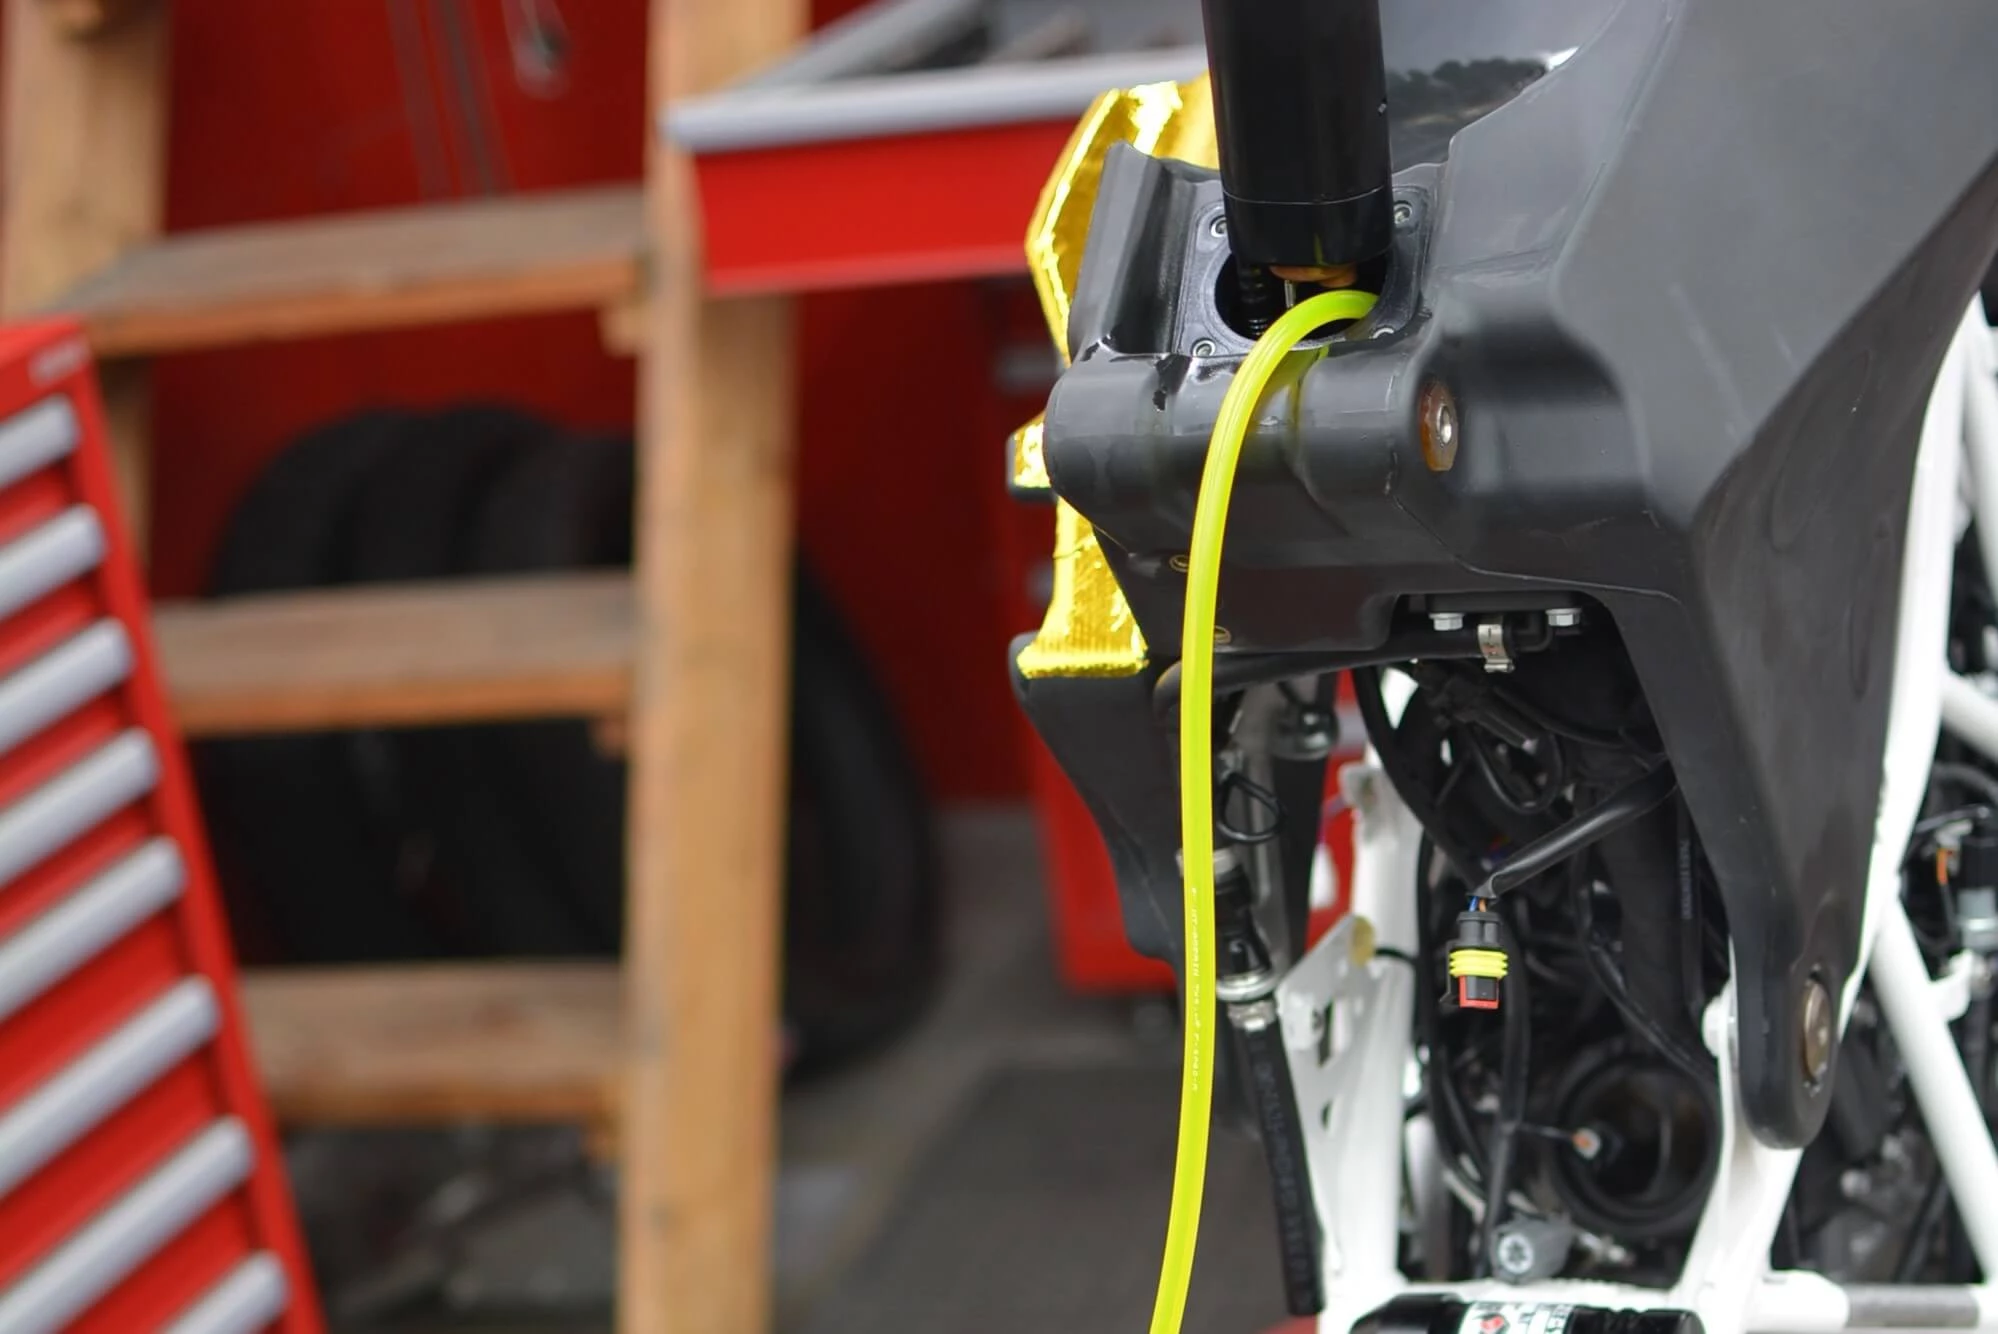
With the Omega 701 Rally Kit, the fuel system is slightly altered to compensate for 3 fuel tanks instead of one. First you need to drain the stock fuel tank which can be an interesting task. We chose to simply tip up the subframe, unbolt the fuel pump and siphon the fuel with a tygon hose. You'll need to make sure the line reaches the lowest cavity of the fuel tank.
Once the fuel is drained, the fuel pump is removed and set aside to be later installed in the right fuel tank of the Omega Kit.
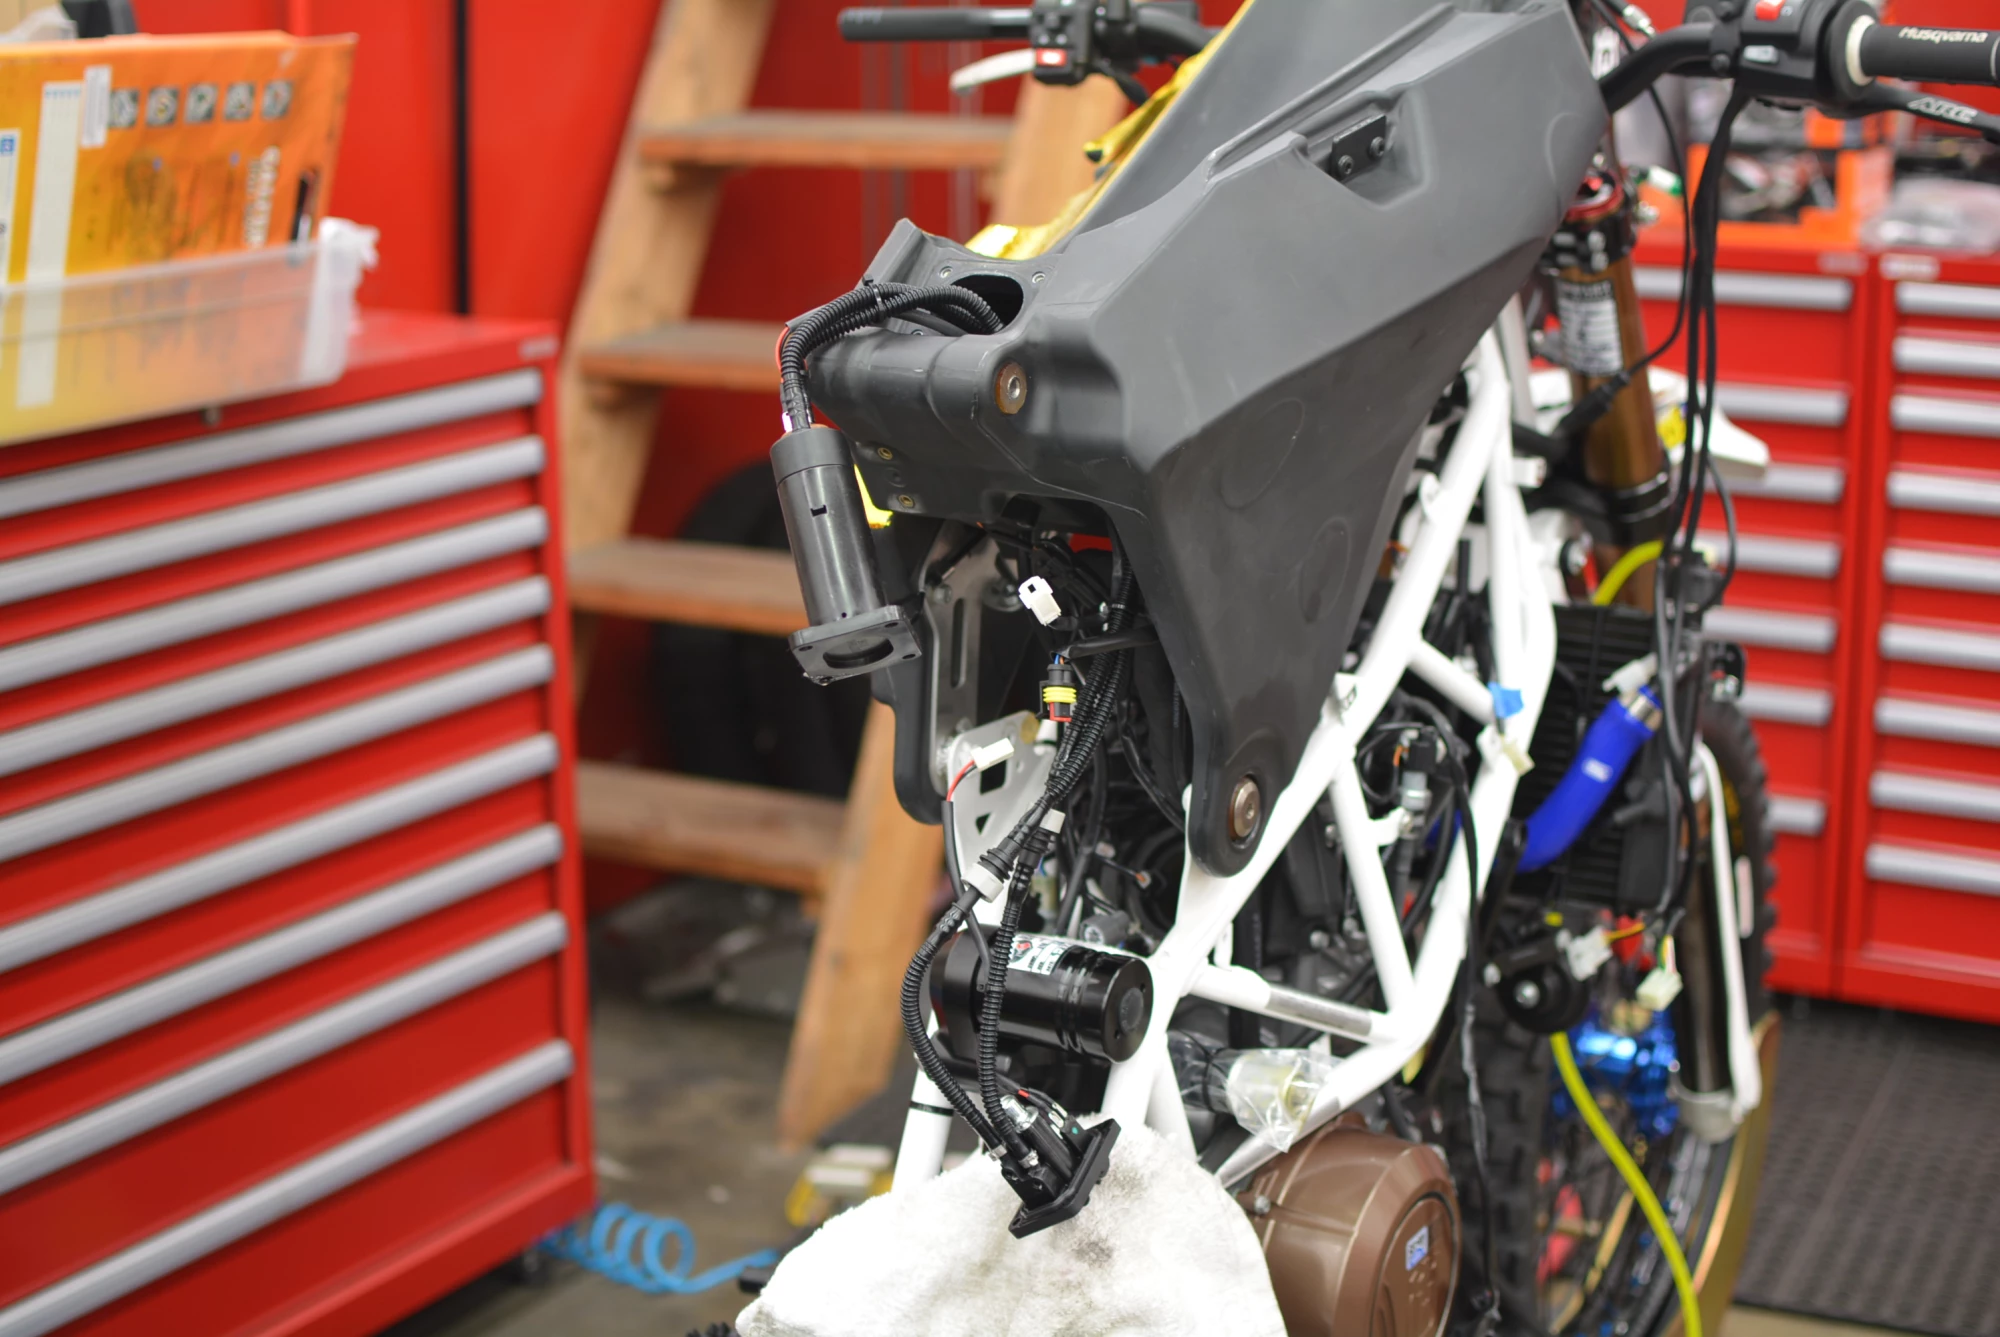
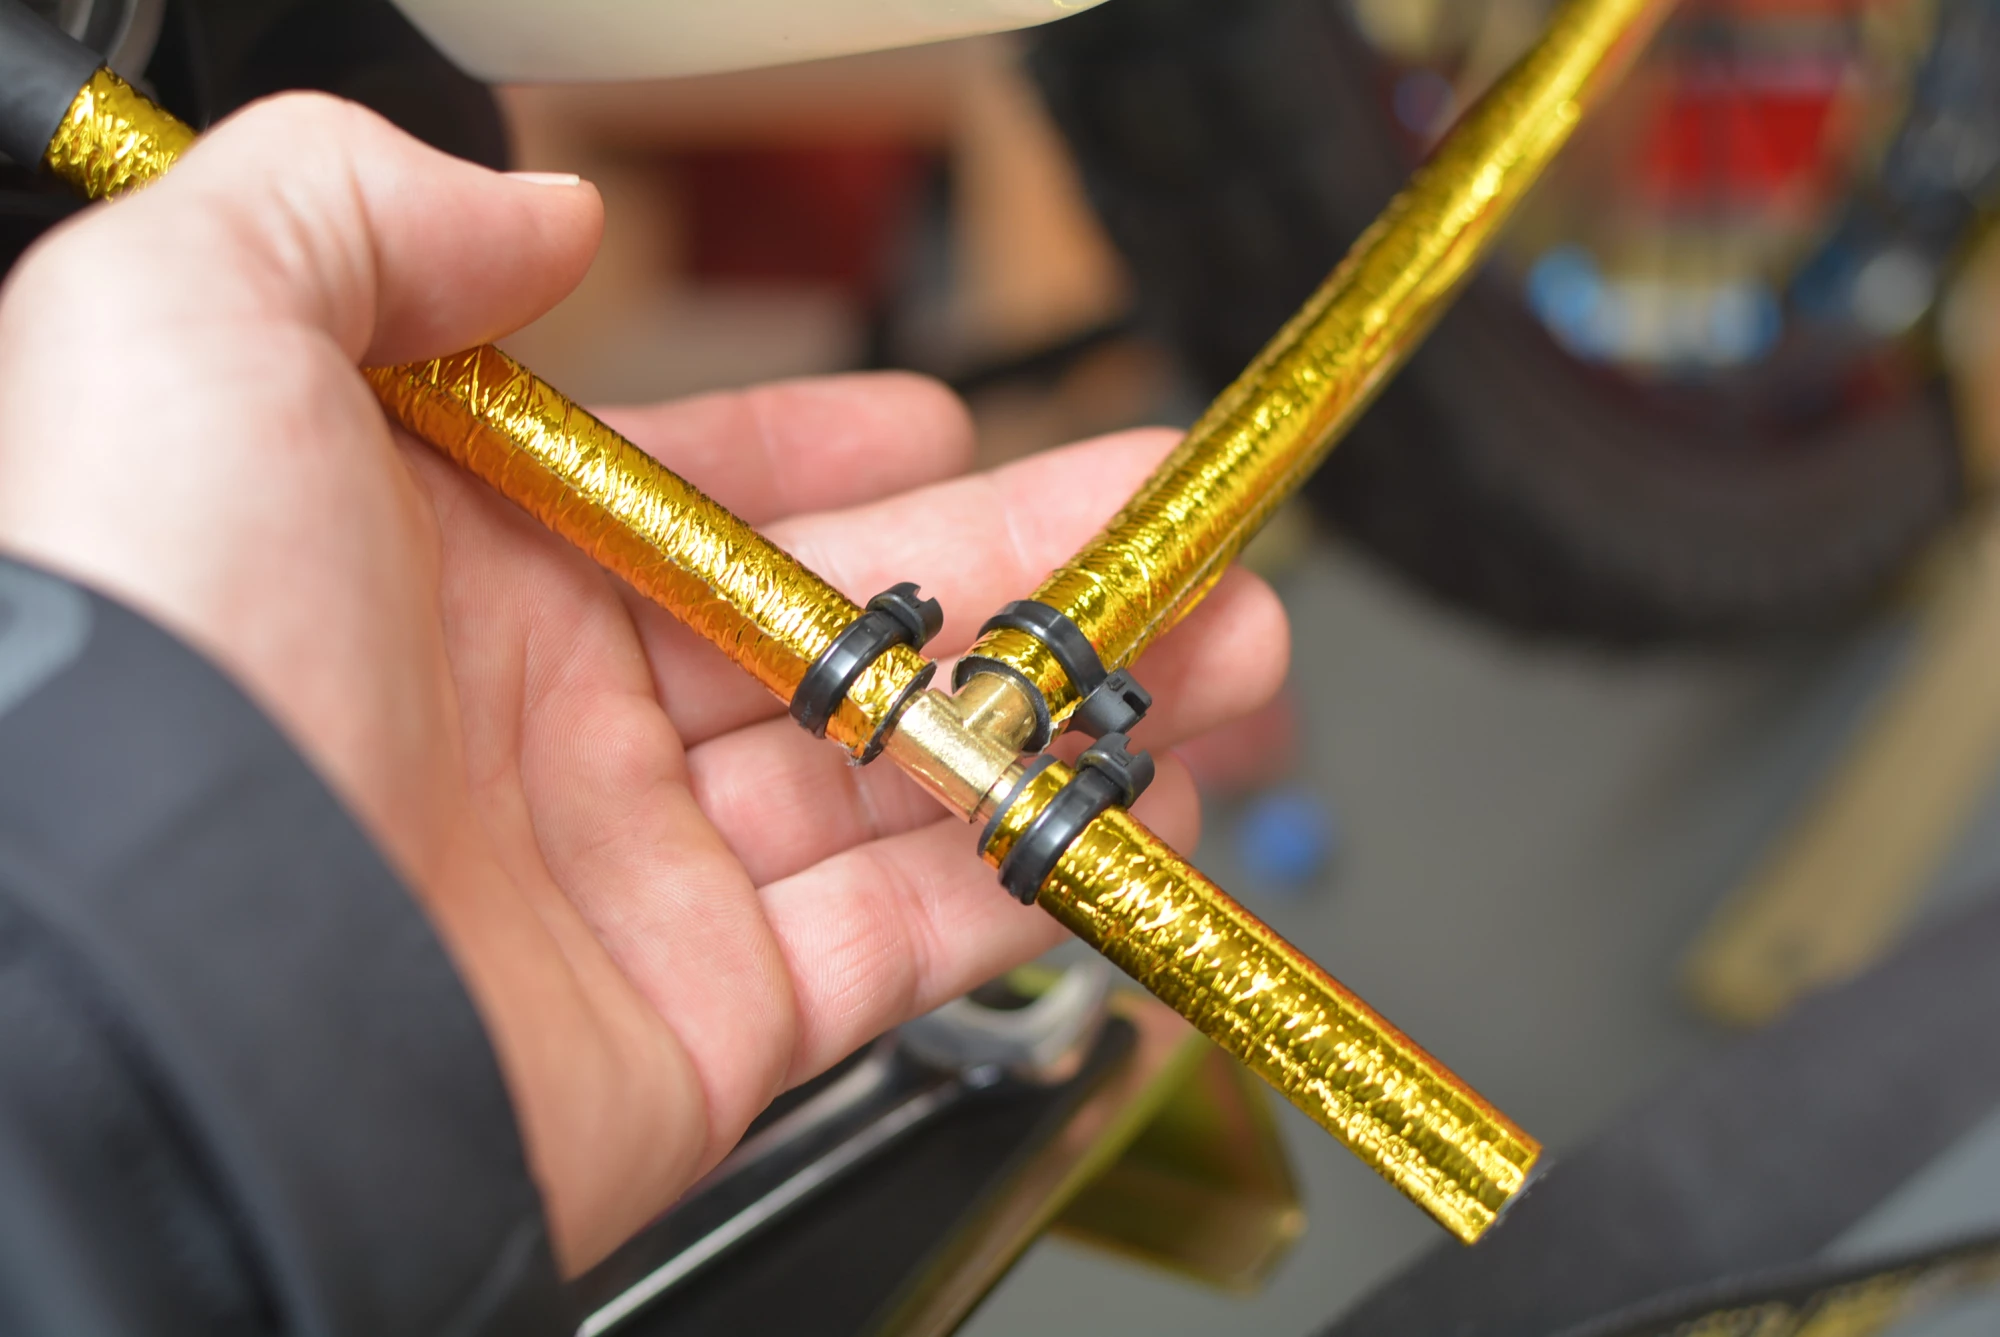
The Omega Rally kit comes with a billet fuel bowl designed to now gravity feed the front two fuel tanks. With this configuration all three fuel tanks get filled separately, and then all gravity feed to the right side tank. The line you see below 'T's' into a fuel line that crosses over the front of the engine, and then the rear and left fuel tanks feed the right where the fuel pump has been moved to and is the lowest spot.
Another alternative is to keep the fuel pump in the rear and purchase a second fuel pump for the right side fuel tank to act as an instant spare in case of a failure. There is obviously a weight penalty involved with this so you will need to consider your bank account, your wiring prowess and your use of the build. For our purposes, keeping the bike light was a priority and in addition to that, almost every other bike we own only has one fuel pump and we protect them all with redundant fuel filtering at the filler cap, fuel pump and in the fuel line with Zip Ty inline fuel filters. For serious adventurers that may be heading into the unknown, you may want to consider this option but for our purposes we kept it simple.

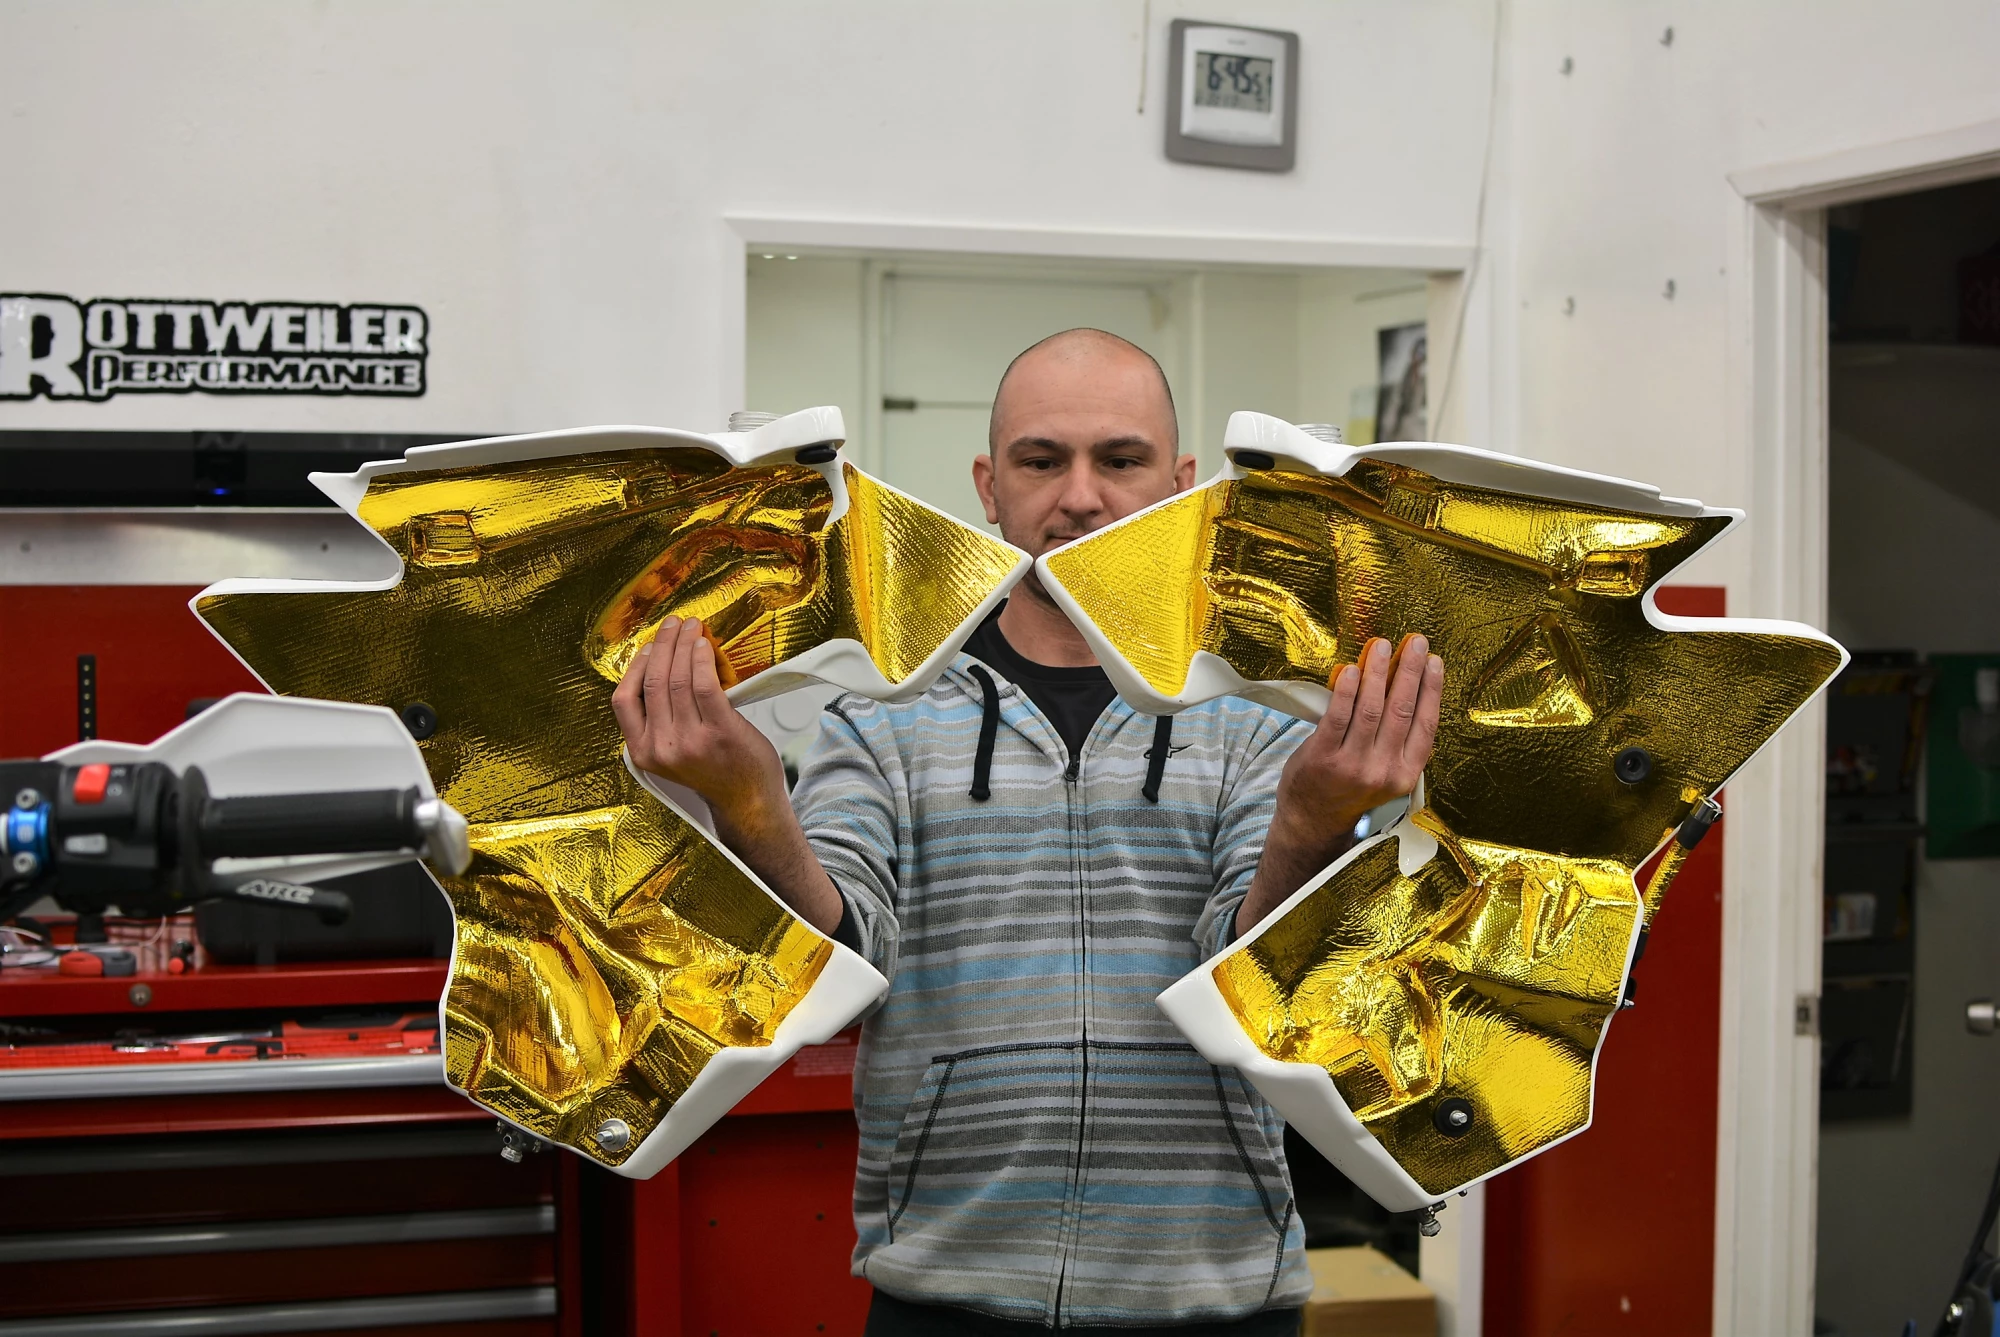
GOLD!
If we took this build to new levels, we figured we might as well go all the way with the details and build the machine using everything in our book that we learned building formula type race cars. Gold reflective material was carefully applied anywhere heat would be an issue. This was especially important on the fuel tanks to keep the fuel as cool as possible and keep the heat from the muffler and engine from boiling it. We learned racing SCORE that heat reflective tape would actually help get better fuel mileage by (believe it or not) reducing the amount of fuel that was boiled out of the fuel tank!
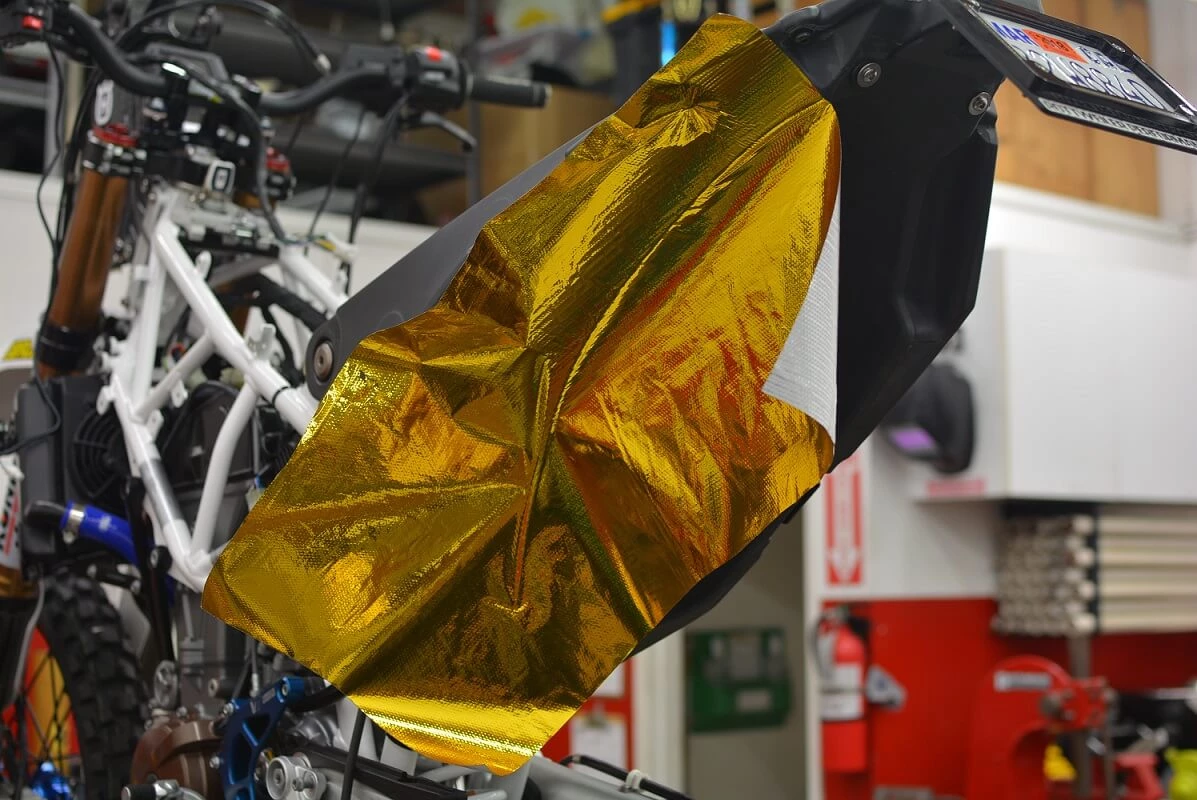
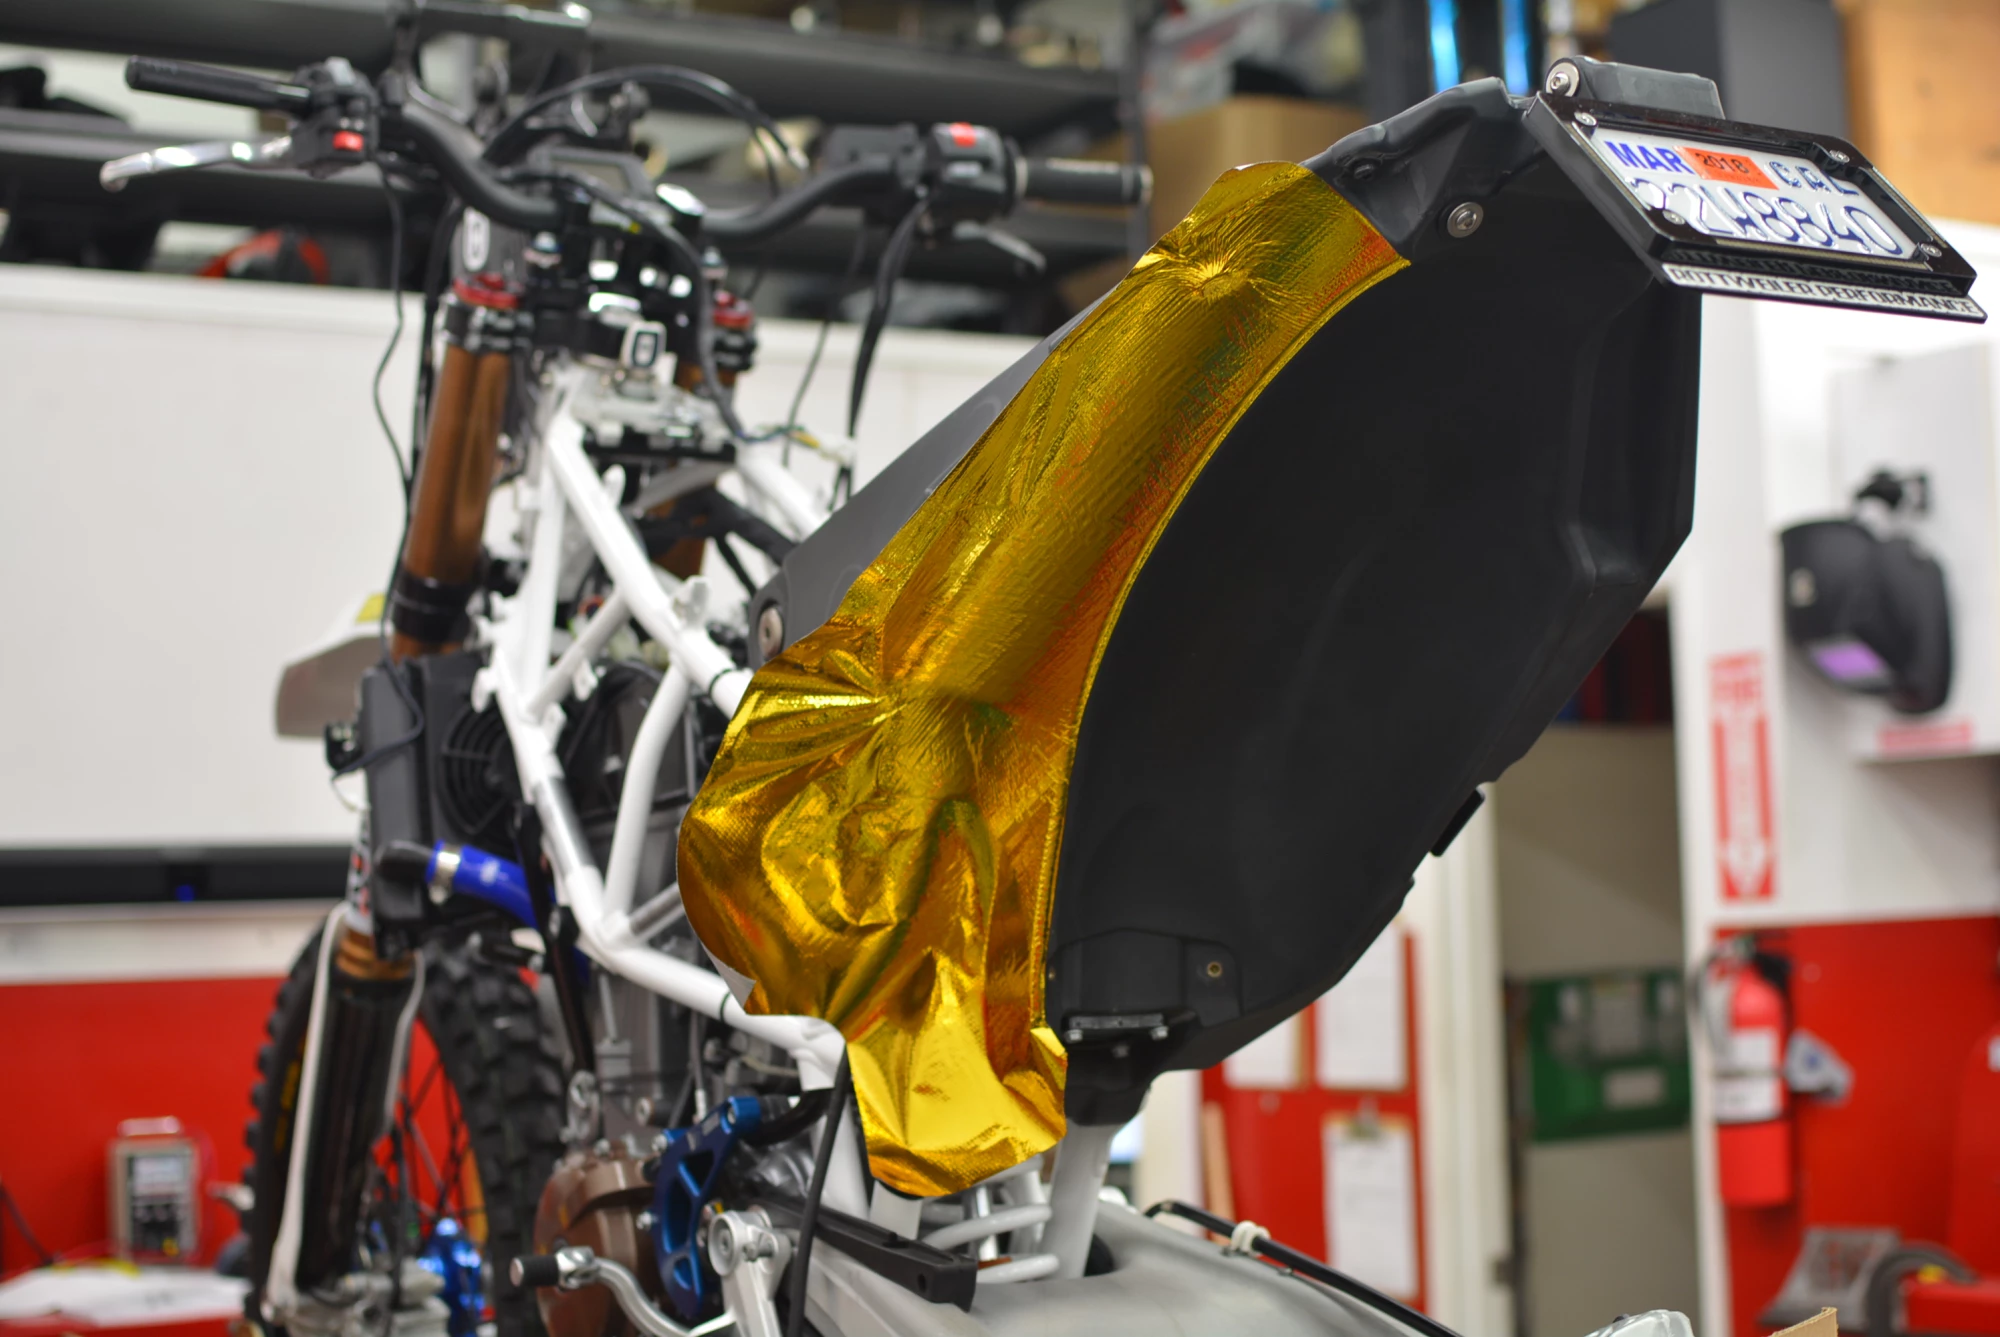
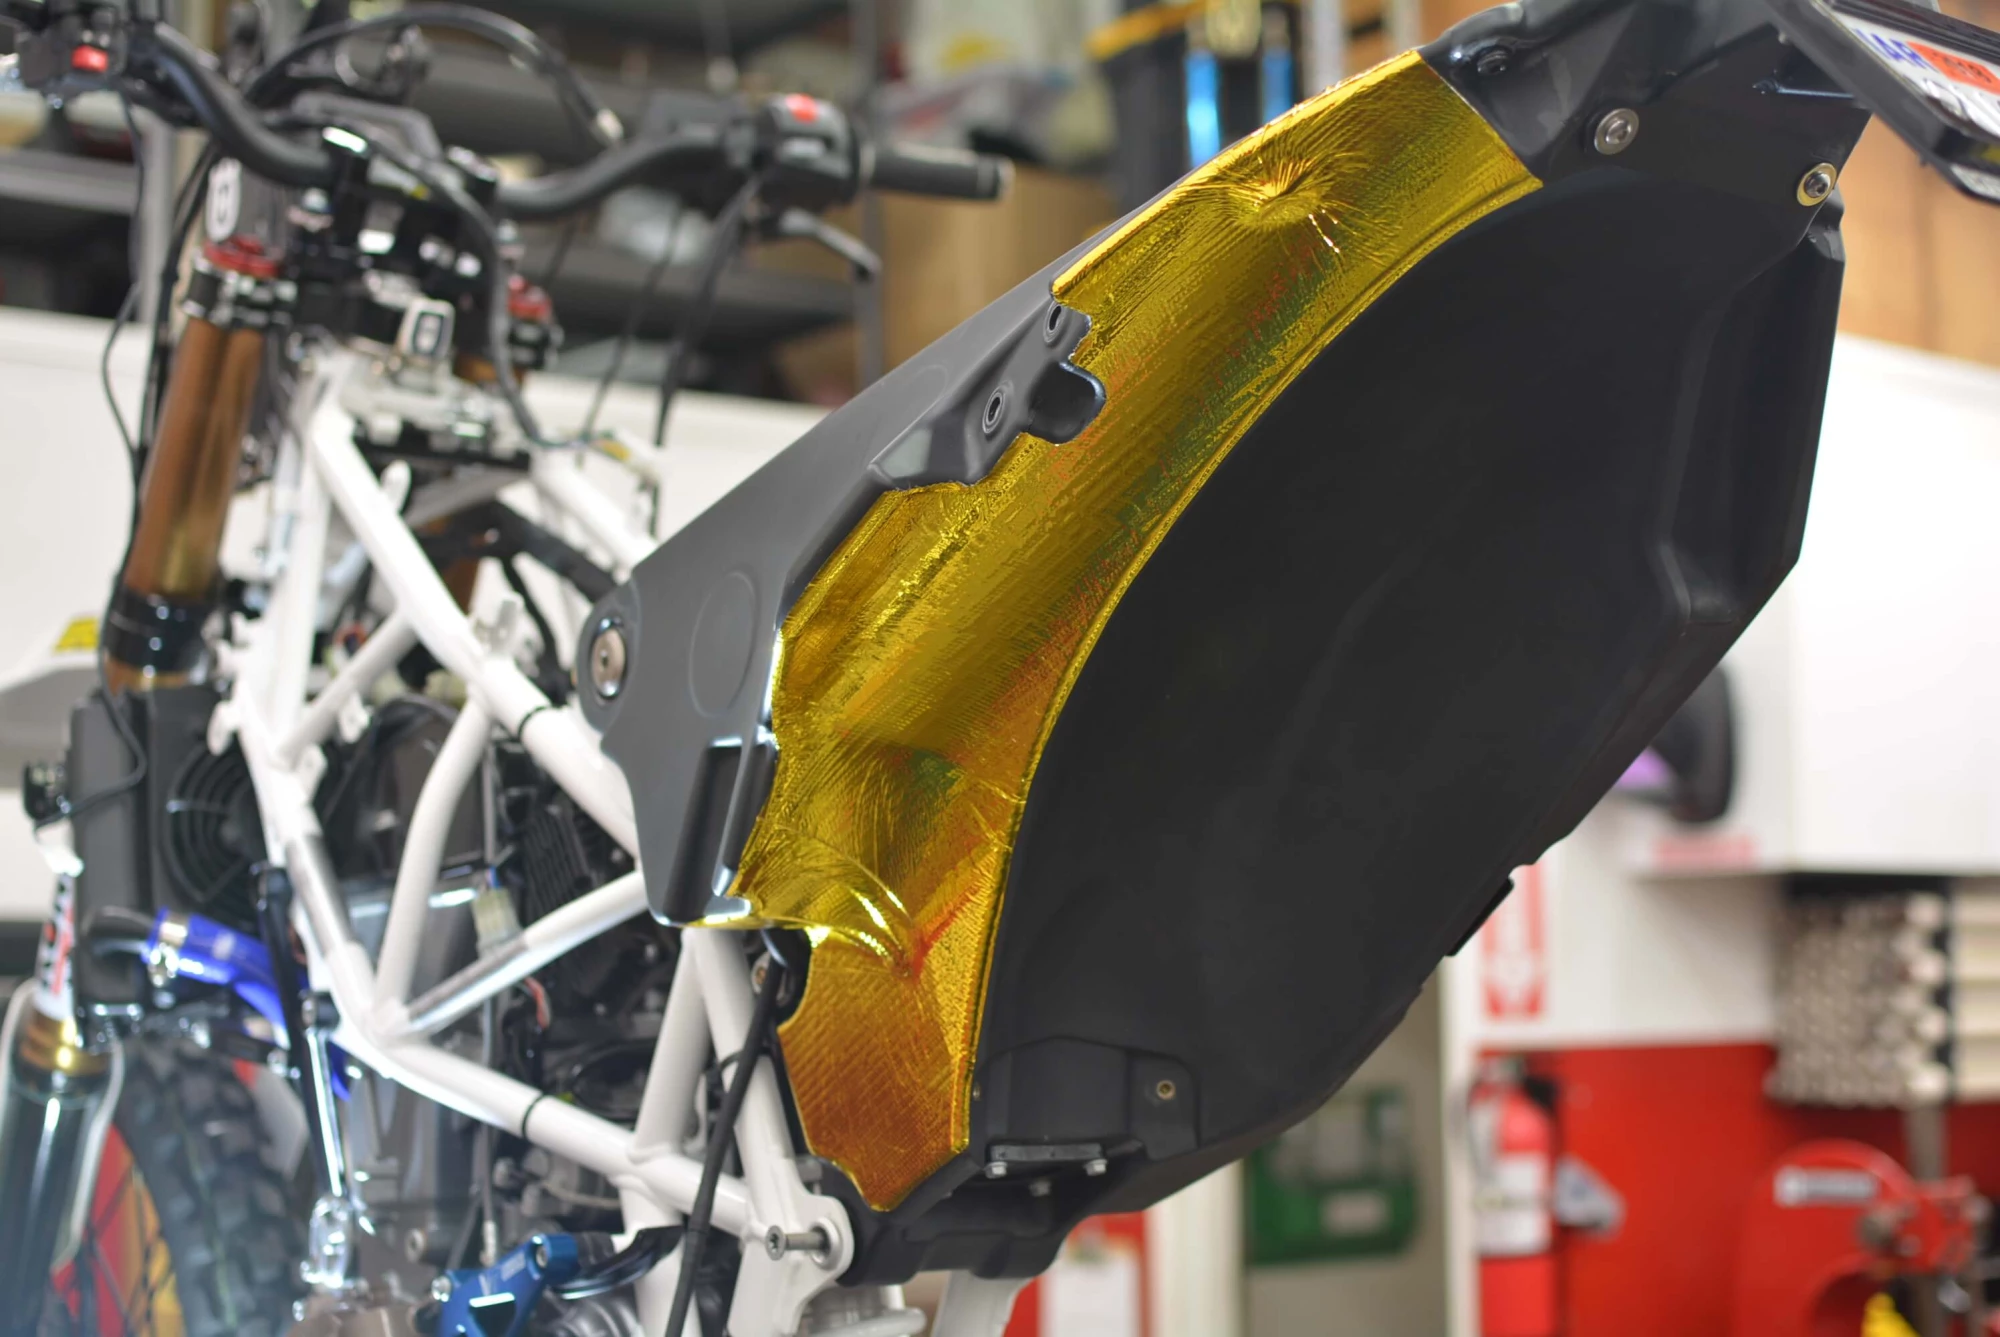
We chose our (at the time) assemblyman Chris to take on the task of applying the front tanks purely because of his outstanding ability to harness his OCD. It took Chris nearly 8 hours per side to craft these beautiful works of golden art.
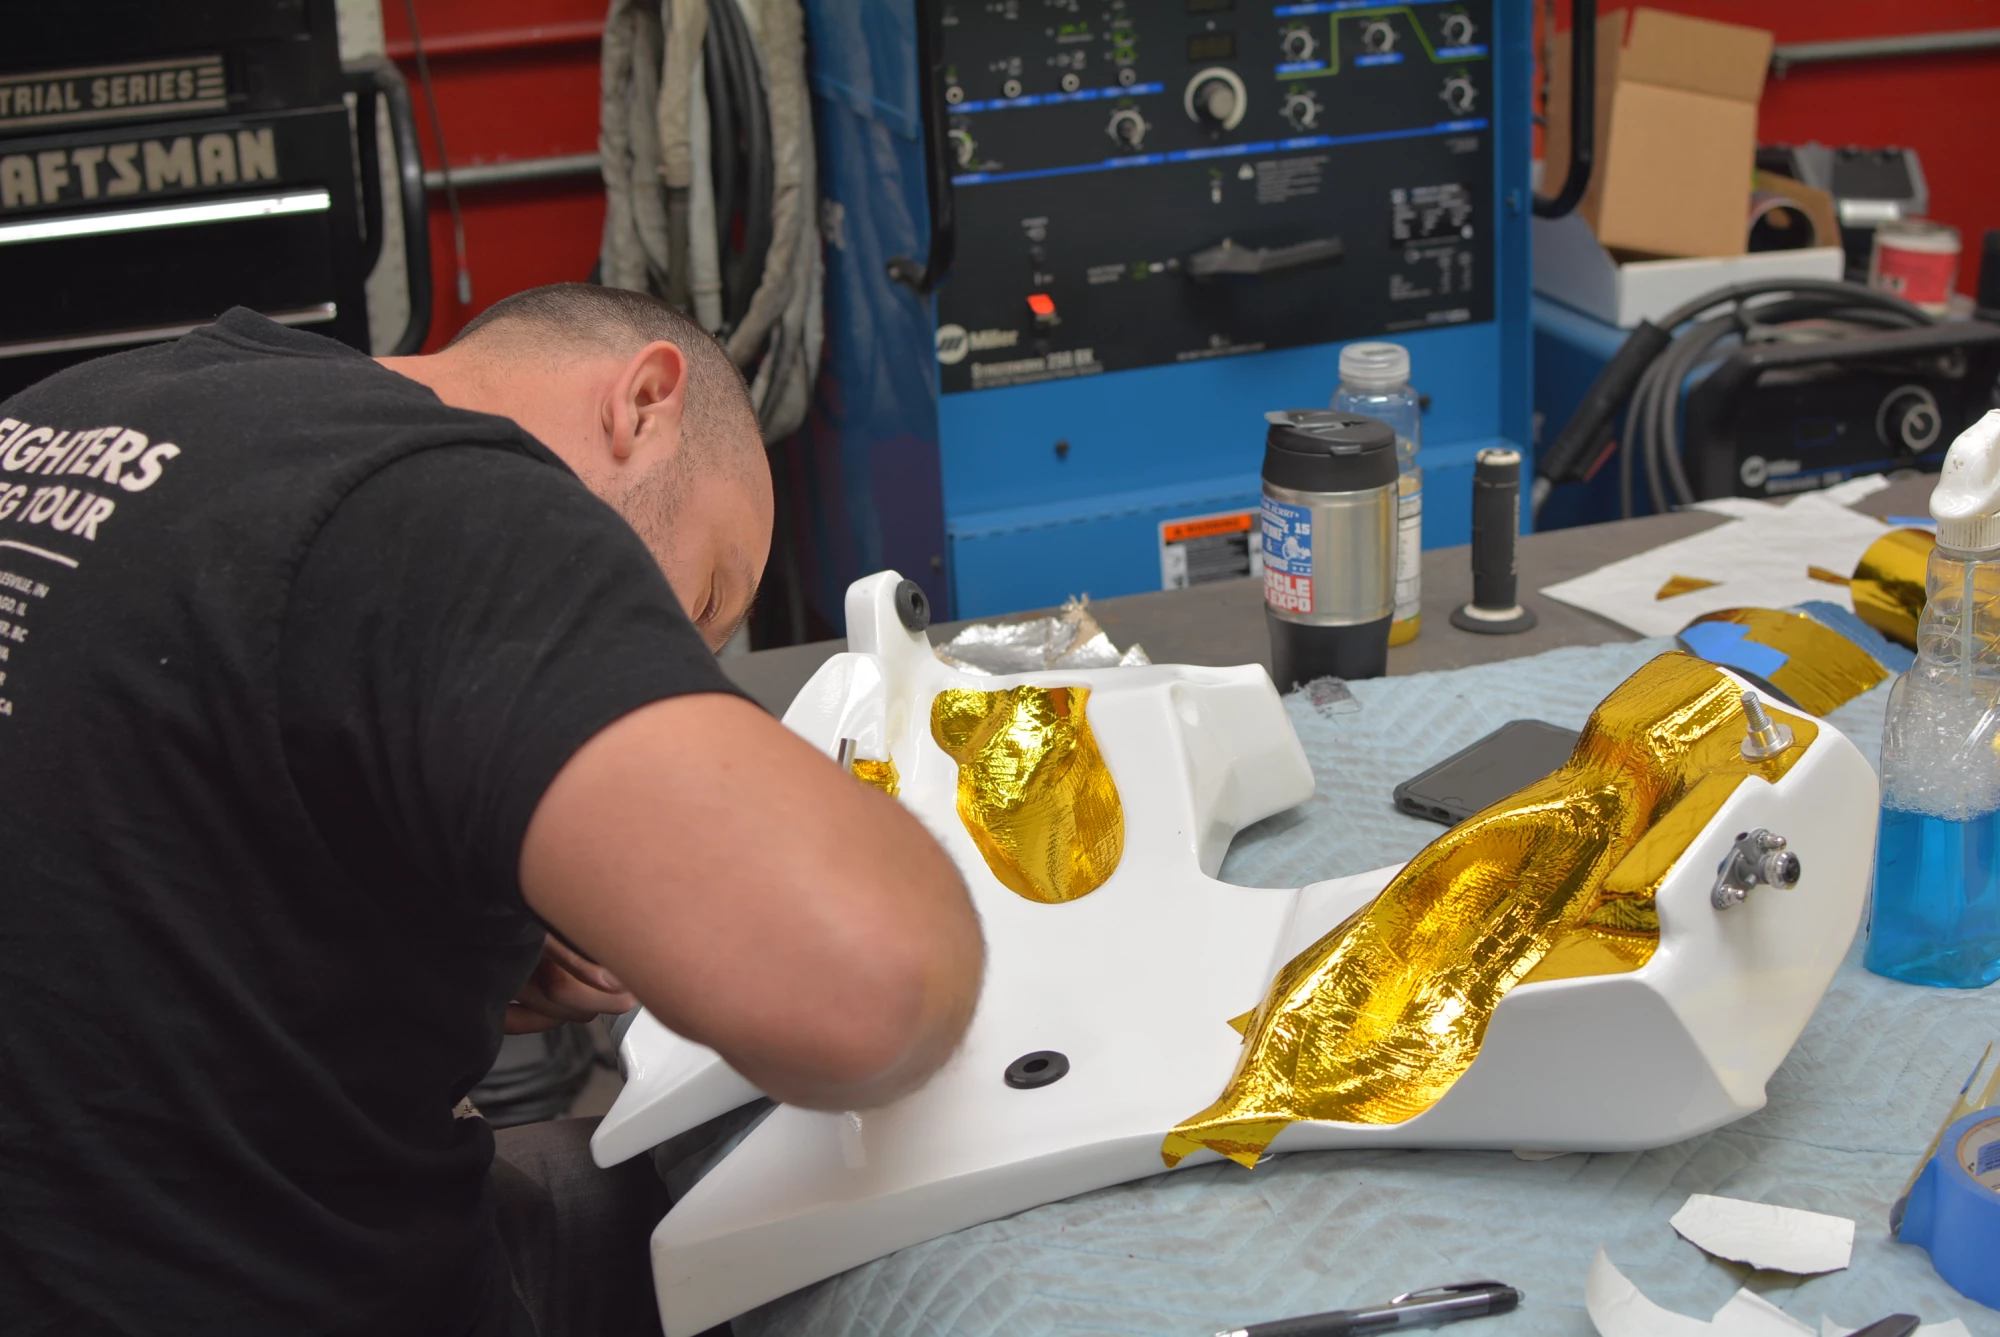
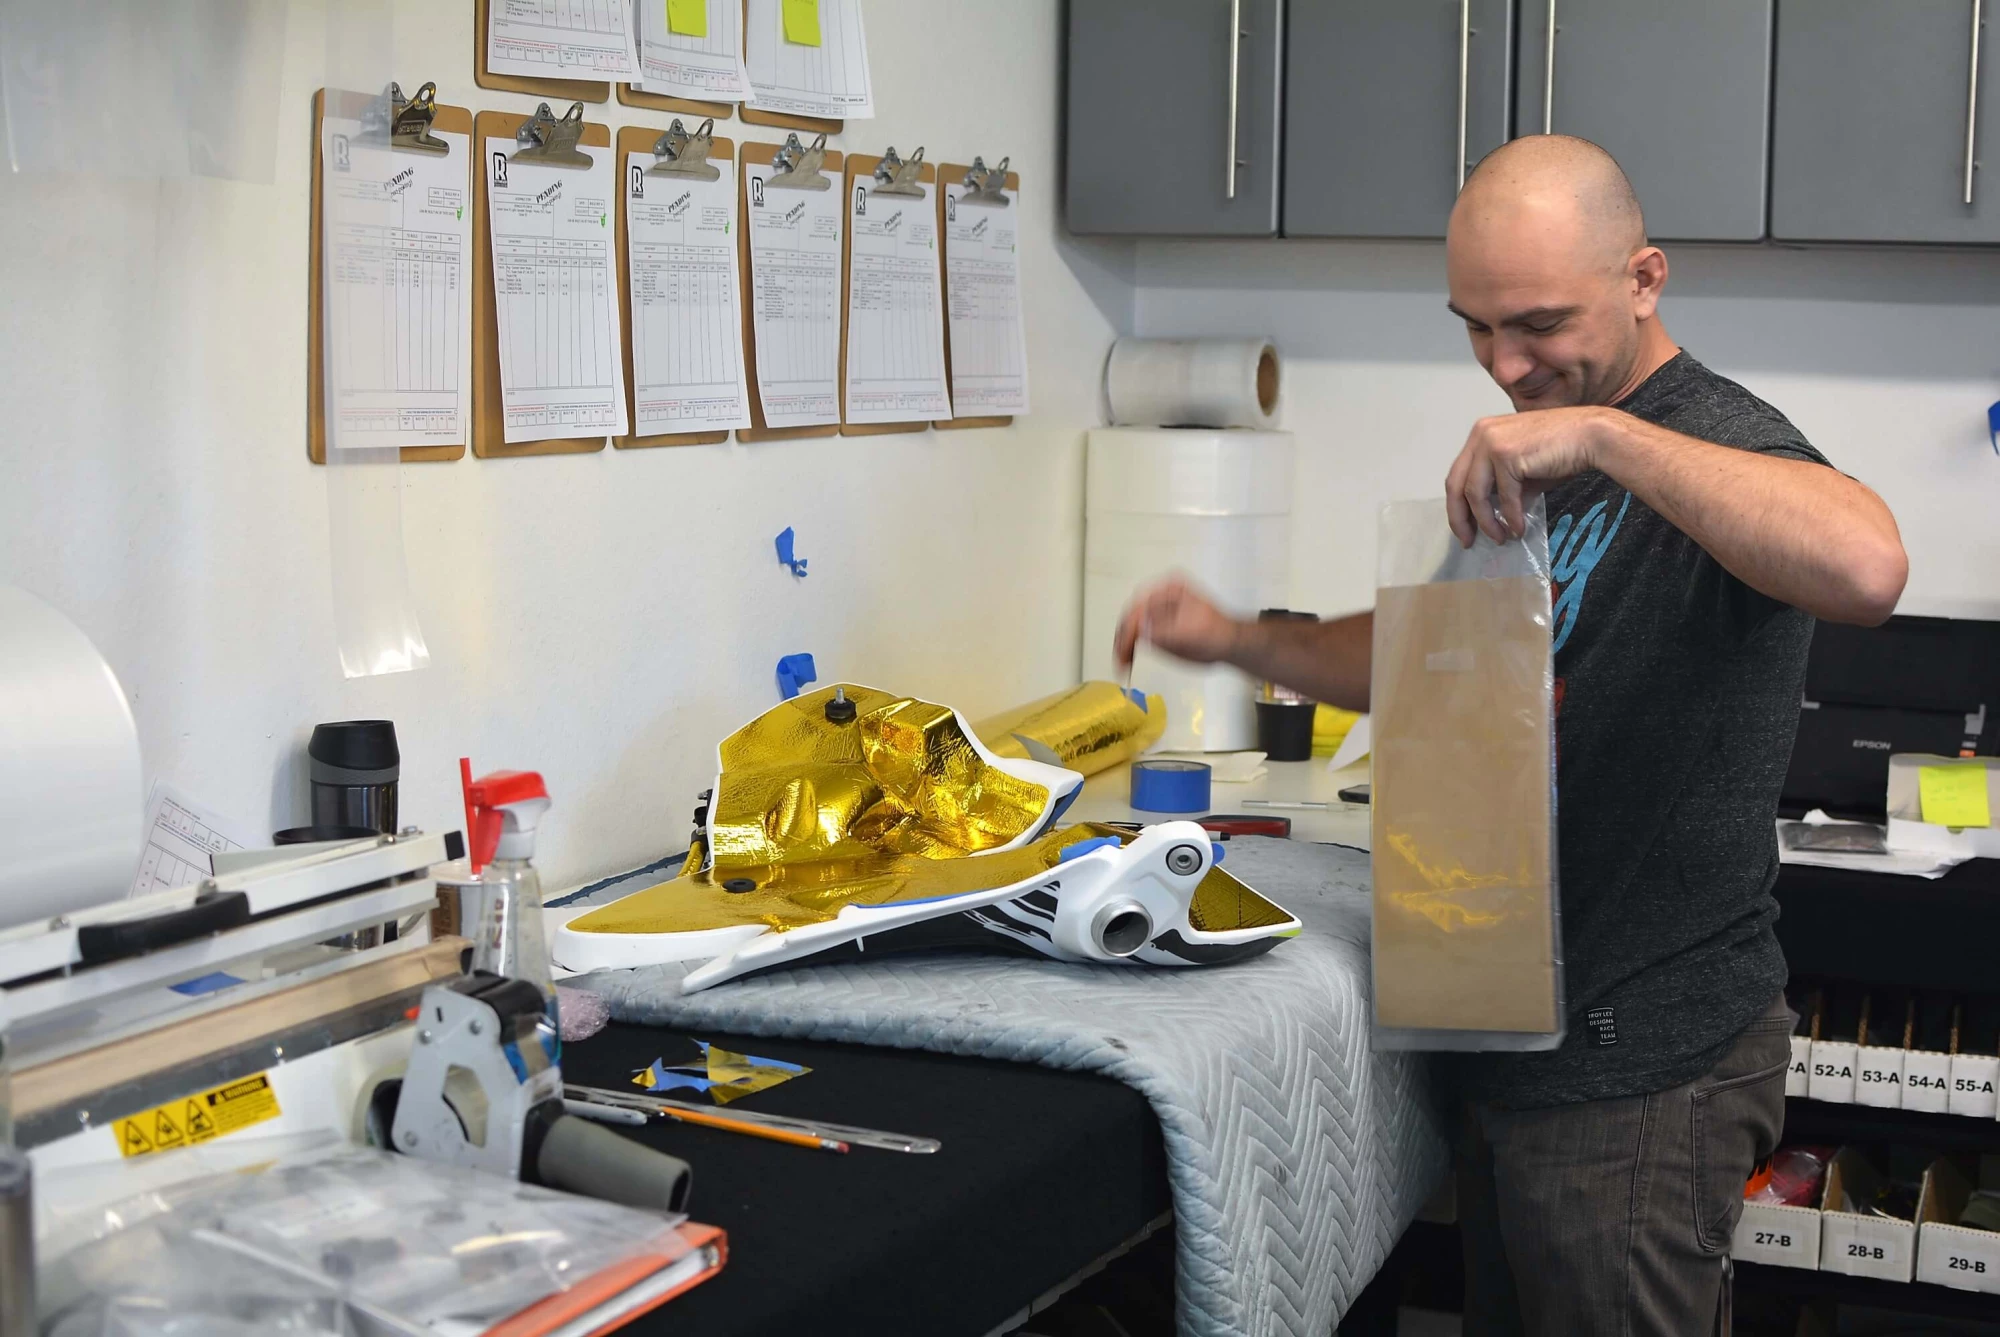

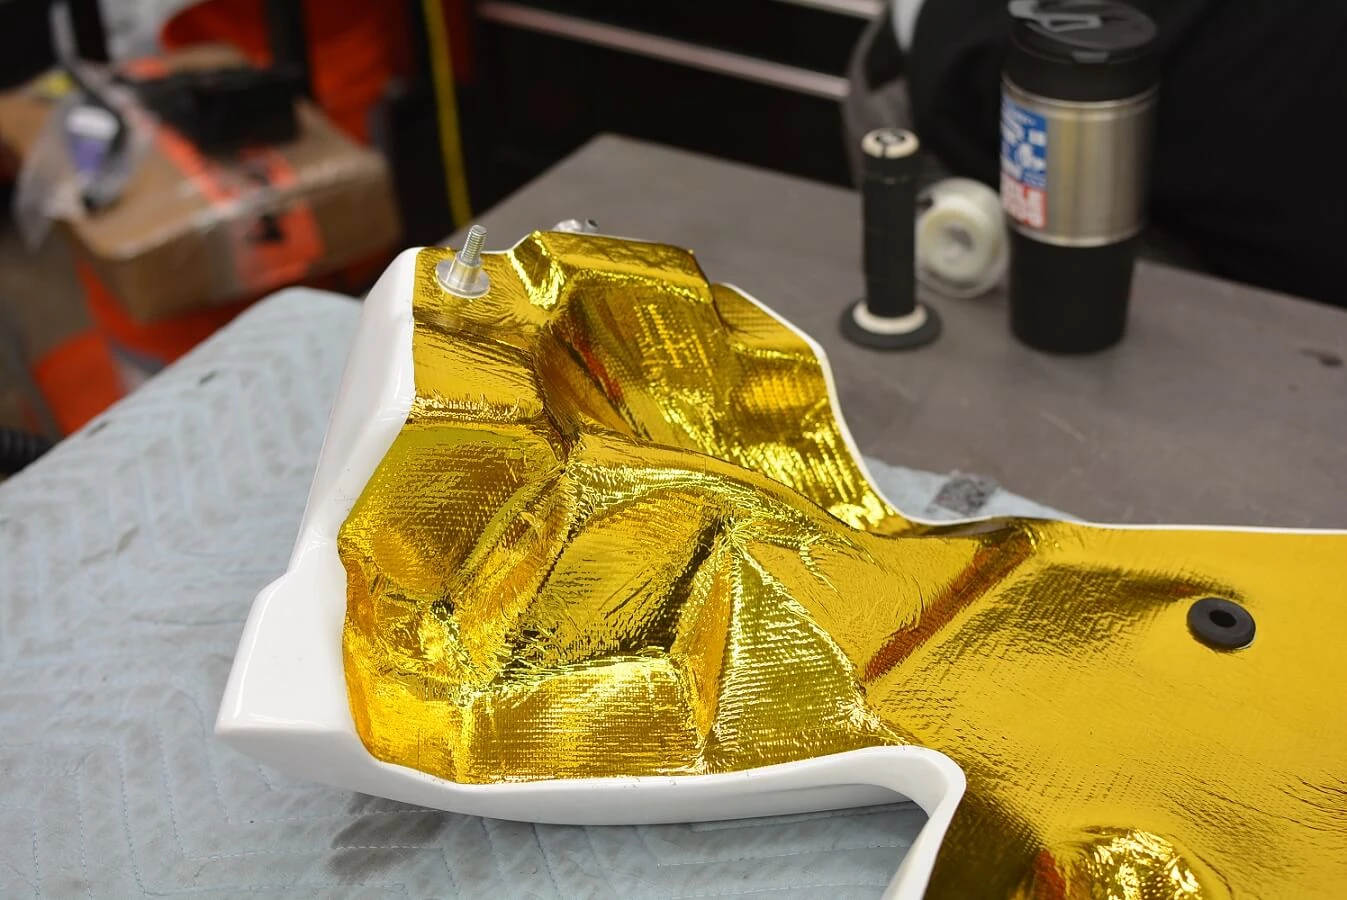
Both left and right Omega fuel tanks.
After striking it rich with gold fever, we then moved on to all the fuel and coolant lines to keep as much heat out of them as possible.
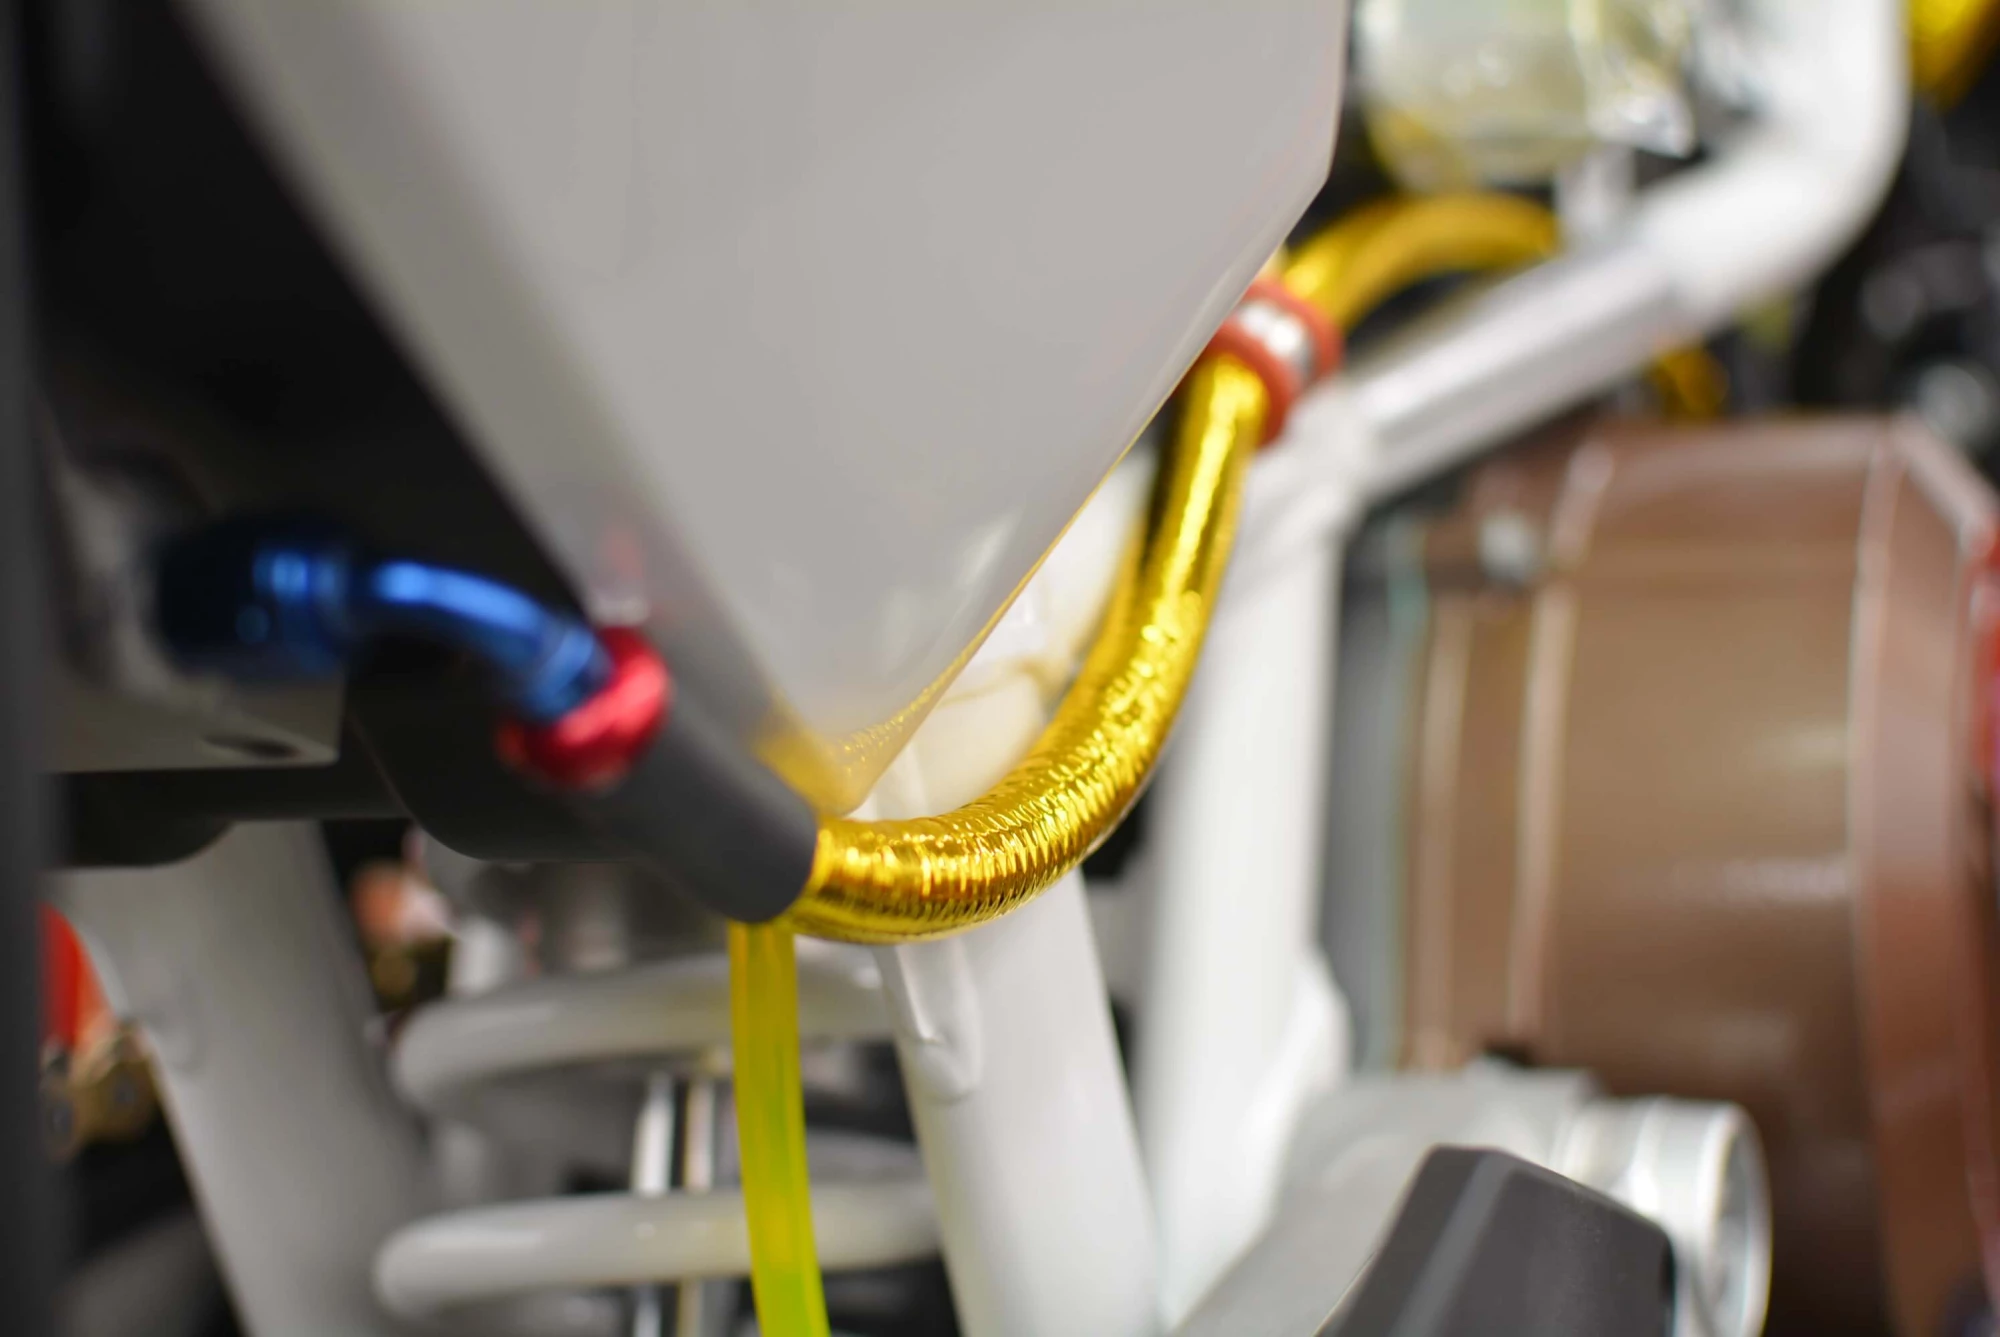
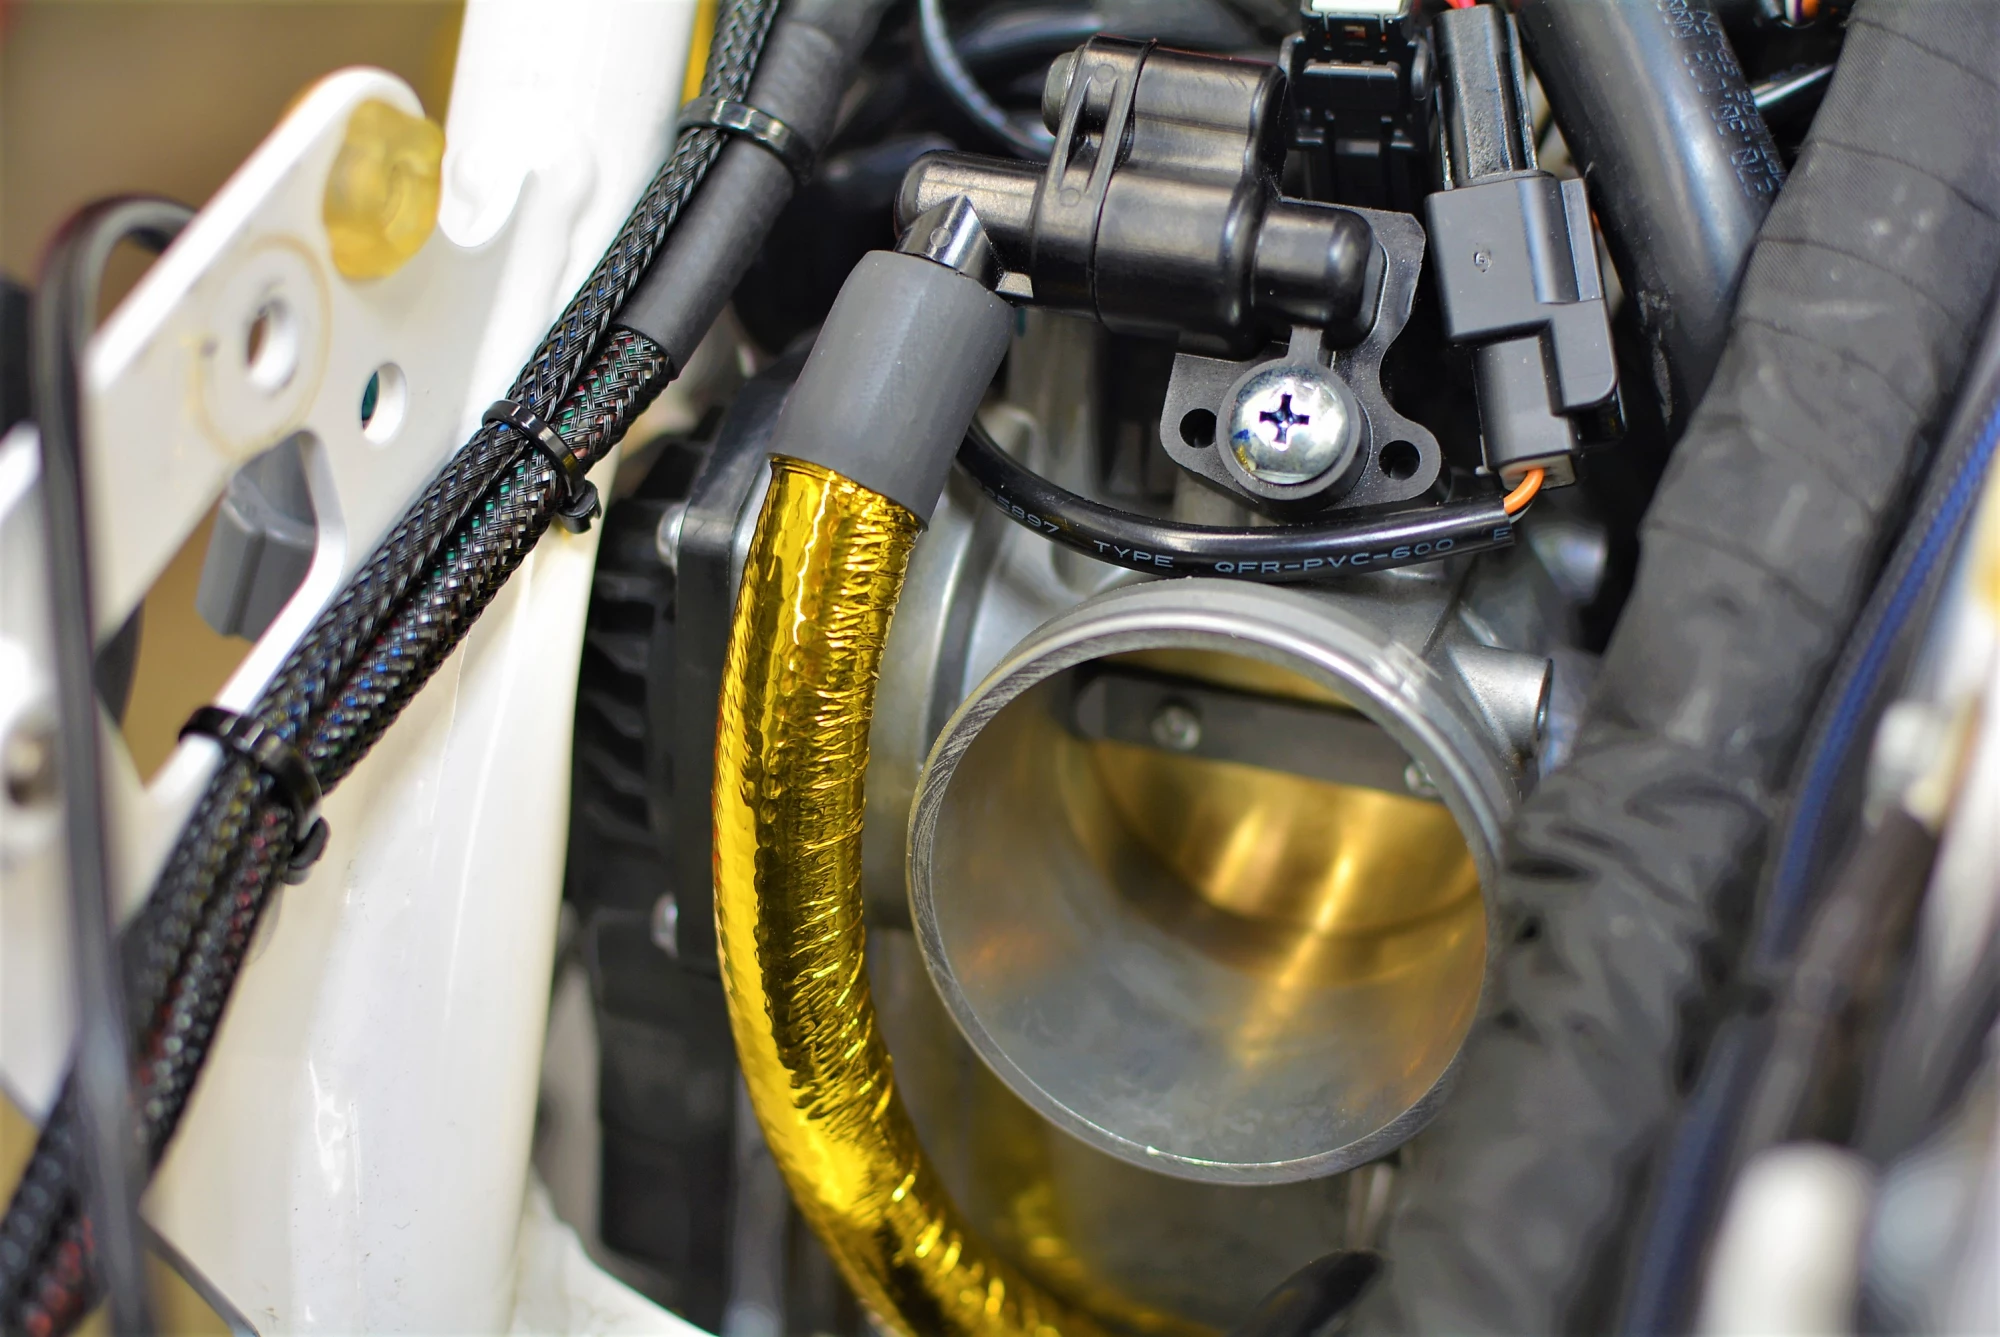
Anything trapped inside the engine compartment was liberally coated but after a while we did find that the fuel lines ended up having an adverse effect on the adhesive for some reason and started growing a sort of gel out from under the gold foil so on the fuel lines alone we have now switched to this protective insulation line found here.

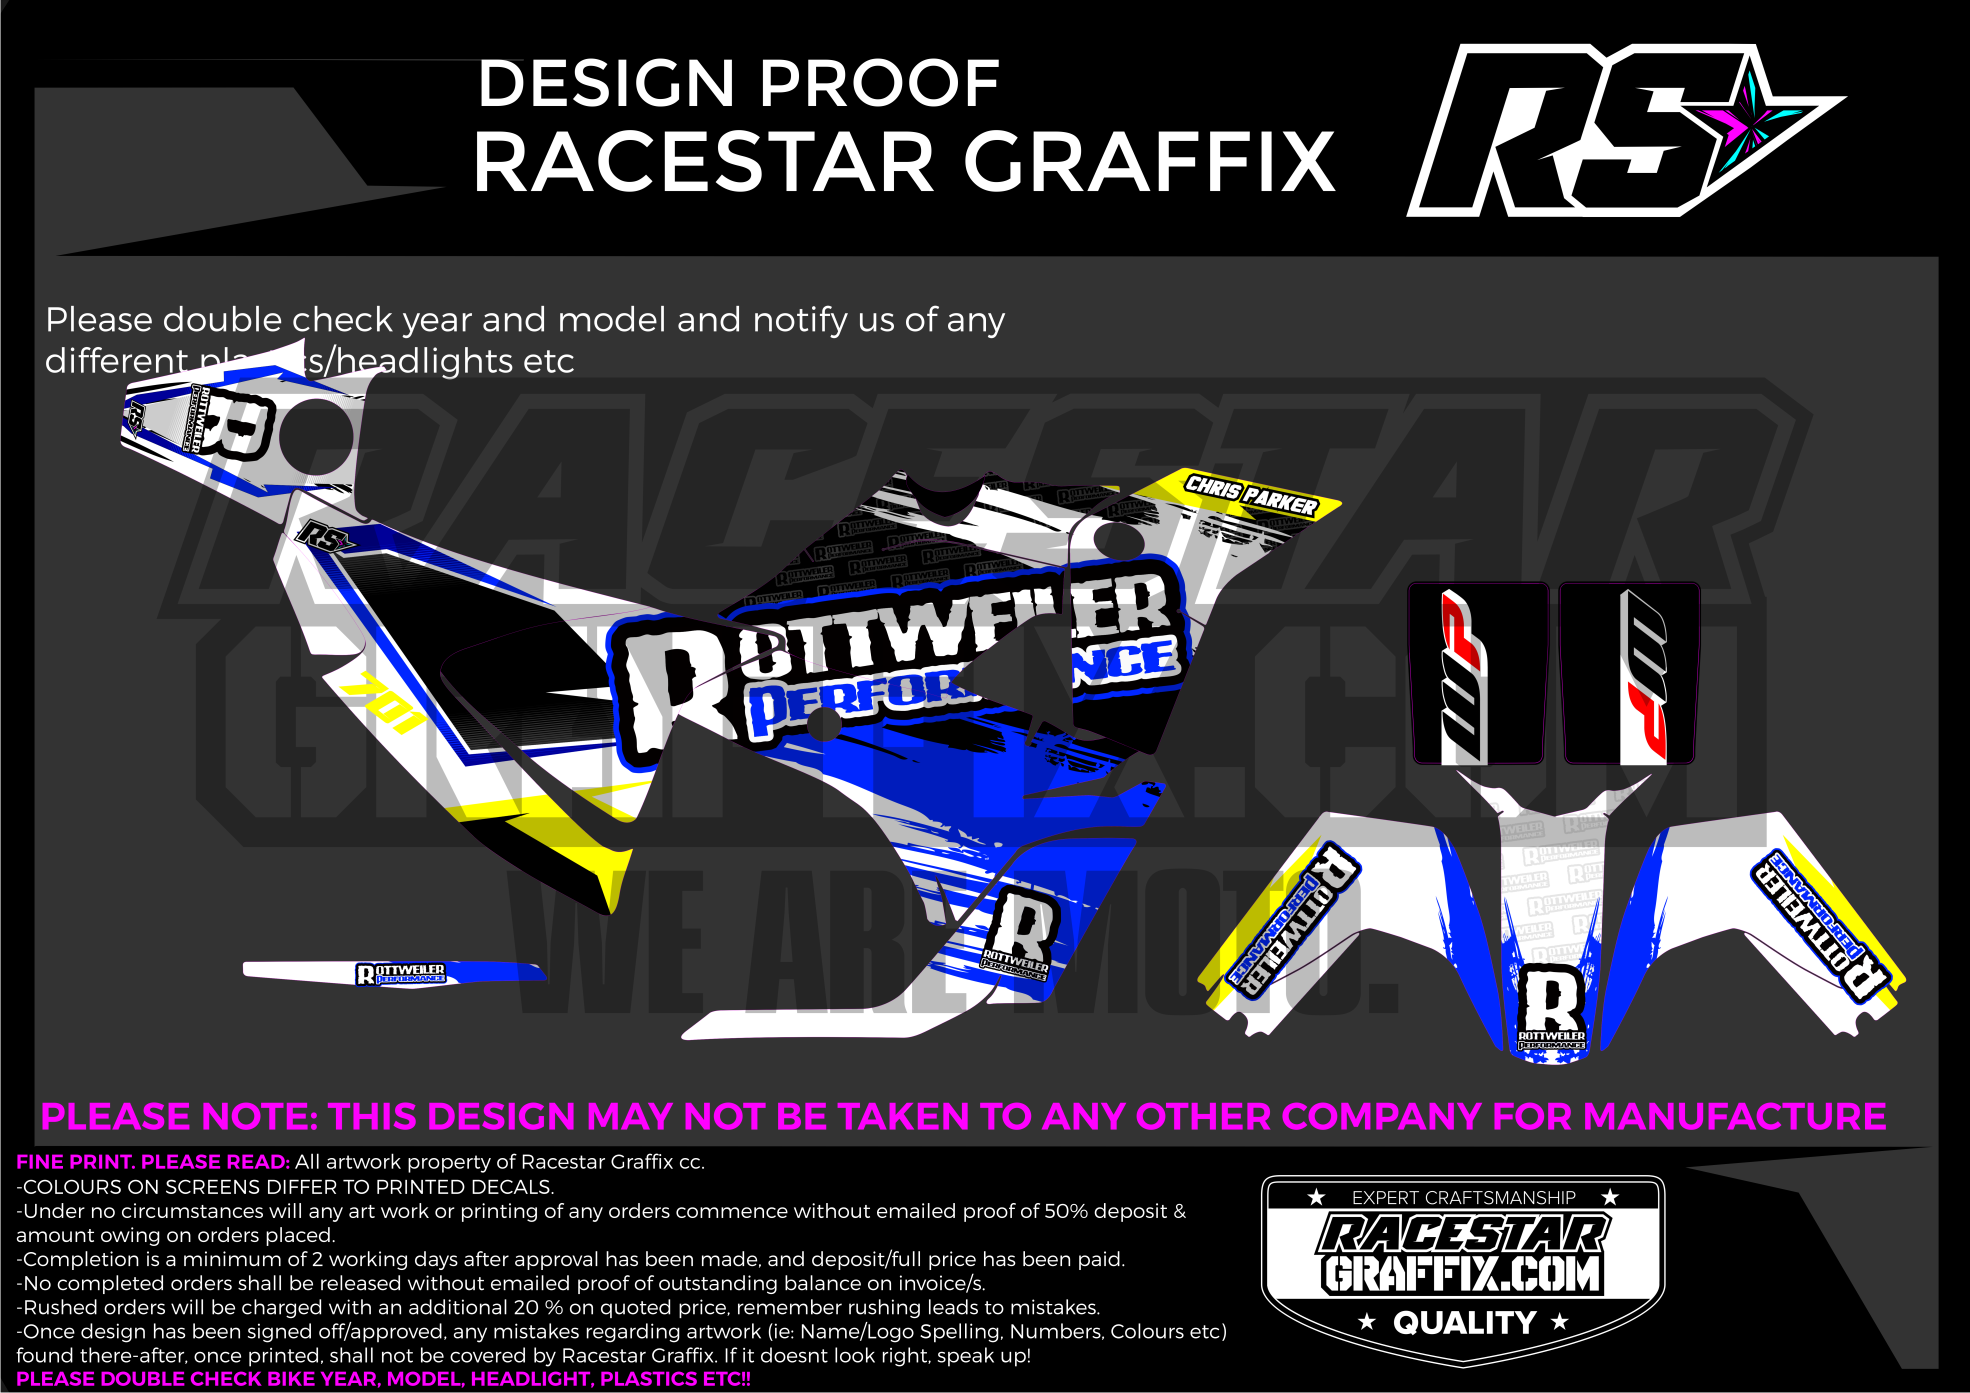
The kit was starting to take form, and now it was time for some custom graphics. Race Star Graphics worked in conjunction with Omega Fibre to create a custom rally graphic kit for us that was a stunner. A couple of tweaks and some back and forth and the end result has turned into something that so far, three of our customers who have had Rottweiler Performance build their Omega kits have opted for! Can't beat that.
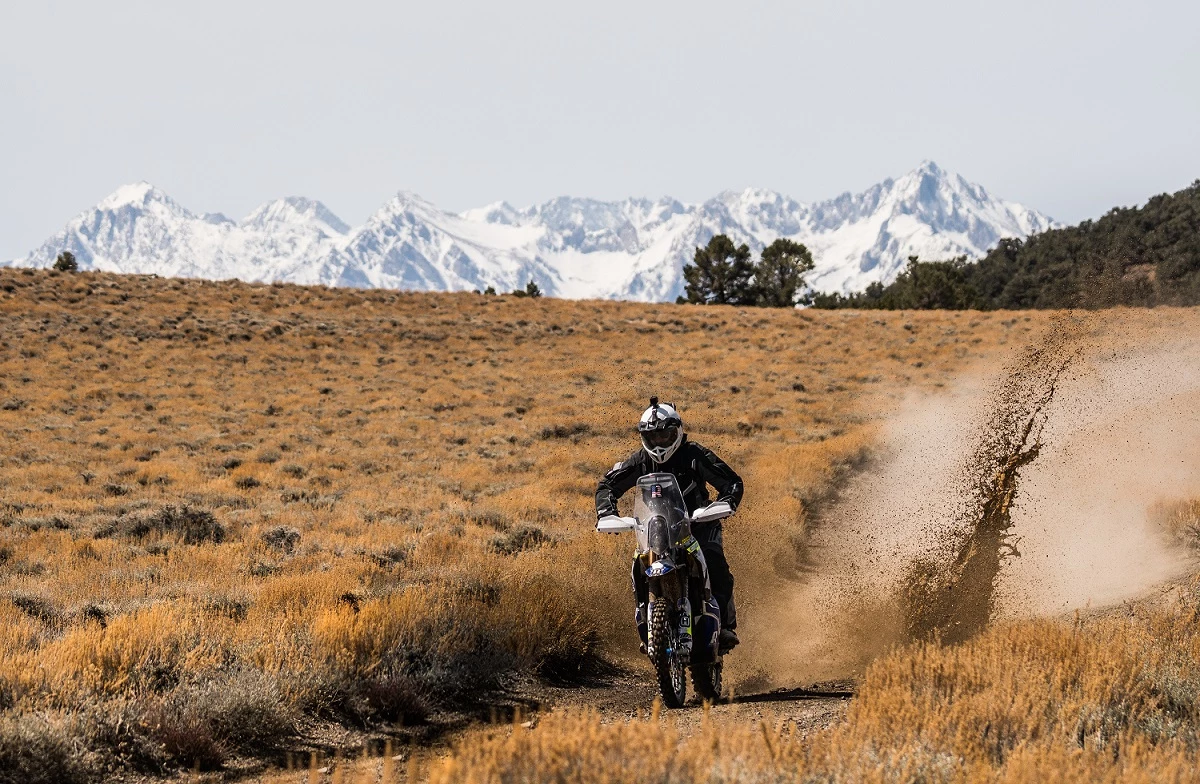
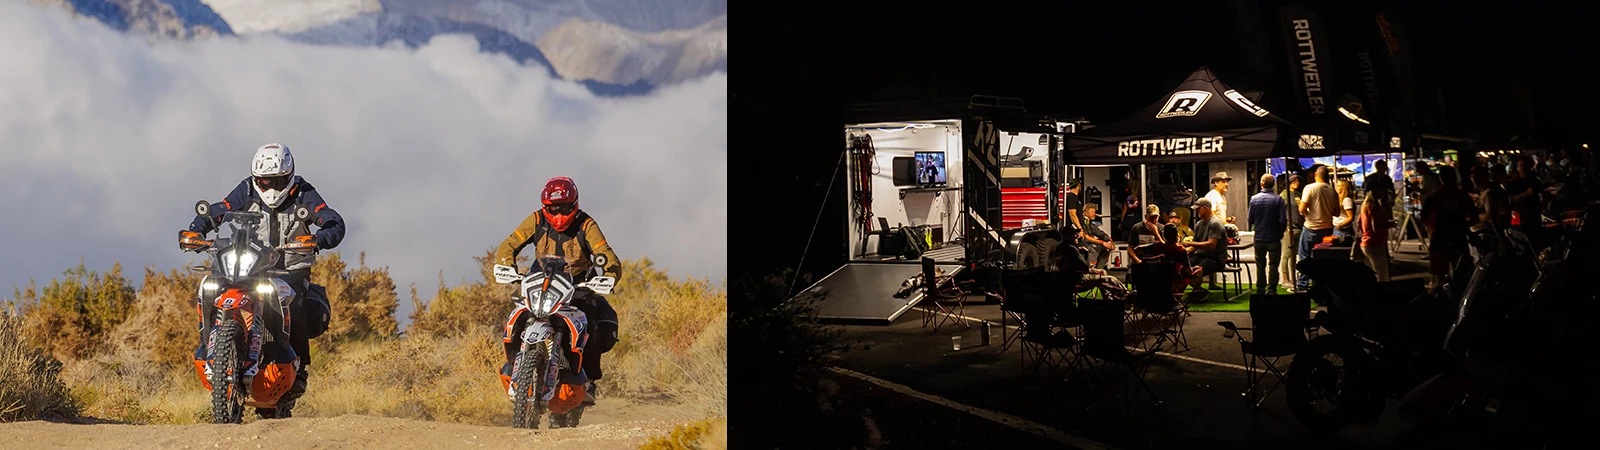
ROLLING WORK OF ART
One of the first rides on this bike after the build was complete was joining the Back Country Discovery Route crew for the California edition route. We joined the team starting in Lone Pine and worked our way to Bishop for a fun day of shooting while we simultaneously shook down the new ride. Other than the fact that the gearing (at the time) was way too tall, the bike performed flawlessly.
The Konflict Suspension was ultra plush and inspired confidence over all types of terrain. Something you tend to REALLY want because crashing this bike is not exactly an option or in our plan book. EVER. With the extended travel the bike is tall. Very tall. But it's not designed to be a commuter. It is designed to be an attack machine that can commute, and it achieves that in spades. With massive amounts of travel rivaling even some factory Dakar bikes, this bike can take some pretty big hits and shake it off with ease.
The handling can be described as a smaller adventure bike, like the KTM Adventure 990 where you tend to steer them a bit more from the rear. I'm sure after a while we will be hitting things a little harder and faster as we get used to the new ergonomics.
Even with the extra weight (only about 18 lbs without counting the extra fuel) the motor pulls hard, and the mapping is solid and reliable in any condition. Fuel capacity is now hovering around 6.5 gallons, more than enough to get you where you want to be and then some. This bike even rivals some of the larger adventure bikes in terms of capable distance.
The idea was simple; Take a Husky 701 rally build to 11. While there are still a few details we would have liked to add like a wide ratio transmission which in our opinion is badly needed in stock trim and and some deeper internal engine work like balancing the crank, polishing the gears, billet clutch etc., for now we are going to save those items for round two and stop with just short of what we feel is incredible. We were able to produce a machine that not only looks as well as it works, but has also been an exercise in fully understanding what it takes to pull something like this into reality. As a bonus, you are never running short of conversation virtually any place you take this machine. That's the fun part.
Written by: Chris Parker / Owner Rottweiler Performance
Top static photo: Simon Cudby of Upshift Magazine
Build Photos: Chris Parker / Rottweiler Performance staff
Action Shots below: Ely Woody
For those of you lusting for such a build, please feel free to shoot us a call and pick our brain(s). We sincerely hope that you have enjoyed reading about how we created this beast and all that we ask if you have is that you spread this blog around anywhere you think people may enjoy it.
If you would like to see this bike in person it resides in our lobby at our Southern California location. Feel free to come by, say hello and check it out!
Thanks to all and see you in the next build!
PHOTOS BY ELY WOODY ON THE CABDR ROUTE